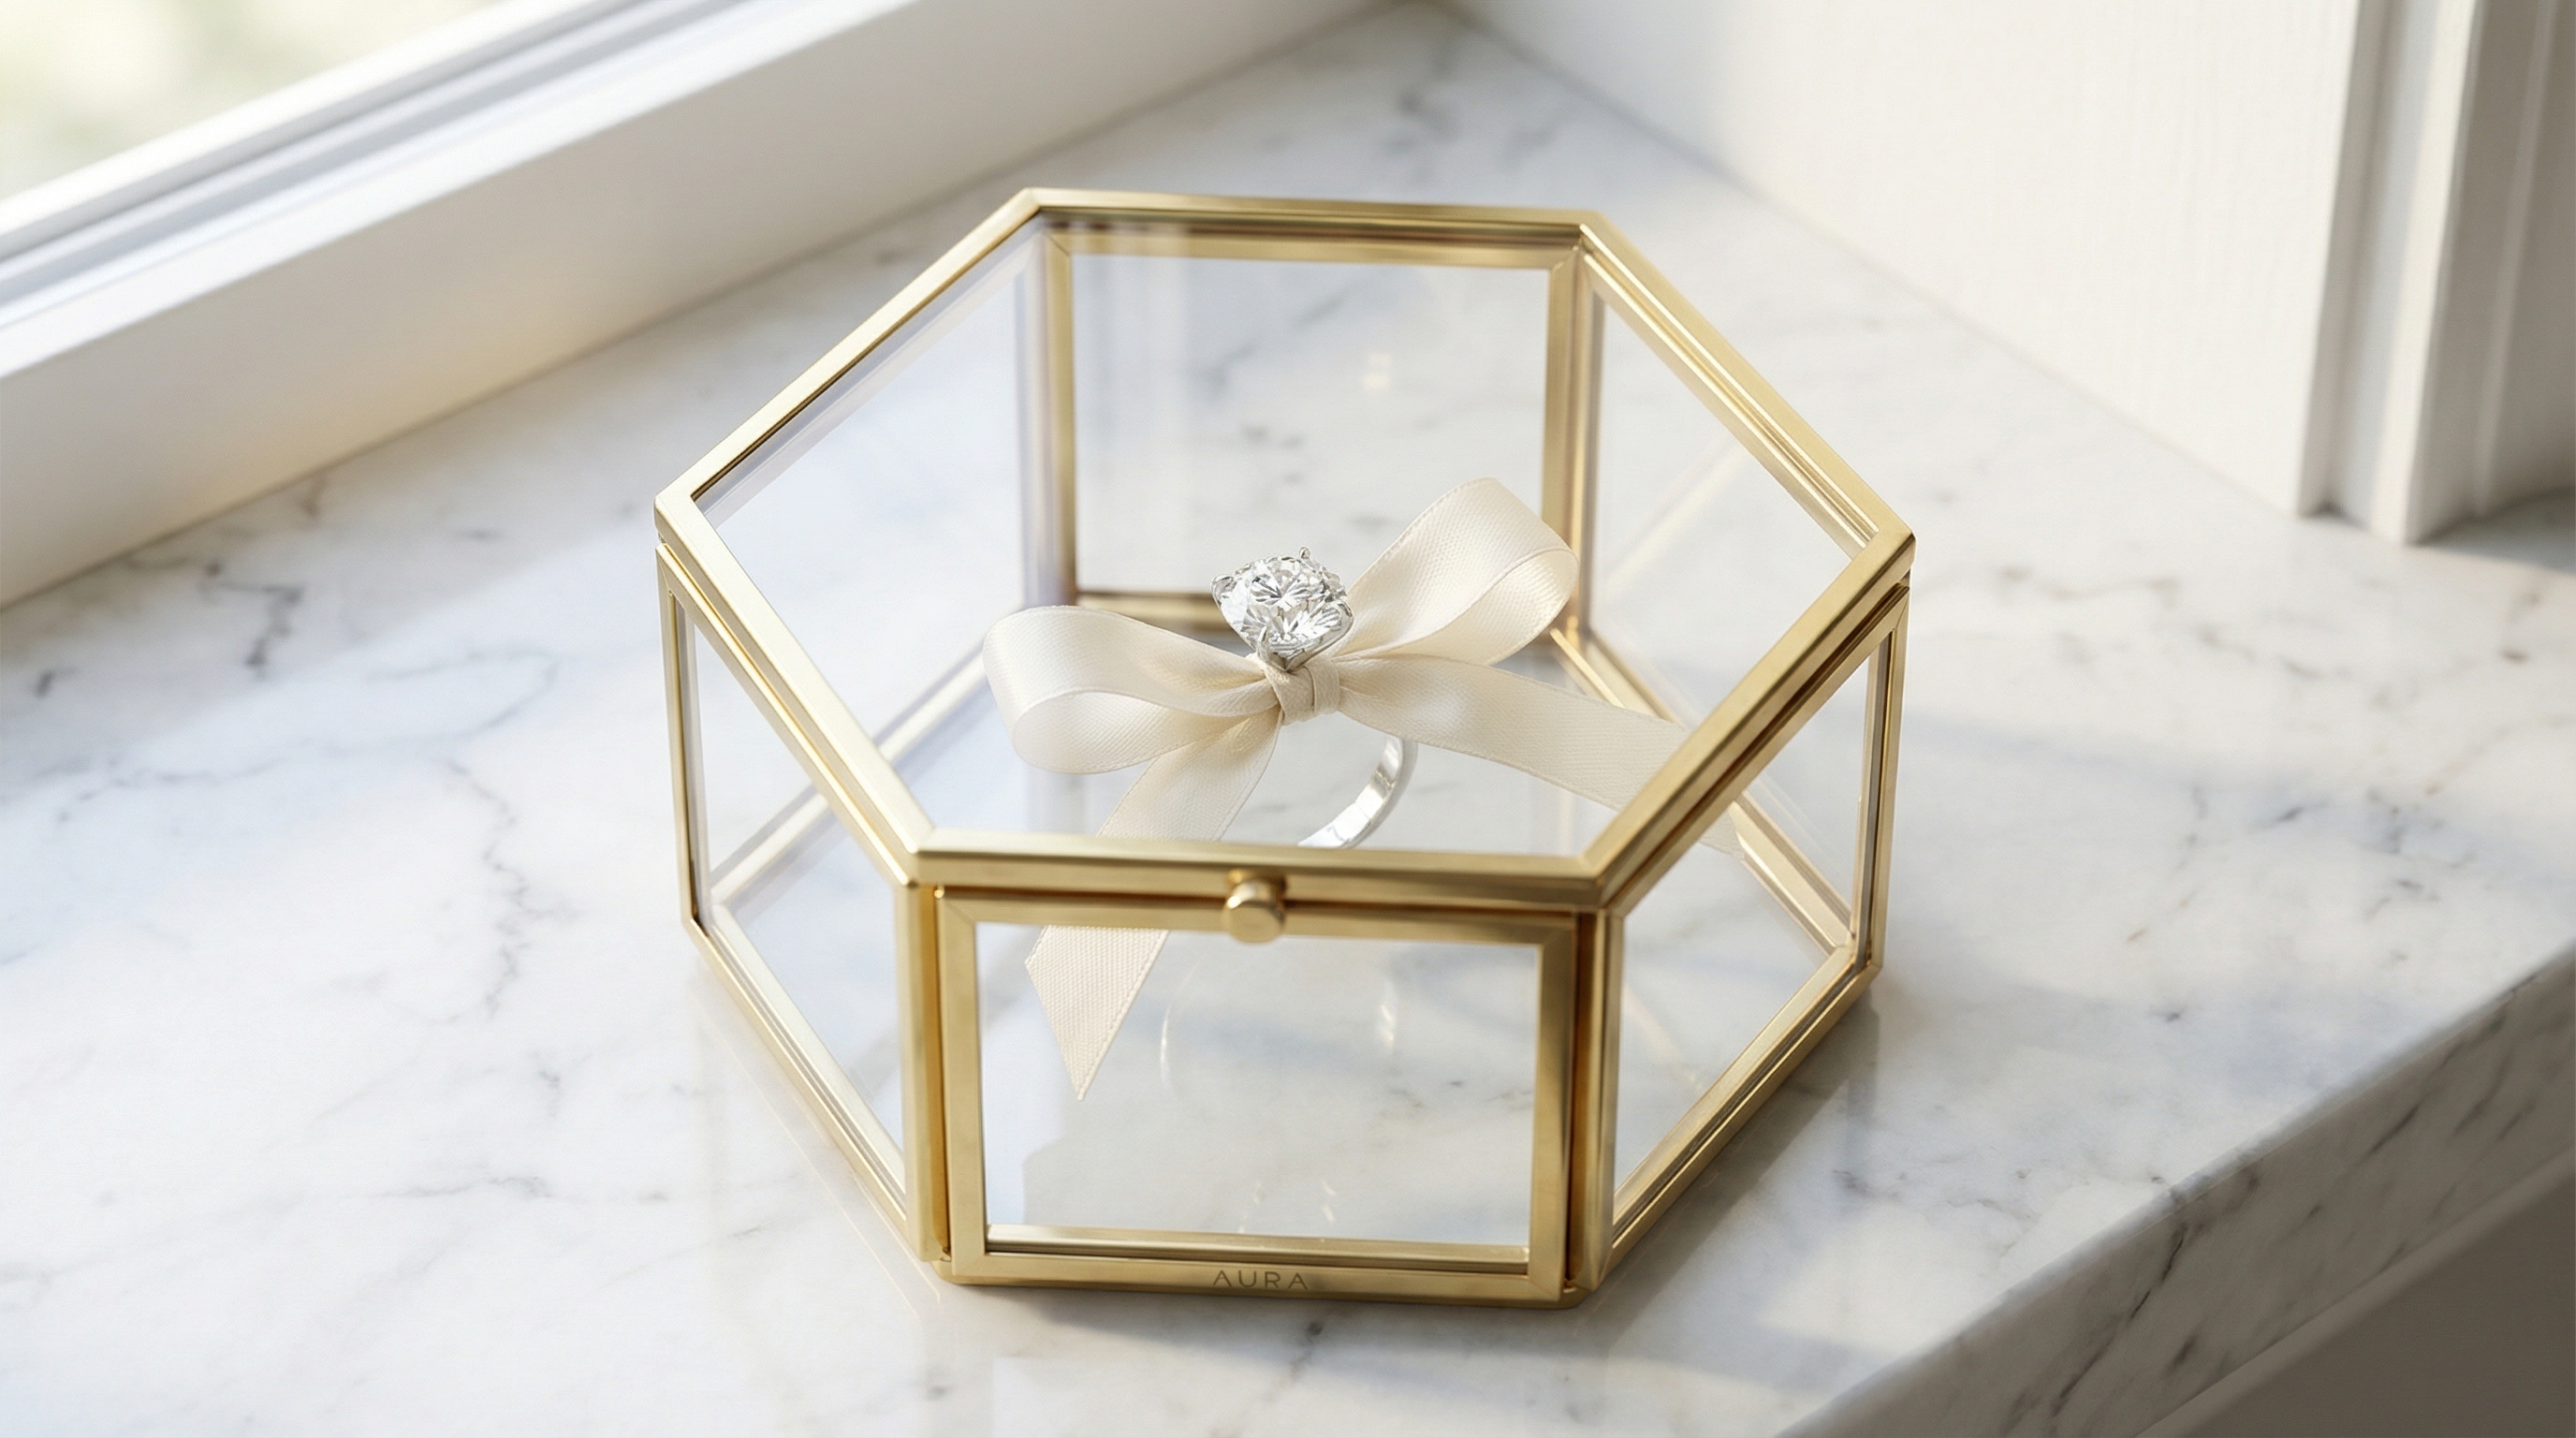
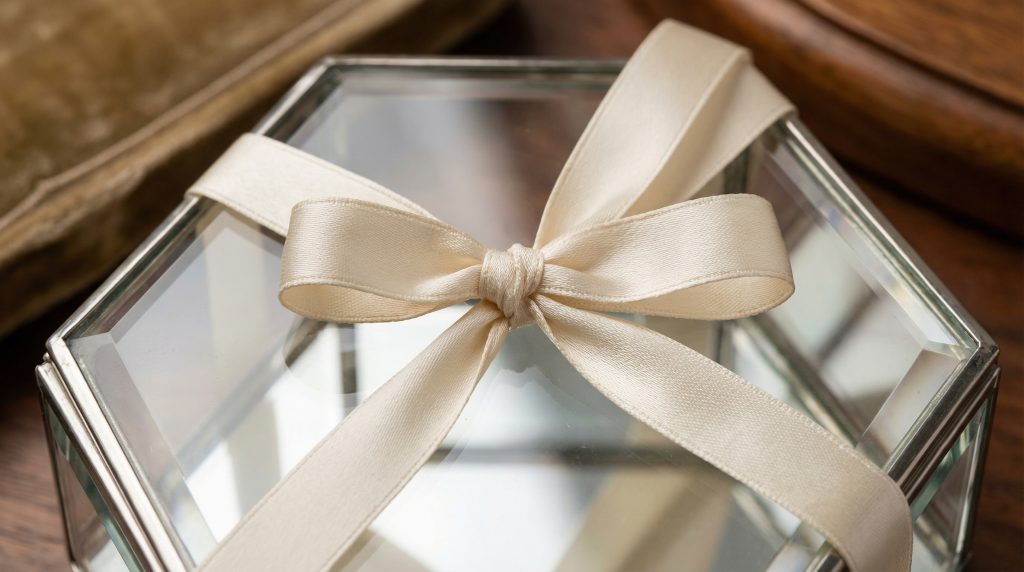
A DIY Hexagon Glass Ring Box is a customized jewelry container constructed from a geometric glass vessel and a hand-tailored fabric pillow designed to showcase high-value engagement rings.
Finding a presentation that matches the emotional weight and brand sophistication of a luxury jewelry reveal is often a stressful challenge for industry professionals. Standard, mass-produced packaging frequently feels impersonal, failing to capture the unique character of a bespoke wedding set during critical portfolio photography. By creating a custom diy ring box , you solve this presentation dilemma, providing a high-end, exhibition-style vessel that elevates the perceived value of your products.
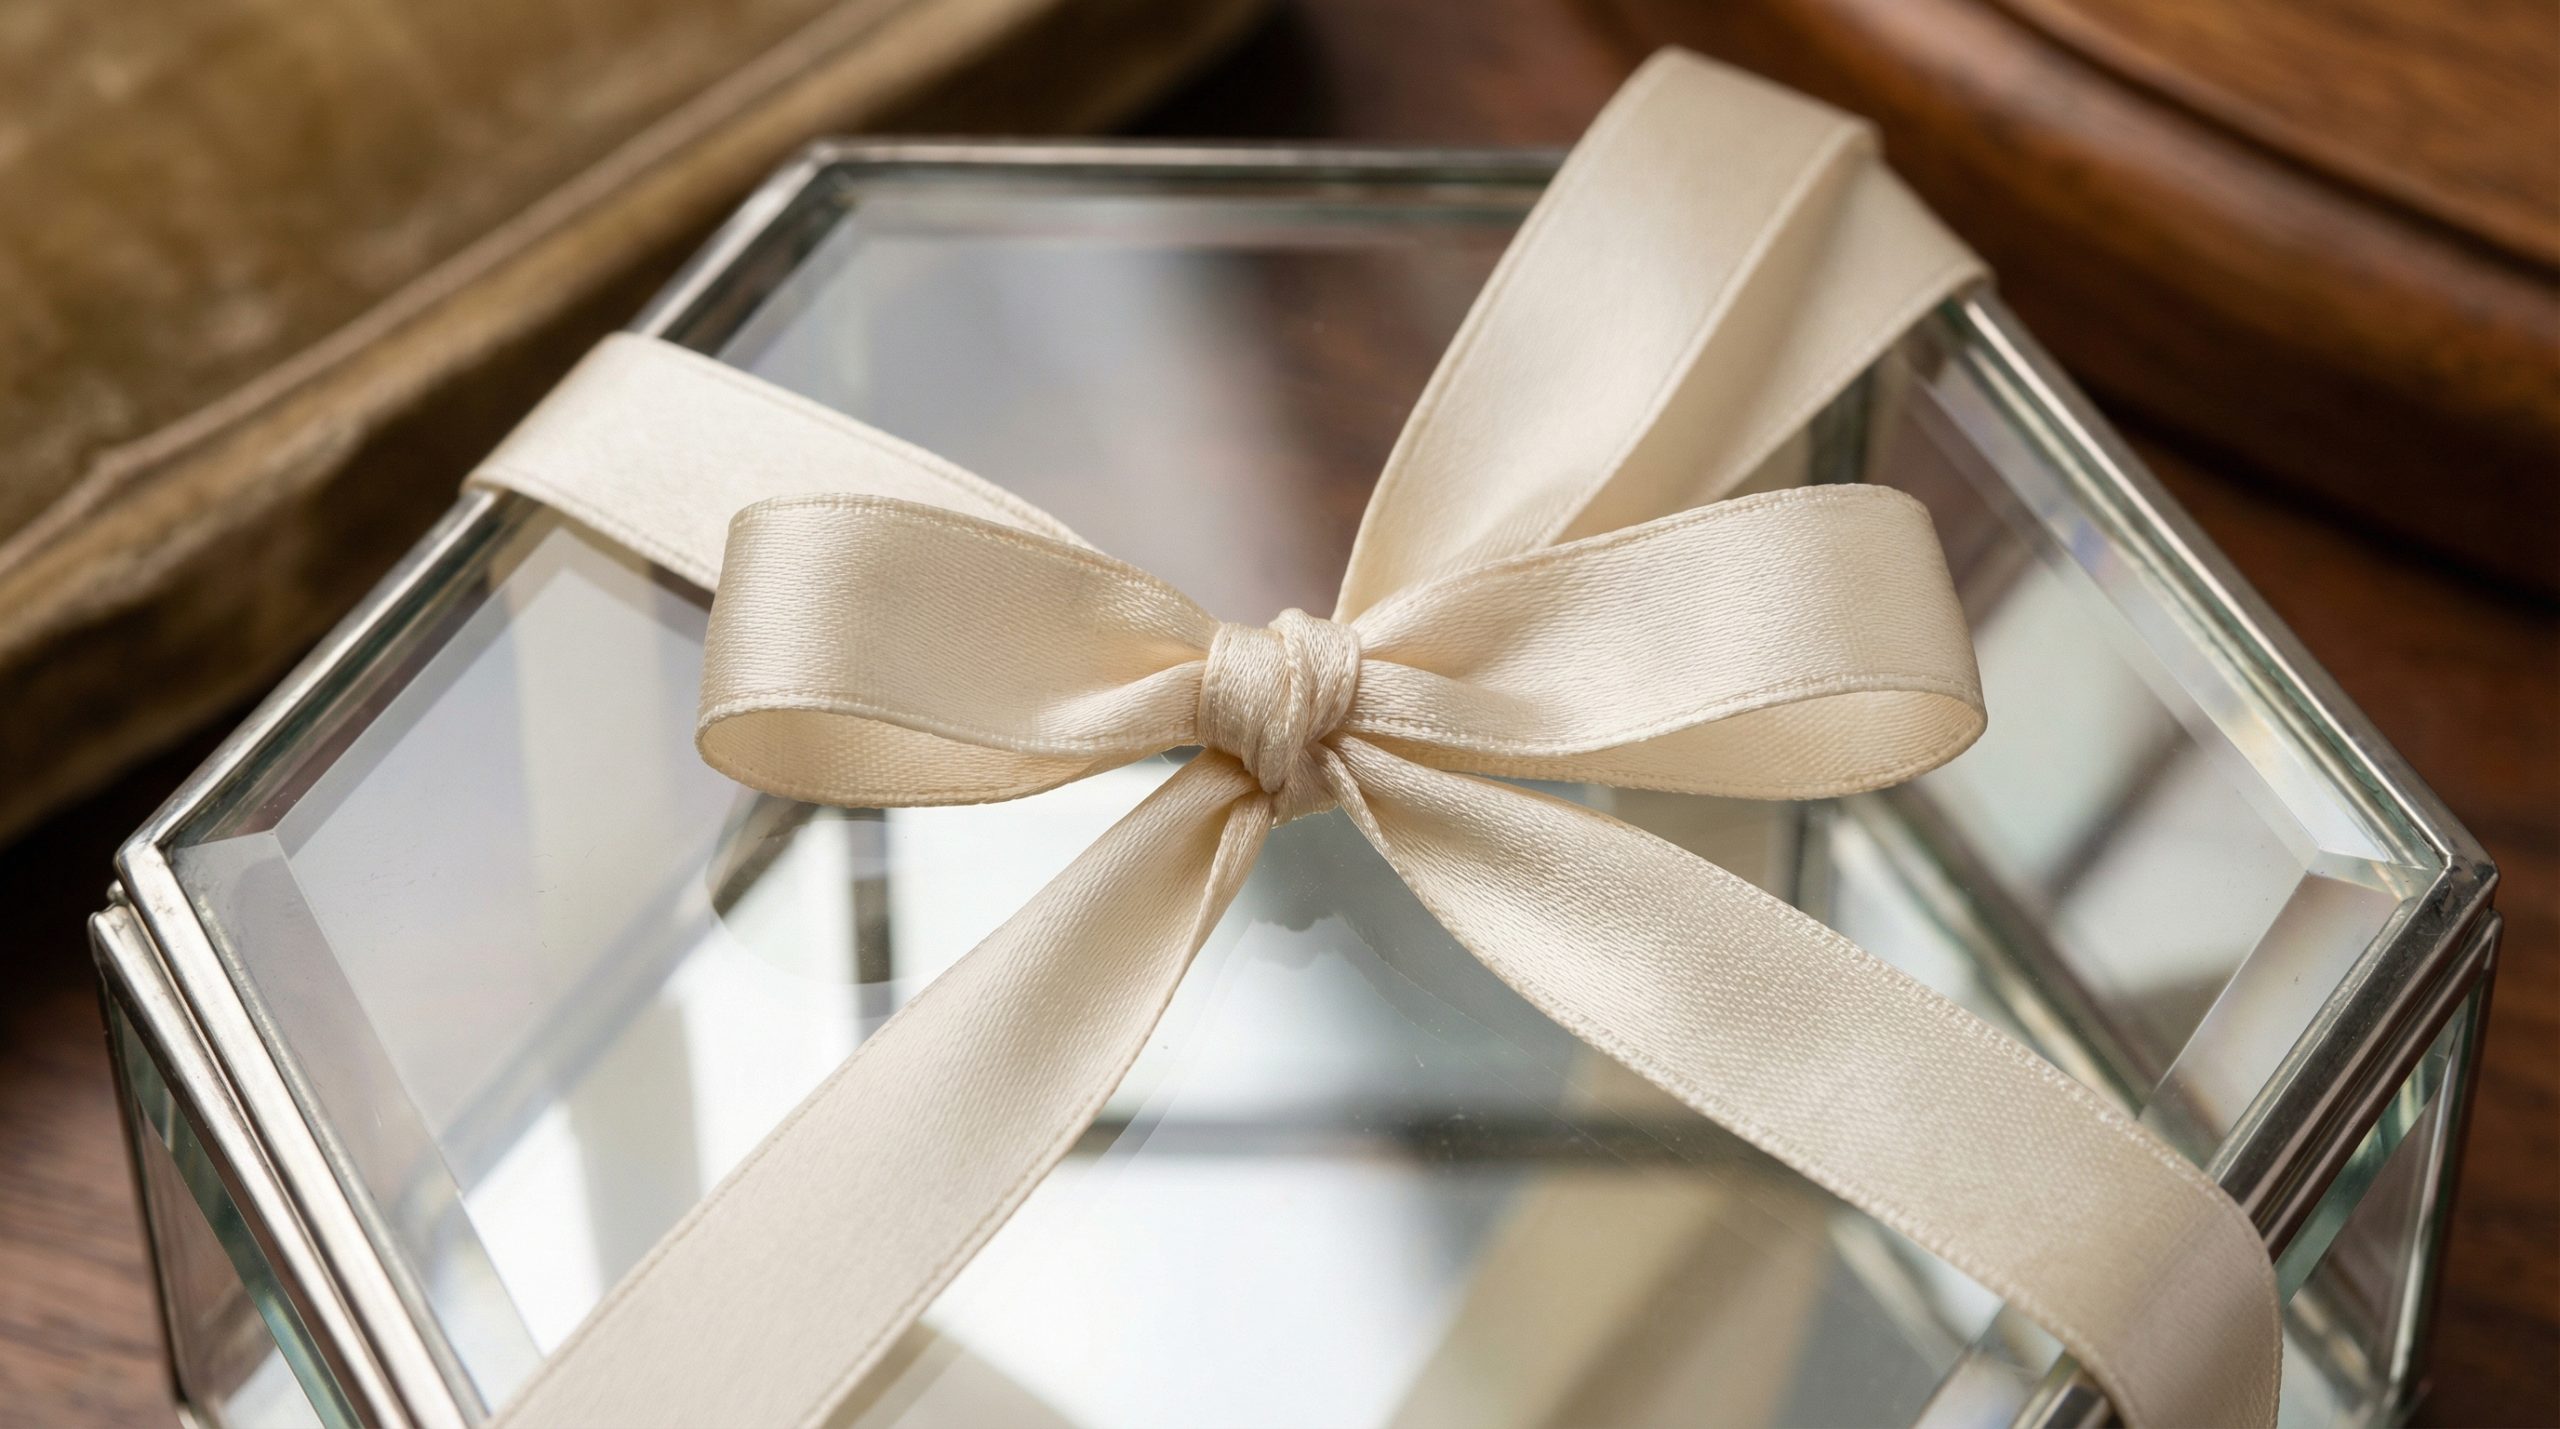
Why use a glass vessel for your diy ring box?
A glass vessel provides 360-degree visibility and a modern aesthetic that highlights the jewelry’s brilliance from every angle. This transparency is essential for professional social media showcases where the product must remain the focal point even when the lid is closed.
Benefits of Visual Transparency
Transparent packaging offers a clean, architectural look that resonates with contemporary B2B design trends. It allows for effortless light penetration, which is vital for maintaining the fire and scintillation of gemstones in varied environments.
Here is the deal:
- Enhanced visibility for luxury brand storytelling.
- Protection from environmental dust without obscuring the ring.
- Versatile styling options for boutique window displays.
Key Takeaway: Utilizing glass structures ensures that your jewelry is always on display, maximizing its visual impact for clients and photographers alike.
| Feature | Impact on Presentation | Professional Benefit | |
|---|---|---|---|
| Clear Glass | 360-Degree Product View | Enhanced Visual Marketing | |
| Hexagon Shape | Modern Geometric Profile | Brand Differentiation | |
| Hinged Lid | Interactive Unboxing | Premium User Experience |
Analysis: The transition toward glass-encased presentation reflects a broader industry shift toward “gallery-style” packaging that prioritizes the visual integrity of the asset.
What supplies are needed for a diy ring box?
Building a premium diy ring box requires a hinged glass hexagon container, high-density craft foam, velvet or silk fabric, and professional-grade adhesives. Sourcing high-quality materials ensures the final product feels substantial and matches the tactile expectations of luxury consumers.
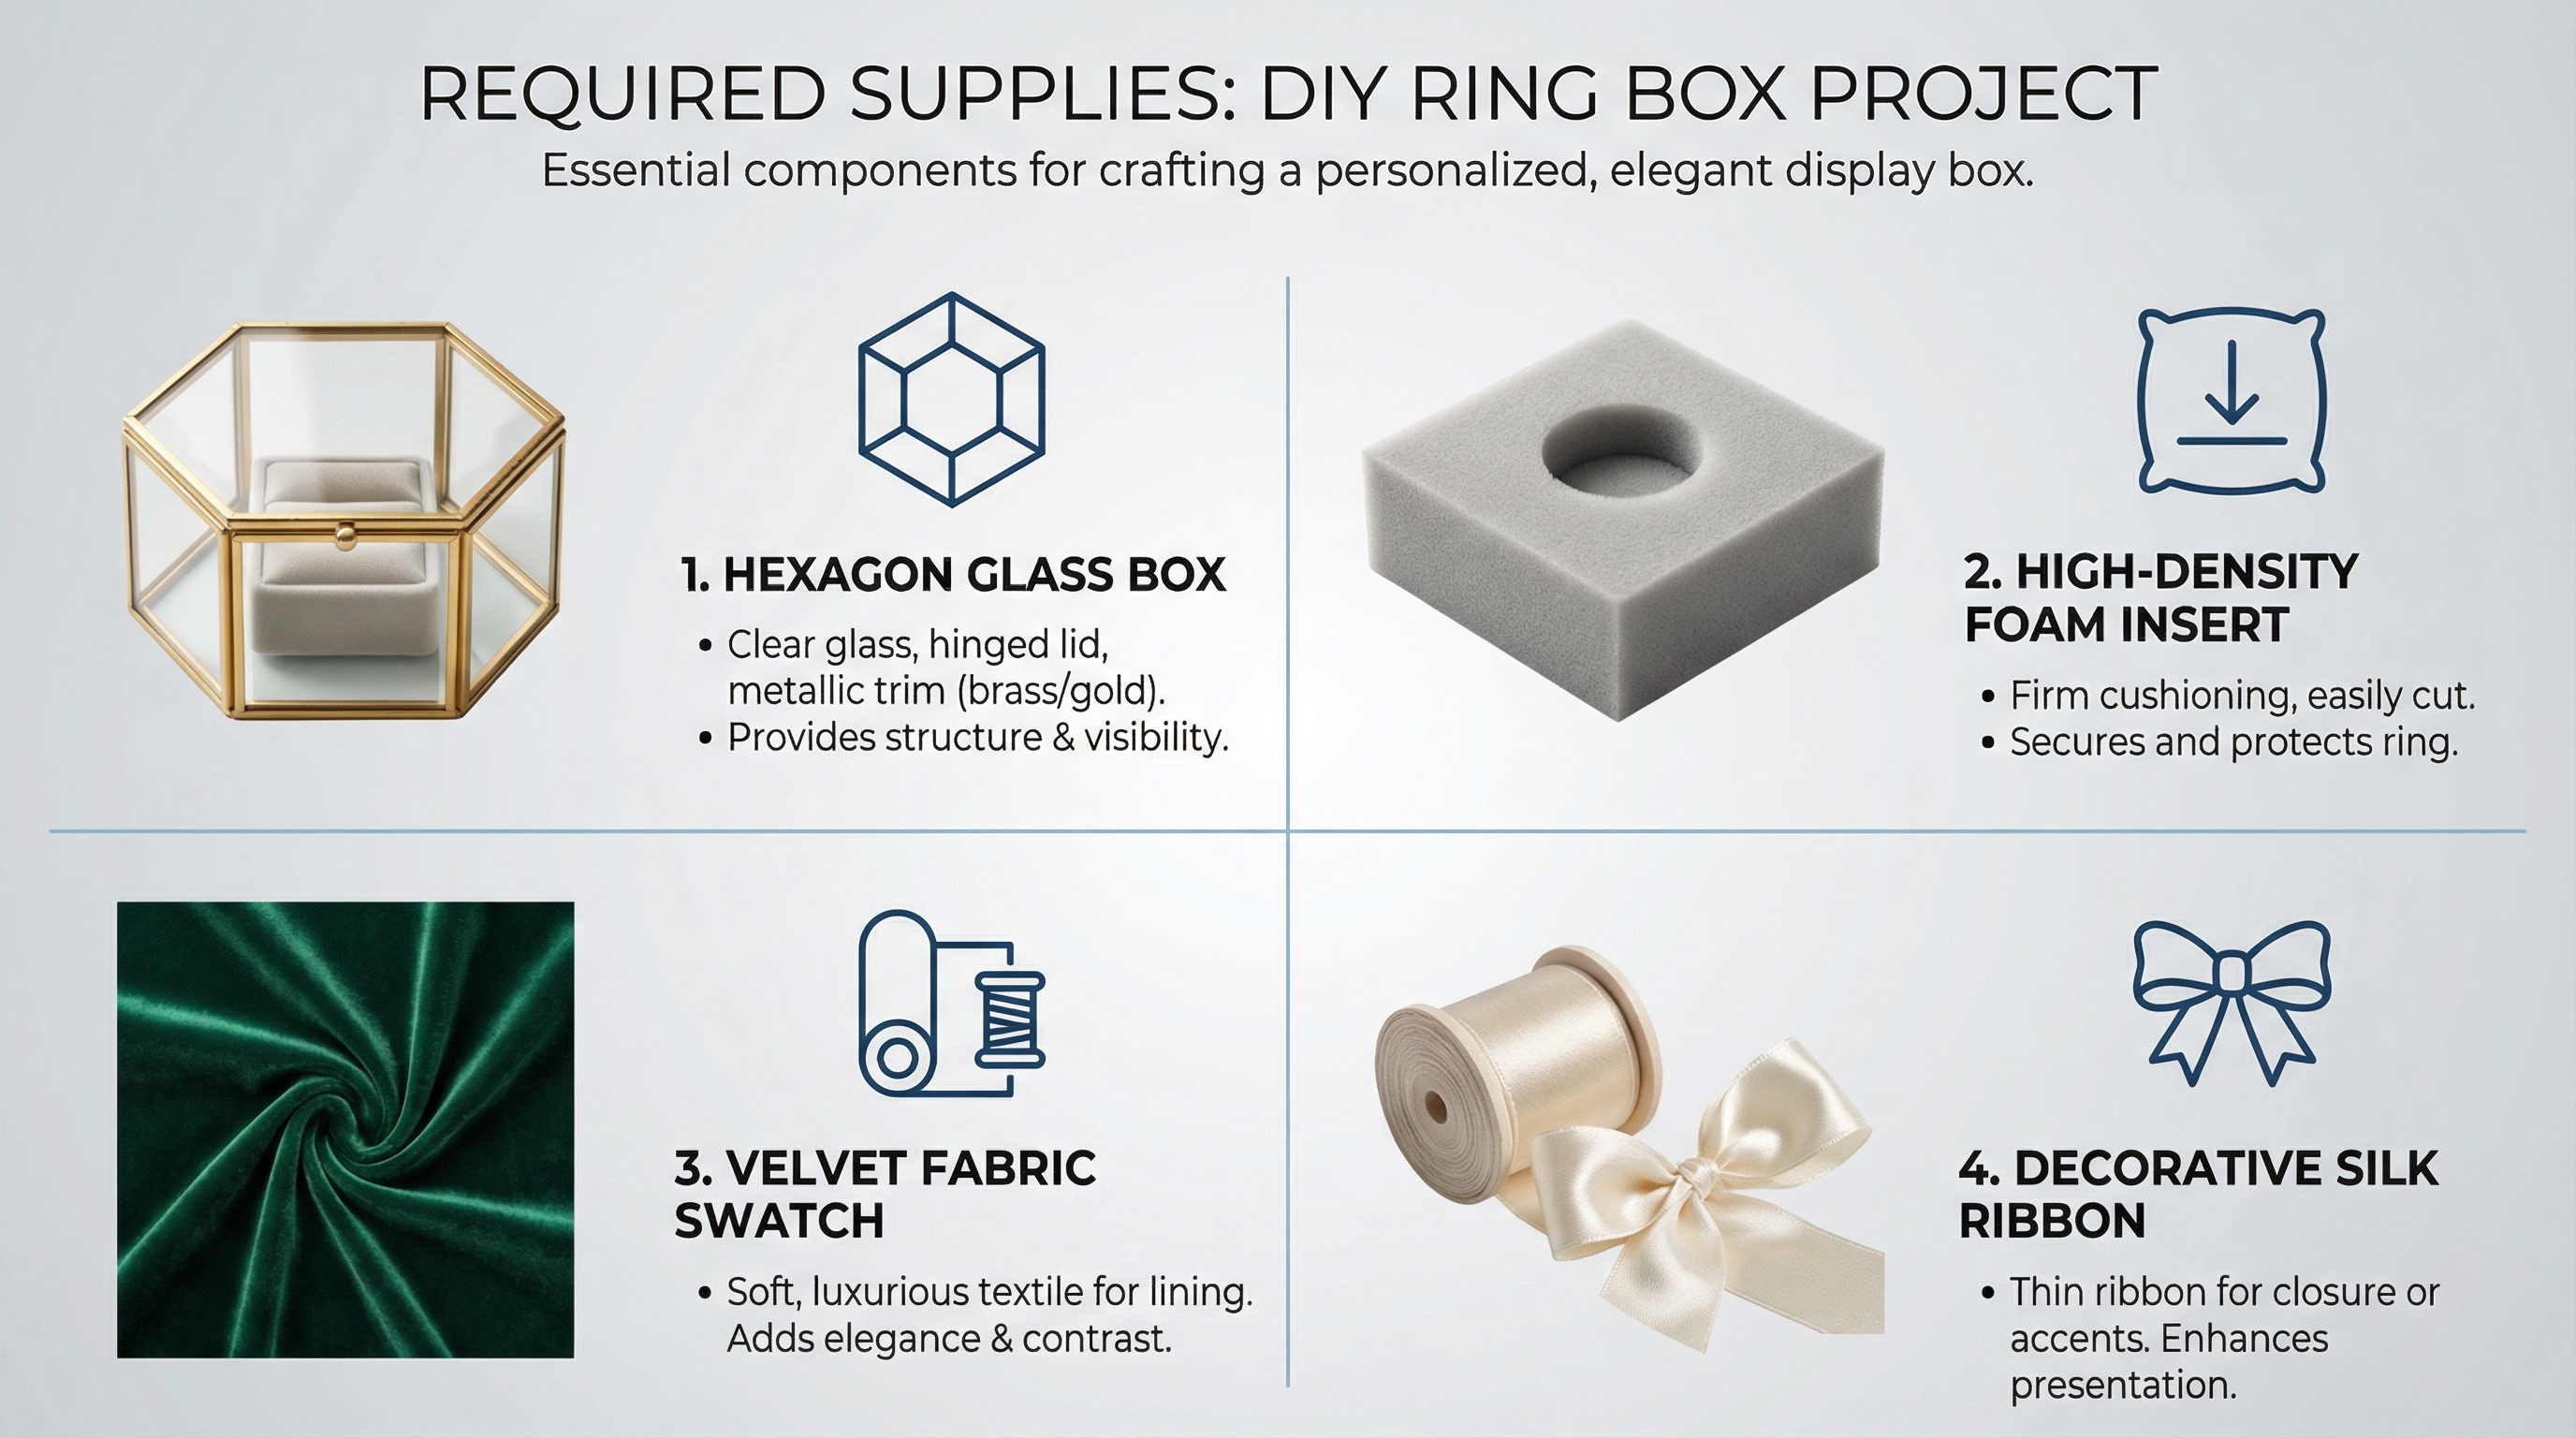
Essential Component Checklist
Using the right density of foam and textile weight determines the longevity and professional finish of the internal pillow. Cheap materials can degrade or lose their shape, compromising the security of the jewelry over time.
The best part?
- 1-inch high-density foam for structural support.
- Premium velvet or silk fabric squares (12-inch).
- Industrial-grade hot glue or multi-surface adhesive.
- 1/4-inch silk ribbon and heavy-duty upholstery needles.
Key Takeaway: High-quality inputs directly correlate with the perceived market value of the output; never compromise on fabric density or foam resilience.
| Supply Category | Recommended Grade | Purpose | |
|---|---|---|---|
| External Box | Lead-Free Tempered Glass | Structural Durability | |
| Internal Support | High-Density Upholstery Foam | Ring Stability | |
| Textile | Silk or Premium Linen | Aesthetic Finish |
Analysis: A strategic selection of industrial-grade supplies ensures the packaging can withstand the rigors of shipping while maintaining a bespoke appearance.
How do you measure a diy ring box template?
You measure a template by tracing the box exterior on cardstock and trimming the shape to be exactly 1/3-inch smaller than the internal footprint. This precision ensures that the final fabric-wrapped pillow drops into the box without causing stress to the glass walls.
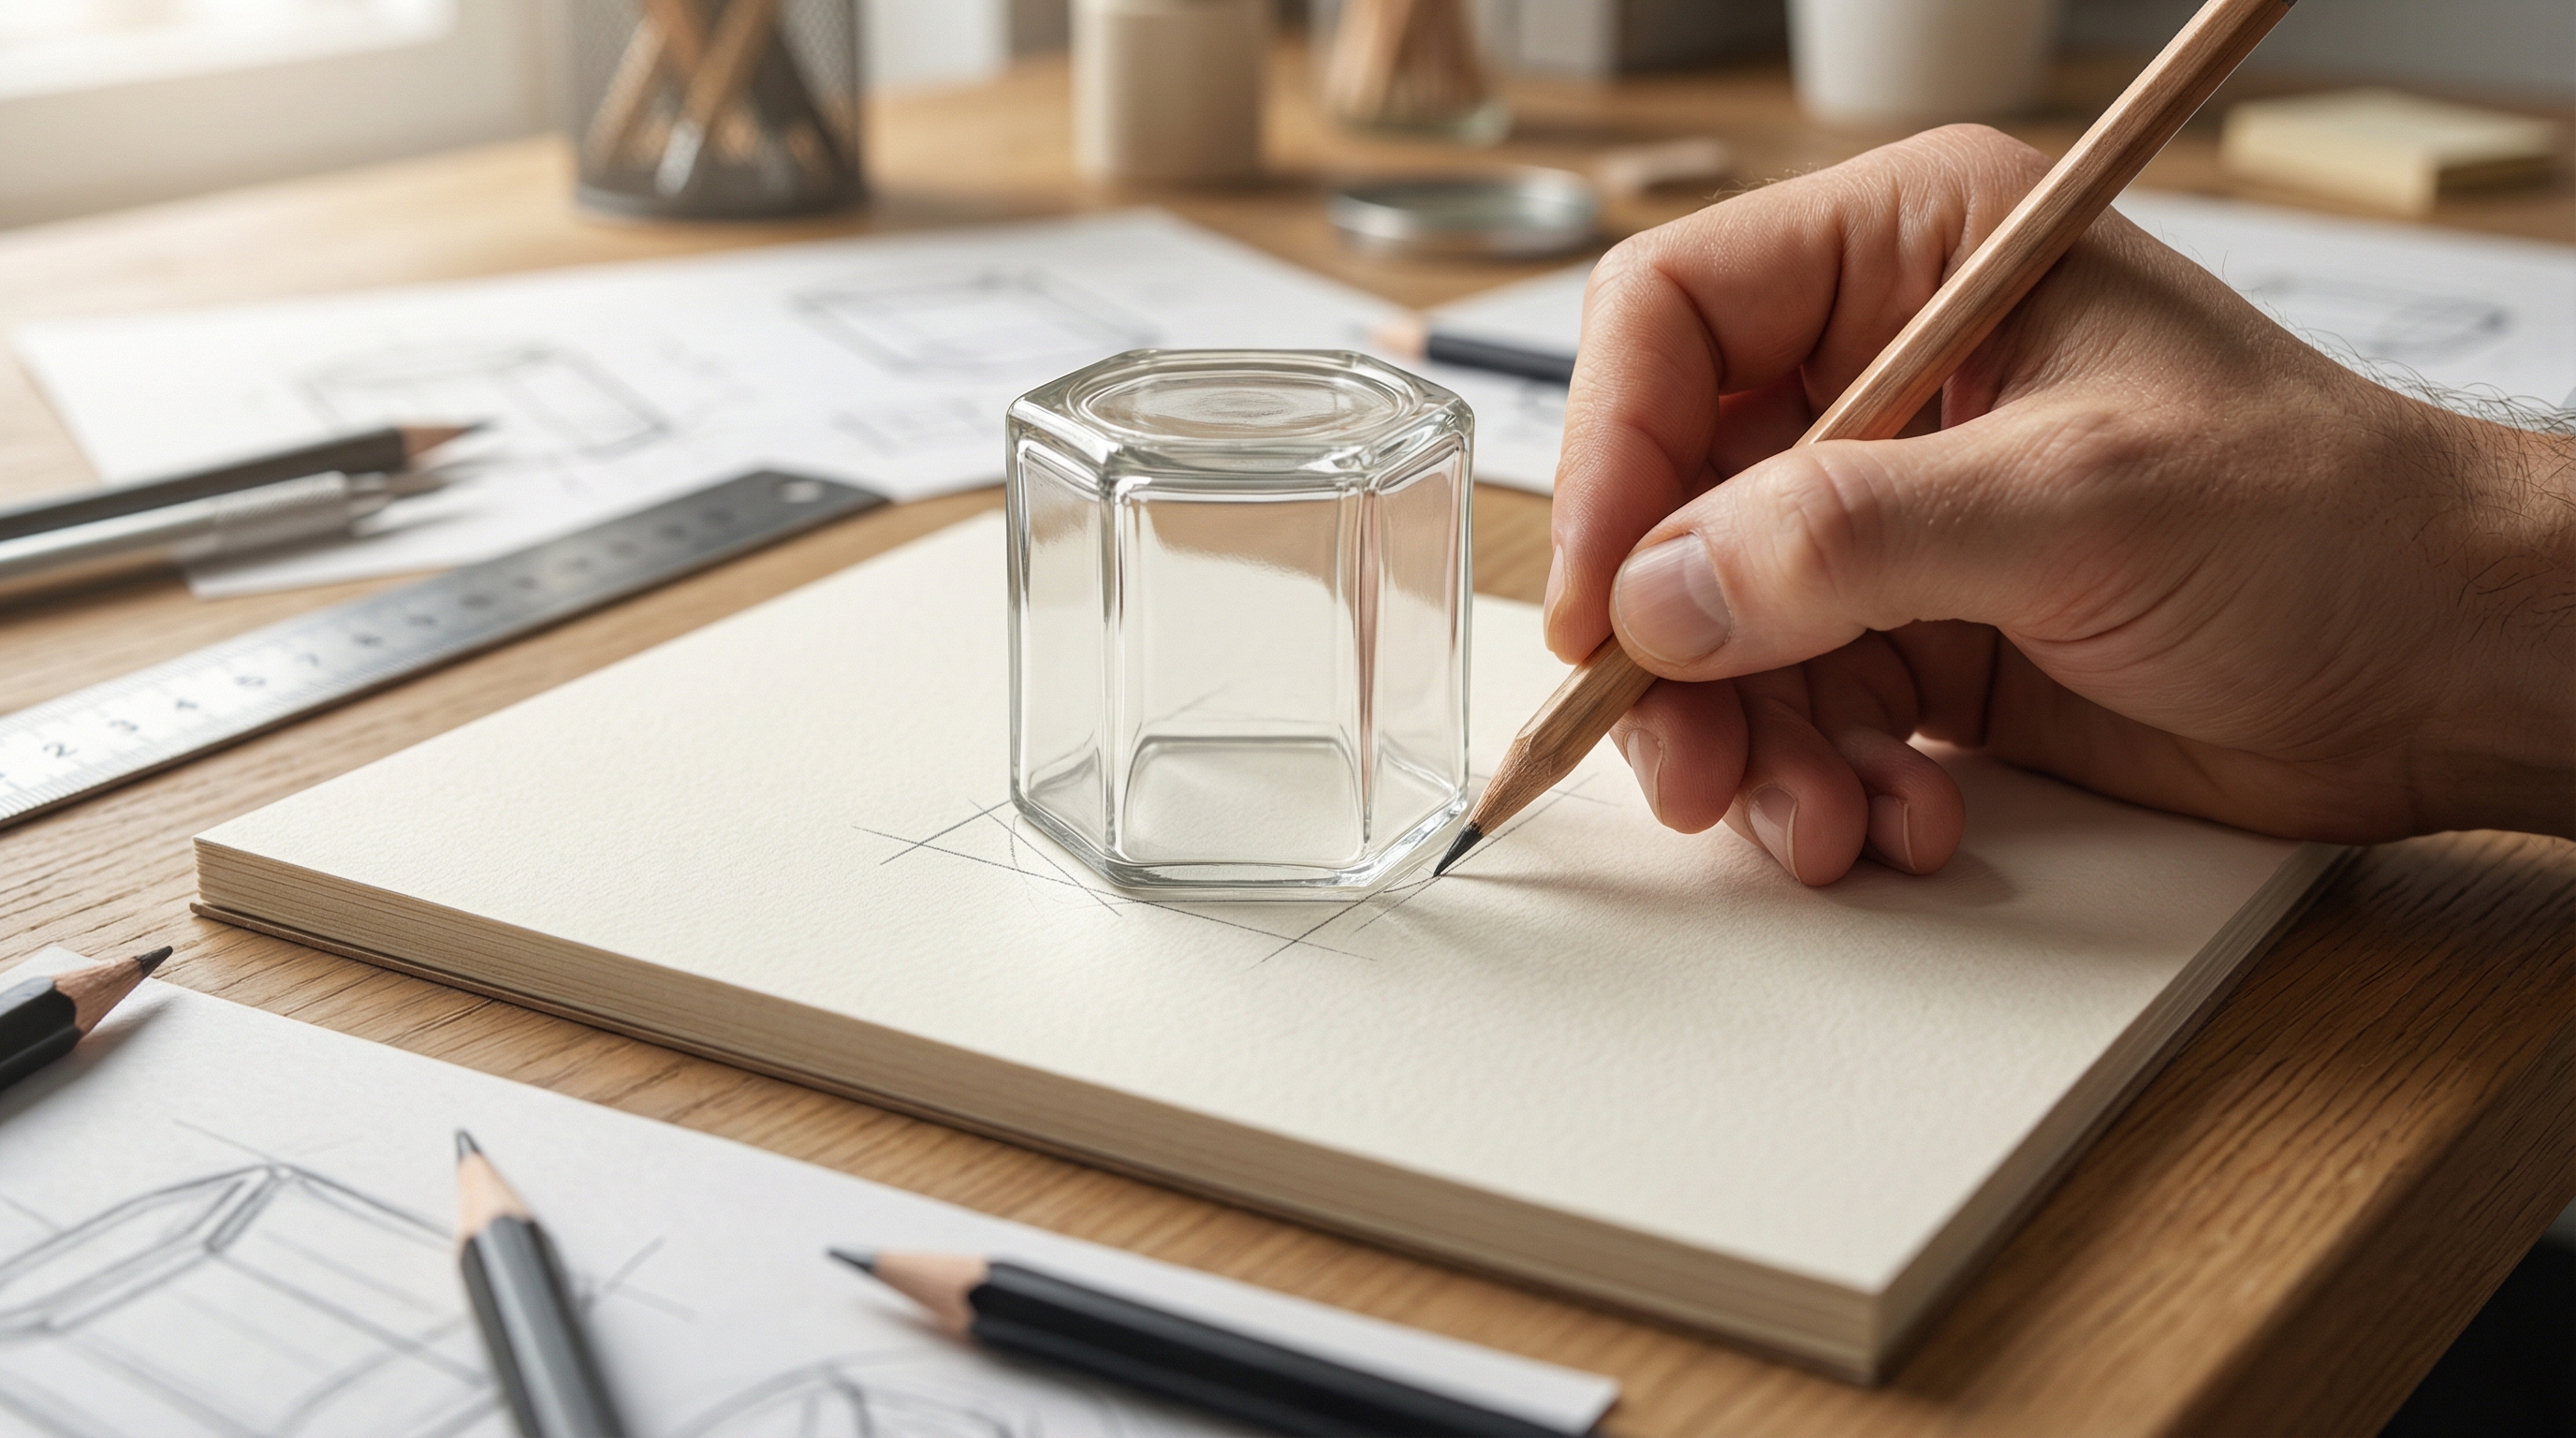
Precision Sizing Techniques
Accurate measurements account for the thickness of the glass and the bulk of the fabric that will eventually cover the foam insert. Creating a reusable cardstock template allows for consistency across multiple product units in a seasonal collection.
Think about it:
- Trace the exterior footprint on stiff cardstock first.
- Reduce all sides by 1/3-inch to accommodate walls.
- Perform a “drop test” to ensure a gap-free fit.
Key Takeaway: Investing time in a precise template prevents the foam from buckling and ensures a professional, snug fit for every unit produced.
| Step | Action Required | Tolerance Level | |
|---|---|---|---|
| Initial Trace | Exterior Perimeter Capture | +/- 0mm | |
| Margin Trim | Reduce for Glass Thickness | -8mm (approx.) | |
| Verification | Internal Clearance Check | 2mm Gap |
Analysis: Standardizing the measurement process is a core B2B efficiency that minimizes material waste and ensures product consistency.
Which foam works best for a diy ring box?
The most effective interior for a diy ring box is one-inch thick, medium-density upholstery foam that maintains its shape under the weight of the ring. This specific thickness provides the necessary depth to create a significant “divot” for the ring to sit securely.
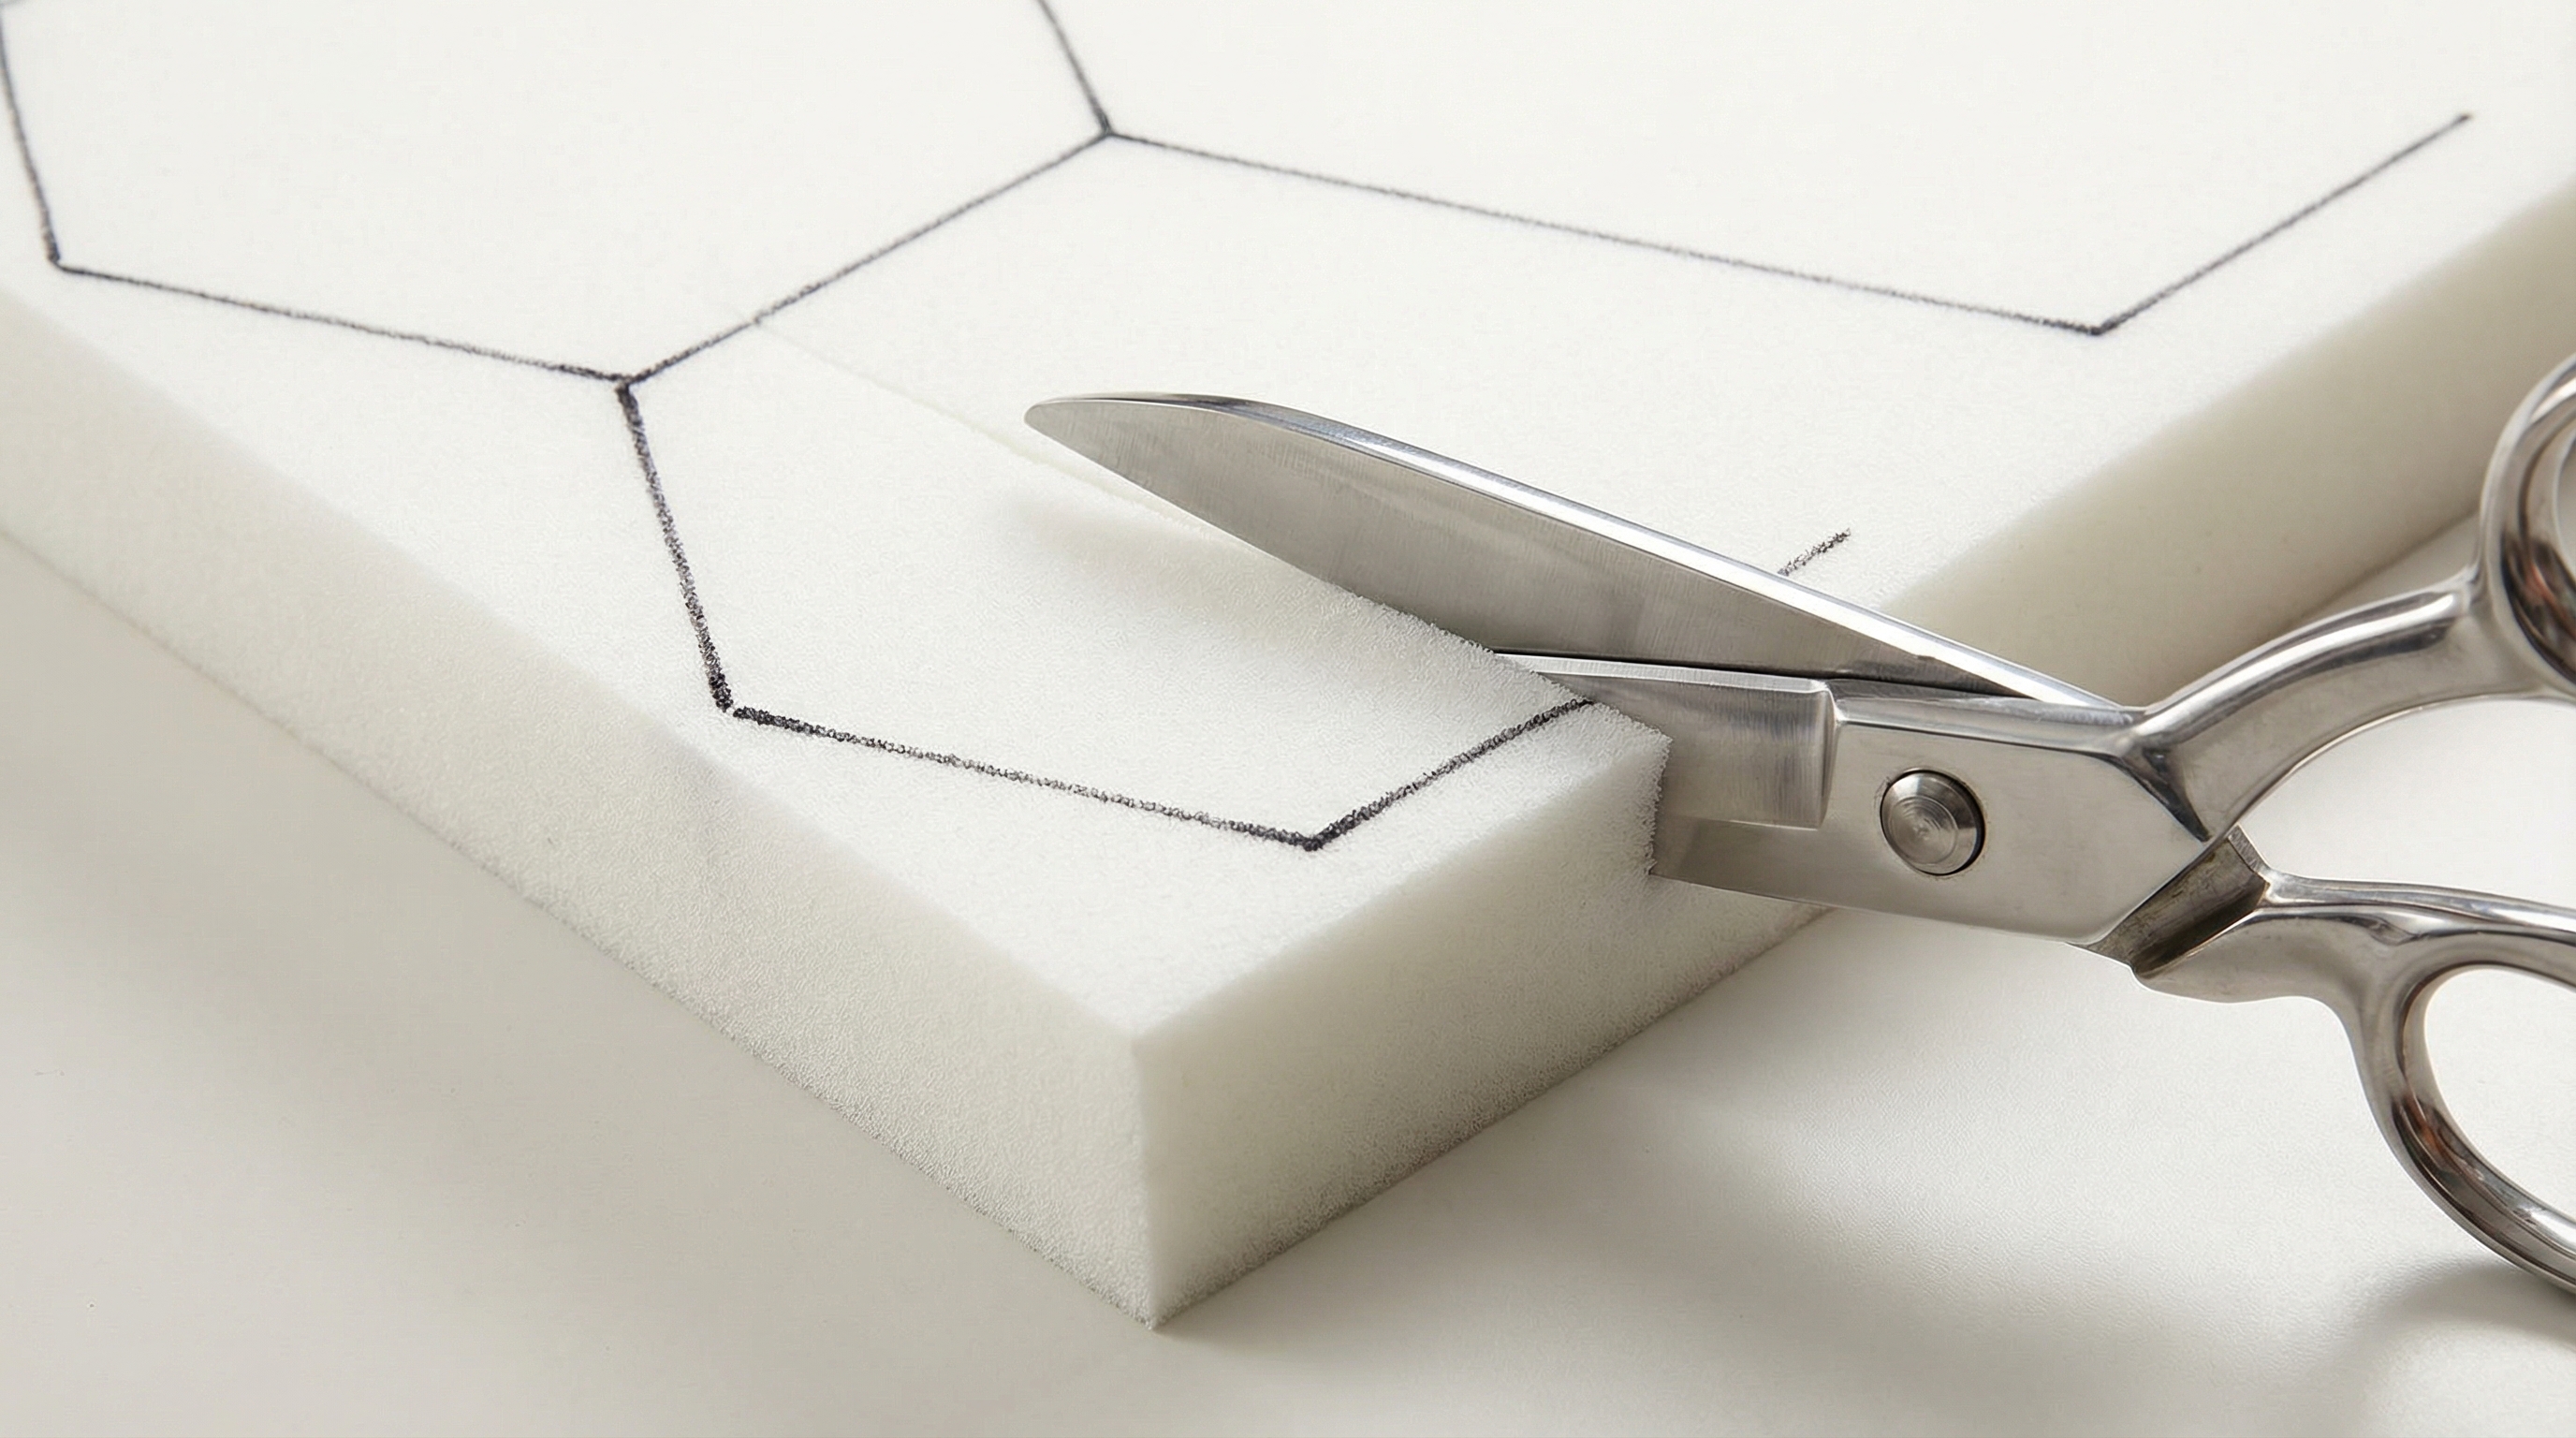
Foam Density and Cutting
Low-density foams found in basic packing materials often compress too easily and fail to keep the jewelry upright during movement. For a professional result, the foam must offer enough resistance to keep the wrapping fabric perfectly taut.
It gets better:
- Use sharp upholstery scissors for clean, vertical edges.
- Trace the template with permanent ink for visibility.
- Avoid jagged cuts to maintain the sharp hexagon geometry.
Key Takeaway: High-density foam is the industry standard for creating a substantial pillow that suggests luxury through weight and resilience.
| Foam Type | Density Rating | Best Use Case | |
|---|---|---|---|
| Upholstery Foam | High/Medium | Premium Retail Packaging | |
| Closed-Cell | Rigid | High-Value Shipping | |
| Craft Foam | Low | Temporary Display Only |
Analysis: Selecting an appropriate internal support is a functional decision that directly impacts how a client perceives the overall quality of the package.
How do you cut fabric for a diy ring box?
To cut the fabric, you place the foam on your textile and trace a shape that is roughly two inches larger on all sides to allow for a clean wrap. This extra margin is essential for ensuring that the fabric can be pulled tightly and secured to the bottom of the foam.
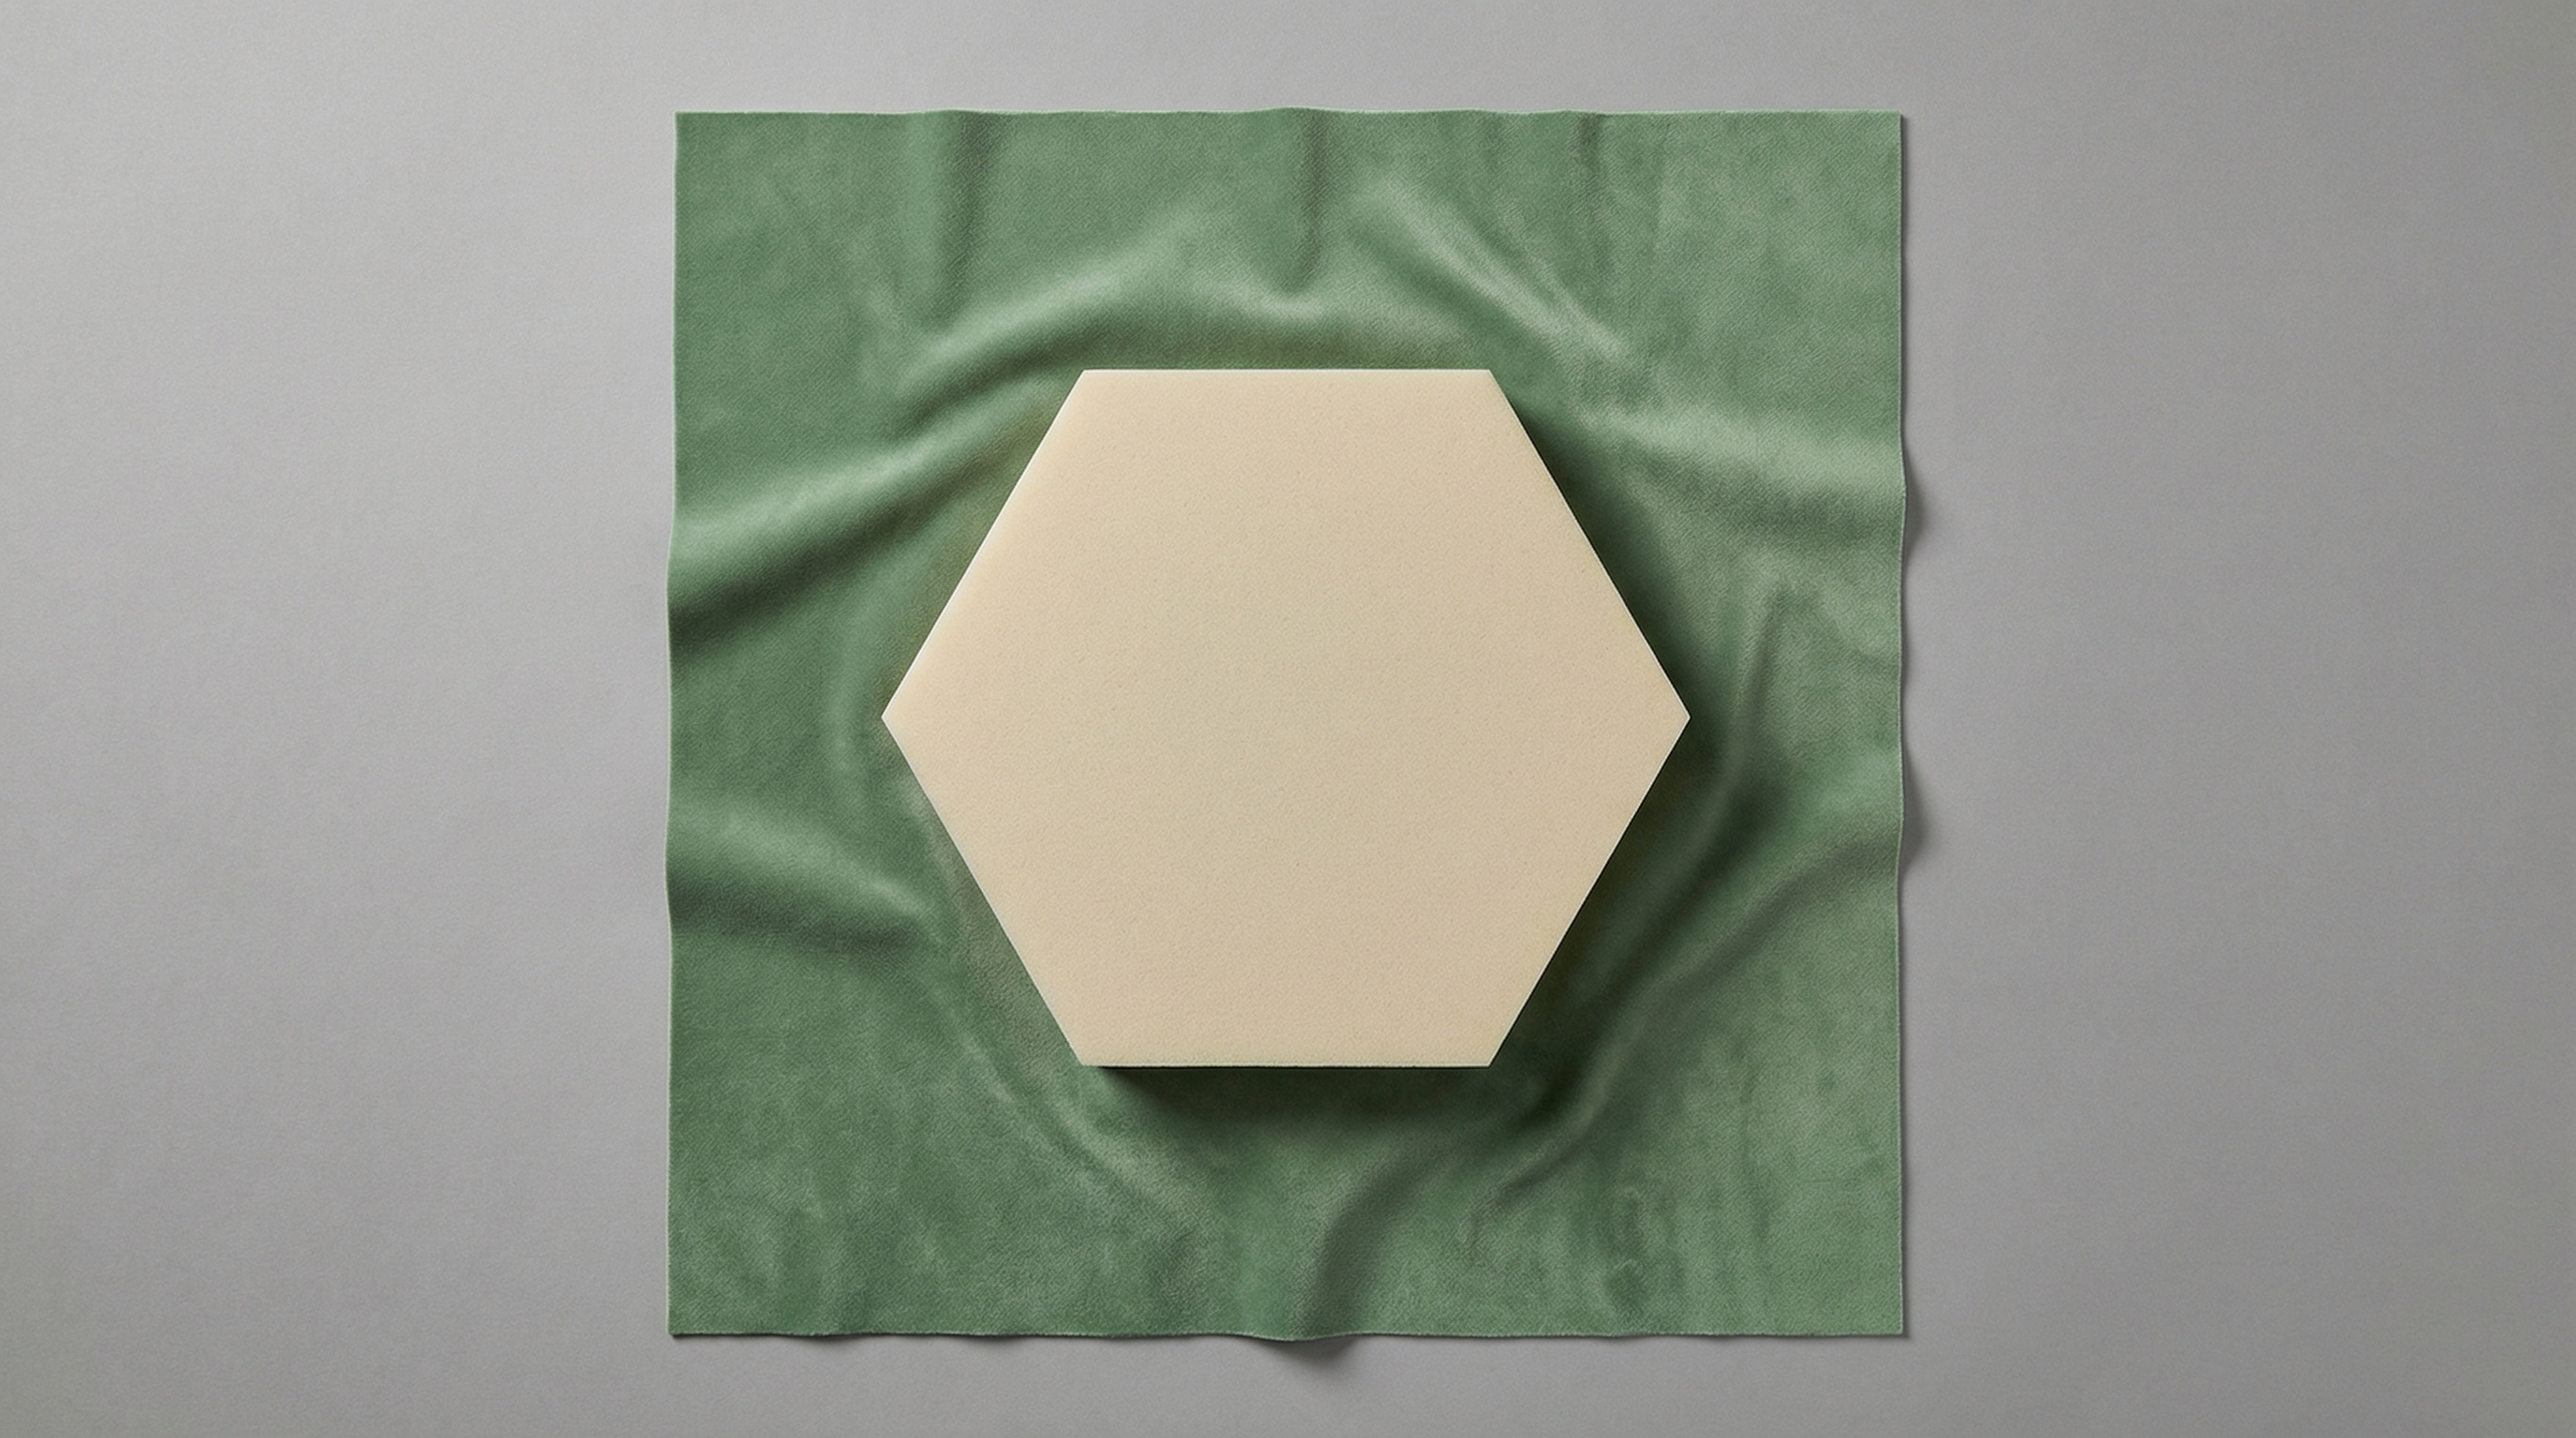
Textile Preparation Steps
Selecting a fabric with a slight stretch, such as certain velvets, can help in navigating the complex corners of a hexagonal shape. The contrast between the fabric color and the metal of the ring can significantly enhance the visual brilliance of the diamond.
Here is the catch:
- Lay the fabric on a flat, hard surface to prevent snags.
- Center the foam to visualize the overhang before cutting.
- Use fabric shears to prevent fraying at the hexagon vertices.
Key Takeaway: A generous 2-inch margin provides the necessary leverage to achieve professional tension during the gluing and wrapping phase.
| Material | Advantage | Difficulty Level | |
|---|---|---|---|
| Velvet | Luxurious Texture | Moderate (Bulk) | |
| Silk | High Luster | High (Fraying) | |
| Linen | Modern Aesthetic | Low (Stable) |
Analysis: Strategic textile selection allows a brand to pivot its entire aesthetic from vintage to modern without changing structural components.
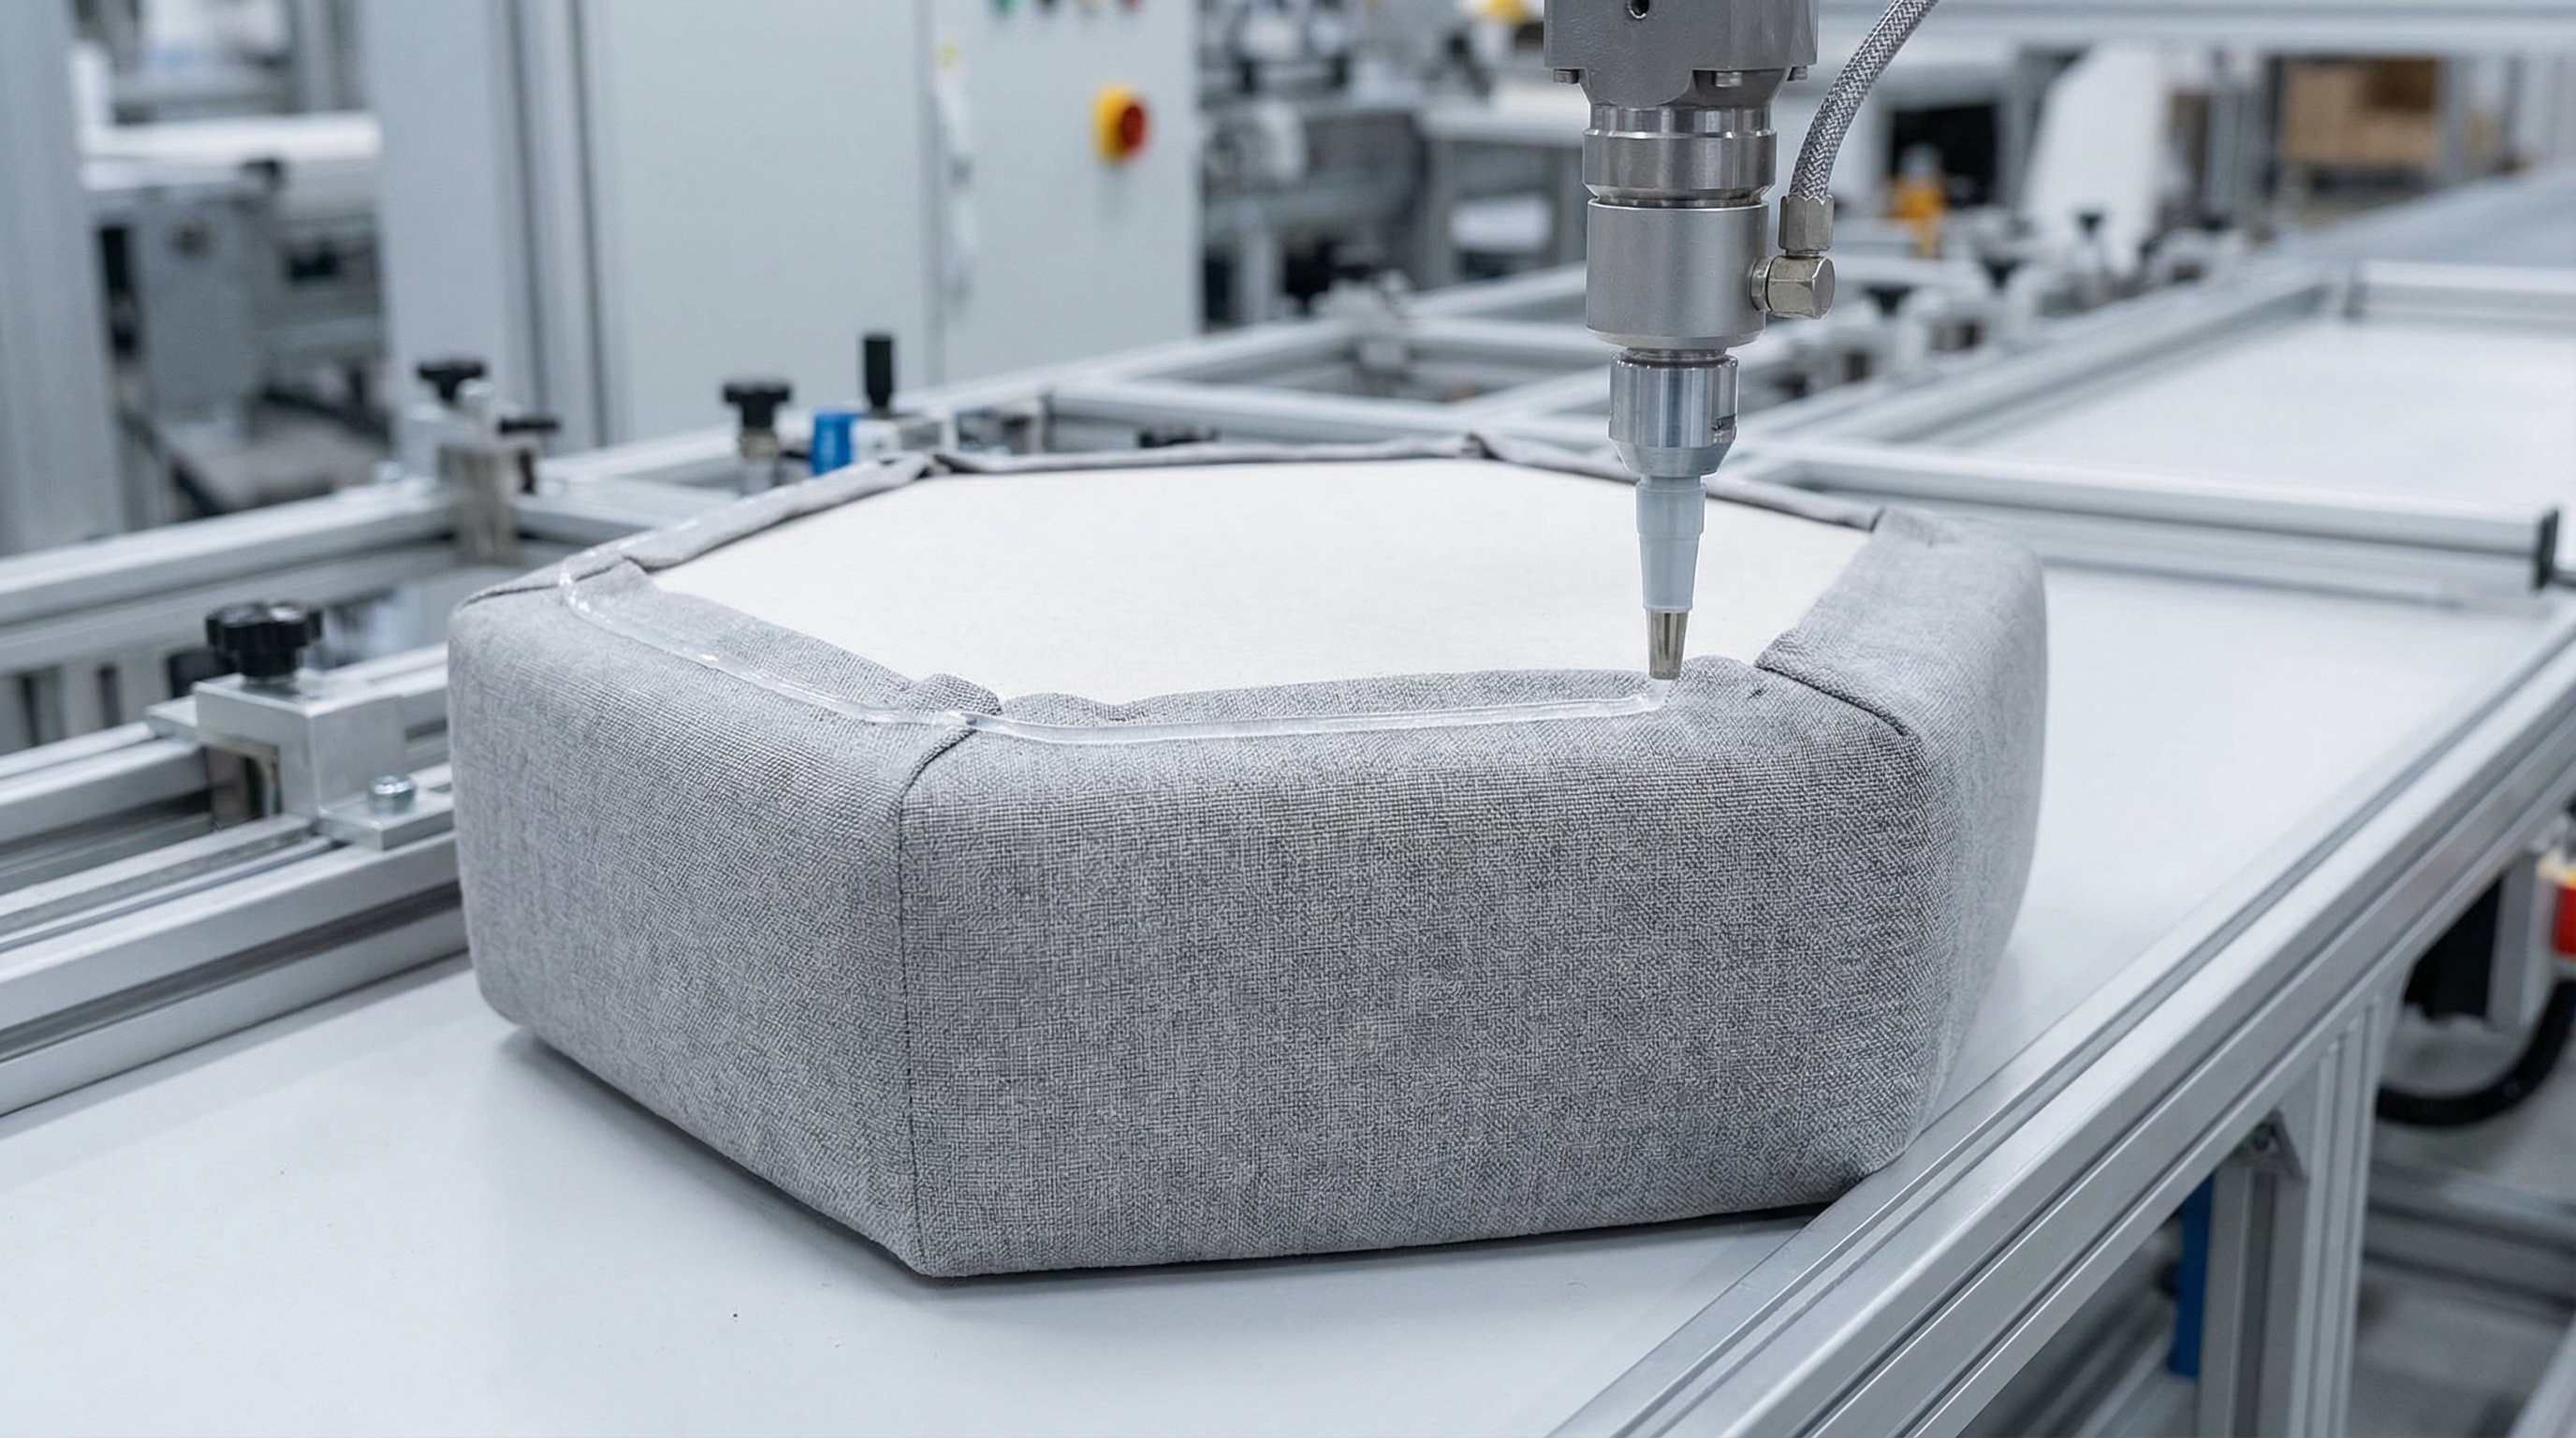
How do you wrap a diy ring box pillow?
You wrap a diy ring box pillow by pulling the fabric taut over the foam edges and securing the material on the underside with a thin bead of hot glue. Consistency is the secret to a professional finish, requiring equal tension on all six sides of the hexagon.
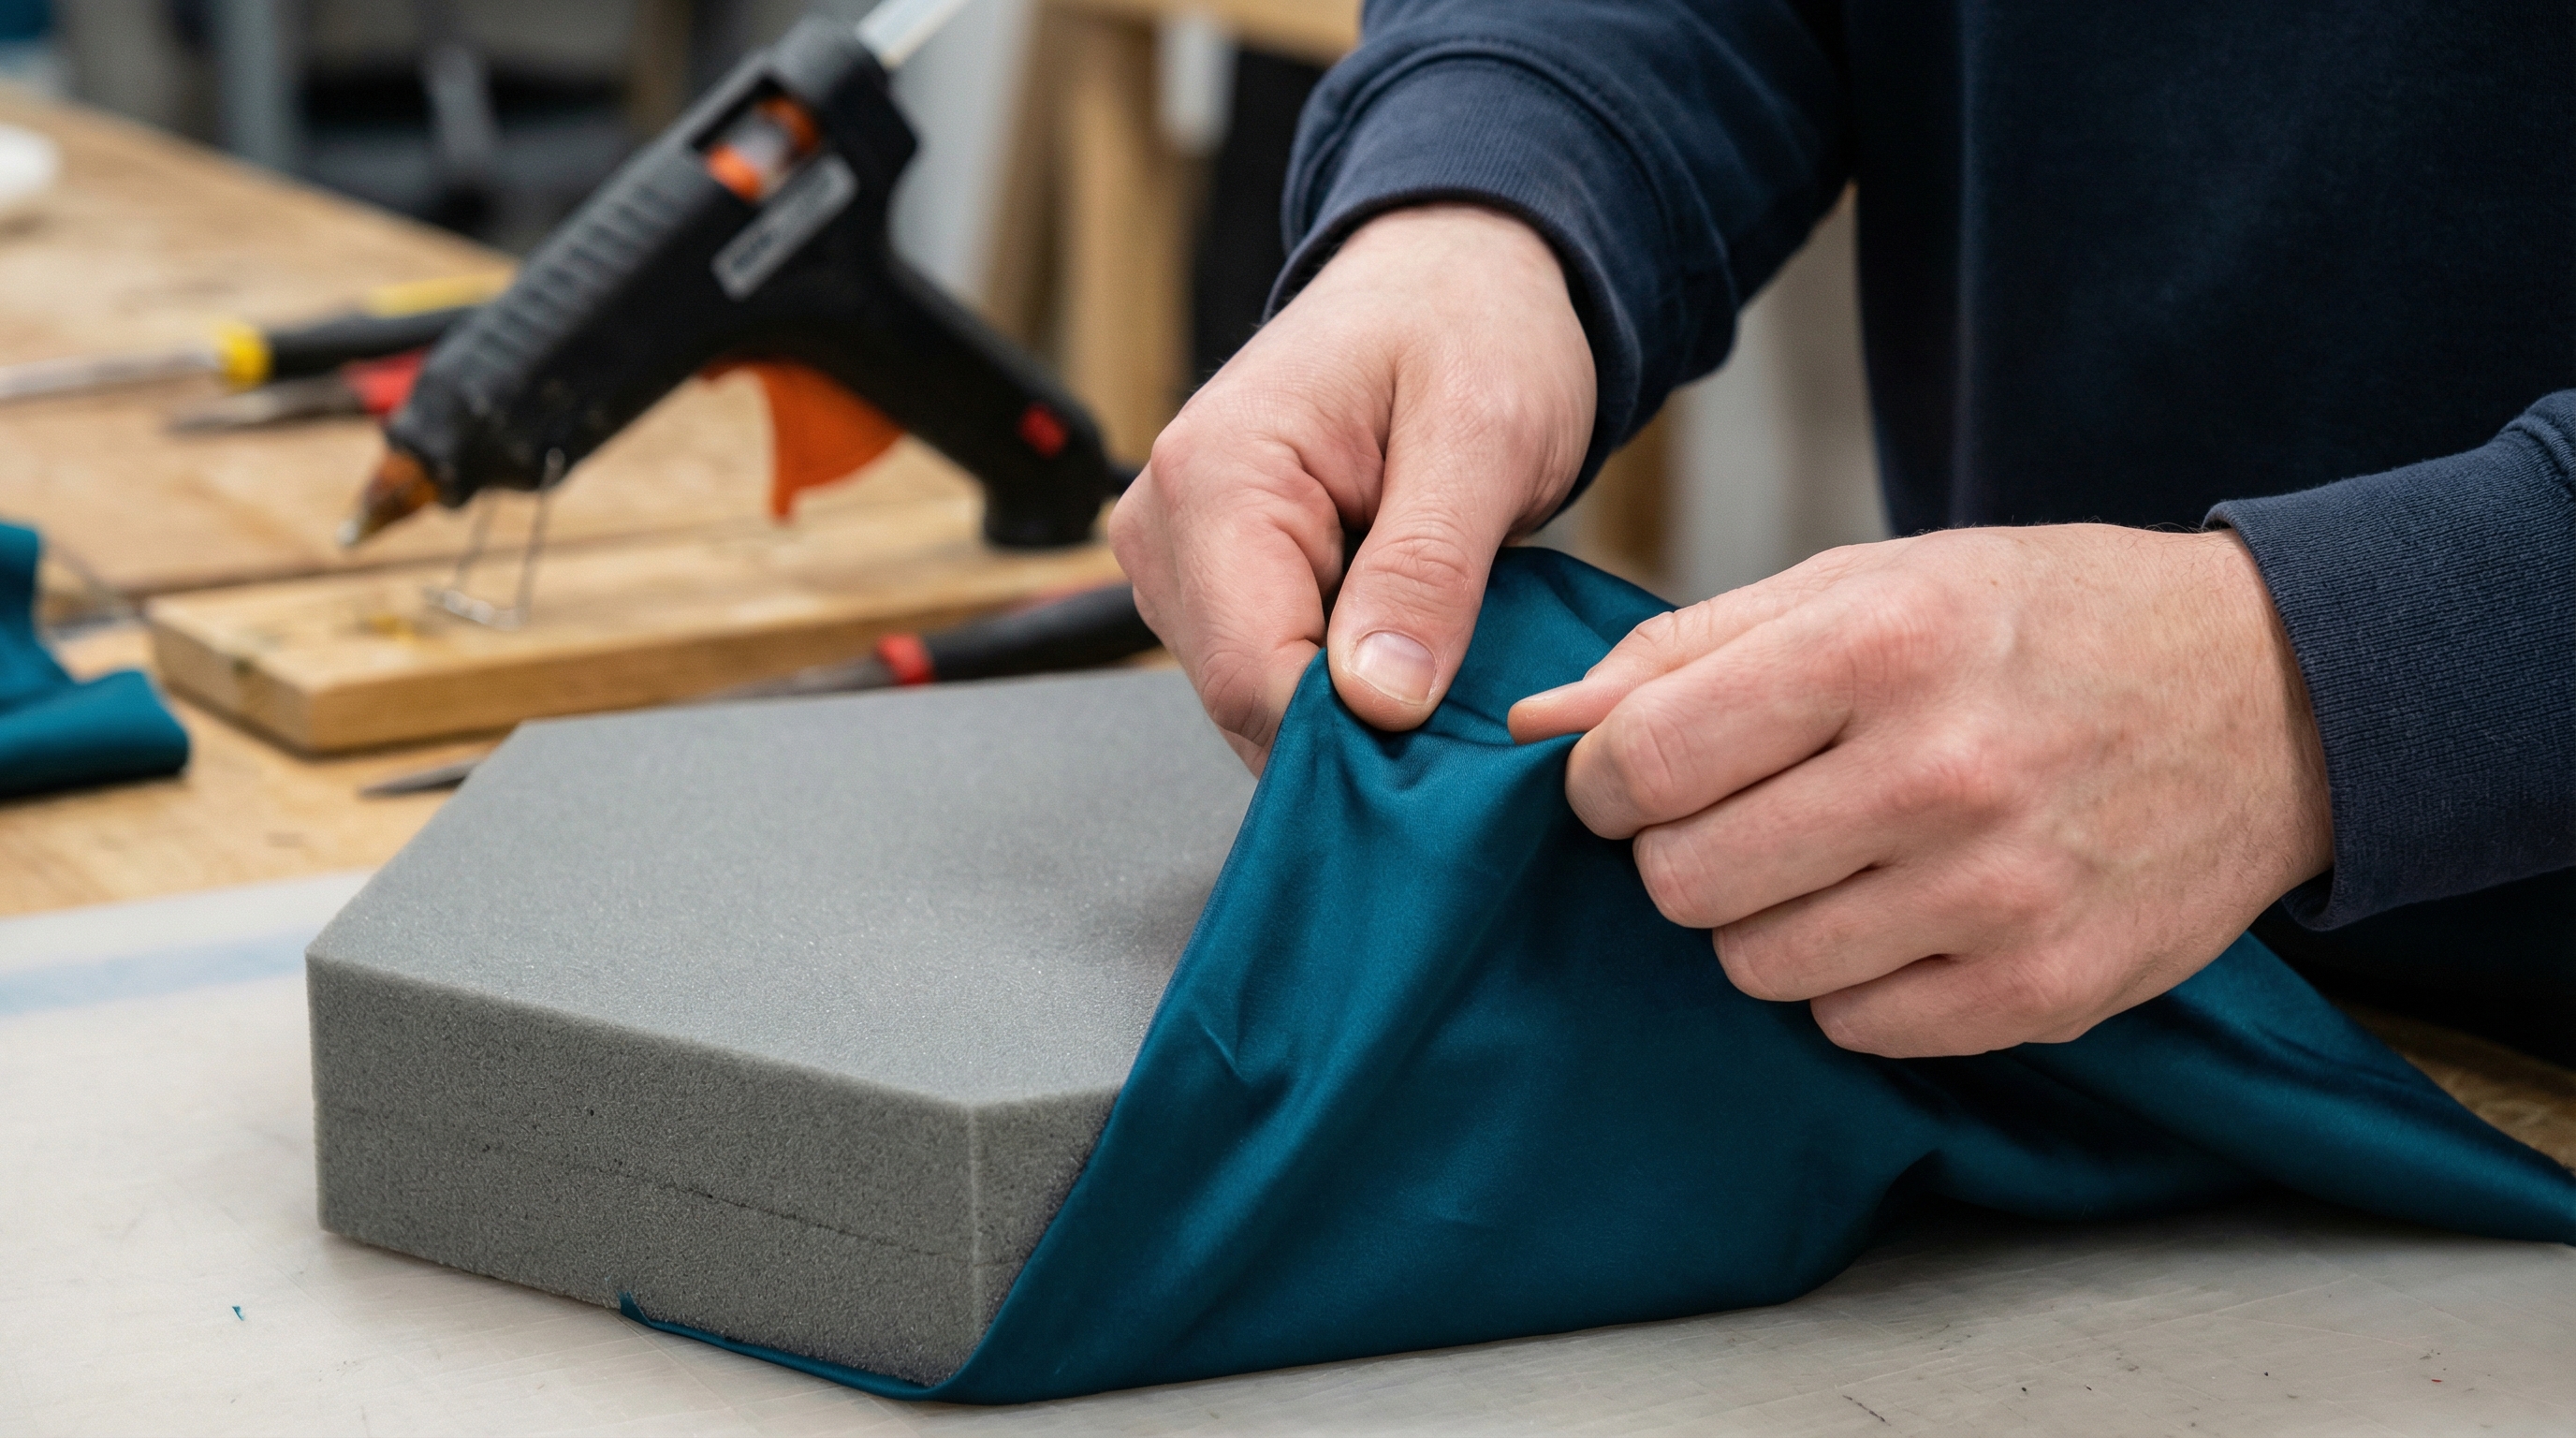
Tension and Folding Techniques
Folds should be executed similar to high-end upholstery, with “hospital corners” at each vertex to minimize bulk. Avoid placing any adhesive on the sides of the foam, as lumps will be visible through the transparent glass walls.
The results speak for themselves:
- Secure opposite sides first to stabilize the grain.
- Tuck excess fabric inward at each hexagonal corner.
- Trim overlapping layers to maintain a flat base.
Key Takeaway: Tension is the defining factor of a professional pillow; the fabric must be tight enough to slightly compress the foam edges.
| Action | Success Metric | Risk Factor | |
|---|---|---|---|
| Tension Pull | No Surface Ripples | Foam Distortion | |
| Corner Folding | Sharp Geometric Points | Excessive Bulk | |
| Base Gluing | Permanent Adhesion | Visible Residue |
Analysis: Professional upholstery techniques applied at a miniature scale distinguish commercial-grade packaging from standard amateur craft projects.
How do you sew a divot for a diy ring box?
You create a professional divot by passing a needle through the center of the foam pillow with enough tension to compress the surface into a tufted shape. This central indentation serves as the functional “seat” for the ring, preventing it from shifting during transit.
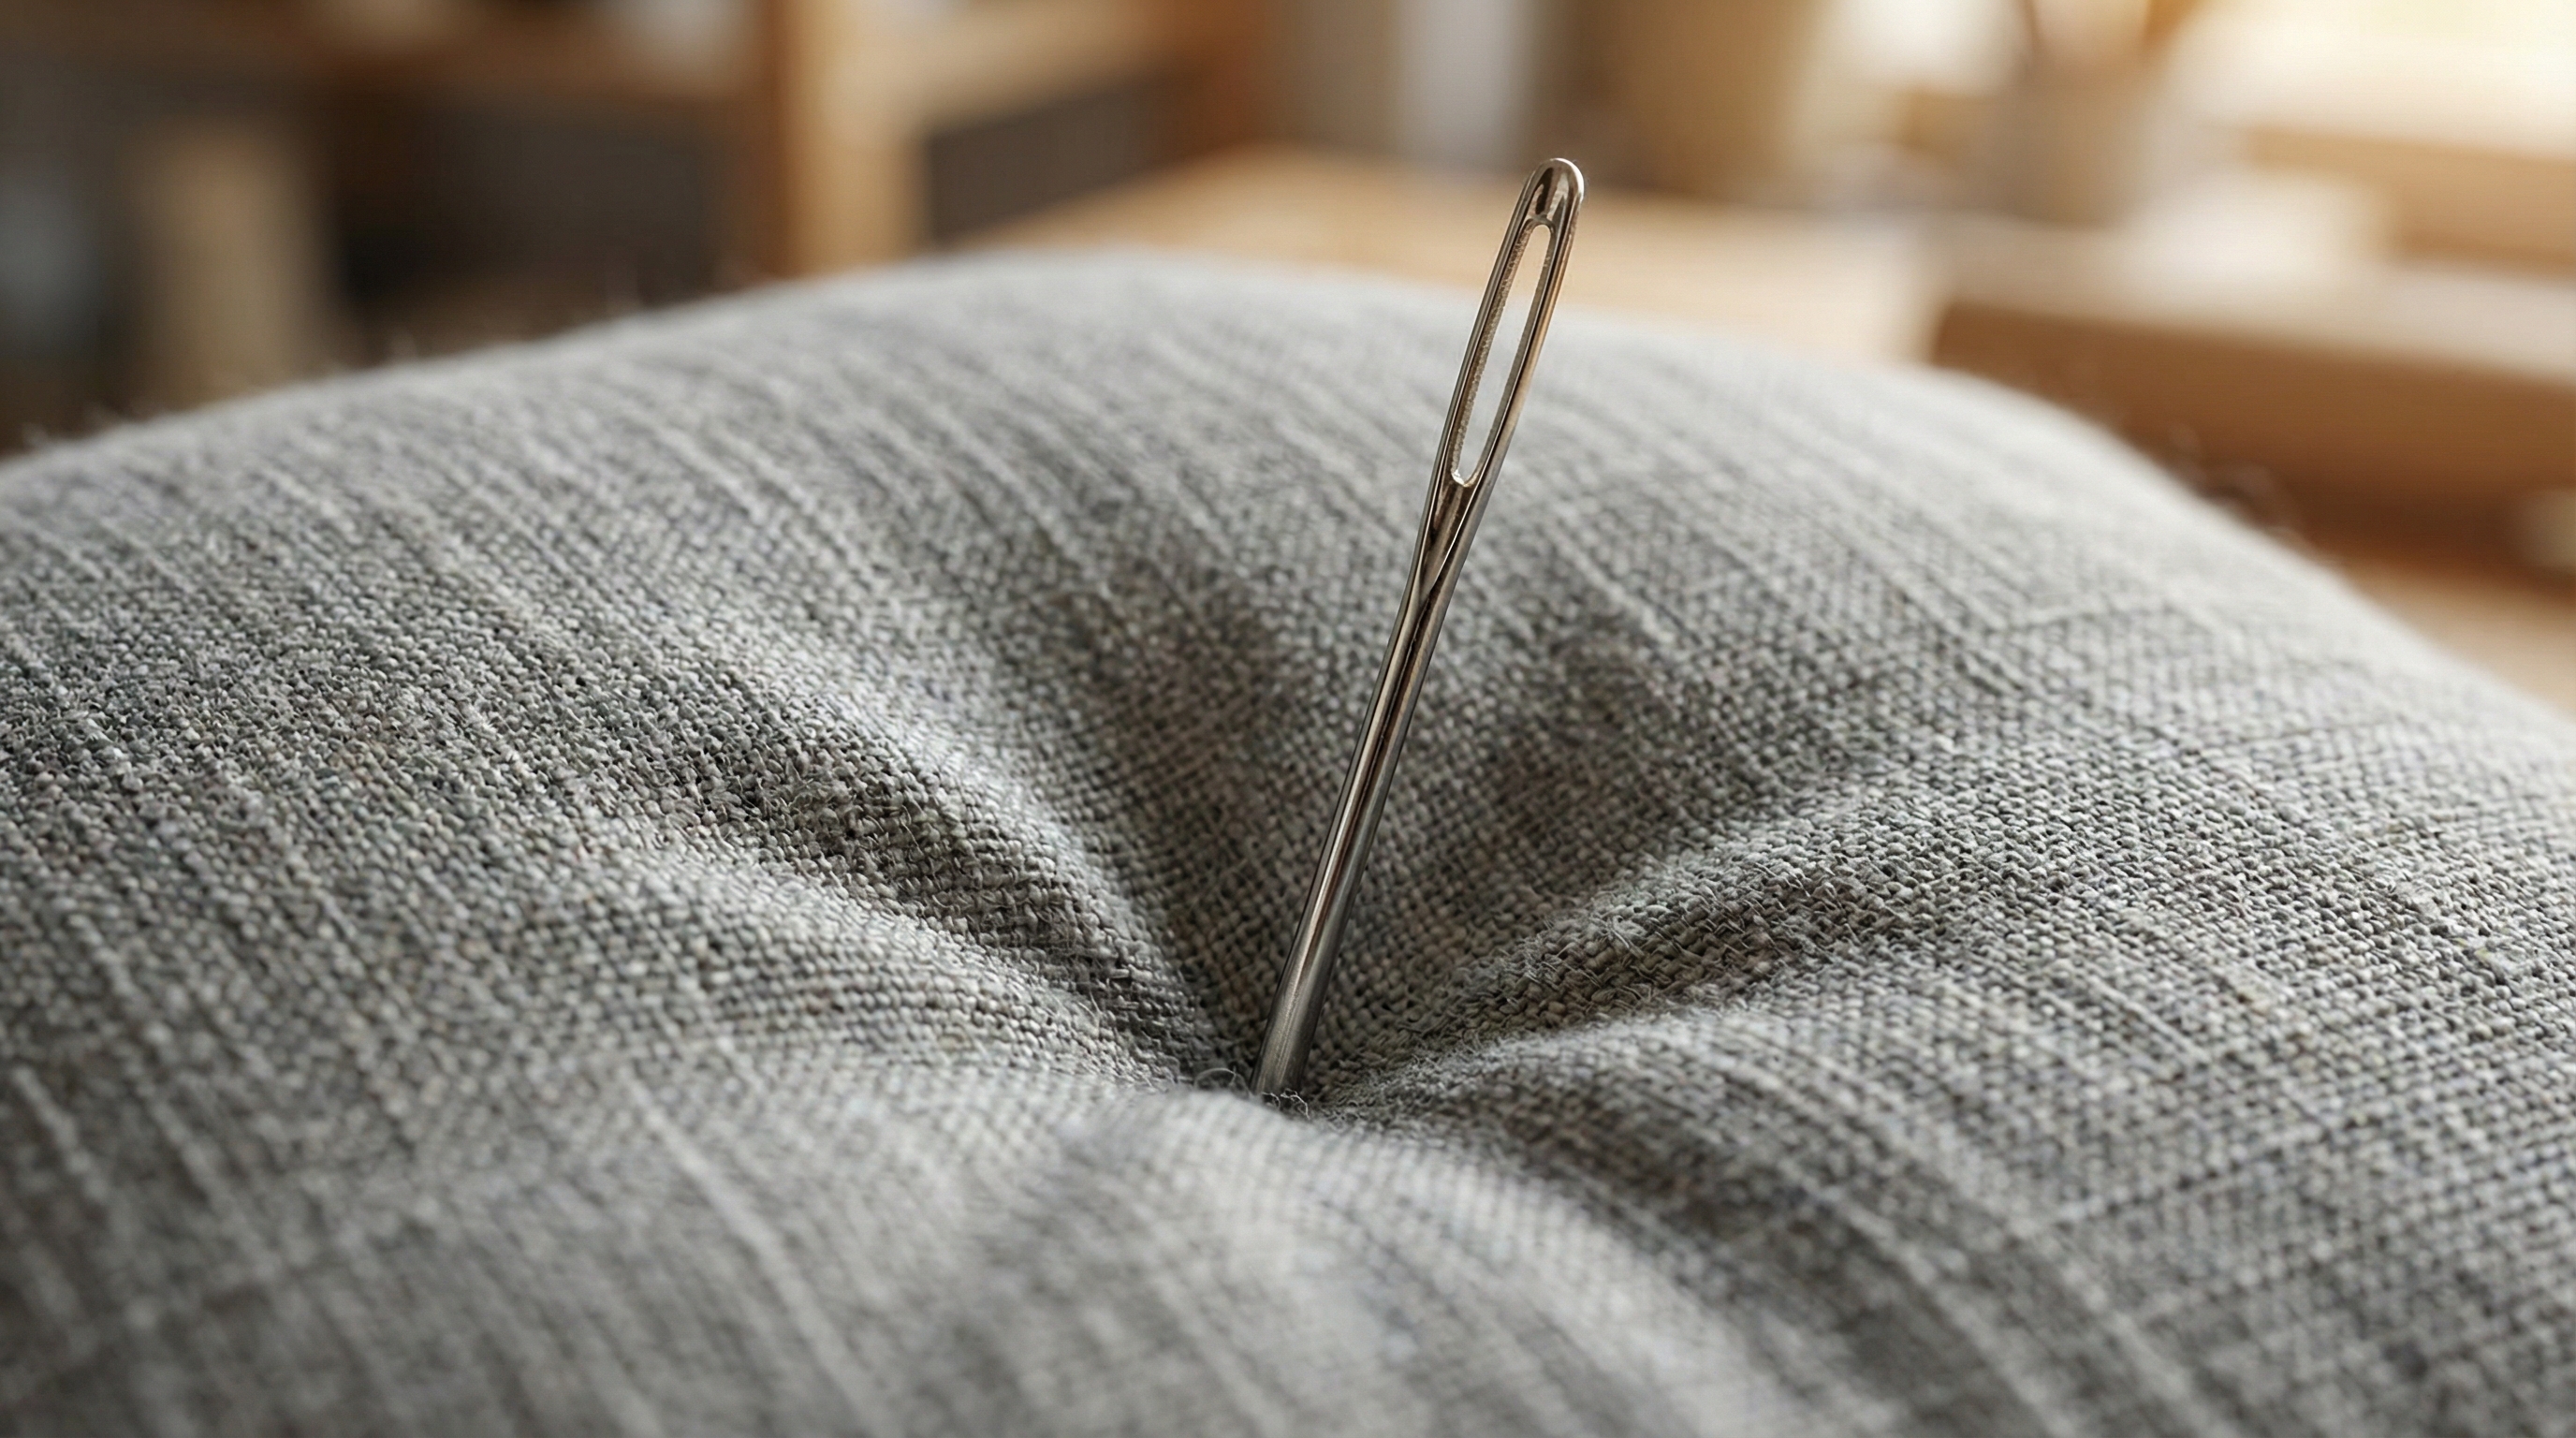
The Tufting Process
Using a long upholstery needle is necessary to pass through the full 1-inch thickness of the high-density foam. This process not only secures the ring but also adds a high-end, bespoke aesthetic that mimics luxury furniture.
Believe it or not:
- Thread a needle with a double strand of heavy thread.
- Pass the needle from the bottom to the center-top.
- Loop the ribbon and pull tight to create a 1/2-inch deep dimple.
Key Takeaway: The “tufting” technique is a functional necessity that doubles as a luxury design detail, significantly increasing the box’s perceived value.
| Component | Specification | Function | |
|---|---|---|---|
| Needle | 3-Inch Upholstery | Deep Material Piercing | |
| Thread | Heavy-Duty Nylon | Tension Maintenance | |
| Ribbon | 1/4-Inch Silk | Ring Security Tie |
Analysis: The transition from a flat surface to a tufted pillow is the specific detail that elevates the jewelry container to a professional B2B standard.
What ribbon adds luxury to a diy ring box?
A 1/4-inch silk or satin ribbon provides the most luxurious finish for a diy ring box while ensuring the ring remains securely tied in place. The ribbon should be long enough to wrap around the ring band and be tied into a decorative bow that complements the overall theme.
Choosing Decorative Elements
The color of the ribbon should either match the fabric for a monochromatic look or provide a stark contrast for a more dramatic presentation. High-quality silk ribbons offer a soft drape that adds a sophisticated touch to the unboxing experience.
Look at the facts:
- Silk ribbons provide superior tactile feedback for clients.
- Satin options offer a high-shine finish for photography.
- Ribbon tails should be trimmed at an angle to prevent fraying.
Key Takeaway: Decorative ribbons are not just for aesthetics; they are the primary safety mechanism that holds the jewelry in place during high-stakes reveals.
| Ribbon Material | Aesthetic Impact | Durability | |
|---|---|---|---|
| Pure Silk | Soft/Organic Luxury | High | |
| Double-Satin | High Shine/Modern | Moderate | |
| Grosgrain | Matte/Architectural | Very High |
Analysis: In professional packaging, the secondary closure (the ribbon) is often perceived as a signifier of the care taken in the primary product’s creation.
Should you glue a diy ring box insert?
You should glue the insert if the box will be used for shipping, but leave it removable if the intention is to allow the client to repurpose the glass vessel. Permanent adhesion using a multi-surface glue provides a solid, unified feel that suggests a high level of manufacturing quality.
Adhesion Strategy for B2B
For e-commerce applications, securing the pillow is a requirement to prevent the jewelry from rattling or becoming dislodged during the vibration of transit. However, boutique brands often prefer a removable insert to increase the long-term utility of the box as a keepsake.
Beyond that:
- Use clear silicone or E6000 for glass-to-fabric bonding.
- Apply glue only to the bottom of the pillow to avoid visible residue.
- Allow 24 hours for full curing before placing the jewelry inside.
Key Takeaway: The decision to glue depends on the distribution channel; prioritize safety for shipping and versatility for in-person retail.
| Scenario | Recommendation | Rationale | |
|---|---|---|---|
| E-commerce/Shipping | Permanent Glue | Transit Vibration Resistance | |
| Boutique/Showroom | Removable Insert | Multi-use Value for Client | |
| Photography Prop | Temporary Tape | Rapid Styling Changes |
Analysis: Packaging strategy must always balance the immediate safety of the asset with the long-term brand interaction experience.
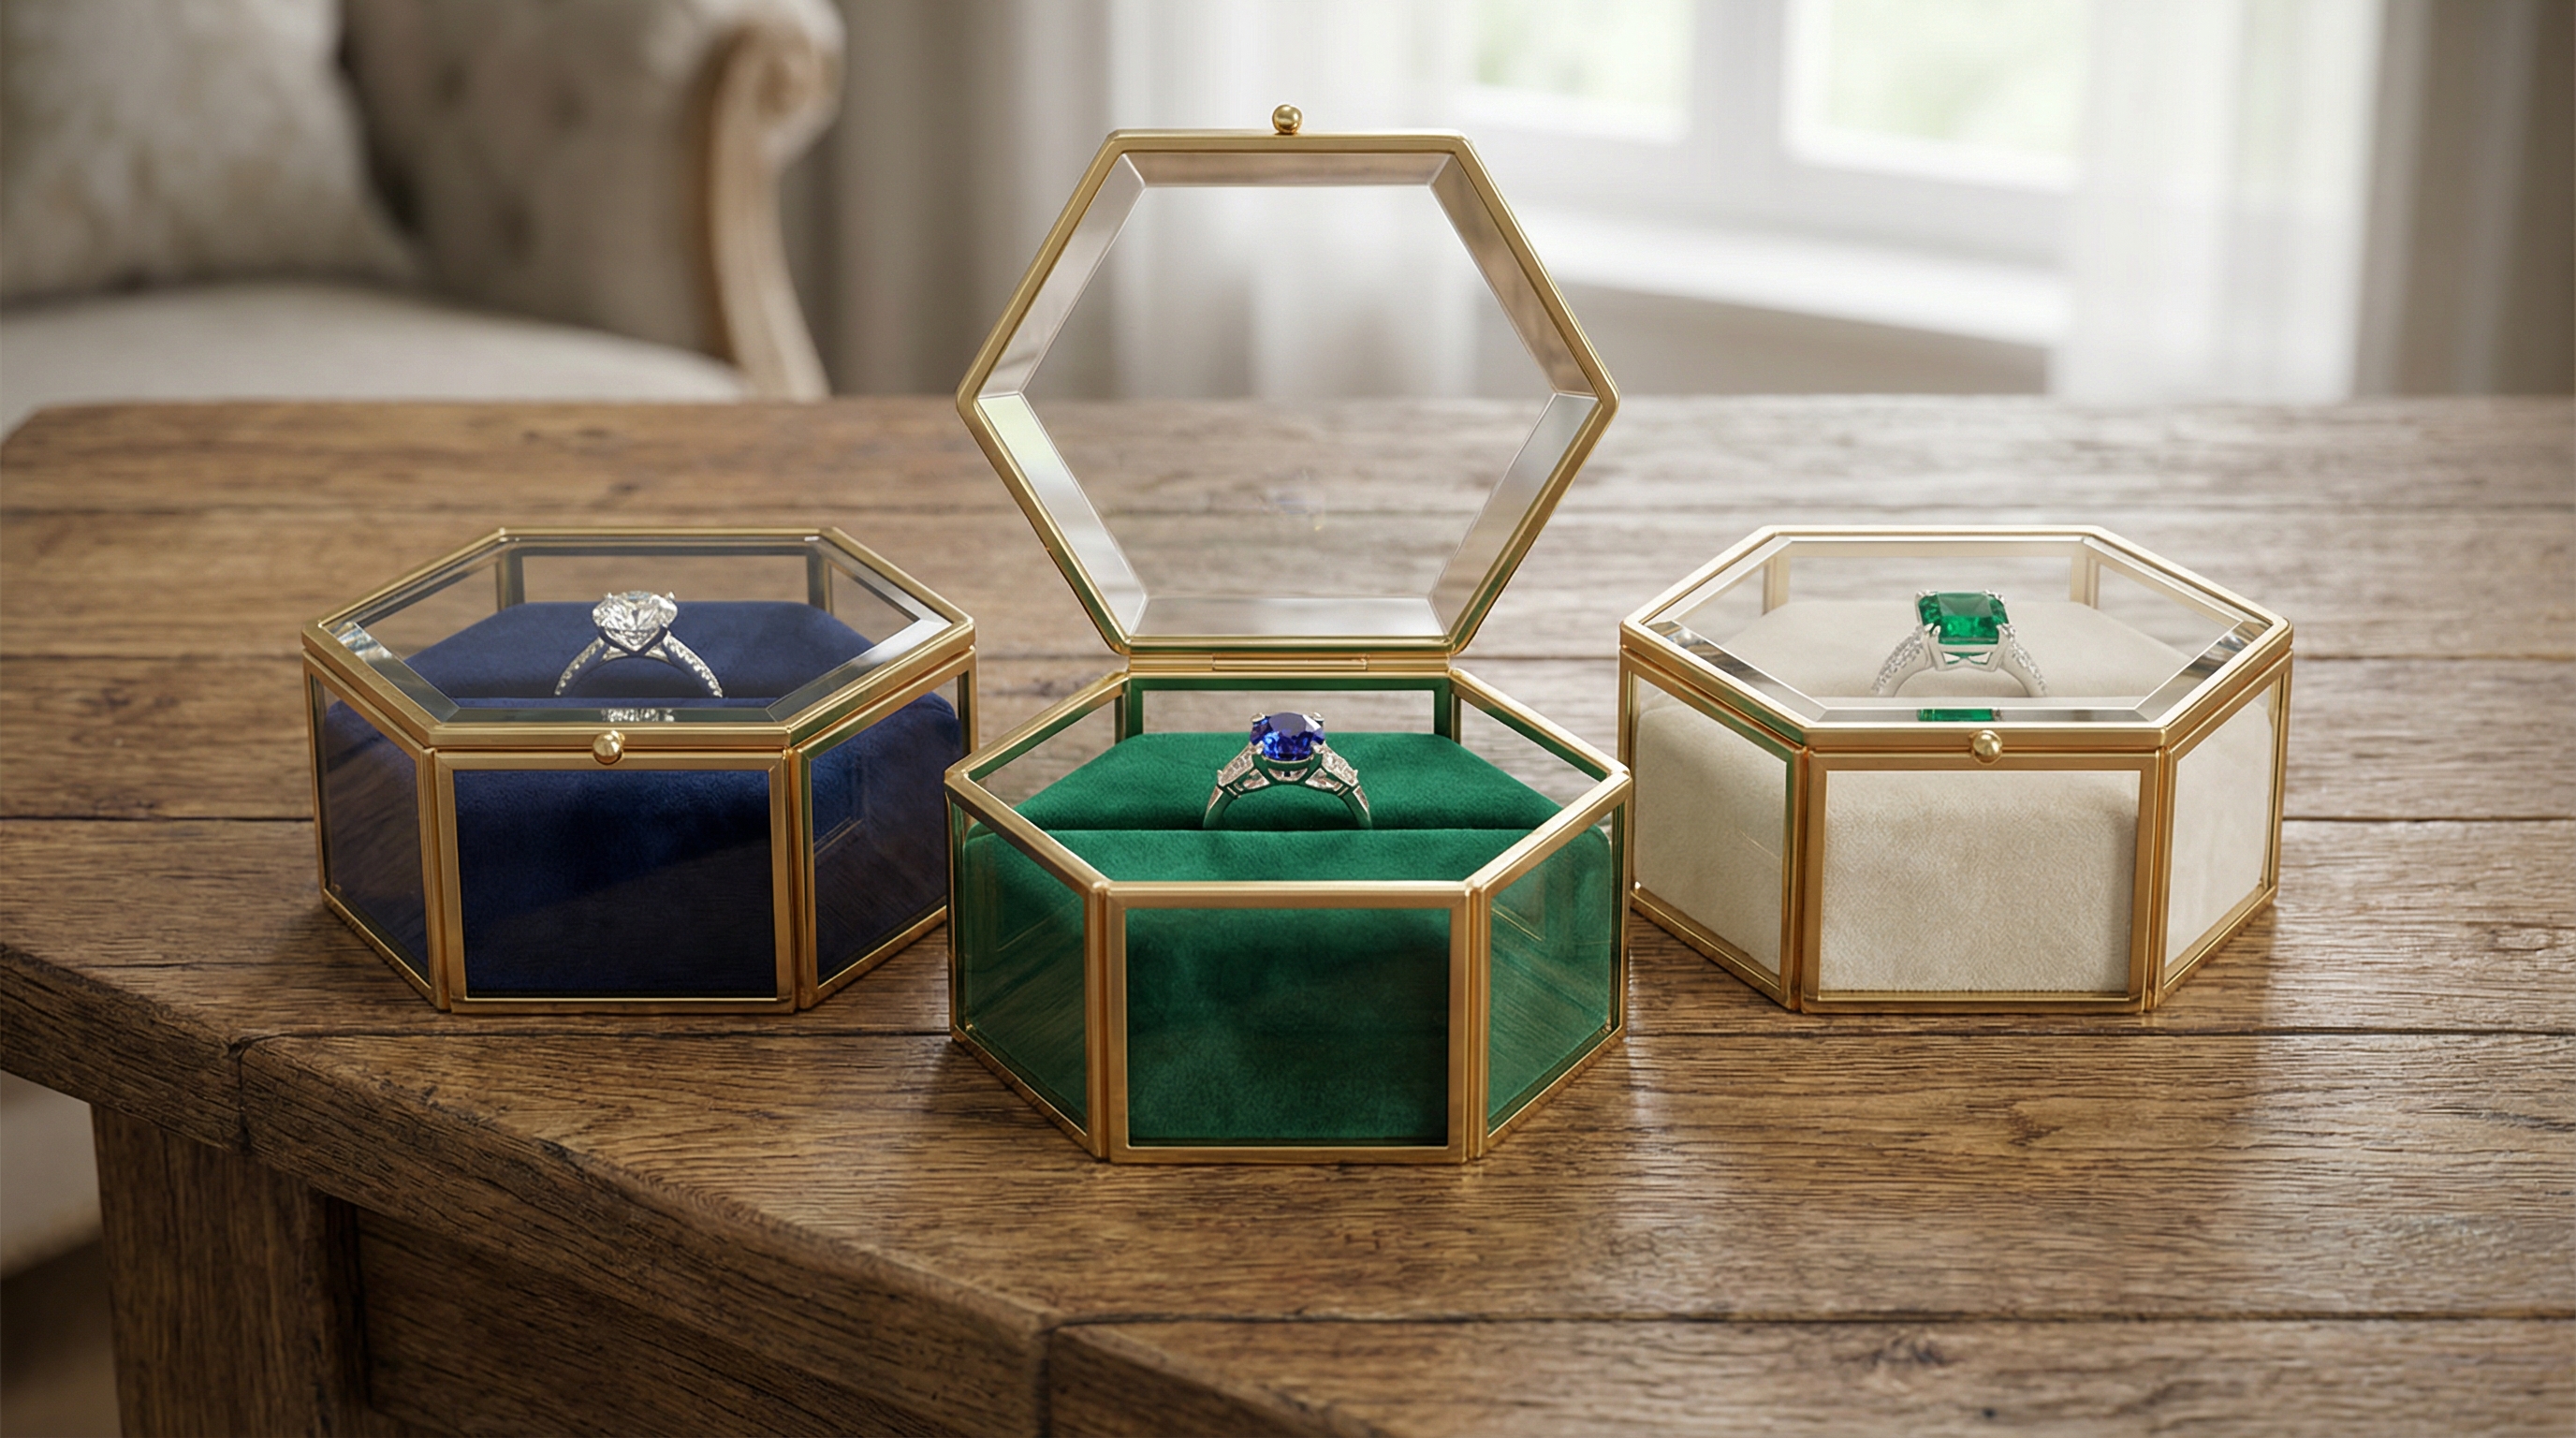
How do you style a finished diy ring box?
Styling a finished diy ring box involves coordinating the fabric color with the gemstone to create a high-contrast visual that pops in professional photography. The hexagon shape provides natural leading lines that guide the viewer’s eye directly to the center of the ring.
Professional Staging Tips
When arranging multiple boxes for a brand catalog, varying the fabric colors can showcase the versatility of your collection. Placing the boxes on reflective surfaces like marble or polished wood enhances the light play through the glass walls.
Make no mistake:
- Use macro lenses to capture the detail of the tufted pillow.
- Angle the box slightly to catch the “sparkle” on the metal edges.
- Group boxes in odd numbers (3 or 5) for a balanced composition.
Key Takeaway: Effective styling transforms a simple container into a powerful marketing tool that reinforces your brand’s commitment to quality.
| Styling Element | Impact | Professional Tip | |
|---|---|---|---|
| Color Contrast | Depth and Clarity | Dark fabric for light gems | |
| Lighting | Brilliance Capture | Use soft, natural side light | |
| Arrangement | Visual Narrative | Mix open and closed lids |
Analysis: The visual presentation of the packaging is often the first touchpoint a client has with a brand’s aesthetic standards, making styling a critical business task.
Conclusion
By following this guide, you have now mastered the art of creating a professional-grade presentation vessel that reflects the quality of your jewelry. We understand that finding the perfect way to display high-value pieces can be a significant challenge, but this project has effectively solved those presentation problems. If you are looking to scale your packaging needs or require custom solutions for your boutique, contact us today to explore our full range of B2B options.
Frequently Asked Questions
Can I use this design for necklaces?Absolutely, by increasing the dimensions of the glass box and the foam pillow, you can easily adapt this technique for larger jewelry pieces.
What’s the best way to clean the glass?A microfiber cloth dampened with a small amount of ammonia-free glass cleaner is the most effective method for maintaining a smudge-free appearance.
How do I know if the foam is too dense?The foam should offer resistance when pressed but still allow a needle to pass through with moderate effort using an upholstery thimble.
Can I add my logo to the fabric pillow?Yes, high-end brands often use heat-transfer vinyl or custom-printed silk to incorporate subtle branding directly onto the tufted surface.
What’s the best adhesive for extreme temperatures?For jewelry boxes intended for shipping across various climates, an industrial multi-surface glue like E6000 provides the most reliable bond.