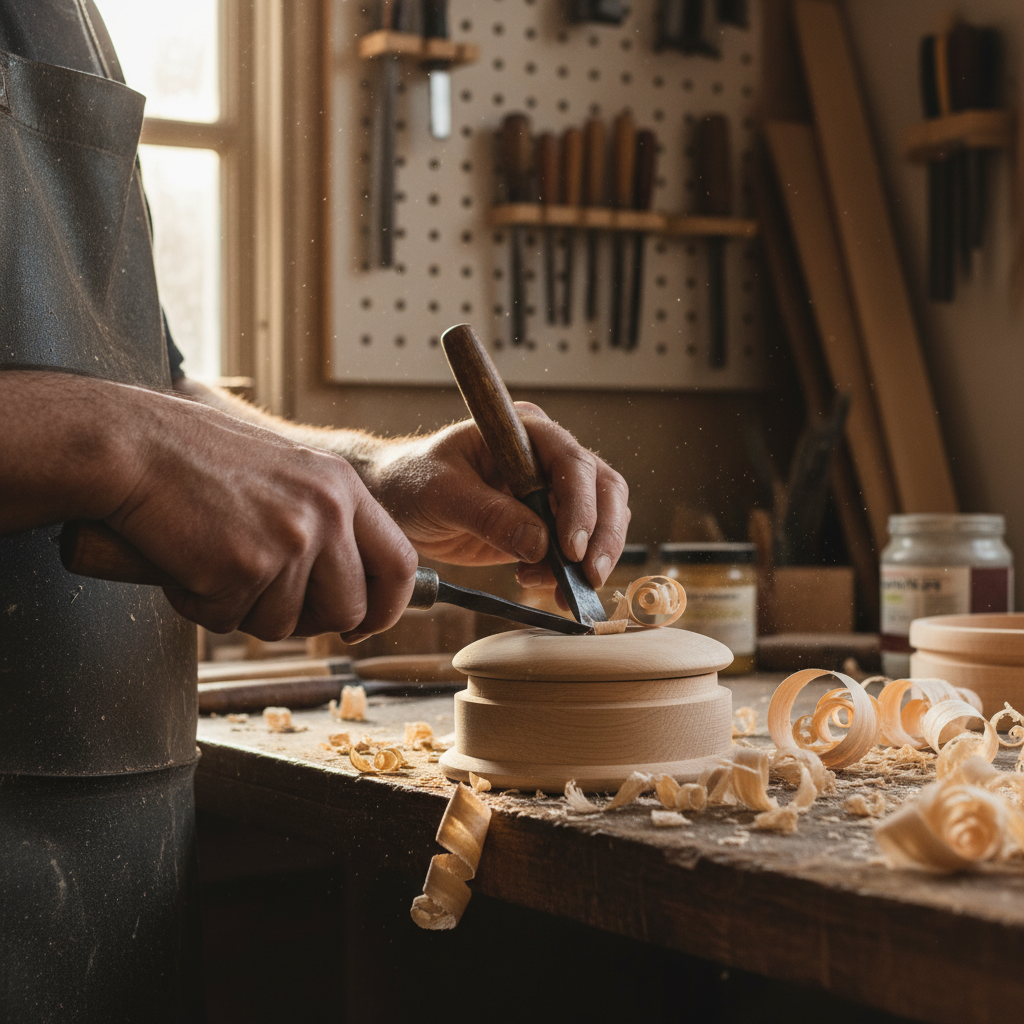
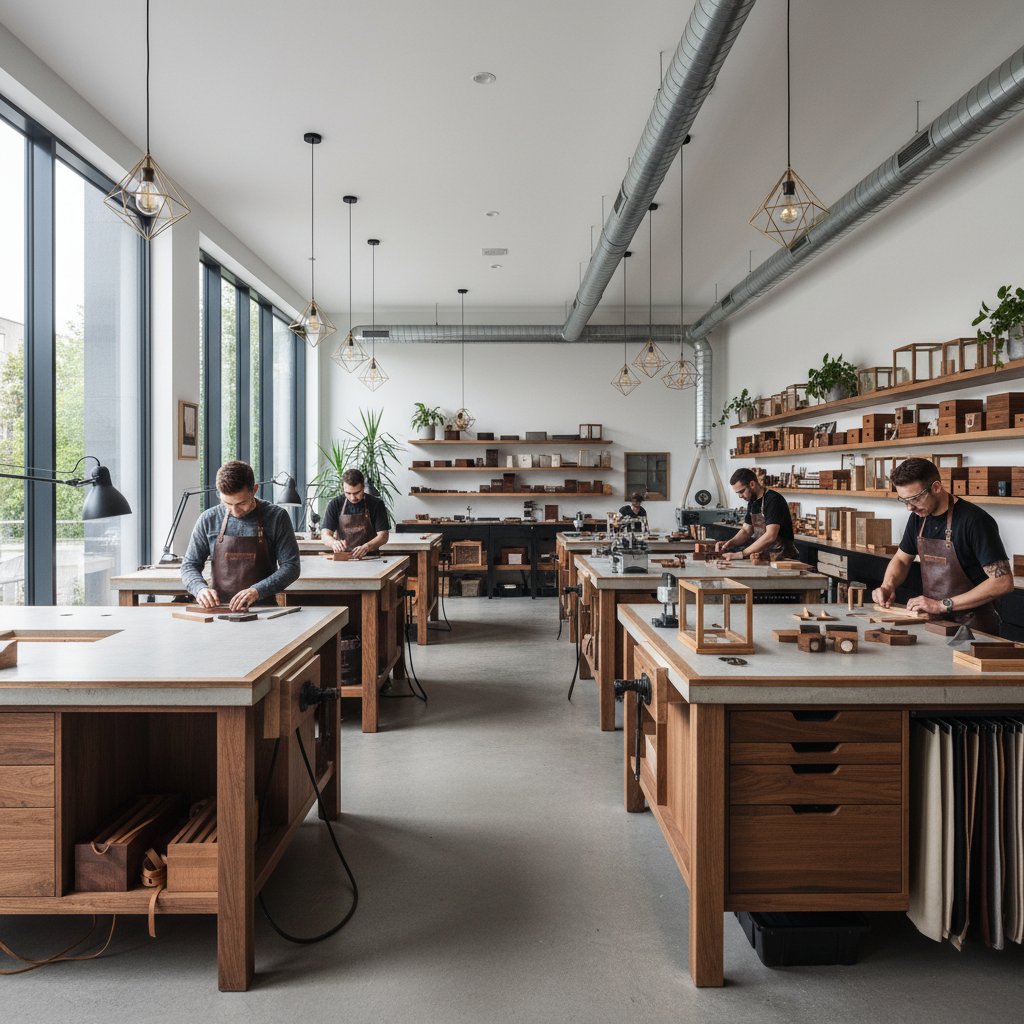
10 free jewelry box plans are detailed woodworking guides that provide step-by-step instructions for crafting custom, high-quality storage for your precious items. Your growing collection of heirloom pieces and fine gems often ends up in a cluttered drawer where they risk damage. This lack of organization agitates the problem as delicate chains knot and soft stones suffer from surface abrasions. You need a protective, elegant housing that preserves your investment for years to come. By learning how do you make a jewelry box that fits your specific needs, you transform a simple storage task into a sophisticated display of your personal style.
How do you make a jewelry box with a secret mirror?

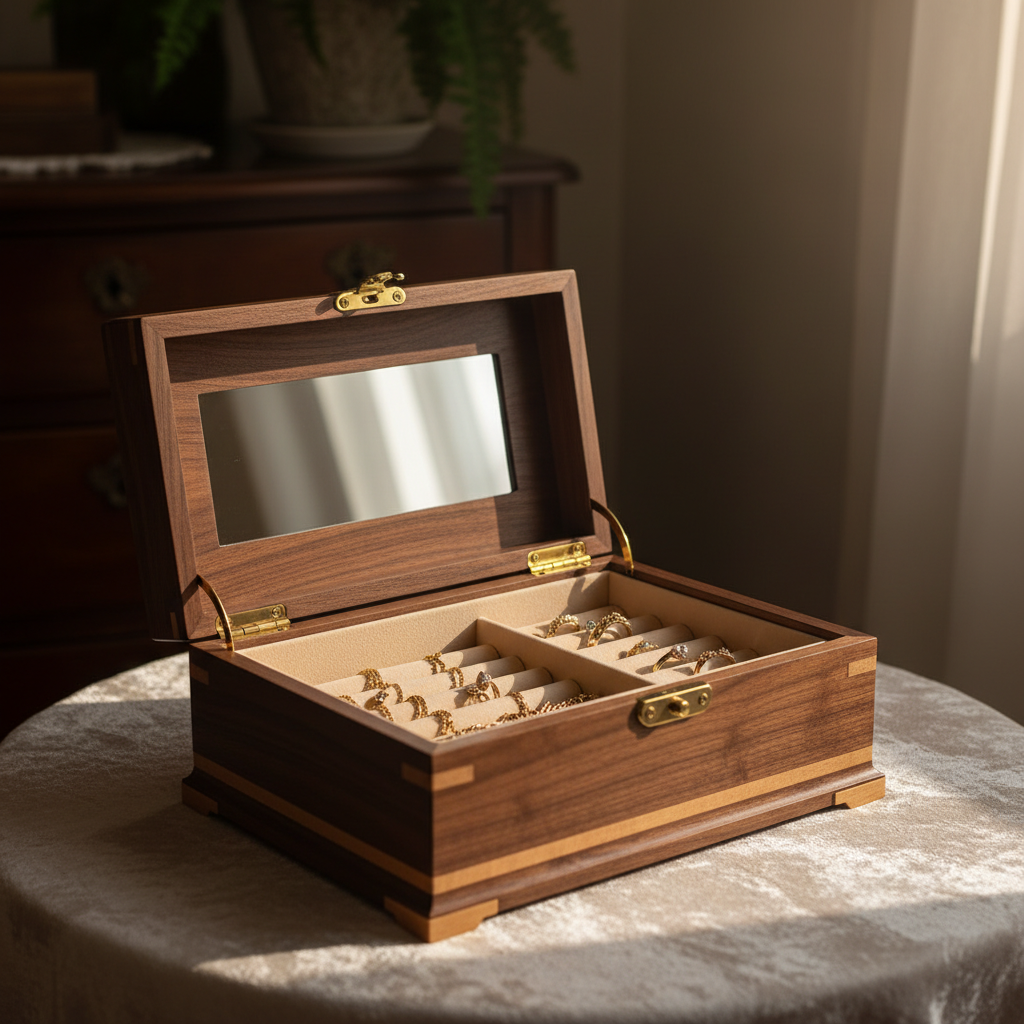
You build a jewelry box with a secret mirror by integrating a hinged false back or a sliding panel that conceals a secondary storage area. When considering how do you make a jewelry box with security in mind, the hidden mirror design serves a dual purpose of reflection and concealment. You should select high-quality glass that remains lightweight to ensure the hinges operate smoothly over time.
Think about it: a hidden compartment provides peace of mind while adding a layer of mystery to your handcrafted furniture. You must ensure the tolerances are tight so the mirror does not rattle or reveal the void behind it.
Structural hidden panels
Constructing the frame requires precise measurements to ensure the mirror stays flush against the back wall. You must create a small finger pull or use a magnetic latch to allow access to the hidden hooks behind the glass.
Finishing the secret space
Lining the interior with dark felt or velvet enhances the secret feel while protecting your most valuable items from scratches. You can install small brass hooks to hang necklaces without them tangling against the mirror’s surface.
- Select a thin 3mm mirror to reduce weight.
- Use piano hinges for maximum structural support.
- Install magnetic catches for a seamless finish.
Key Takeaway: Secret mirrors provide an excellent way to combine daily functionality with a secure, hidden storage area for high-value items.
| Component | Requirement | Purpose | |
|---|---|---|---|
| Mirror Glass | 3mm Polished | Weight Management | |
| Backing Plate | 5mm Plywood | Structural Support | |
| Latches | Magnetic | Invisible Closure |
This table highlights the critical materials needed to ensure your secret compartment remains functional and discreet.
How do you make a jewelry box using simple wood?
You create a simple wooden jewelry box by assembling four side panels and a base using basic butt joints or miter cuts. If you are a beginner wondering how do you make a jewelry box, starting with softwoods like pine or poplar allows for easy sanding and finishing. You should focus on achieving square corners to ensure the lid fits perfectly without any gaps or wobbling.
The best part? A minimalist design highlights the natural beauty of the wood grain without requiring complex tools or years of experience. You can easily scale the dimensions up or down to accommodate the specific size of your collection.
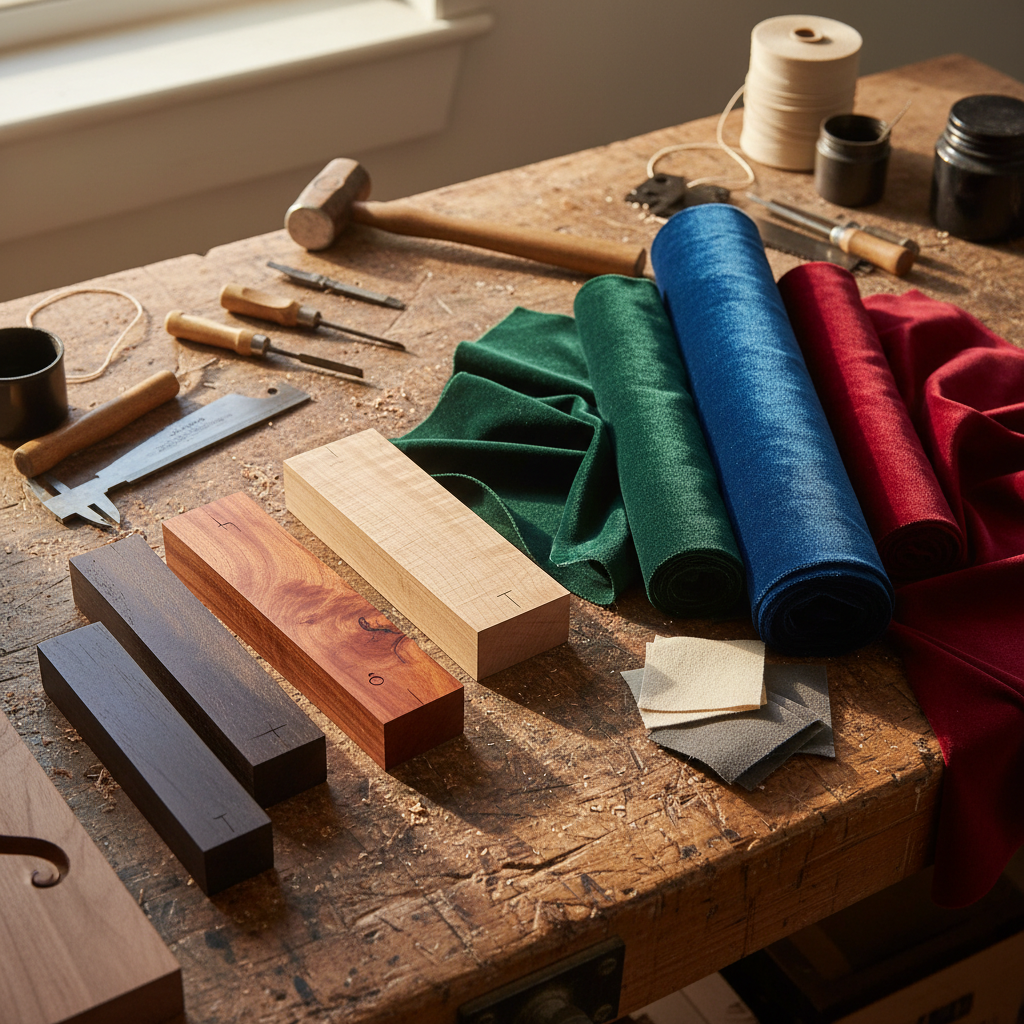
Selecting your timber
Choosing the right wood determines the final look and durability of your project. Hardwoods like oak offer a premium feel, while softer woods are more forgiving for those new to woodworking.
Assembly and gluing
Apply high-quality wood glue to the joints and use clamps to hold the structure firm while it dries. You can add decorative corner splines later to increase the strength of the bond and add a touch of visual contrast.
- Cut four sides to identical heights.
- Sand every surface with 220-grit paper.
- Apply a clear wax for a natural finish.
Key Takeaway: Simple wooden boxes provide a timeless aesthetic that is achievable even for those with limited woodworking tools.
| Step | Tool | Goal | |
|---|---|---|---|
| Cutting | Mitre Saw | Precise 45-degree angles | |
| Sanding | Orbital Sander | Smooth surface prep | |
| Finishing | Lint-free Cloth | Even wax application |
Following these steps ensures a clean finish that makes your simple wood project look like a professional piece.
How do you make a jewelry box with multiple drawers?
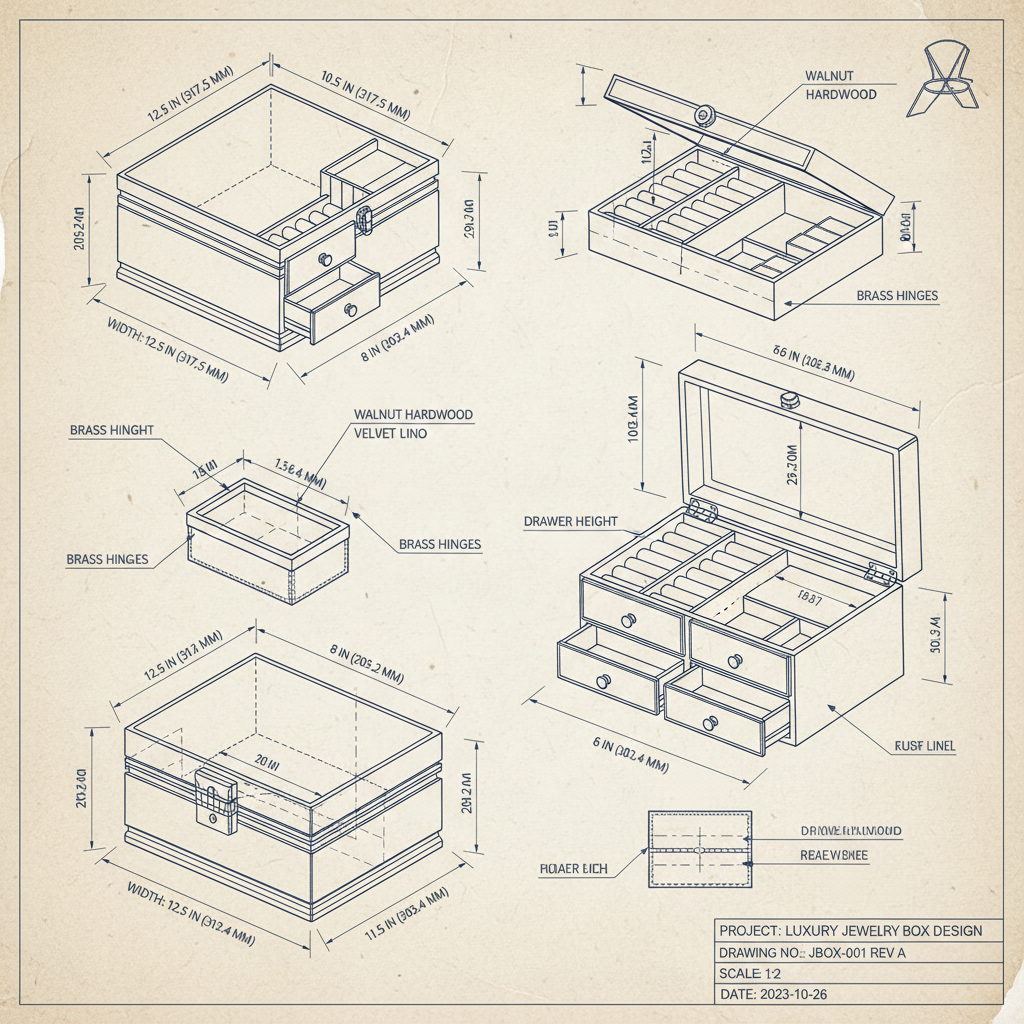
You build a multi-drawer jewelry box by constructing an outer shell with internal runners that support independent sliding compartments. When researching how do you make a jewelry box with high capacity, the drawer system is the most efficient way to categorize different accessory types. You must ensure the internal cavity is perfectly square so the drawers do not stick or bind during daily use.
Ready for the good part? Graduated drawer depths allow you to store everything from flat earrings to chunky watches in one organized unit. This vertical arrangement keeps your vanity footprint small while maximizing your internal storage space.
Drawer slide construction
Creating smooth-gliding drawers requires you to mill the runners with extreme precision. You can use thin strips of hardwood or professional metal slides depending on the size and weight of your intended inventory.
Customizing the tiers
Each drawer should serve a specific purpose, such as a shallow top tier for rings and a deeper bottom tier for bracelets. You can build removable dividers that let you adjust the storage space as your collection grows over time.
- Design drawers with 5mm of side clearance.
- Add felt bottoms to prevent metal-on-wood sliding.
- Use decorative knobs for a luxury touch.
Key Takeaway: A multi-drawer layout maximizes storage efficiency while keeping various jewelry types separate and protected.
| Tier | Recommended Depth | Ideal Content | |
|---|---|---|---|
| Top | 20mm | Rings and Studs | |
| Middle | 35mm | Bangles and Chains | |
| Bottom | 50mm | Watches and Sets |
This technical breakdown helps you plan the internal dimensions for a perfectly organized multi-tier storage system.
How do you make a jewelry box from existing cases?
You make a jewelry box from an existing case by stripping the interior and installing custom fabric-lined dividers. Many hobbyists look at how do you make a jewelry box and realize that upcycling an old cigar box or a vintage chest is a sustainable shortcut. You should clean the exterior thoroughly and apply a fresh coat of lacquer to restore the original luster of the container.
This is where it gets interesting: repurposing a vintage item adds immediate character and history to your dressing table that a new box simply cannot match. You are limited only by the structural integrity of the base container you select.
Preparing the shell
Remove any old paper linings or glue residue using a gentle solvent to create a clean surface for your new interior. You may need to reinforce the hinges if the case is particularly old to ensure it can handle frequent opening.
Installing soft inserts
Cut pieces of foam or heavy cardboard to fit the interior dimensions and wrap them in silk or velvet before gluing. You can create ring rolls by rolling small cylinders of foam and covering them in matching fabric for a professional look.
- Use a spray adhesive for a bubble-free fabric finish.
- Select contrasting colors for a bold internal look.
- Add a small ribbon stay to keep the lid upright.
Key Takeaway: Upcycling existing cases is an eco-friendly way to create a high-end jewelry organizer with unique historical charm.
| Material | Cost | Difficulty | |
|---|---|---|---|
| Cigar Box | Low | Easy | |
| Velvet Fabric | Moderate | Medium | |
| Foam Inserts | Low | Easy |
Starting with an existing frame reduces construction time while allowing you to focus on the luxury interior details.
How do you make a jewelry box in a cabinet style?
You construct a cabinet-style jewelry box by building a tall vertical frame with side-opening doors and multiple internal drawers. When you investigate how do you make a jewelry box for a large professional collection, the cabinet style offers the most comprehensive storage solution available. You should use solid wood for the base to prevent the unit from tipping when the side panels are fully extended.
Believe it or not, a well-designed cabinet can hold hundreds of pieces while occupying a very small footprint on your furniture. It essentially acts as a miniature armoire dedicated solely to your most valuable accessories.
Vertical necklace storage
Side doors allow you to install rows of hooks that let necklaces hang straight, preventing the knots that ruin delicate chains. You should line these side panels with soft fabric to dampen any noise and prevent metal contact with the wood.
Integrating the top lid
Most cabinet designs feature a flip-top lid with an inset mirror for easy accessorizing. You can build a small tray under this lid for items you wear daily, keeping them within reach for a quick morning routine.
- Install weighted feet for maximum stability.
- Use magnetic catches on side doors.
- Include a lock for added security.
Key Takeaway: Cabinet-style boxes are the ultimate choice for serious collectors who need to organize a wide variety of jewelry types vertically.
| Feature | Function | Benefit | |
|---|---|---|---|
| Side Hooks | Tangle-free hanging | Preserves chain life | |
| Flip-top Mirror | Visual aid | Convenient styling | |
| Locking Bar | Central security | Protects entire stock |
The cabinet structure provides a professional level of organization that is ideal for high-value retail or personal collections.
How do you make a jewelry box for hanging earrings?

You build an earring hanging box by incorporating a perforated mesh or wire grid into a wooden frame. When people ask how do you make a jewelry box specifically for studs and dangles, visibility and accessibility are the primary design goals. You should choose a decorative aluminum mesh that allows earring posts to slide through easily without catching on the metal edges.
Let us face it: digging through a dark box to find a matching pair of earrings is a waste of your valuable time. A hanging display ensures that every pair is visible and ready to wear at a moment’s notice.
Grid selection and mounting
Aluminum or copper mesh provides a sturdy surface that will not rust or tarnish your silver jewelry over time. You must secure the grid tightly within the frame to prevent it from sagging under the weight of your earring collection.
Base tray for backs
Including a small wooden tray at the bottom of the stand gives you a place to store loose earring backs or cleaning cloths. You can line this tray with the same velvet used in your other projects to create a cohesive set of organizers.
- Paint the grid gold for a luxury aesthetic.
- Ensure the frame is deep enough for long dangles.
- Use a wide base to prevent tipping.
Key Takeaway: Hanging stands turn your earring collection into a beautiful visual display while keeping every pair instantly accessible.
| Grid Type | Hole Size | Best For | |
|---|---|---|---|
| Fine Mesh | 1mm | Stud earrings | |
| Expanded Metal | 5mm | Large hoops | |
| Wire Grid | 10mm | Heavy dangles |
Choosing the right grid ensures your earrings stay secure regardless of their backing style or overall weight.
How do you make a jewelry box with epoxy finishes?

You create an epoxy-finished jewelry box by applying a clear resin coat over a wooden lid to achieve a high-gloss, glass-like surface. If you are curious about how do you make a jewelry box that looks modern and artistic, resin casting allows you to embed decorative elements or logos. You should work in a dust-free environment to ensure the finish remains perfectly clear and free of surface imperfections.
Ready for the good part? Epoxy is incredibly durable and water-resistant, protecting your handcrafted work from spills and scratches for a lifetime. This finish also deepens the natural color of the wood, making the grain appear three-dimensional.
Mixing and pouring resin
Accurate measurement of the resin and hardener is critical to ensure the finish cures properly and does not stay tacky. You should use a small torch or heat gun to pop any air bubbles that rise to the surface shortly after pouring.
Polishing the final coat
Once the epoxy has fully cured, you can sand it with high-grit paper and use a buffing compound to reach a mirror-like shine. This process transforms a simple wooden box into a high-end luxury item that catches the light beautifully in any room.
- Level the box before pouring the resin.
- Wear gloves to avoid fingerprints.
- Allow 24 hours for a full cure.
Key Takeaway: Epoxy finishes add a professional, high-gloss layer of protection that modernizes the look of traditional wooden jewelry boxes.
| Finish Stage | Tool | Result | |
|---|---|---|---|
| Pouring | Spatula | Even distribution | |
| Degassing | Heat Gun | Bubble-free surface | |
| Buffing | Polishing Cloth | Deep reflective shine |
Following this finishing sequence prevents common resin mistakes and ensures a professional, high-end result for your project.
How do you make a jewelry box with modern leather?

You make a leather jewelry box by wrapping a wooden or heavy cardboard frame in thin, high-quality leather or leatherette. When considering how do you make a jewelry box with a tactile luxury feel, leather offers a sophisticated finish that is popular in high-end retail. You should use a permanent contact adhesive to ensure the material stays tight against the corners without bubbling or peeling over time.
Here is the deal: leather provides a soft exterior that is comfortable to handle and protects your furniture from scratches. It also offers a neutral, elegant backdrop that makes your jewelry the center of attention.
Wrapping techniques
Thinning the leather at the corners—a process known as skiving—allows you to fold the material without creating unsightly bulk. You must apply the adhesive to both the wood and the leather, waiting for it to become tacky before pressing them together for a permanent bond.
Interior color coordination
Select a lining fabric that complements the exterior leather color to create a cohesive and expensive-looking result. Dark leathers often look best with rich cream or deep navy interiors, highlighting the sparkle of the gold jewelry inside.
- Use a bone folder for crisp edges.
- Apply leather conditioner for a soft feel.
- Trim excess material with a fresh blade.
Key Takeaway: Leather wrapping is a specialized skill that elevates a basic wooden box into a world-class luxury storage solution.
| Leather Type | Texture | Durability | |
|---|---|---|---|
| Full Grain | Natural | Very High | |
| Pebbled | Uniform | High | |
| Synthetic | Consistent | Moderate |
This comparison helps you choose the right material based on the desired tactile feel and long-term durability of the box.
How do you make a jewelry box with a twisty design?

You create a twisty jewelry box by using a central pivot point that allows stacked circular or square sections to rotate independently. When you look at how do you make a jewelry box that acts as a conversation piece, the rotating mechanical design is a top choice. You should use precisely milled wooden discs to ensure the movement feels smooth and satisfying every time you open a tier.
Think about it: a rotating box is not just storage; it is an interactive piece of art that delights anyone who uses it. The stacking nature of the design allows you to hide or reveal specific sections as needed.
Machining the pivot
A brass rod or a specialized screw serves as the central axis that holds all the stacked compartments together. You must drill the center hole perfectly straight to prevent the tiers from wobbling or sticking as they spin open.
Sanding for movement
Ensuring there is a small gap between the rotating layers prevents the wood from rubbing and damaging the finish. You should sand the mating surfaces to a high grit and apply a dry lubricant like wax to keep the motion effortless.
- Center the pivot pin exactly.
- Use washers between layers to reduce friction.
- Weight the bottom tier for stability.
Key Takeaway: Rotating designs offer a unique, playful unboxing experience while maximizing storage in a compact, vertical footprint.
| Component | Material | Function | |
|---|---|---|---|
| Pivot Pin | Brass Rod | Central Rotation | |
| Spacer | Nylon Washer | Friction Reduction | |
| Body | Walnut Wood | Aesthetic Appeal |
Proper hardware selection is the secret to achieving the smooth mechanical action required for a high-quality twisty box.
How do you make a jewelry box with oak joints?
You build a jewelry box with oak joints by cutting interlocking “fingers” or box joints that provide extreme structural strength and visual appeal. When craftsmen discuss how do you make a jewelry box that lasts for generations, they often point to the durability of oak and traditional joinery. You should use a dedicated jig to ensure every cut is identical, resulting in a tight, gap-free fit that requires minimal glue.
What’s the real story? Visible joinery is a hallmark of high-end woodworking that signals quality and attention to detail to any observer. It transforms the corners of the box into decorative features rather than just structural points.
Cutting the fingers
Using a dado blade on a table saw allows you to remove material quickly and accurately for a perfect interlocking fit. You must back the oak with a sacrificial board during the cut to prevent the tear-out that can ruin the clean look of the grain.
Finishing the oak grain
Oak has an open grain that takes stains beautifully, allowing you to highlight the natural patterns of the timber. You should apply several thin coats of oil or lacquer, sanding lightly between each one to achieve a smooth, professional-grade surface.
- Check fit before applying glue.
- Sand the corners flush after assembly.
- Use a clear finish to show the grain.
Key Takeaway: Oak box joints provide a rugged, traditional aesthetic combined with the strongest possible construction for small furniture.
| Joint Type | Strength | Visual Impact | |
|---|---|---|---|
| Box Joint | High | Interlocking Pattern | |
| Miter Joint | Moderate | Clean Corners | |
| Dovetail | Very High | Artisanal Luxury |
The choice of joinery significantly impacts both the longevity of the box and its perceived value as a handcrafted heirloom.
Final Summary and Recommendations
These 12 free jewelry box plans offer a diverse range of styles to suit every level of skill and storage need. Whether you are building a secret mirror compartment or a modern leather-wrapped case, the key to success lies in precision and quality materials. Our vision is to empower creators to build unboxing experiences that truly delight the senses and preserve precious memories. We encourage you to start your next project with confidence and dedication to craftsmanship. If you need professional advice on high-end materials or large-scale manufacturing, contact us today for expert guidance.
Frequently Asked Questions
Q1: Can I make a jewelry box without any power tools?Yes, you can use traditional hand saws, chisels, and hand planes to build any of these designs with more time and patience.
Q2: What is the best wood for a beginner’s first jewelry box project?Pine or poplar are excellent choices because they are inexpensive and easy to cut, sand, and finish.
Q3: How do I prevent my necklaces from tangling inside the box?Install small hooks or a dedicated hanging rack in a vertical cabinet section to keep chains straight and separate.
Q4: Is velvet the only option for lining the interior?No, you can also use silk, faux suede, or even high-quality felt depending on the level of luxury you want to achieve.
Q5: How can I add a personal touch to a standard box plan?You can use laser engraving to add a name or logo, or choose unique hardware like vintage brass knobs and hinges.