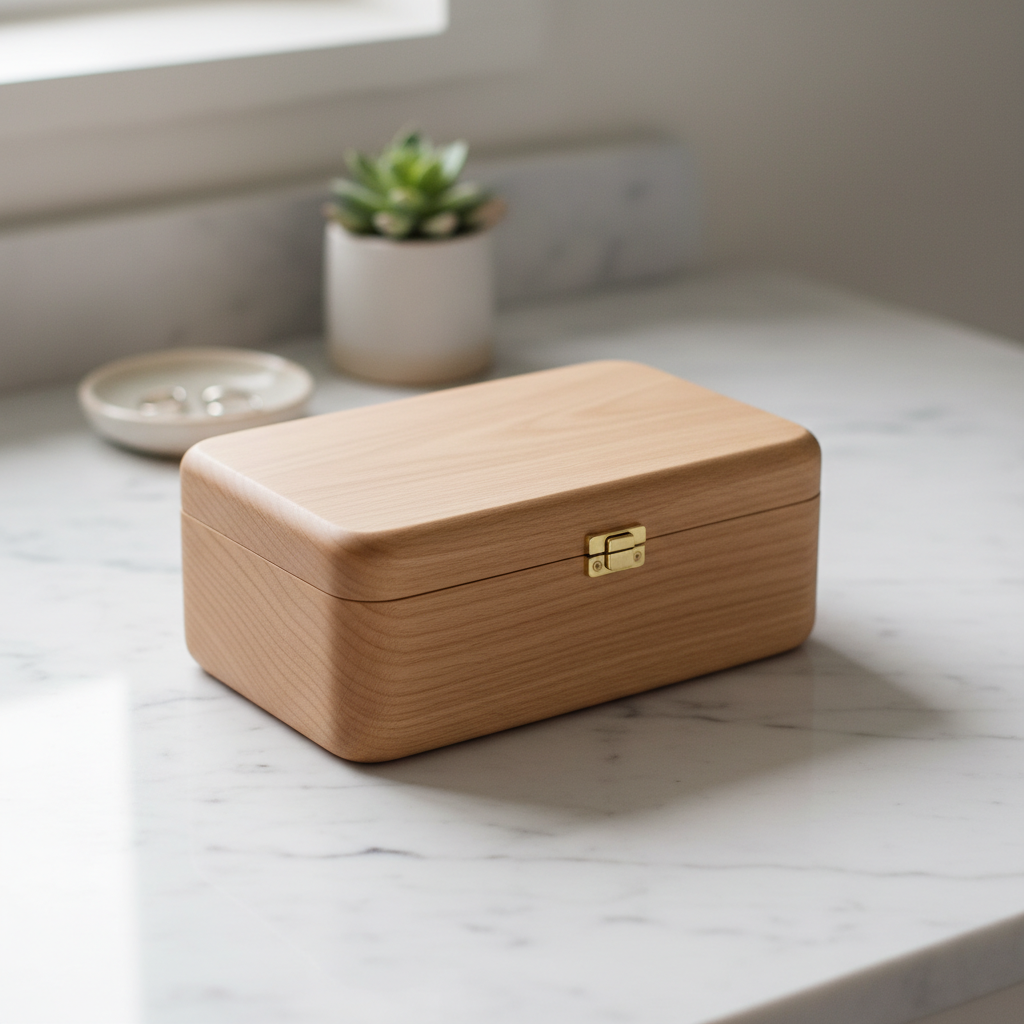
Storing fine jewelry in messy tangles creates immense frustration during morning routines. Delicate gold chains often knot together without proper organization or structured storage. You can solve this messy problem by learning how to make a jewelry box today using professional-grade woodworking blueprints.
Where do I start when learning how to make a jewelry box?
Learning how to make a jewelry box starts with selecting a blueprint that matches your current woodworking skill level and tool availability. Choosing a simple box structure first allows you to focus on mastering basic techniques like sanding and finishing. Most free plans provide a comprehensive cut list which simplifies the material procurement process significantly.
Choosing Your First Blueprint
Success depends on understanding the spatial requirements of your specific collection before you cut a single piece of wood. Consider the number of rings or necklaces requiring dedicated slots so the final unit remains functional. Check this out:
- Select a basic rectangular design for your first attempt.
- Always check the dimensions against your largest bracelet or watch.
- Download a plan that includes a step-by-step assembly guide.
Measuring for Interior Components
Precision in your initial measurements prevents wasted materials and ensures that internal dividers fit perfectly within the main frame. You should account for the thickness of the wood when calculating the internal volume of each drawer or tray. Here is the deal: failing to measure twice often leads to gaps that ruin the professional look of your jewelry display .
Key Takeaway: Proper preparation through skill-appropriate blueprints and precise measurements is the foundation of any successful woodworking project.
| Planning Step | Action Item | Priority | |
|---|---|---|---|
| Skill Assessment | Choose beginner vs. advanced plan | High | |
| Collection Audit | Count rings, necklaces, and watches | High | |
| Material List | Buy hardwoods and specific hardware | Medium |
Expert planning reduces material waste and ensures the final product meets your storage needs perfectly.
Which blueprints are best for professional results?
High-quality results in how to make a jewelry box depend on using an exploded diagram to understand how internal components integrate with the external frame. These detailed visual guides allow you to see exactly how joints intersect and where hardware should be placed. By following a professional blueprint, you avoid the common trial-and-error mistakes that plague novice builders.
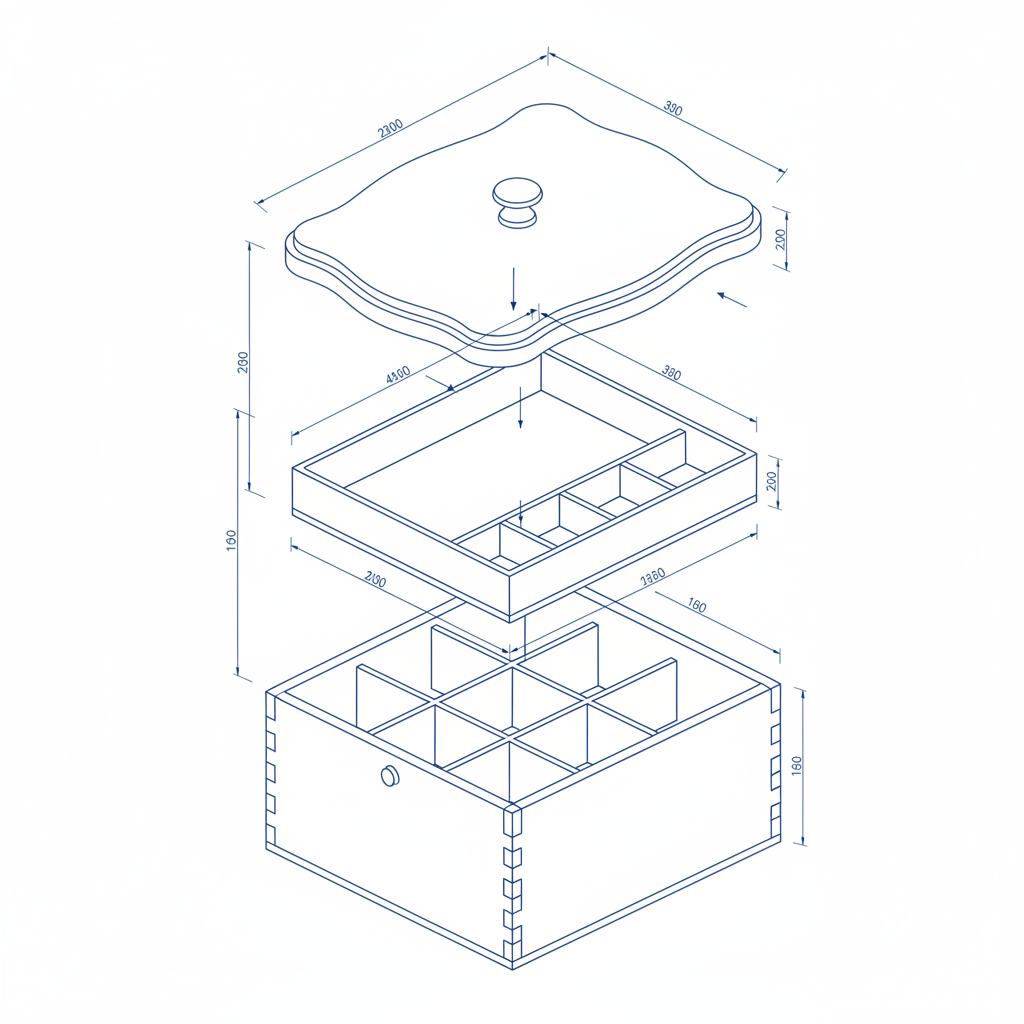
Understanding Complex Joinery
Professional blueprints often include advanced joinery like dovetails or box joints that provide both strength and visual interest. Think about it: these joints are the hallmark of high-end furniture and elevate your box to heirloom status. Using an exploded diagram helps you visualize the tenons and mortises before you fire up your table saw.
- Study the joint orientation to ensure maximum structural strength.
- Use a marking gauge to transfer dimensions directly from the plan.
- Practice complex cuts on scrap wood before moving to your primary timber.
Visualizing the Assembly Sequence
An exploded diagram acts as a roadmap for the entire assembly process, showing you exactly which piece to glue first. But wait, there’s more: it also highlights where hidden compartments or false bottoms can be integrated into the design. Following the sequence ensures that you don’t accidentally seal off a section before installing its lining.
Key Takeaway: Using exploded diagrams ensures structural accuracy and allows for the seamless integration of complex decorative features.
| Diagram Feature | Purpose | Benefit | |
|---|---|---|---|
| Exploded View | Shows all parts separately | Clear assembly order | |
| Dimensions | Provides exact measurements | Reduces cutting errors | |
| Joinery Details | Illustrates connection points | Professional aesthetics |
Utilizing visual blueprints transforms complex construction tasks into a series of manageable and repeatable steps.
What tools are required for small jewelry projects?
Essential tools for how to make a jewelry box include precision instruments like Japanese pull saws, sharp chisels, and high-quality wood glue. Because these projects are small in scale, even a minor measurement error can be highly visible to the naked eye. Investing in a reliable square and a fine-tooth saw will help you achieve the tight-fitting joints required for luxury storage.
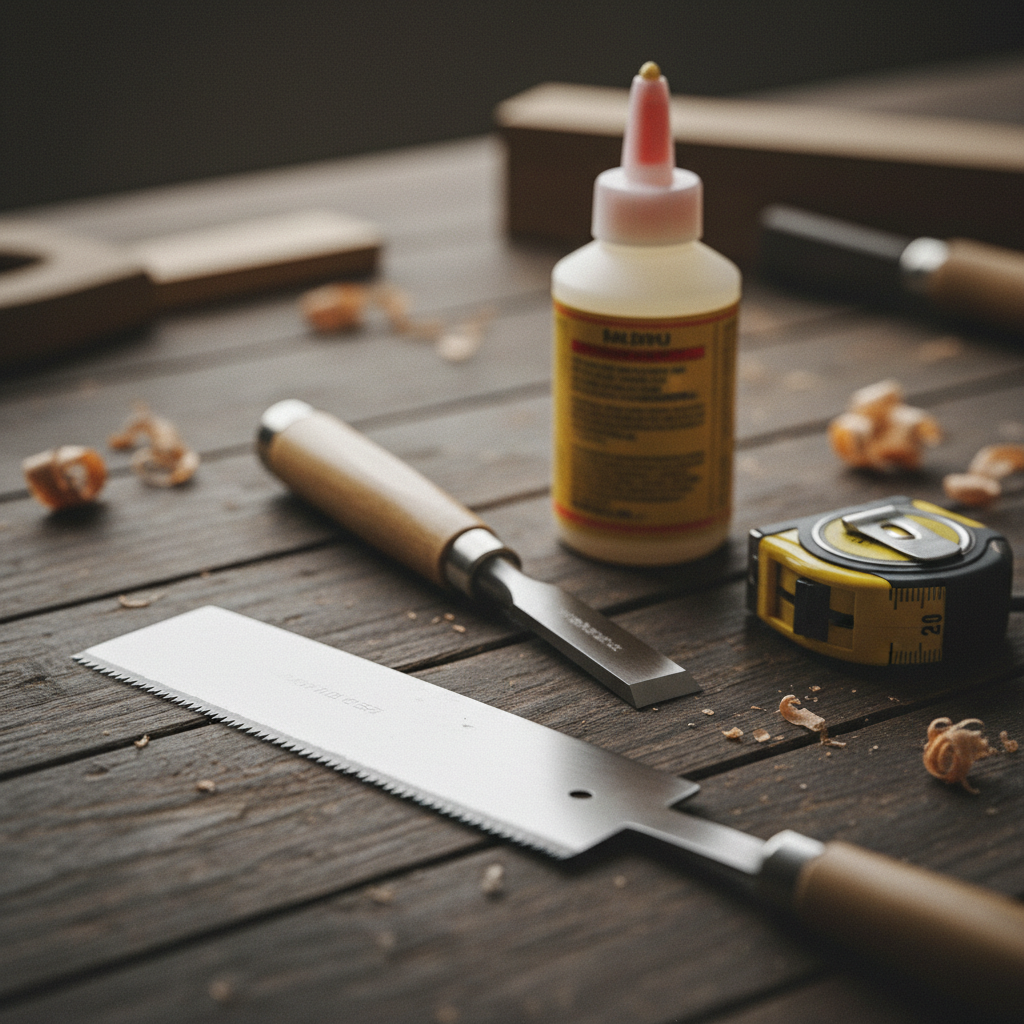
Must-Have Hand Tools
Precision marking tools are arguably more important than power tools when working on small-scale wooden items. The best part? Hand tools give you a level of control and “feel” that heavy machinery simply cannot replicate in tight corners. You should keep your chisels razor-sharp to ensure clean paring of joints without crushing the wood fibers.
- A Japanese pull saw for thin, accurate crosscuts.
- A set of bench chisels for cleaning out mortises.
- A combination square for checking 90-degree angles.
Essential Clamping Equipment
Glue-ups are the most stressful part of the build, so having the right variety of clamps is absolutely vital. Ready for the good part? Band clamps are particularly useful for jewelry boxes because they apply even pressure around all four corners simultaneously. Without proper clamping, your box may end up “racked” or out of square, making it impossible for the lid to fit.
Key Takeaway: Precision hand tools and specialized clamping equipment are the keys to achieving the tight tolerances needed for fine woodworking.
| Tool Category | Specific Tool | Primary Use | |
|---|---|---|---|
| Cutting | Japanese Pull Saw | Precise, thin kerf cuts | |
| Measuring | Marking Gauge | Consistent joint layout | |
| Assembly | Band Clamp | Squaring four-way corners |
Quality tools are an investment that pays dividends through improved accuracy and a significantly more enjoyable building experience.
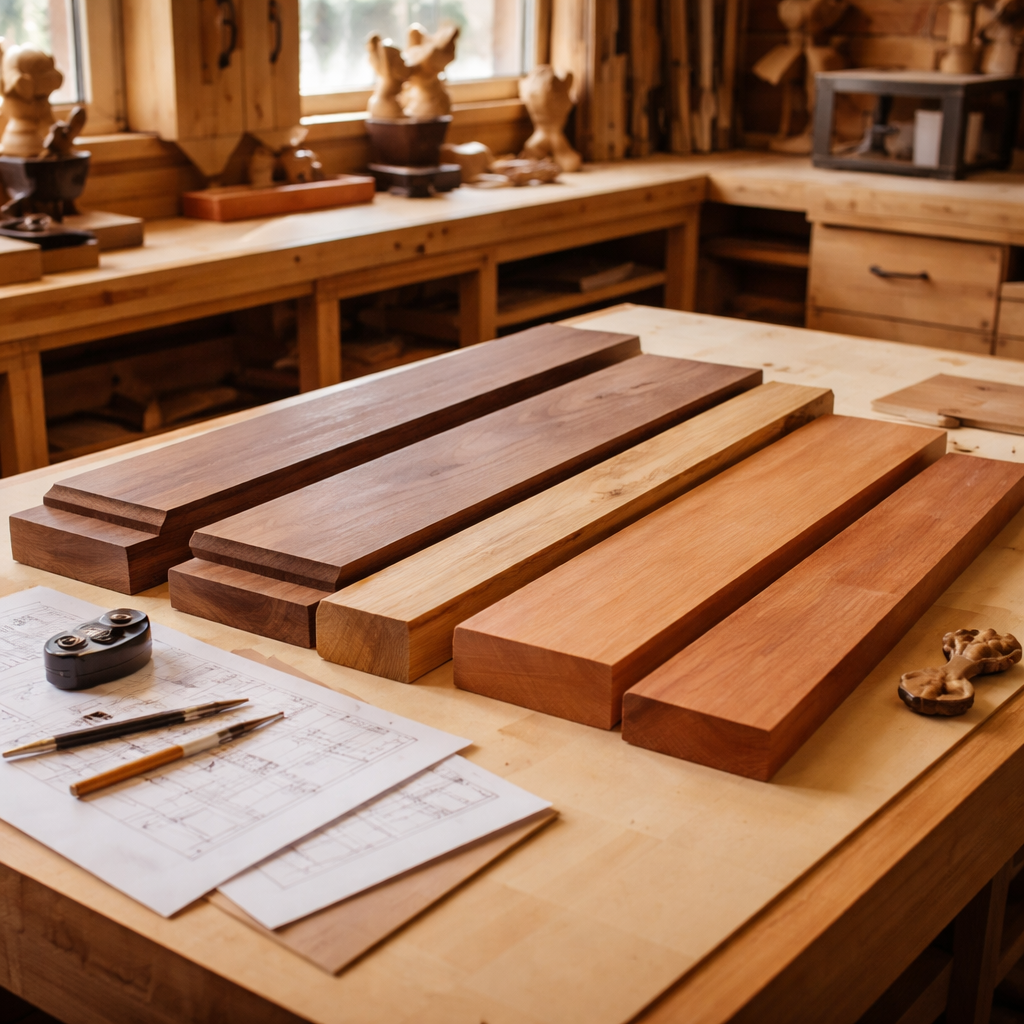
Can I build a luxury case with simple hardwoods?
You can definitely achieve a luxury look for how to make a jewelry box by pairing high-grade hardwoods like cherry or walnut with a flawless finish. While exotic woods are beautiful, local hardwoods offer excellent stability and a classic aesthetic that fits most home decors. The secret to a premium feel lies in the selection of the wood grain and the attention to detail during assembly.
Selecting the Right Wood Species
Choosing a wood with a tight grain pattern makes the finishing process much easier and results in a smoother surface. Believe it or not: Black Walnut is a favorite among craftsmen because of its rich color and excellent workability with hand tools. You should look for “quartersawn” lumber to minimize the risk of warping over time in humid environments.
- Walnut provides a naturally dark, sophisticated appearance.
- Cherry ages into a deep, reddish-brown patina over the years.
- Maple offers a bright, clean look that highlights internal linings.
Grain Matching for Aesthetics
“Wrap-around” grain matching is a technique where the grain pattern continues seamlessly around all four corners of the box. Check this out: this simple step immediately signals to anyone looking that the box was custom-made by a skilled artisan. You achieve this by cutting all four sides from a single long board in a specific sequence.
Key Takeaway: High-quality results come from thoughtful material selection and advanced techniques like grain matching rather than expensive timber alone.
| Wood Type | Character | Best Use | |
|---|---|---|---|
| Walnut | Dark, elegant | External frame | |
| Oak | Strong, textured | Traditional chests | |
| Birdseye Maple | Ornate, light | Decorative lids |
Selecting the right wood species determines the final weight, durability, and visual impact of your handmade storage piece.
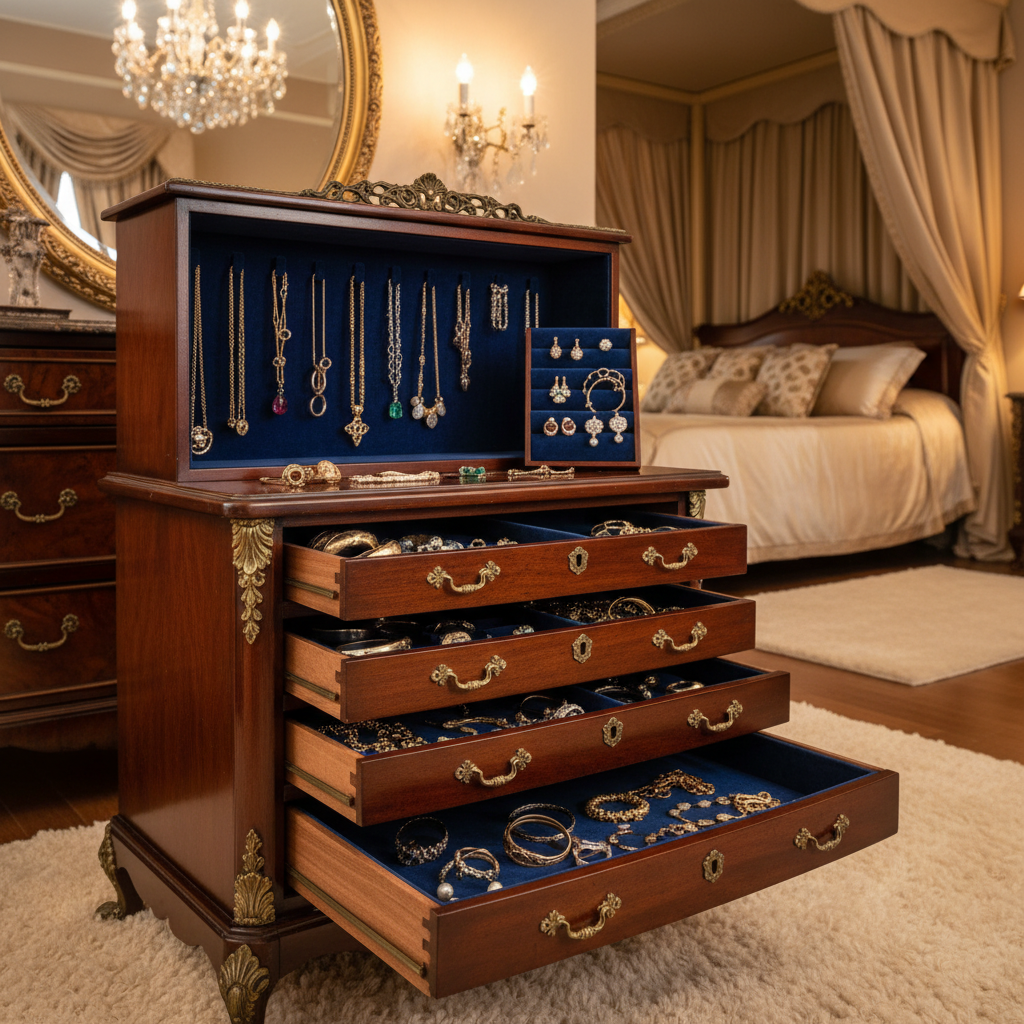
How do I design a multi-tier jewelry chest?
Designing a multi-tier chest for how to make a jewelry box requires calculating vertical drawer clearance to accommodate larger items like watches and bangles. A multi-drawer approach allows you to separate different types of jewelry, preventing delicate chains from tangling with heavy watches. You should plan the bottom drawers to be deeper for bulky items while keeping the top trays shallow for rings and earrings.
Managing Drawer Slides and Fit
Drawers in small chests usually rely on wood-on-wood slides rather than metal rollers to save space and maintain a traditional look. Now here is where it gets interesting: you must leave a tiny “reveal” or gap so the wood can expand and contract without sticking. Applying a bit of paste wax to the runners will ensure the drawers glide smoothly for years to come.
- Design the top tier with a flip-up lid for quick access.
- Include removable trays for added versatility and cleaning.
- Ensure drawer fronts are cut from the same board for consistency.
Incorporating Vertical Hanging Space
Necklaces are best stored hanging to prevent the dreaded “knotting” that occurs in flat trays. Let’s face it: adding a vertical side compartment with small brass hooks can save you hours of frustration. These “wings” can be hidden behind magnetic latches or integrated into the main door design for easy access.
Key Takeaway: Strategic vertical planning and smooth-gliding drawer construction are essential for organizing large and diverse jewelry collections.
| Tier Level | Storage Type | Recommended Height | |
|---|---|---|---|
| Top Tray | Rings & Studs | 1.5 – 2 inches | |
| Middle Drawer | Bracelets & Pins | 2.5 – 3 inches | |
| Bottom Drawer | Watches & Large Bangles | 4+ inches |
A tiered design maximizes storage capacity while keeping your most-used items easily accessible at the top.
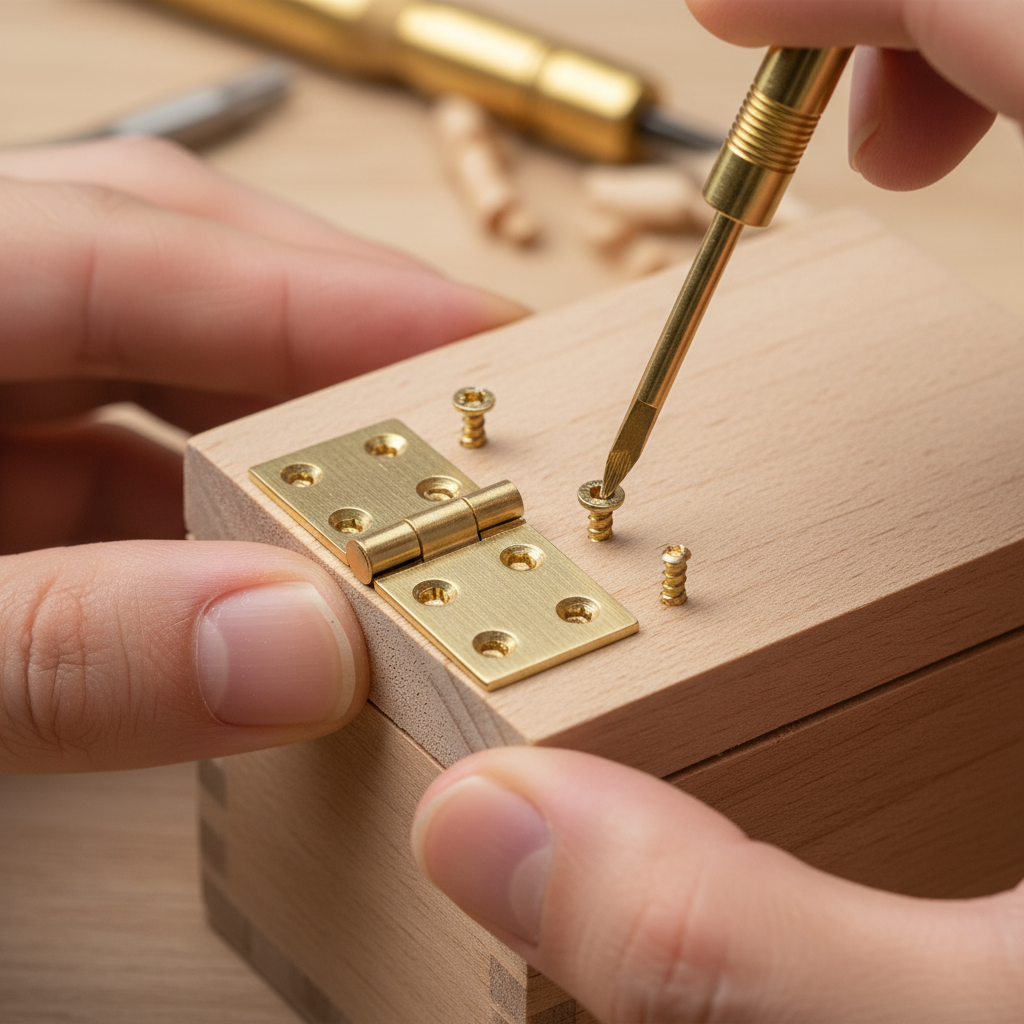
Why is hardware choice vital for fine boxes?
Selecting the right hardware for how to make a jewelry box ensures that lids open smoothly and the structural integrity remains intact over years of use. High-quality brass hinges and latches act as the “jewelry” for the box itself, adding a touch of metallic brilliance to the wood. Poor hardware choice can make even the most beautiful wooden chest feel cheap or flimsy when operated.
Choosing Between Hinge Styles
Quadrant hinges are a premium choice because they include a built-in stay that holds the lid open at a perfect 95-degree angle. But wait, there’s more: installing these requires a high level of precision with a router or a sharp chisel to create the mortise. If you are a beginner, high-quality butt hinges offer a simpler installation process while still providing excellent durability.
- Solid brass hardware resists corrosion and develops a beautiful patina.
- Magnetic catches provide a sleek, modern “click” when closing.
- Decorative escutcheons protect the wood around keyholes or latches.
The Importance of Precision Installation
Hardware must be installed perfectly level to prevent the lid from “binding” or sitting crookedly on the base. Check this out: using a self-centering drill bit for your screw holes prevents the hardware from shifting during the final assembly. Even a fraction of a millimeter of misalignment can cause the box to feel low-quality during use.
Key Takeaway: Premium, well-installed hardware is the final touch that distinguishes a professional heirloom piece from a standard DIY project.
| Hardware Type | Best Feature | Difficulty | |
|---|---|---|---|
| Quadrant Hinge | Built-in lid stay | Advanced | |
| Butt Hinge | Classic, strong | Intermediate | |
| Side Rail Hinge | Invisible when closed | Advanced |
Investing in high-quality hardware ensures that the mechanical parts of your box are as durable as the timber.
What are the best layouts for ring organization?
Optimal ring layouts for how to make a jewelry box involve using soft foam or felt rolls that securely cradle bands while preventing metal-on-metal contact. Organizing these slots in parallel rows allows you to see your entire collection at a glance, making it easier to choose the right piece for your outfit. You should design these inserts to be removable for easy cleaning or to reorganize as your collection grows.
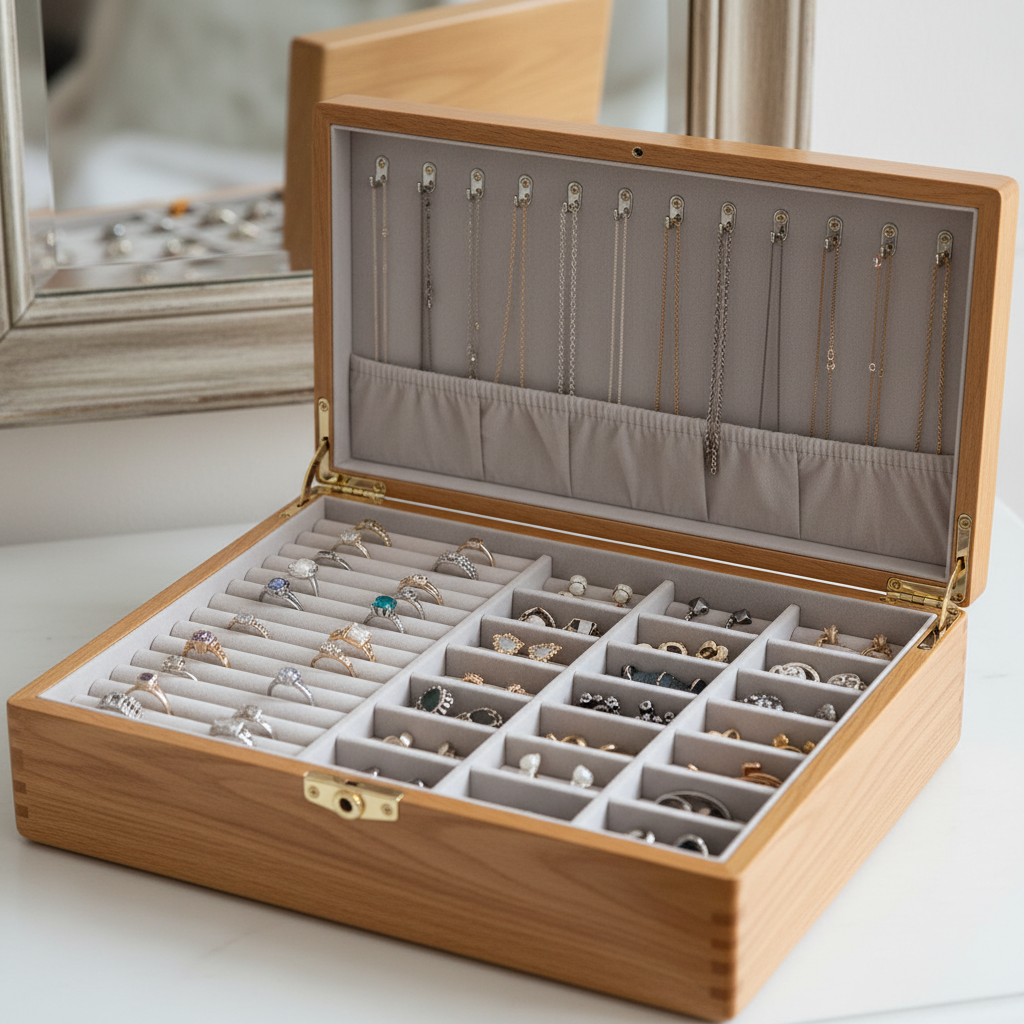
Creating Custom Ring Rolls
You can make professional-looking ring rolls by wrapping velvet or suede around lengths of foam backing rod. Believe it or not: this DIY method is much cheaper than buying pre-made inserts and allows for a perfect fit in your custom box. Ensure the rolls are squeezed tightly together so the rings stay upright and don’t slide around.
- Use a high-contrast fabric like navy or black to make gold pop.
- Measure your widest ring band to determine the necessary slot width.
- Secure the rolls with a small amount of fabric glue at the base.
Balancing Compartment Sizes
A well-organized jewelry display needs a mix of small slots for studs and larger open areas for statement pieces. Ready for the good part? Using adjustable dividers allows you to change the layout as your style evolves over time. These dividers should be made from thin wood strips or cardstock wrapped in matching fabric for a cohesive look.
Key Takeaway: Custom-made ring rolls and adjustable dividers provide the most flexible and protective environment for diverse jewelry types.
| Layout Element | Benefit | Protection Level | |
|---|---|---|---|
| Velvet Rolls | Holds rings upright | High (anti-scratch) | |
| Grid Dividers | Separates earrings | Medium | |
| Large Basins | Fits bulky necklaces | Low (requires padding) |
Thoughtful internal organization ensures that your jewelry remains organized, protected, and beautiful for years to come.
How do I apply a glass-smooth finish to wood?
Achieving a mirror-like finish for how to make a jewelry box requires meticulous sanding between multiple thin applications of lacquer or polyurethane. The finish is what protects the wood from oils, moisture, and dust while enhancing the natural beauty of the grain. You should perform the final finishing in a dust-free environment to avoid small particles getting trapped in the wet coating.

The Secret to Sanding
Sanding should progress from coarse to very fine grits, ensuring that you remove the scratches from the previous grit at each stage. What is the catch? Skipping a grit will leave visible sanding marks that only become apparent once the finish is applied. You should sand with the grain of the wood to prevent cross-grain scratches that ruin the professional look.
- Start with 120 grit and move up to at least 400 grit for wood.
- Use a “tack cloth” to remove every speck of dust before finishing.
- Consider wet-sanding the final coat for a truly professional sheen.
Choosing Your Topcoat
Wipe-on polyurethanes are excellent for jewelry boxes because they allow for thin, controlled layers that don’t “run” or drip. Here is the deal: multiple thin coats are always better than one thick, gloppy coat. Shellac is another great option as it dries incredibly fast and is completely non-toxic once cured, making it safe for delicate items.
Key Takeaway: Meticulous sanding and the application of multiple thin topcoats are the only ways to achieve a professional, glass-smooth finish.
| Finish Type | Gloss Level | Durability | |
|---|---|---|---|
| Polyurethane | High to Matte | Very High | |
| Lacquer | High Gloss | Medium | |
| Wax/Oil | Satin/Natural | Low |
A high-quality finish not only beautifies the project but also provides the necessary protection for long-term use.
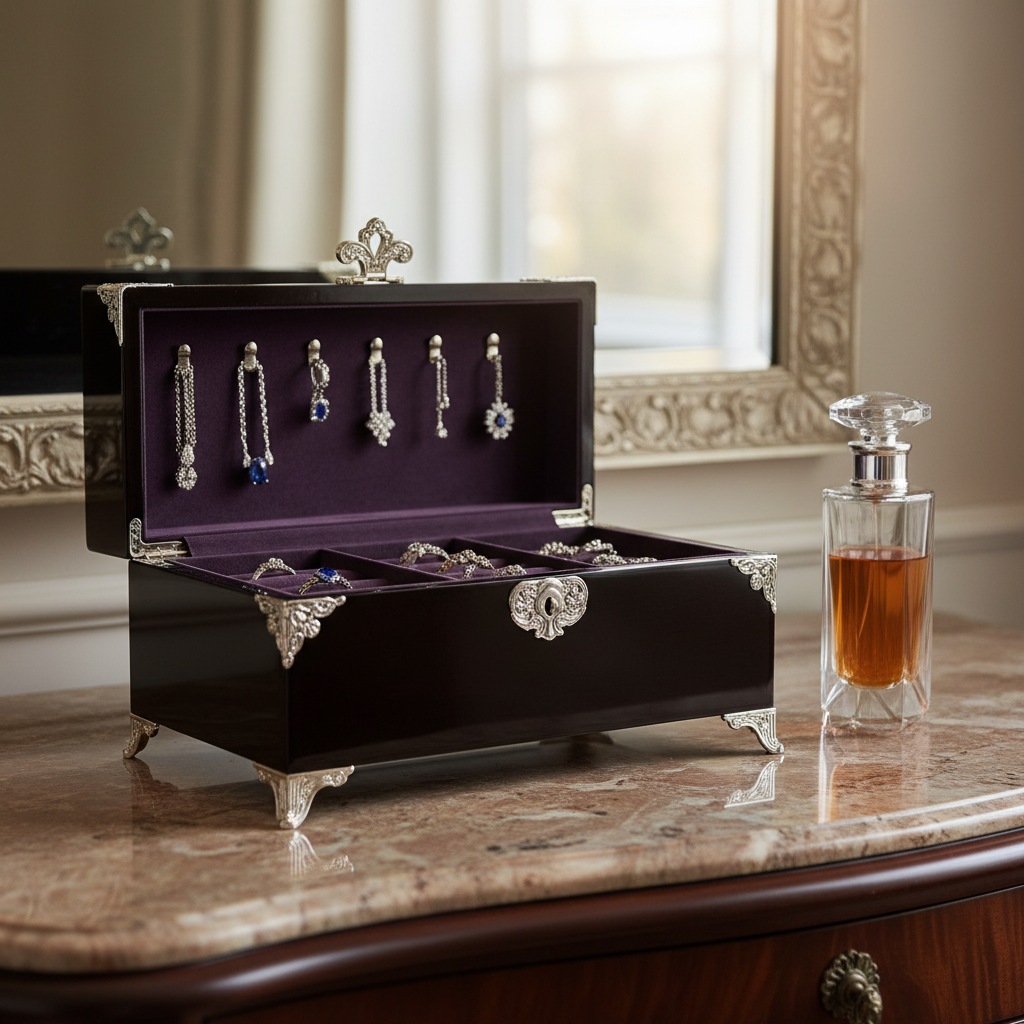
Where should I display a handmade jewelry chest?
The best place to display a finished project for how to make a jewelry box is on a stable, level surface like a master bedroom dresser or a dedicated vanity table. Choosing a location that is away from direct sunlight will prevent the wood finish from fading and keep your gemstones safe from heat damage. You should also ensure the area is free from excessive moisture, which can cause the wood to swell and drawers to stick.
Optimizing for Daily Access
Your storage unit should be placed at a height that allows you to comfortably see into the top trays without straining. Think about it: if the box is too high or too low, you are less likely to return your jewelry to its proper place, leading back to the original problem of clutter. A well-lit area is also essential for distinguishing between similar-looking silver or white gold pieces.
- Place near a mirror to facilitate trying on jewelry.
- Keep away from sink areas to avoid water splashes and drain loss.
- Ensure there is enough clearance to fully open the lid and all drawers.
Creating a Visual Focal Point
A handcrafted wooden box is a piece of art that can serve as the center of your bedroom decor. Ready for the good part? Surrounding the box with complementary items like a small vase or a perfume bottle creates a luxury “boutique” feel in your own home. This elevated presentation makes the act of getting ready in the morning feel like a special ritual.
Key Takeaway: Strategic placement in a dry, well-lit, and accessible location protects your investment and enhances the overall room aesthetic.
| Location Feature | Benefit | Importance | |
|---|---|---|---|
| No Direct Sunlight | Prevents wood/gem fading | High | |
| Away from Moisture | Stops wood warping | High | |
| Eye-Level Access | Enhances usability | Medium |
Proper placement ensures that your handmade masterpiece remains a functional and beautiful part of your daily routine.
Can I turn custom designs into a gift business?
You can scale how to make a jewelry box into a profitable business by offering personalized engravings and luxury velvet linings for high-end gifting. There is a massive market for unique, handmade items that cannot be found in traditional retail stores. By focusing on quality and custom features, you can position your work as a premium gift for weddings, anniversaries, and milestones.
Personalization and Branding
Adding a client’s initials or a special date with a laser engraver significantly increases the perceived value of your product. Check this out: personalization allows you to charge a premium because the item becomes an irreplaceable memento for the recipient. You should also develop a signature “maker’s mark” to brand your creations and build long-term brand recognition.
- Offer a choice of internal lining colors to match customer preferences.
- Provide a “care guide” with every purchase to show professionality.
- Use high-quality photography to showcase your work on social media.
Scaling Through Manufacturing Partners
If demand exceeds your workshop’s capacity, you might consider partnering with a specialized factory to produce your designs at scale. Believe it or not: many successful artisans design the blueprints and outsource the core construction while handling the final finishing and personalization in-house. This hybrid model allows you to grow your business without needing a massive factory of your own.
Key Takeaway: Personalization and strategic scaling through partnerships are the most effective ways to turn a woodworking hobby into a luxury brand.
| Business Growth Step | Action | Potential Impact | |
|---|---|---|---|
| Customization | Offer engraving services | 30% price increase | |
| Niche Marketing | Target wedding gift buyers | Higher sales volume | |
| Outsourcing | Partner with a manufacturer | Scalable production |
Transforming your craft into a business requires a balance of high-quality construction and savvy marketing strategies.
Frequently Asked Questions
Can I make a jewelry box without expensive power tools? Yes, you can build a beautiful chest using only hand saws, chisels, and a hammer. While power tools speed up the process, traditional hand tools provide a level of precision and “soul” that machines often lack. It simply requires more patience and practice.
What’s the best wood for a beginner’s project? Pine or Poplar are excellent choices for novices because they are affordable and very easy to cut and sand. Once you gain confidence with these softer woods, you can move on to harder species like Oak or Walnut for a more professional finish.
Can I use fabric other than velvet for the lining? Absolutely, you can use silk, suede, or even high-quality cotton if it is soft enough to protect delicate gems. The key is to choose a material that is non-abrasive and can be glued smoothly to the internal wooden surfaces.
What’s the best way to clean a wooden jewelry box? You should use a soft, dry microfiber cloth to remove dust from the exterior and a very slightly damp cloth for the interior. Avoid using harsh chemical cleaners or furniture polishes that could seep into the wood and damage your jewelry over time.
Can I add a lock to my handmade box? Yes, most woodworking hardware suppliers sell small “box locks” that can be mortised into the front of the frame. Adding a lock provides an extra layer of security and gives the piece a more sophisticated, “private” feel.
In summary, mastering the art of jewelry box construction allows you to create functional heirlooms that protect your most prized possessions. At YiXin Packaging, our vision is to empower creators and brands with the highest quality packaging insights and manufacturing solutions. Whether you are building a single DIY project or looking to scale a commercial line, we are here to support your journey. To elevate your brand with professional results, please contact us today . We look forward to helping you create something truly extraordinary.