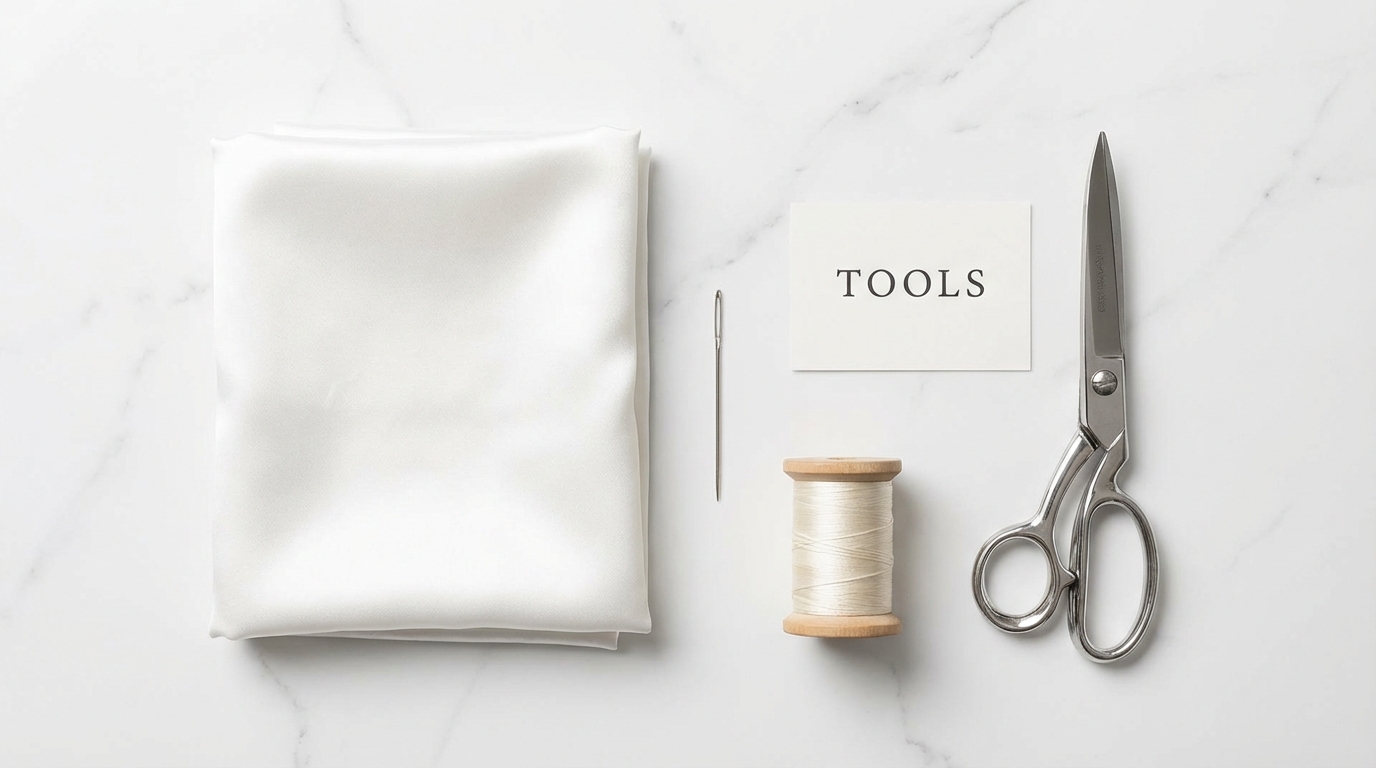
Making a professional ring pillow involves selecting premium fabrics and mastering basic stitching to create a sentimental wedding heirloom. Many couples find that generic, store-bought accessories fail to capture the specific aesthetic of their ceremony, which can diminish the visual impact of the ring exchange. By learning how to make a ring box cushion , you can craft a custom piece that perfectly matches your wedding theme and elevates the presentation of your jewelry.
Why use a lace overlay for your cushion?
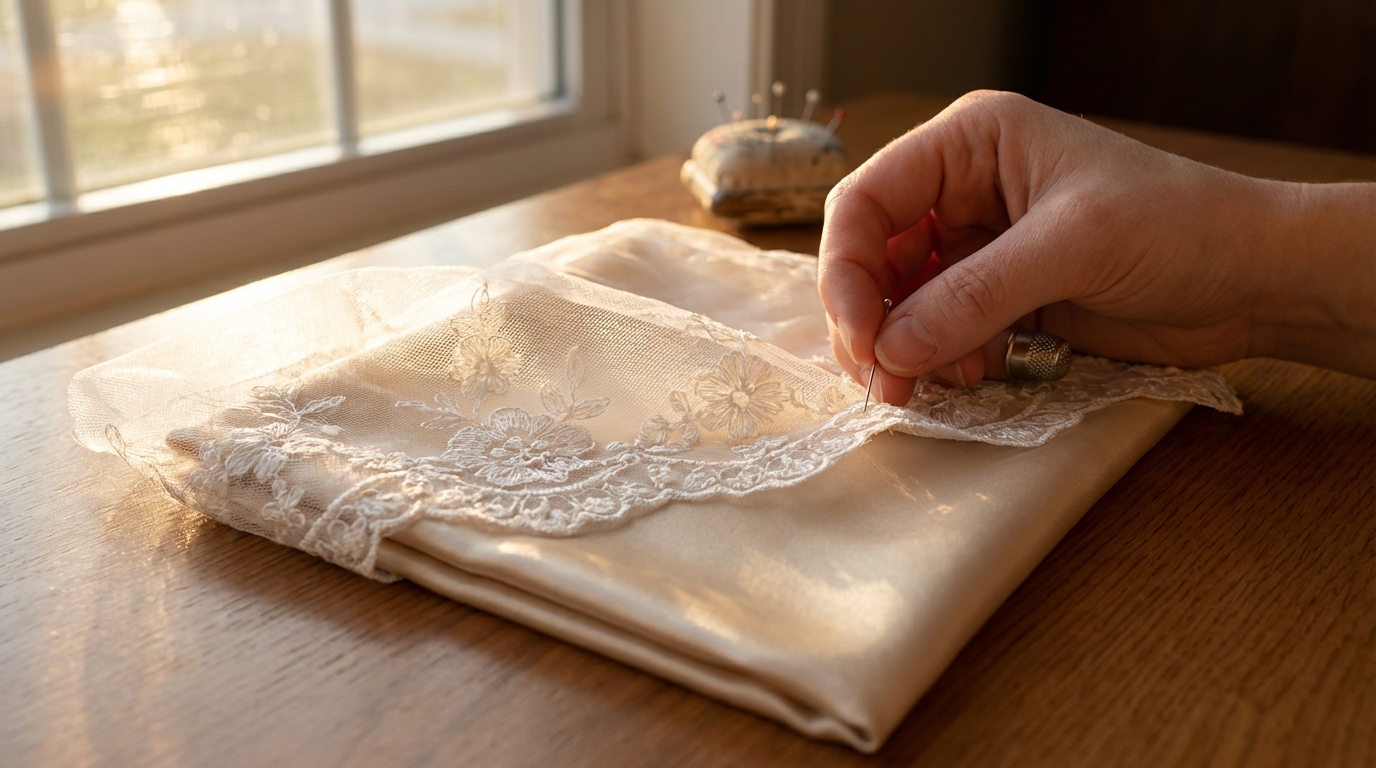
Adding a lace overlay is a premier technique in how to make a ring box cushion because it provides an immediate vintage or romantic aesthetic. This layer should be cut to the exact dimensions of your base fabric and pinned securely before any stitching begins.
How to layer lace correctly?
To achieve a professional look, you must treat the lace and the base fabric as a single unit. Pin them together at the corners and along the edges to prevent the delicate mesh from shifting during assembly.
Selecting the right lace pattern
- Chantilly lace offers a soft, floral touch for traditional themes.
- Venise lace provides a heavier, more structured Victorian feel.
- Alençon lace is ideal for a classic, royal wedding appearance.
Think about it: The contrast between a matte base fabric and a shimmering lace overlay creates a sophisticated depth that looks stunning in close-up wedding photography.
Key Takeaway: Lace overlays add textural complexity and high-end visual value to your DIY project.
| Feature | Recommended Choice | Visual Impact | |
|---|---|---|---|
| Overlay Material | Floral Lace | Romantic/Vintage | |
| Base Fabric | Heavy Satin | Smooth/Classic | |
| Pinning Style | Perimeter Pinning | Secure/Flat |
Selecting the right lace ensures your cushion doesn’t look like a generic craft store item.
Is there a no-sew method for ring cushions?
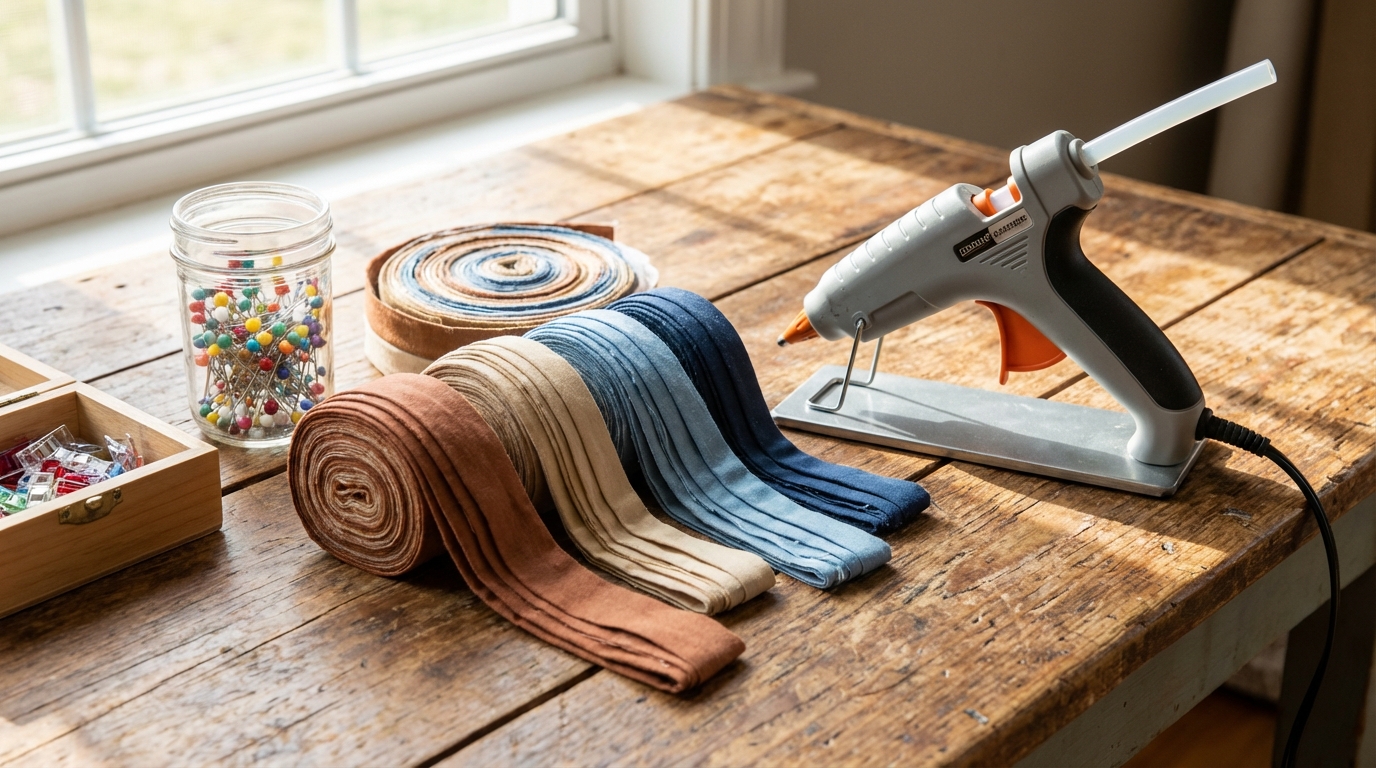
You can absolutely master how to make a ring box cushion without a sewing machine by using high-quality fabric adhesives or iron-on hem tapes. This approach is perfect for busy planners or those who want a custom jewelry box look without the complexity of needlework.
Using fabric glue effectively
When using liquid adhesives, apply them in thin, consistent beads to avoid “soak-through” which can stain delicate silks. Use clothespins to hold the edges firmly together while the glue sets over a 24-hour period.
Will iron-on tape hold up?
- Select “ultra-hold” varieties for heavier fabrics like velvet.
- Always use a pressing cloth to protect the face of your fabric.
- Ensure the iron is at the correct heat setting for the textile.
Here is the thing: No-sew methods are just as durable as traditional stitching if you allow the adhesive to cure completely before stuffing the pillow.
Key Takeaway: Adhesives offer a fast, professional alternative for those who prefer crafting over sewing.
| Tool Type | Best Use Case | Cure Time | |
|---|---|---|---|
| Fabric Glue | Intricate Edges | 24 Hours | |
| Hem Tape | Straight Seams | Immediate | |
| Hot Glue | Decorative Accents | 2 Minutes |
Modern adhesives provide a permanent bond that rivals machine stitching for small wedding accessories.
Which fabrics suit a ring box cushion?
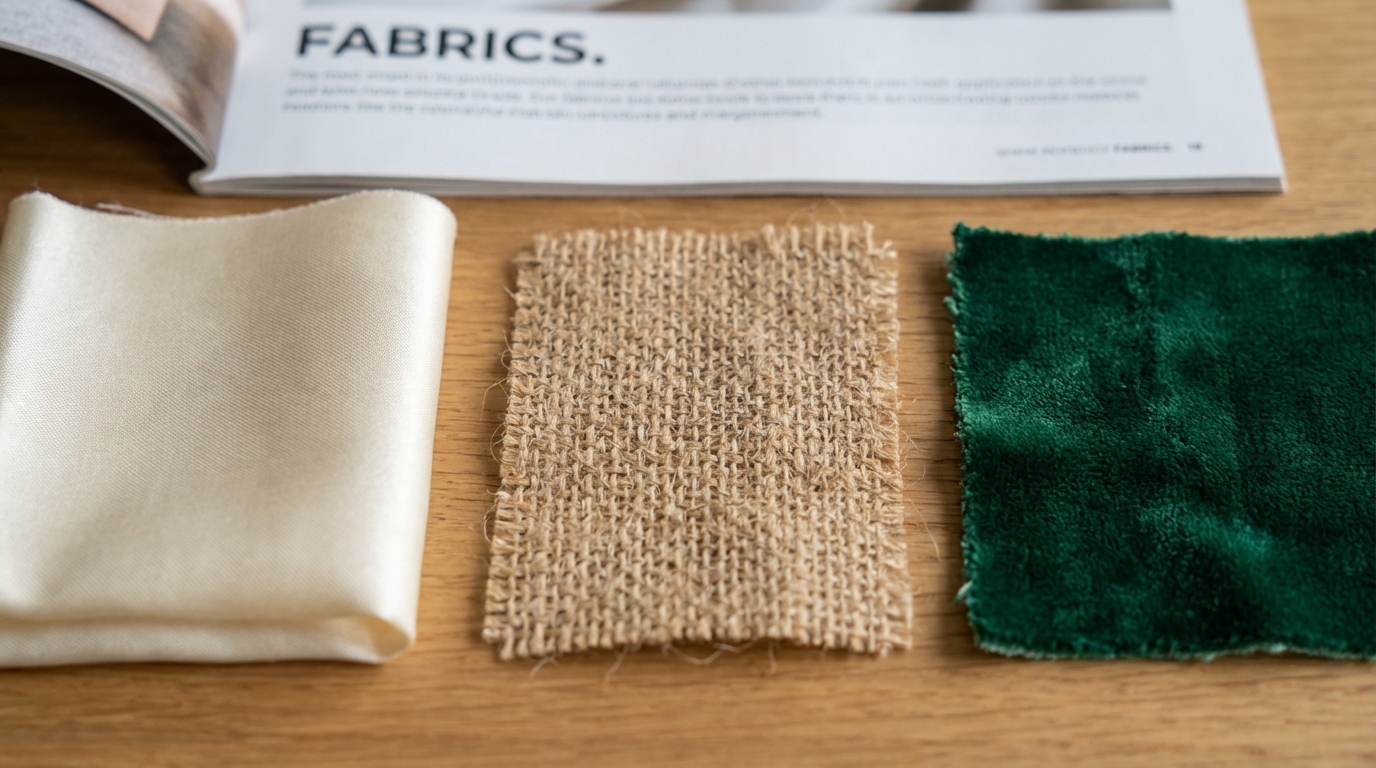
The best textile for how to make a ring box cushion depends entirely on the formality and venue of your wedding ceremony. Choosing a fabric that complements your overall branding ensures a cohesive look from the altar to the reception.
Matching fabrics to themes
For a rustic outdoor wedding, burlap or linen provides an organic, tactile feel that pairs well with natural decor. Conversely, velvet or heavy silk sateen is the standard for luxury indoor ceremonies.
Handling slippery materials
- Use extra-fine pins for satin to avoid permanent holes.
- Place tissue paper under thin silks while sewing to prevent bunching.
- Consider a walking foot on your machine for velvet.
The best part? Mixing textures, such as a rough burlap base with a refined silk ribbon, creates a modern aesthetic that appeals to diverse wedding styles.
Key Takeaway: Your fabric choice dictates the “personality” of the pillow and its ease of construction.
| Fabric | Wedding Style | Difficulty | |
|---|---|---|---|
| Satin | Traditional | Medium | |
| Burlap | Rustic | Easy | |
| Velvet | Luxury | Hard |
Understanding fabric behavior is the first step toward a flawless finish.
How to personalize pillows with embroidery?
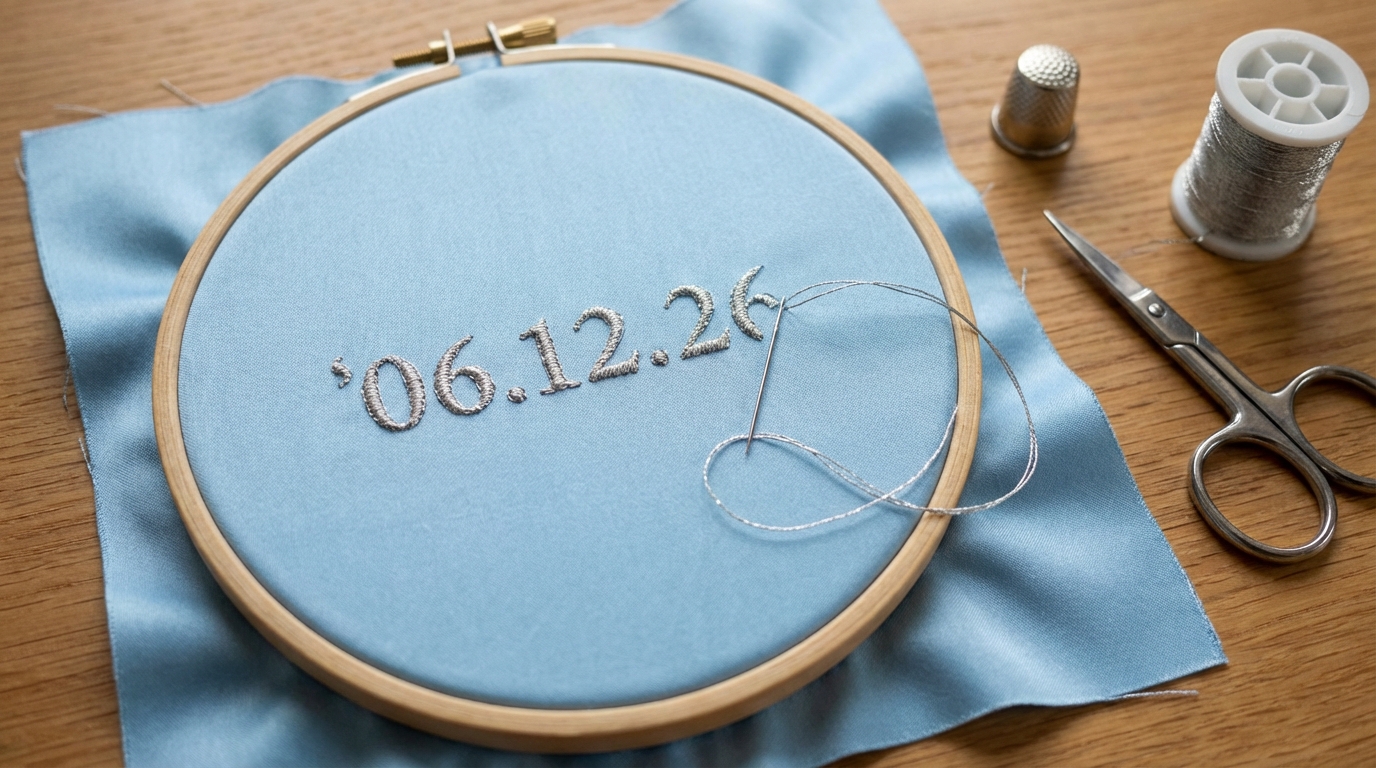
Personalizing how to make a ring box cushion with the couple’s initials or wedding date creates a lasting keepsake that mirrors a premium necklace box design. Always complete your embroidery on the flat fabric square before you sew the pillow together.
Hand-stitching vs. machine embroidery
Hand-stitched monograms offer an artisanal, bespoke charm that many couples find more sentimental for their big day. Machine embroidery provides a precise, uniform look that is ideal for complex logos or specific fonts.
Best stitches for initials
- Satin stitch creates a smooth, solid filled area.
- Backstitch is perfect for thin, elegant cursive lines.
- French knots can add a decorative border around the date.
Bottom line? Embroidery transforms a simple craft project into a high-value wedding artifact that can be passed down through generations.
Key Takeaway: Personalization should always be completed before the pillow is stuffed and closed.
| Method | Appearance | Time Req. | |
|---|---|---|---|
| Hand Stitch | Textured/Bespoke | High | |
| Machine | Clean/Uniform | Low | |
| Appliqué | Bold/Layered | Medium |
Custom stitching ensures your ring pillow is unique to your specific celebration.
What is the best way to close the seams?
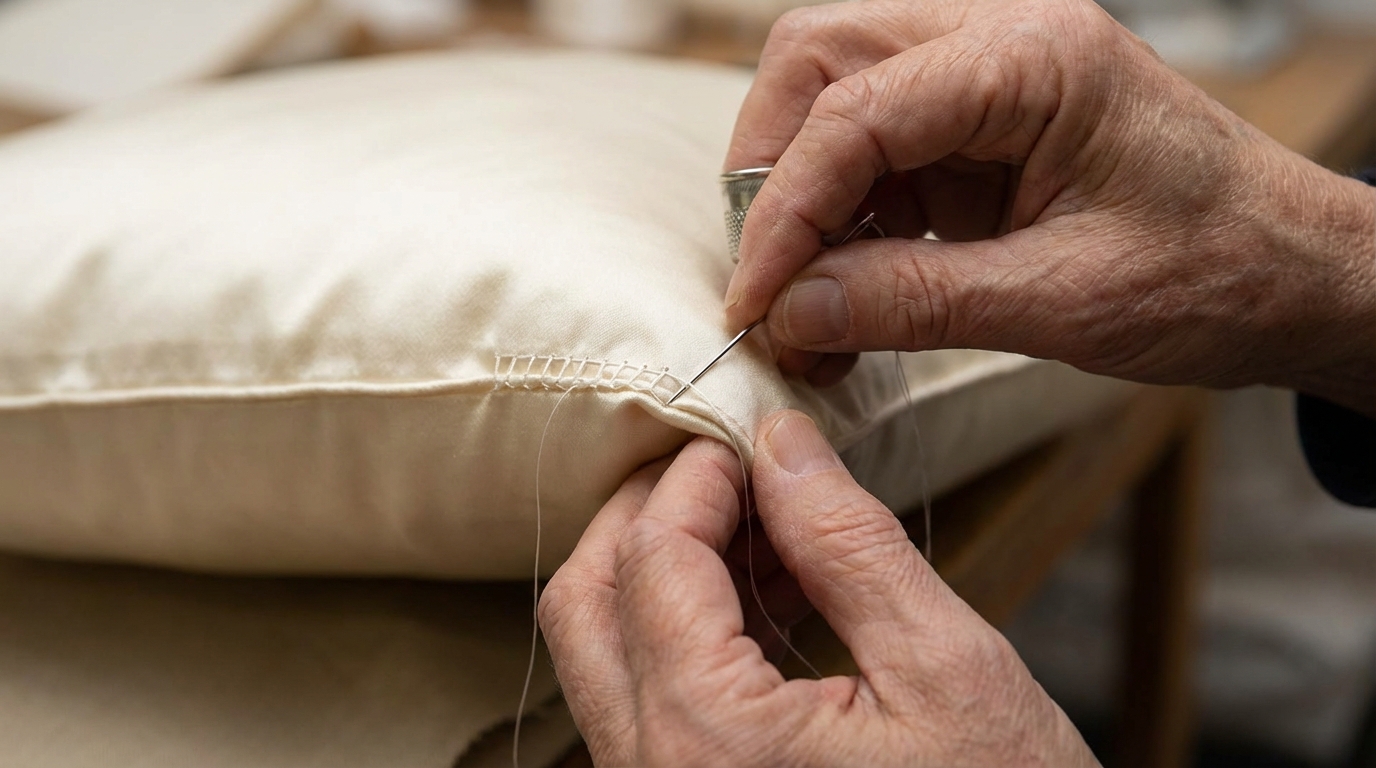
Mastering the ladder stitch is the secret to how to make a ring box cushion with an invisible, professional-grade closure. This technique allows you to seal the final opening after stuffing without any visible thread on the exterior.
Achieving an invisible finish
The ladder stitch works by jumping the needle back and forth between the folded edges of the opening. When you pull the thread tight, the two sides “zip” together, hiding the stitches inside the seam.
Tips for a tight seal
- Use a thread color that exactly matches your fabric.
- Keep your stitches small and consistent in length.
- Knot the thread securely inside the pillow before the final pull.
Listen closely: A poorly closed seam is the most common mistake in DIY projects; taking an extra five minutes here ensures your pillow looks store-bought.
Key Takeaway: The ladder stitch is an essential skill for creating a seamless, high-end wedding accessory.
| Closure Type | Visibility | Durability | |
|---|---|---|---|
| Ladder Stitch | Invisible | High | |
| Whip Stitch | Visible | Medium | |
| Fabric Glue | Invisible | High |
A clean closure is the hallmark of a professional-grade ring pillow.
Can you make unique pillow shapes?
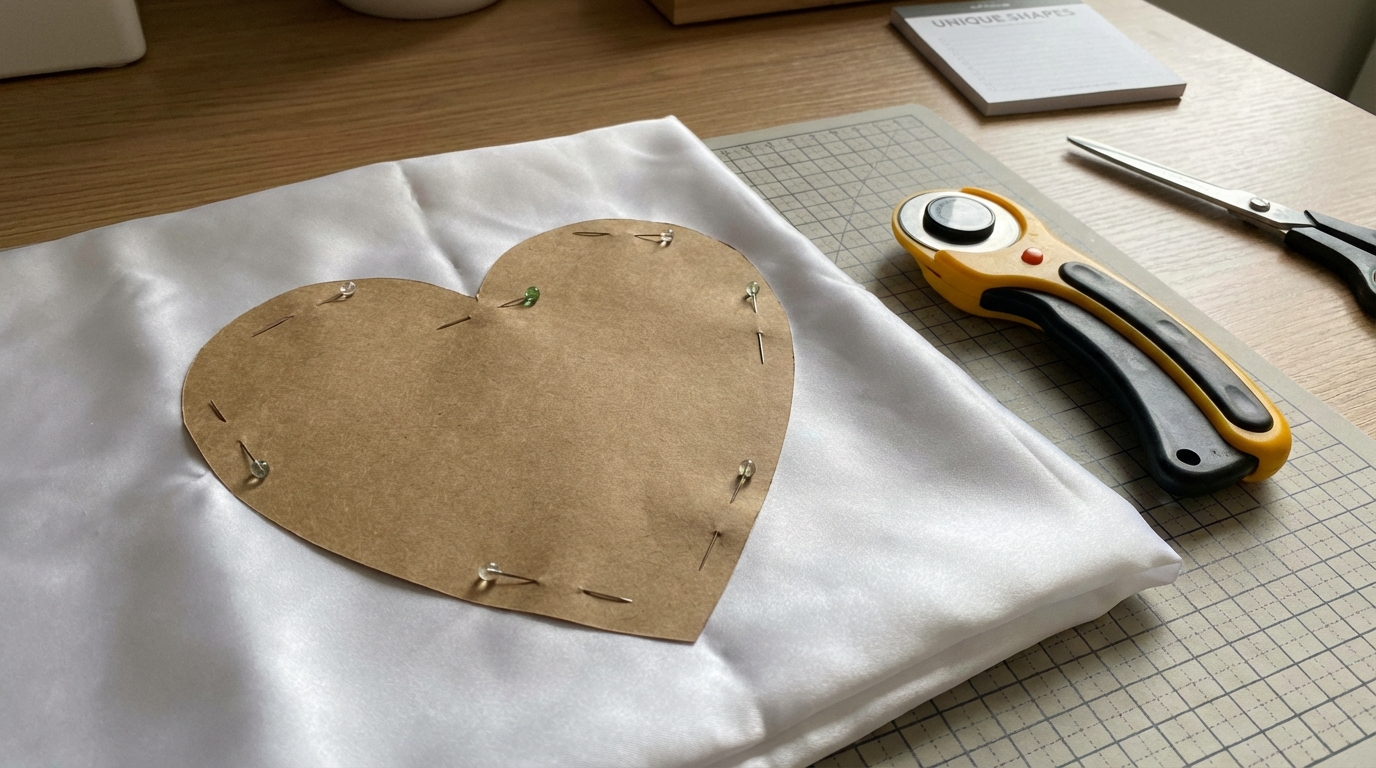
While squares are traditional, learning how to make a ring box cushion in shapes like hearts or circles can make your earring box presentation stand out. Using a paper template ensures that your non-standard shapes remain symmetrical and balanced.
Creating a perfect heart template
Fold a piece of cardstock in half and draw one-half of the heart shape along the fold. Cutting it this way guarantees that both lobes of the heart are identical when unfolded.
Dealing with curved seams
- Notch the seam allowance on curves to prevent puckering.
- Use more pins than usual to hold curved edges together.
- Sew slowly to maintain a smooth, consistent line.
It gets better: Unique shapes often feel more modern and can be tailored to match specific motifs in the bride’s gown or floral arrangements.
Key Takeaway: Templates are non-negotiable when moving away from standard square designs.
| Shape | Skill Level | Vibe | |
|---|---|---|---|
| Square | Beginner | Classic | |
| Heart | Advanced | Romantic | |
| Circle | Intermediate | Modern |
Custom shapes allow for a more personalized and creative wedding day accessory.
How to attach the ring ribbons correctly?
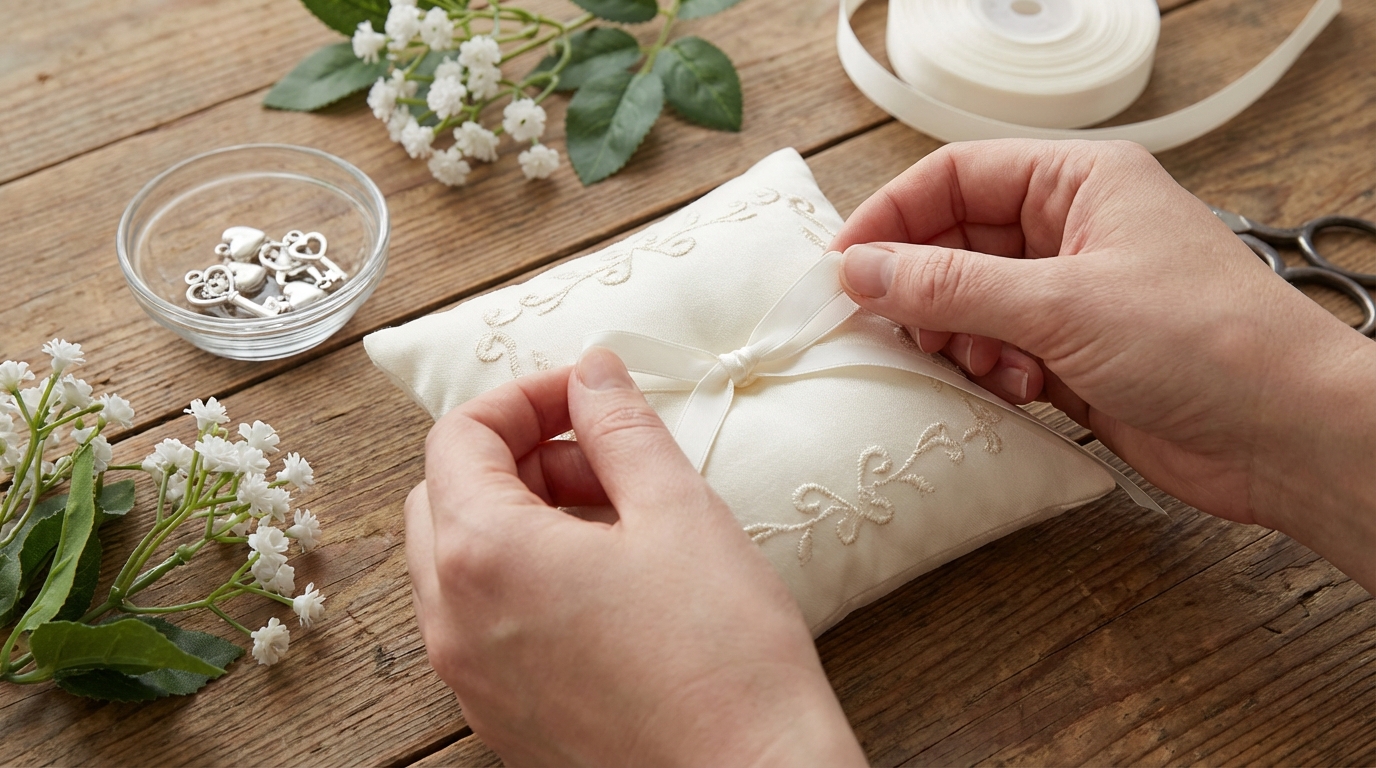
The ribbon is the most functional part of how to make a ring box cushion , as it must hold the wedding bands securely during the walk down the aisle. A center-anchored ribbon ensures the rings sit prominently and safely on the pillow’s surface.
Why use two separate ribbons?
Using two thin ribbons (1/8 inch) instead of one thick one allows you to tie each ring individually. This prevents the rings from clinking together and makes them easier for the officiant to remove.
Securing the ribbon to the base
- Sew a small “X” stitch through the ribbon into the pillow center.
- Alternatively, use a decorative button to anchor the ribbon.
- Ensure the ribbon tails are long enough for a pretty bow.
Now: The way you tie the rings is vital; use a simple bow that can be released with a single tug to avoid awkward fumbling at the altar.
Key Takeaway: Functionality is as important as fashion when attaching your ring-securing ribbons.
| Ribbon Type | Width | Material | |
|---|---|---|---|
| Satin | 1/8 Inch | Silk/Poly | |
| Organza | 1/4 Inch | Sheer | |
| Velvet | 1/8 Inch | Plush |
Secure ribbons provide peace of mind during the most critical moment of the ceremony.
How to set up your crafting workspace?
A clean, organized environment is crucial when learning how to make a ring box cushion to avoid getting lint or dust on your pristine white fabrics. Setting up a dedicated station helps you maintain the high quality required for wedding-grade items.
Essentials for a clean workstation
Always work on a hard, light-colored surface like a white table or marble counter. This makes it easier to spot stray threads or needles before they get lost in your fabric.
Organizational tips for success
- Keep a small bowl nearby for loose pins and needles.
- Store your fabric in a plastic bag until the moment you cut it.
- Ensure your hands are clean and free of oils before touching silk.
You might be wondering: Does the surface really matter? Yes, because delicate fabrics like satin can easily snag on rough wooden tables or pick up stains from unseen debris.
Key Takeaway: A pristine workspace prevents damage to expensive fabrics and ensures a professional result.
| Station Component | Requirement | Benefit | |
|---|---|---|---|
| Lighting | Bright/Natural | Visibility of stitches | |
| Surface | Smooth/Clean | Prevents fabric snags | |
| Storage | Sealed Bags | Keeps fabrics dust-free |
An organized workspace is the foundation of high-quality DIY wedding production.
What defines a professional finish?
A professional result in how to make a ring box cushion is characterized by plump corners, hidden seams, and perfectly centered embellishments. The final product should look like it was sourced from a high-end bridal boutique.
Inspection for quality control
Check every corner to ensure the stuffing is evenly distributed and the points are sharp. Any loose threads should be trimmed as close to the fabric as possible without nicking the seam.
Final aesthetic touches
- Singe ribbon ends with a flame to prevent fraying.
- Steam the finished pillow (not direct iron) to remove wrinkles.
- Ensure the rings sit flat and centered when tied.
The best part? A well-made pillow becomes a family heirloom that can be stored in a commemorative box and revisited for years to come.
Key Takeaway: Attention to the smallest details separates an amateur craft from a professional wedding accessory.
| Quality Check | Pass Criteria | Importance | |
|---|---|---|---|
| Seams | Invisible/No loose threads | High | |
| Stuffing | Even/No lumps | Medium | |
| Ribbons | No fraying/Secure | Critical |
Final inspections ensure your hard work results in a beautiful, altar-ready centerpiece.
How do you achieve a tufted pillow look?
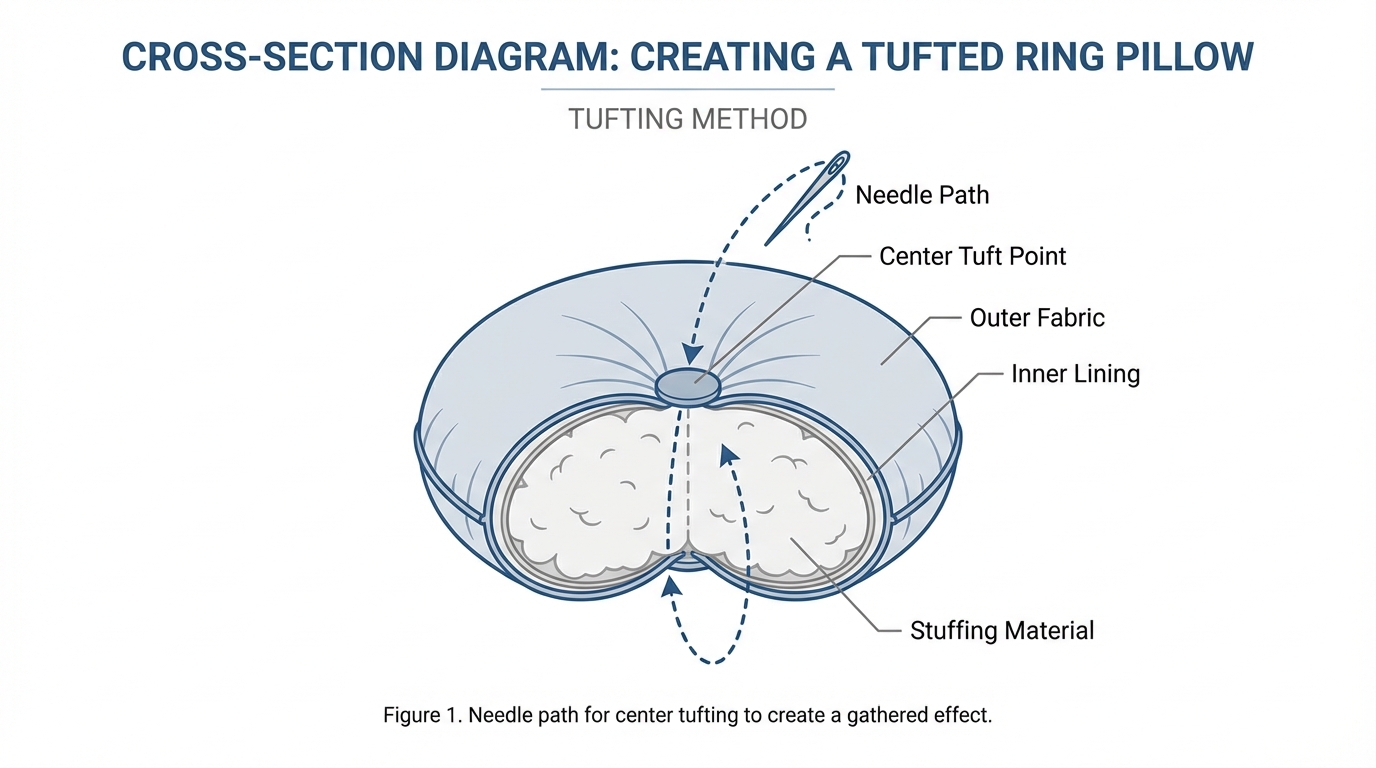
Tufting is a classic step in how to make a ring box cushion that creates a central “dimple,” providing a secure nest for the rings to rest. This structural detail prevents the wedding bands from sliding around during the procession.
The tufting process explained
To tuft a pillow, you sew a heavy-duty thread through the center from the front to the back and then back again. Pulling this thread tight creates the “tuft” before you knot it securely and hide the tail inside.
Enhancing the tuft with hardware
- Add a large pearl bead to the center of the tuft.
- Use a crystal button for a more modern, sparkly look.
- Cover the tuft point with a perfectly tied satin bow.
You might be wondering: Why is tufting necessary? Beyond the aesthetic appeal, it provides structural integrity that keeps the stuffing from shifting over time.
Key Takeaway: Tufting adds both visual depth and functional stability to any ring pillow design.
| Tufting Material | Visual Style | Best For | |
|---|---|---|---|
| Heavy Thread | Minimalist | Modern themes | |
| Pearl Bead | Elegant | Traditional themes | |
| Crystal | Glamorous | Luxury themes |
Tufting is the final touch that gives your ring pillow a luxurious, high-end furniture-like finish.
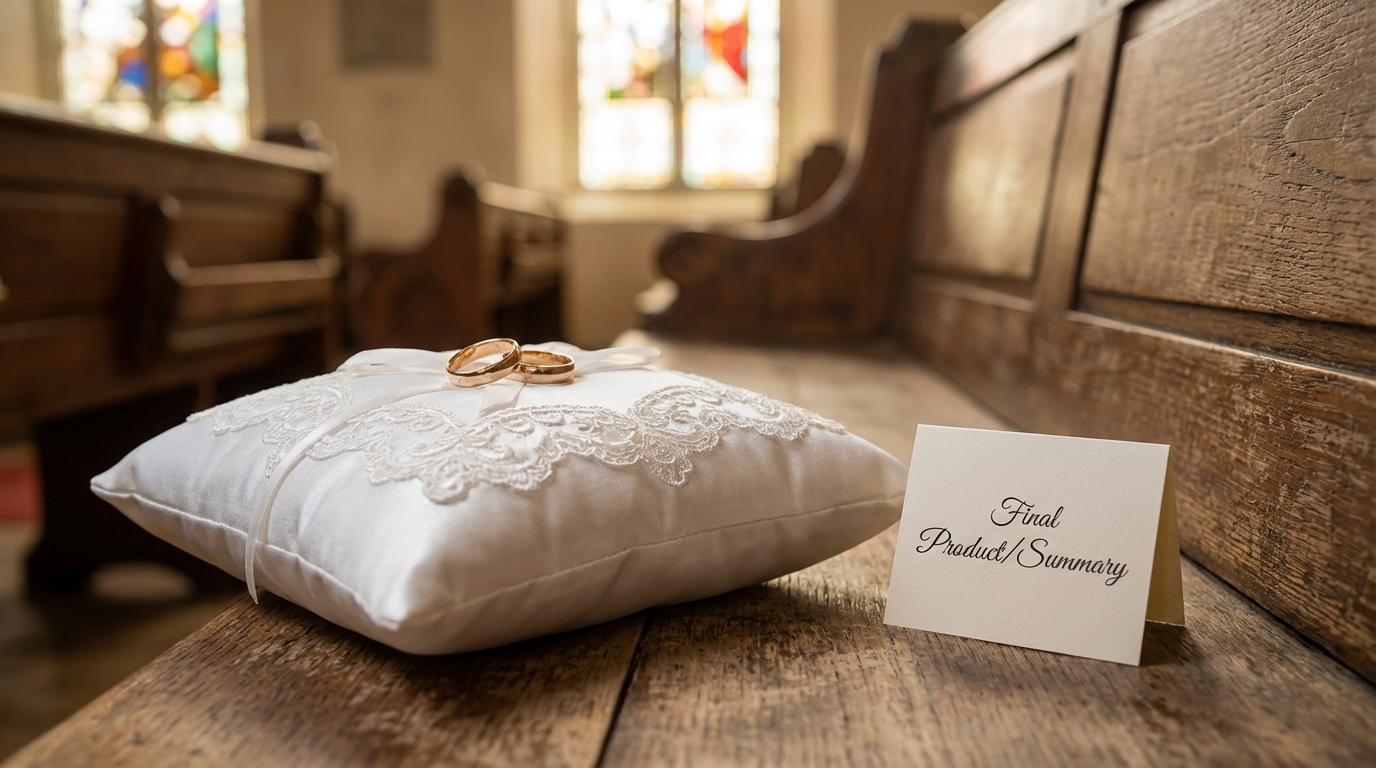
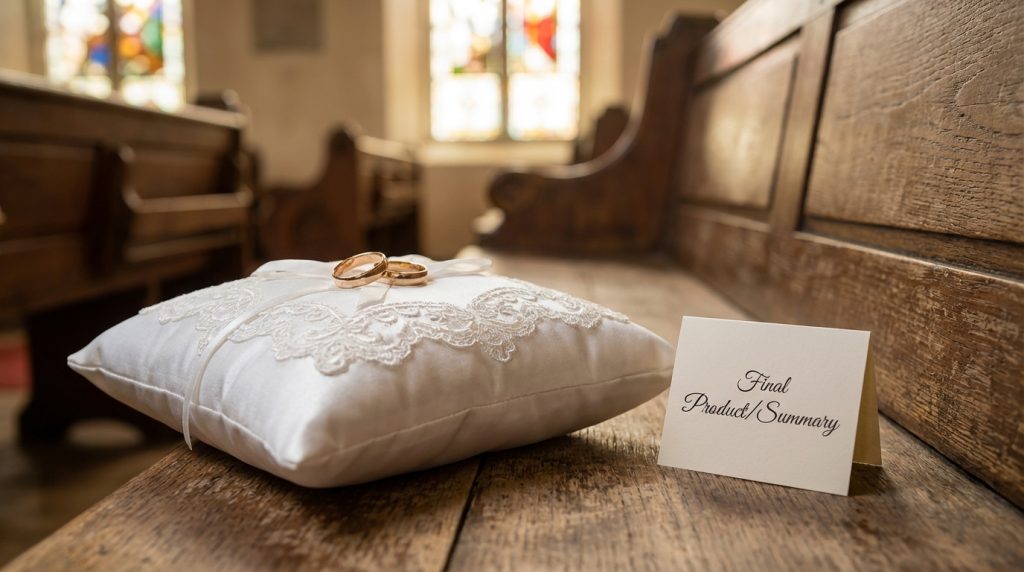
Crafting Your Wedding Legacy
Creating a custom ring pillow is more than just a DIY project; it is a way to weave your personal story into the fabric of your wedding day. By following these steps, you transform simple materials into a cherished heirloom that enhances the beauty of your ring exchange.
At YiXin Packaging, we understand that the presentation of your jewelry is just as important as the gems themselves. As your dedicated partner for premium jewelry solutions, our mission is to provide the high-quality vessels your treasures deserve. To elevate your wedding branding further, please contact us for wholesale inquiries or custom packaging designs that will delight your guests.
Frequently Asked Questions
Can I make a ring pillow without any sewing experience?Yes, because modern fabric glues and iron-on adhesives allow you to create a secure, professional-looking cushion without ever touching a needle.
What is the best size for a ring bearer to carry?Generally, an 8×8 inch or 10×10 inch square is best, as it is small enough for a child’s hands but large enough to look significant in photos.
How do I prevent the satin from fraying?You should always use sharp fabric scissors for cutting and consider using a small amount of “fray check” liquid or a light flame on ribbon ends.
Is it better to use poly-fill or a foam insert?Poly-fill is better for a soft, traditional look, while a foam insert is preferred if you want a more rigid, box-like cushion structure.
How can I make the pillow easier for a child to hold?You can sew a 2-inch wide ribbon strap across the bottom of the pillow, allowing the ring bearer to slide their hand underneath for a secure grip.