
You make a small wooden jewelry box by selecting stable hardwoods, cutting precise 45-degree mitre joints, and finishing the interior with soft velvet lining. Learning how to make a small jewelry box out of wood is the ultimate solution for providing a secure and elegant home for your treasures. This process transforms your morning routine by organizing heirloom investments safely.
Why build a custom wooden jewelry box?

Customization is the primary reason to learn how to make a small jewelry box out of wood . Generic store-bought storage rarely accounts for your specific collection’s dimensions or organizational needs. By building your own, you ensure every piece has a dedicated and safe spot.
Selecting quality materials
You can choose premium hardwoods that offer superior durability compared to mass-produced plastic or thin cardboard. Look: solid walnut or cherry provides a weight and texture that feels truly luxury. High-quality timber resists warping and protects your jewelry from environmental changes.
- Tailored compartment sizes
- Integrated ring rolls
- Removable tiered trays
Key Takeaway: Custom-built boxes provide unmatched material quality and organizational efficiency tailored to your specific jewelry collection.
How to prepare for your woodworking project?

Selecting stable hardwoods is the best way to start learning how to make a small jewelry box out of wood. You need materials that resist warping while offering a beautiful natural grain for the exterior. This initial step dictates the final aesthetics and longevity of your build.
Choosing the right timber
You should focus on hardwoods like oak or walnut for their strength and longevity. Look: soft woods like pine often splinter during the fine joinery work required for small items. These premium choices provide a professional finish that rivals a luxury boutique presentation.
- Oak for durability
- Walnut for rich color
- Cherry for smooth texture
Key Takeaway: Starting with the correct hardwood ensures your jewelry box remains stable and aesthetically pleasing for decades.
How to measure wood for a perfect fit?
Precision measurement is the secret to learning how to make a small jewelry box out of wood . Even a millimeter of error can cause the entire box to be out of square during assembly. Accuracy at this stage prevents gaps in your corners that could make the project look unfinished.
Using digital measuring tools
You will achieve the best results by using a digital caliper or a high-quality combination square. Think about it: gaps in your corners will instantly make a handcrafted project look amateur and unfinished. These tools allow you to transfer internal dimensions to your boards with absolute accuracy.
- Measure twice before cutting
- Check for squareness at every step
- Account for blade kerf width
Key Takeaway: Utilizing precision measuring tools is the only way to ensure that all four sides of your box meet perfectly.
What is the best way to cut the boards?
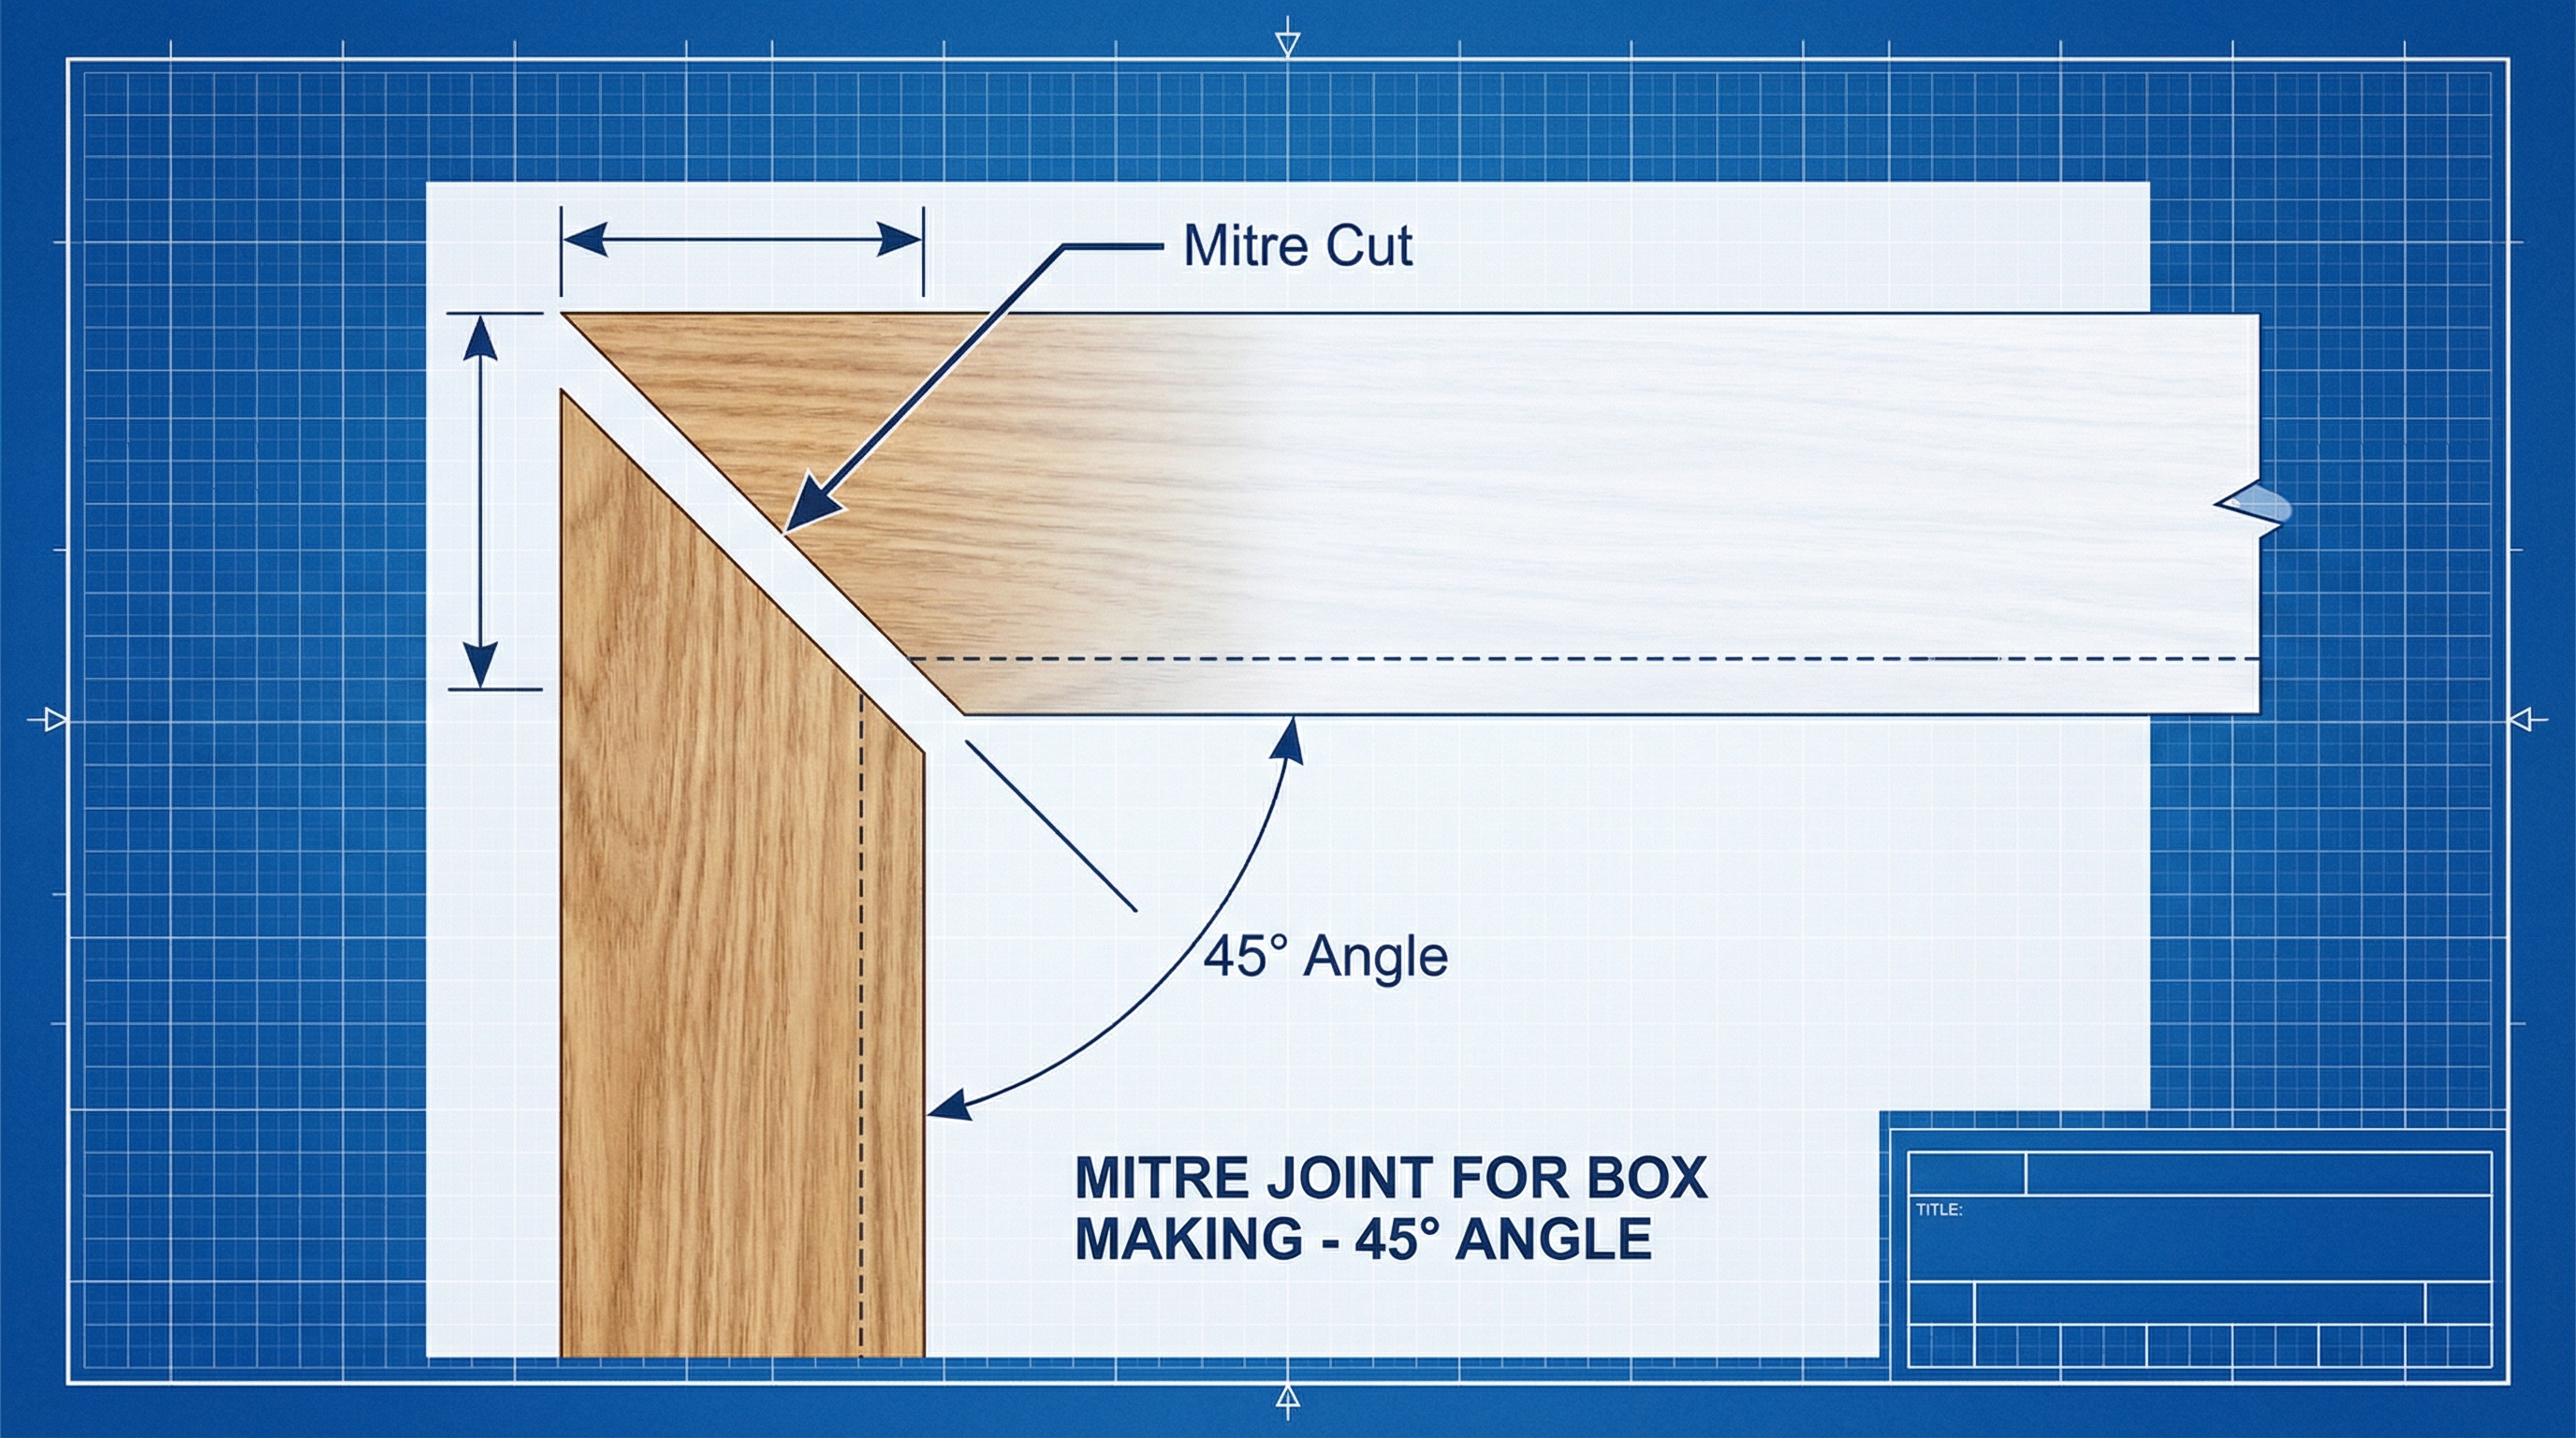
Using 45-degree mitre cuts is the most professional method for how to make a small jewelry box out of wood. These cuts allow the wood grain to flow seamlessly around the corners without showing unattractive end grain. Achieving this look requires a saw that is perfectly calibrated for these specific angles.
Mastering the mitre saw
You should secure your boards firmly to the work surface to prevent shifting during the cut. Here is the deal: your saw must be perfectly calibrated for these angles to meet flush without any visible light passing through. This level of precision defines a high-quality container designed for wedding sets.
- Set saw to exactly 45 degrees
- Use a stop block for identical lengths
- Practice on scrap wood first
Key Takeaway: Perfectly executed mitre cuts create a seamless “wrap-around” grain effect that defines professional-grade woodworking.
How do you glue the box frame together?
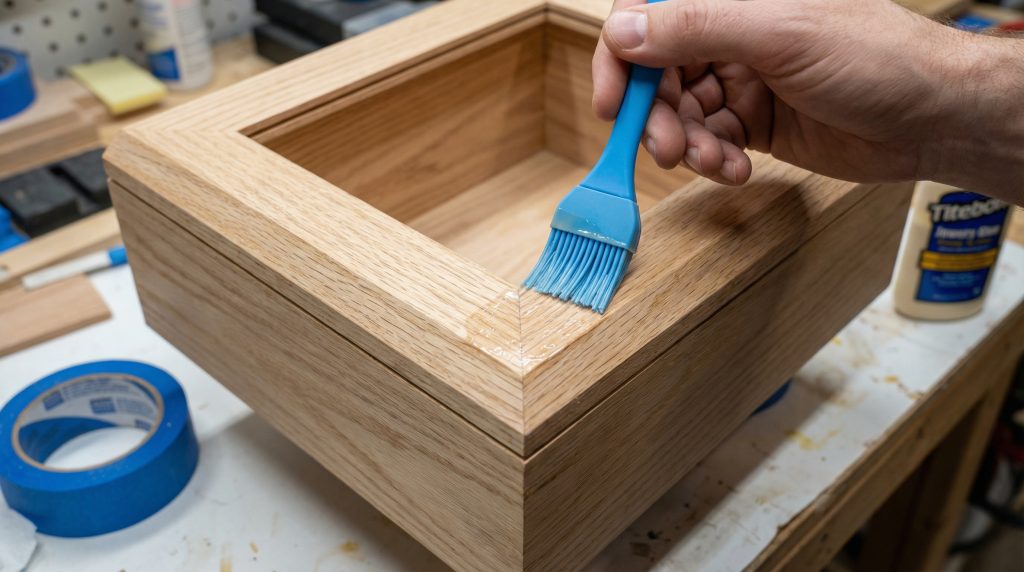
The tape-and-fold method is how you successfully learn how to make a small jewelry box out of wood . This technique uses high-strength adhesive tape to pull mitre joints together while the glue sets in place. It offers a simpler alternative to traditional clamping on small workpieces.
Applying glue for strength
You need to apply a thin, even layer of wood glue to all mitred surfaces before folding the frame. Look: standard metal clamps can often slip on angled surfaces and ruin your alignment. Ensuring uniform coverage creates a bond as strong as any commercial solution.
- Use a small brush for even spread
- Wipe away squeeze-out immediately
- Allow 24 hours for full curing
Key Takeaway: Using tape as a clamping mechanism provides uniform pressure across all four corners simultaneously.
How to attach the bottom and the lid?
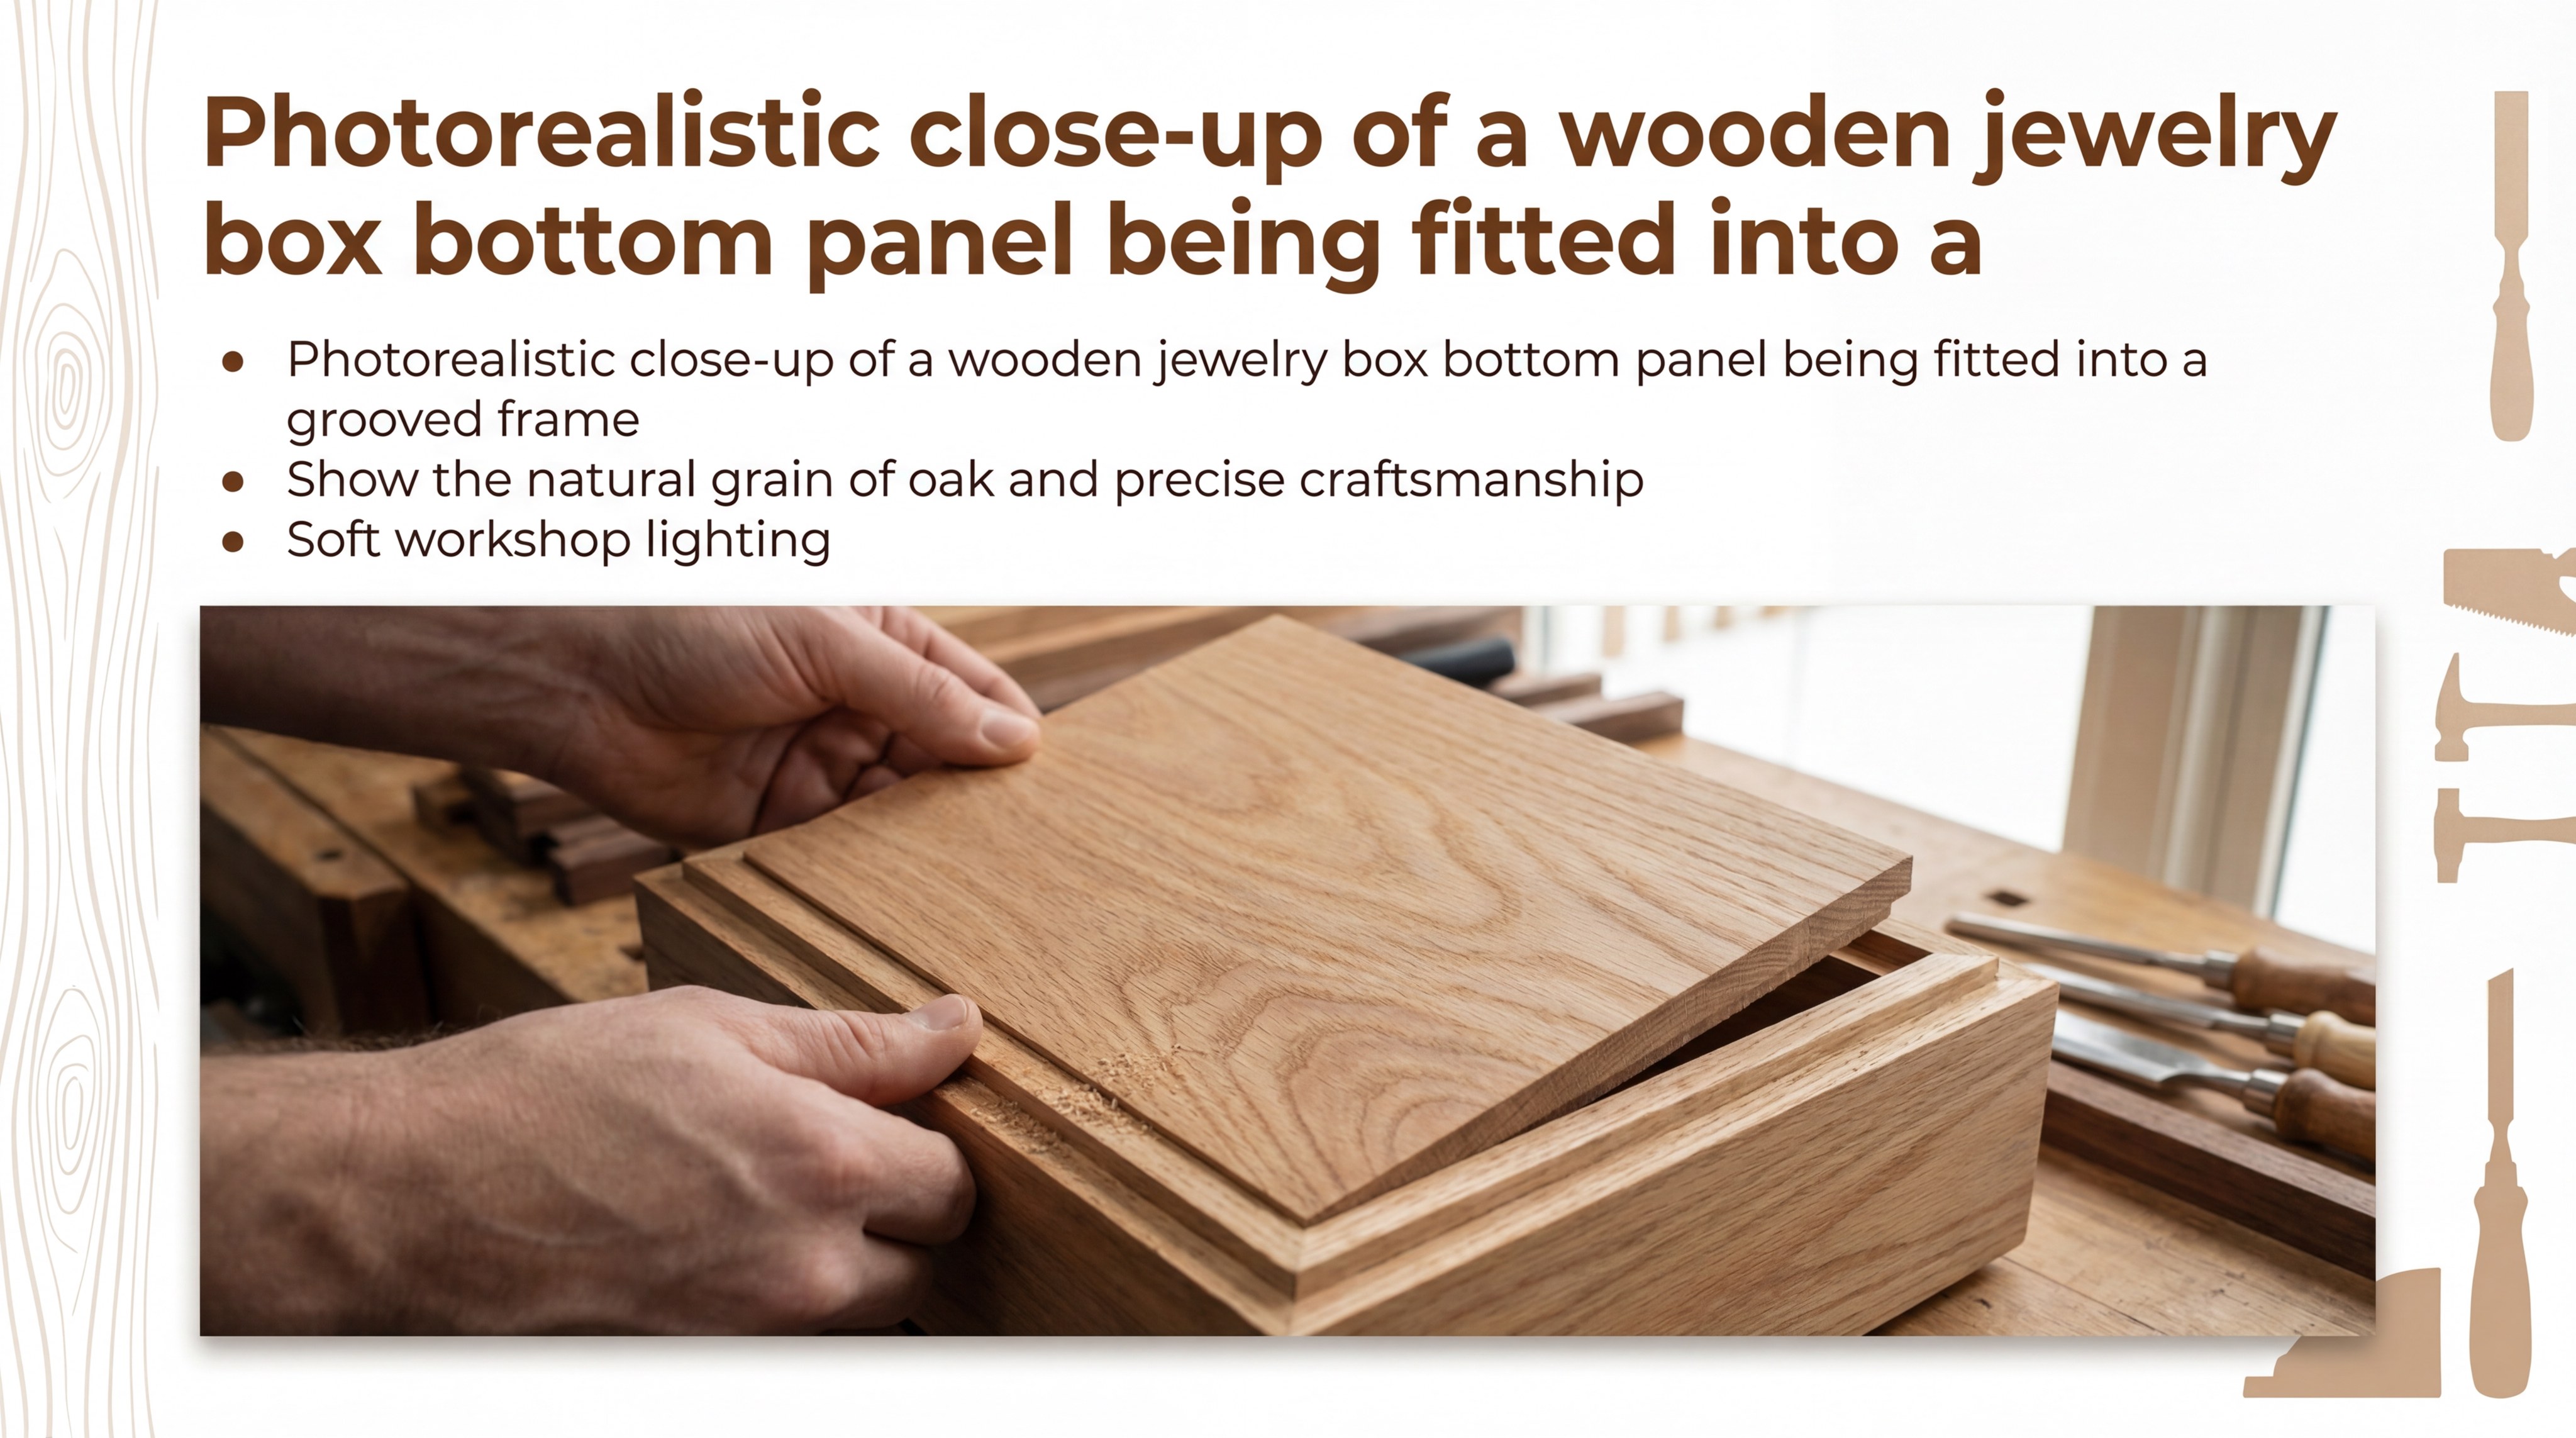
Installing inset panels is the professional standard for how to make a small jewelry box out of wood. This technique hides the edges of the bottom and top boards within the frame itself. It provides a significantly more refined appearance than simple surface mounting.
Fitting the panels
You must cut your top and bottom panels to match the internal grooves of your frame exactly. Think about it: exposed plywood edges will ruin the high-end feel of your build and lower its value. This floating effect allows the wood to expand and contract naturally with seasonal changes.
- Cut panels for a friction fit
- Sand edges for smooth entry
- Use minimal glue on panel edges
Key Takeaway: Insetting your panels within the frame provides structural integrity and a refined, gap-free appearance.
How to sand wood for a professional finish?
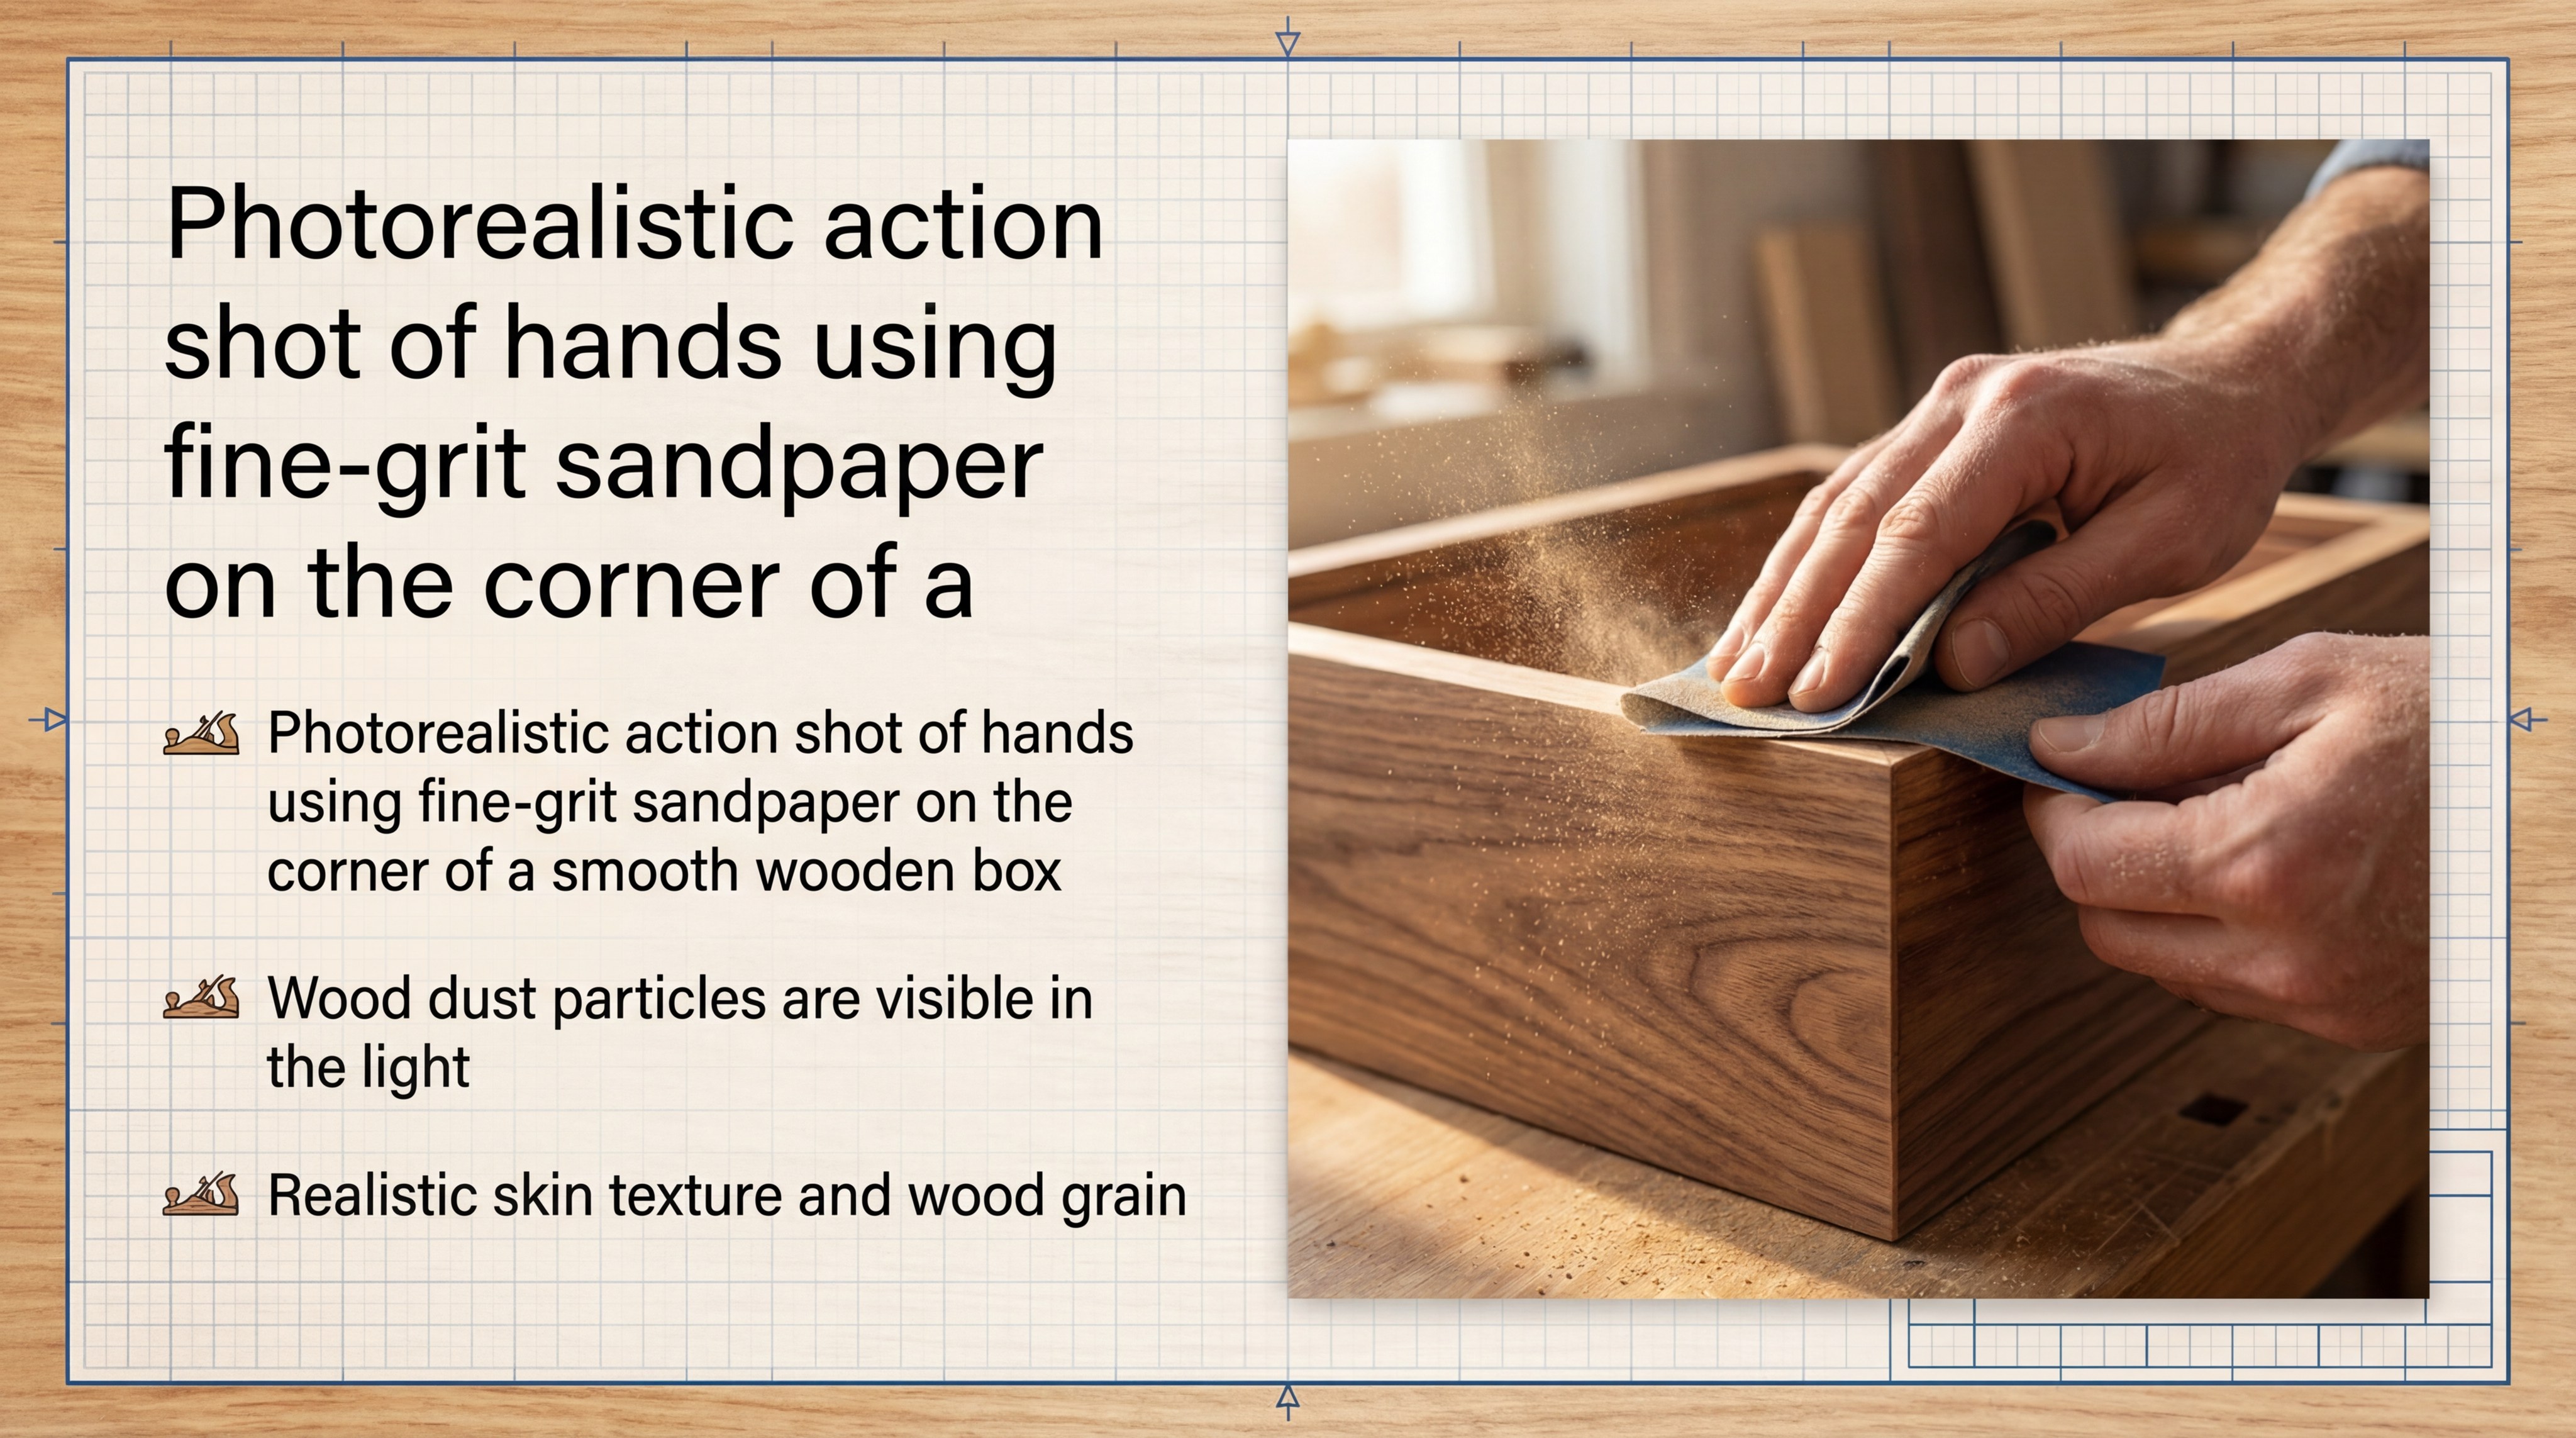
Progressing through graduated sandpaper grits is essential for how to make a small jewelry box out of wood . Starting with coarse grit levels the surface, while fine grits provide a silky, touchable texture. This meticulous preparation is what separates hobbyist projects from professional goods.
Achieving a mirror finish
You should sand in the direction of the grain to avoid leaving swirl marks on the wood. Here is the deal: skipping a grit level will leave visible scratches that appear prominently under your final finish. Methodical sanding prepares the surface for protective oils and waxes.
- Start with 120 grit for leveling
- Move to 180 grit for smoothing
- Finish with 240 grit for polishing
Key Takeaway: Methodical sanding through sequential grit levels is the only way to achieve a professional, furniture-grade surface.
How do you separate the lid from the box?

Sawing the lid from a solid-built box is the expert trick for how to make a small jewelry box out of wood. Building the box as a closed cube ensures that the grain matches perfectly once the lid is separated. This technique creates a seamless transition that is visually stunning when closed.
Cutting with precision
You will mark a straight line around the perimeter of the box, usually three centimeters from the top. Look: it is much harder to align a separately built lid with the base than it is to cut them apart later. This method is standard in custom packaging manufacturing to ensure a perfect fit.
- Clamp the box to your workbench
- Use a fine-toothed saw for the cut
- Rotate the box as you saw
Key Takeaway: Sawing the lid from a completed cube guarantees that the wood grain remains continuous across the opening.
How to install hinges and soft linings?
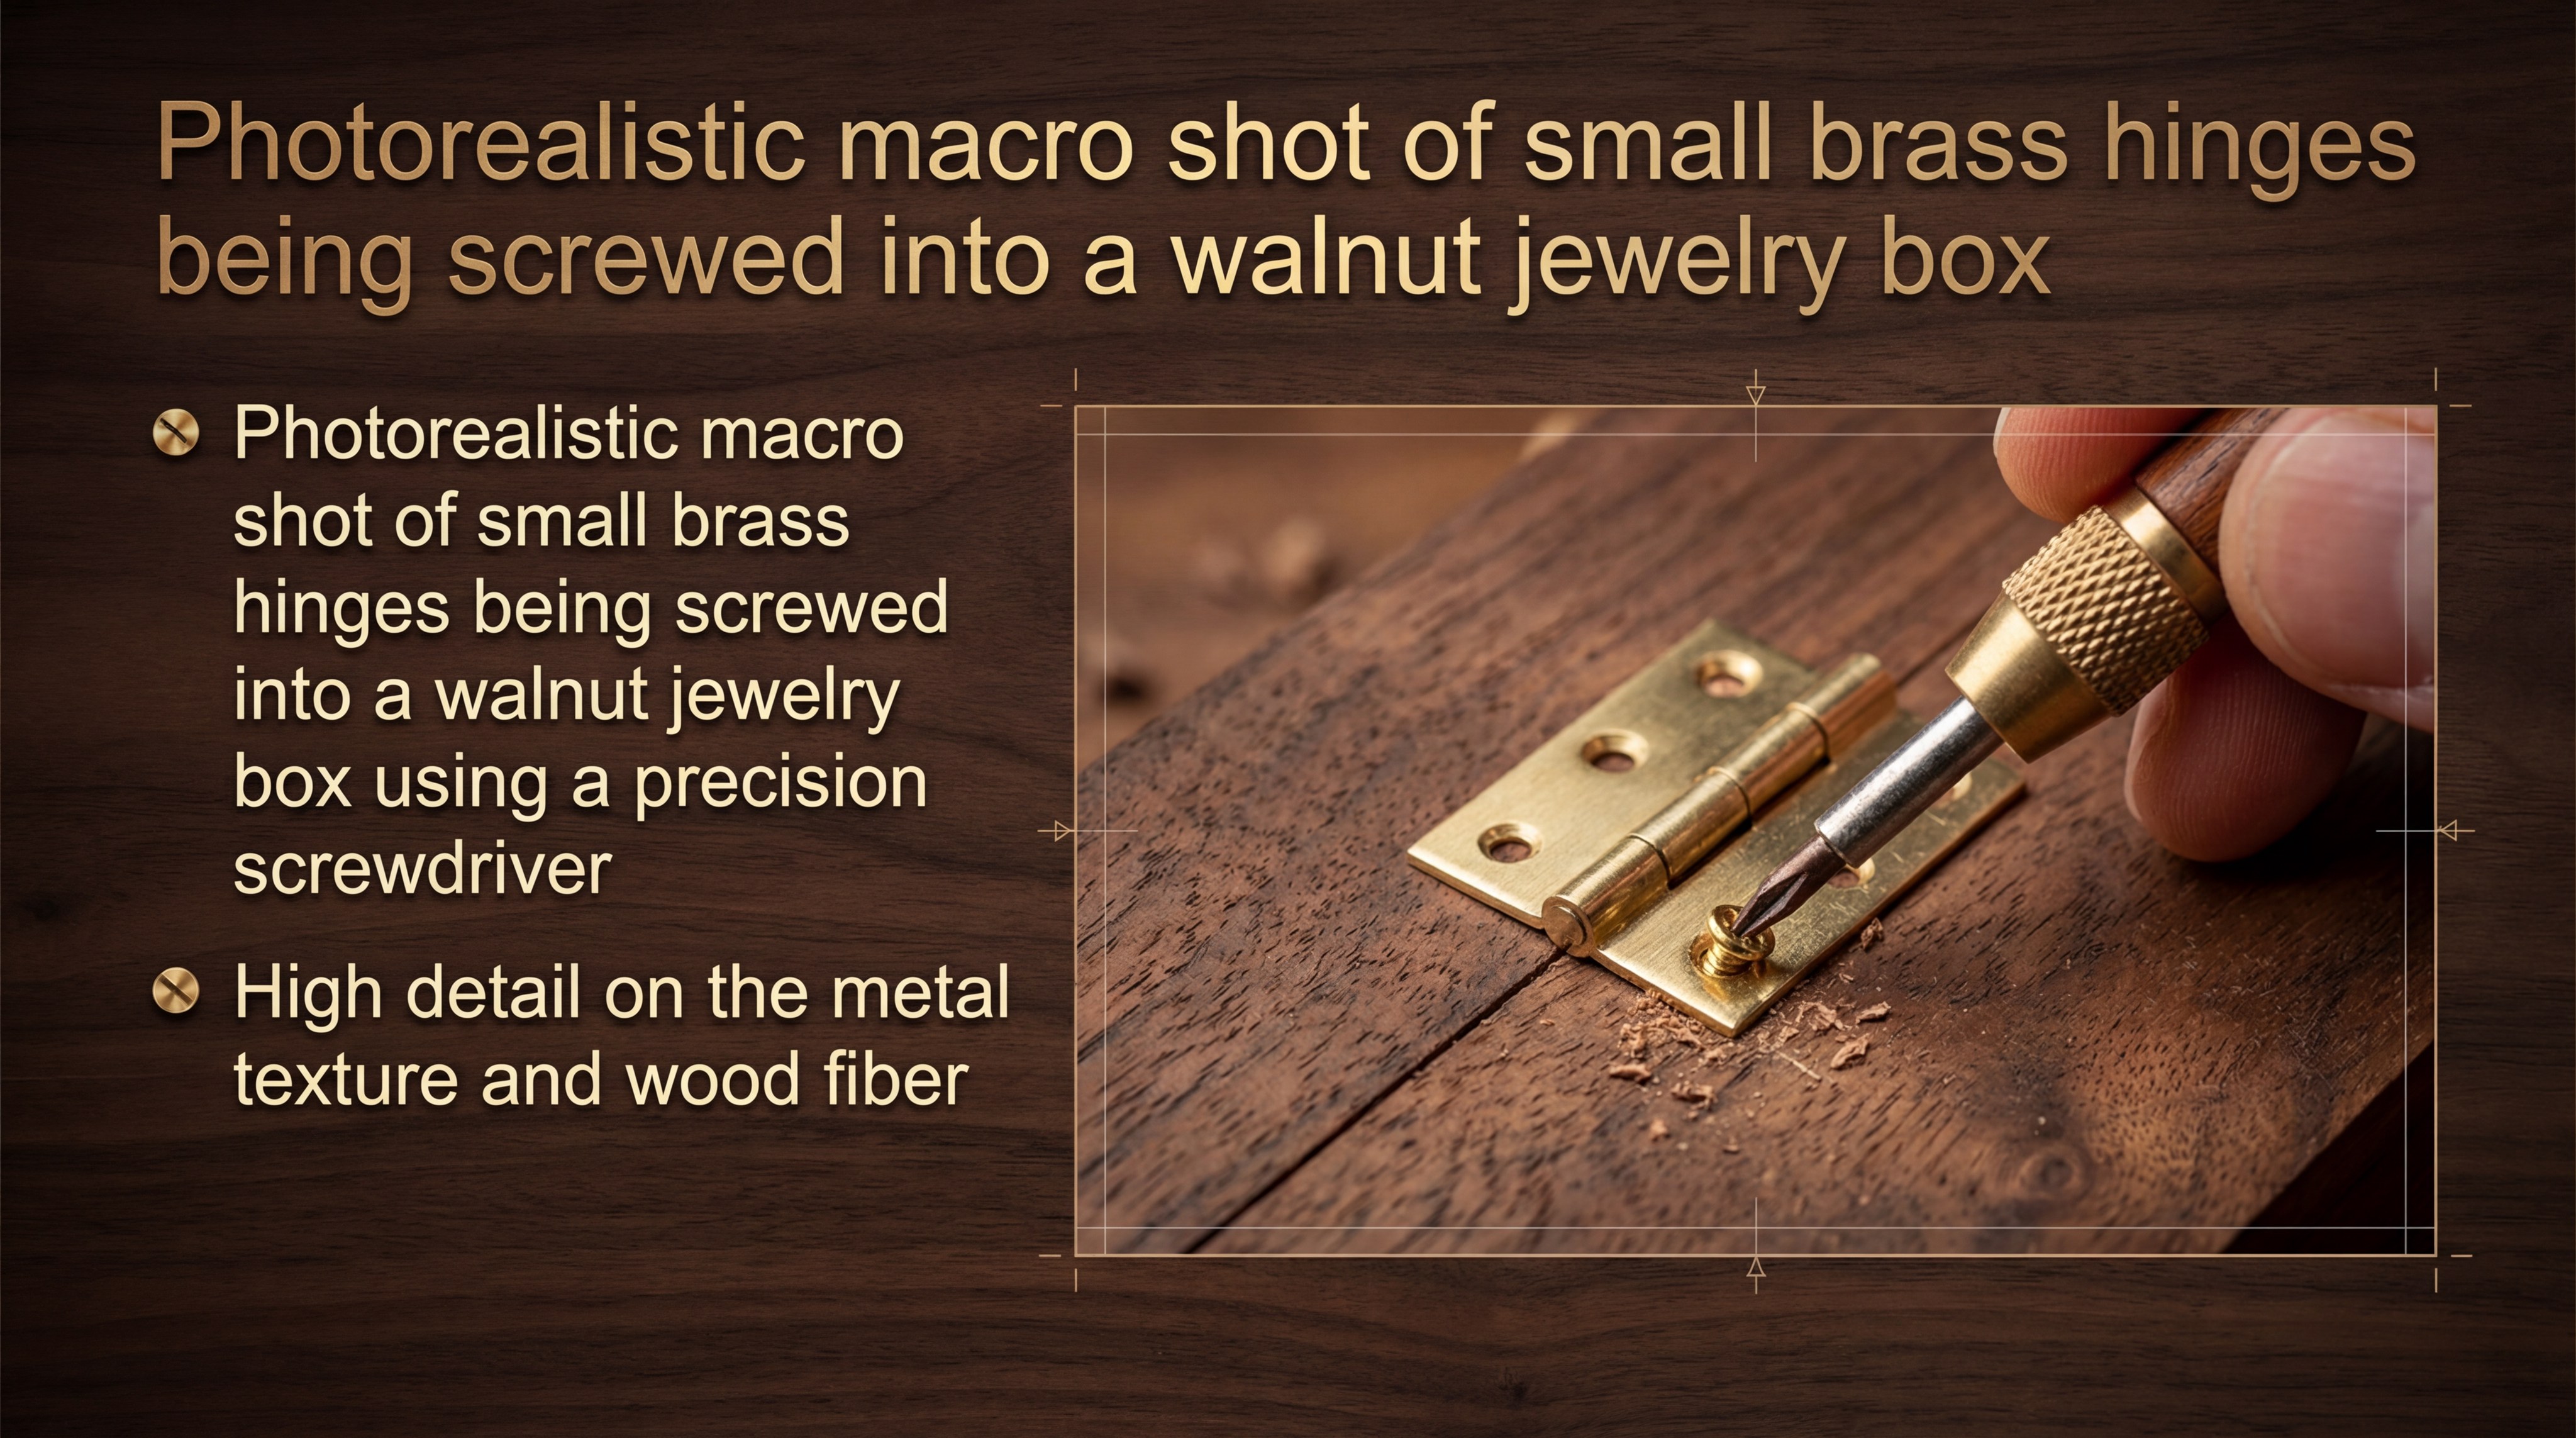
Using pre-drilled piano hinges is the most stable way to finish how to make a small jewelry box out of wood . Small brass screws can easily snap or split the hardwood if you do not create pilot holes first. Proper hinge alignment ensures that the lid opens and closes smoothly every time.
Adding the protective lining
You should wrap thin plywood inserts in velvet or satin to protect your delicate jewelry from scratches. Think about it: a misaligned hinge will make the lid sit crookedly and ruin the box’s functionality. This interior work provides the luxury feel expected from high-quality boutique boxes.
- Measure internal walls precisely
- Spray adhesive for fabric bonding
- Press-fit lined inserts into place
Key Takeaway: Careful hardware installation and fabric-wrapped inserts protect your jewelry while providing a boutique-quality finish.
How to decorate your final jewelry case?
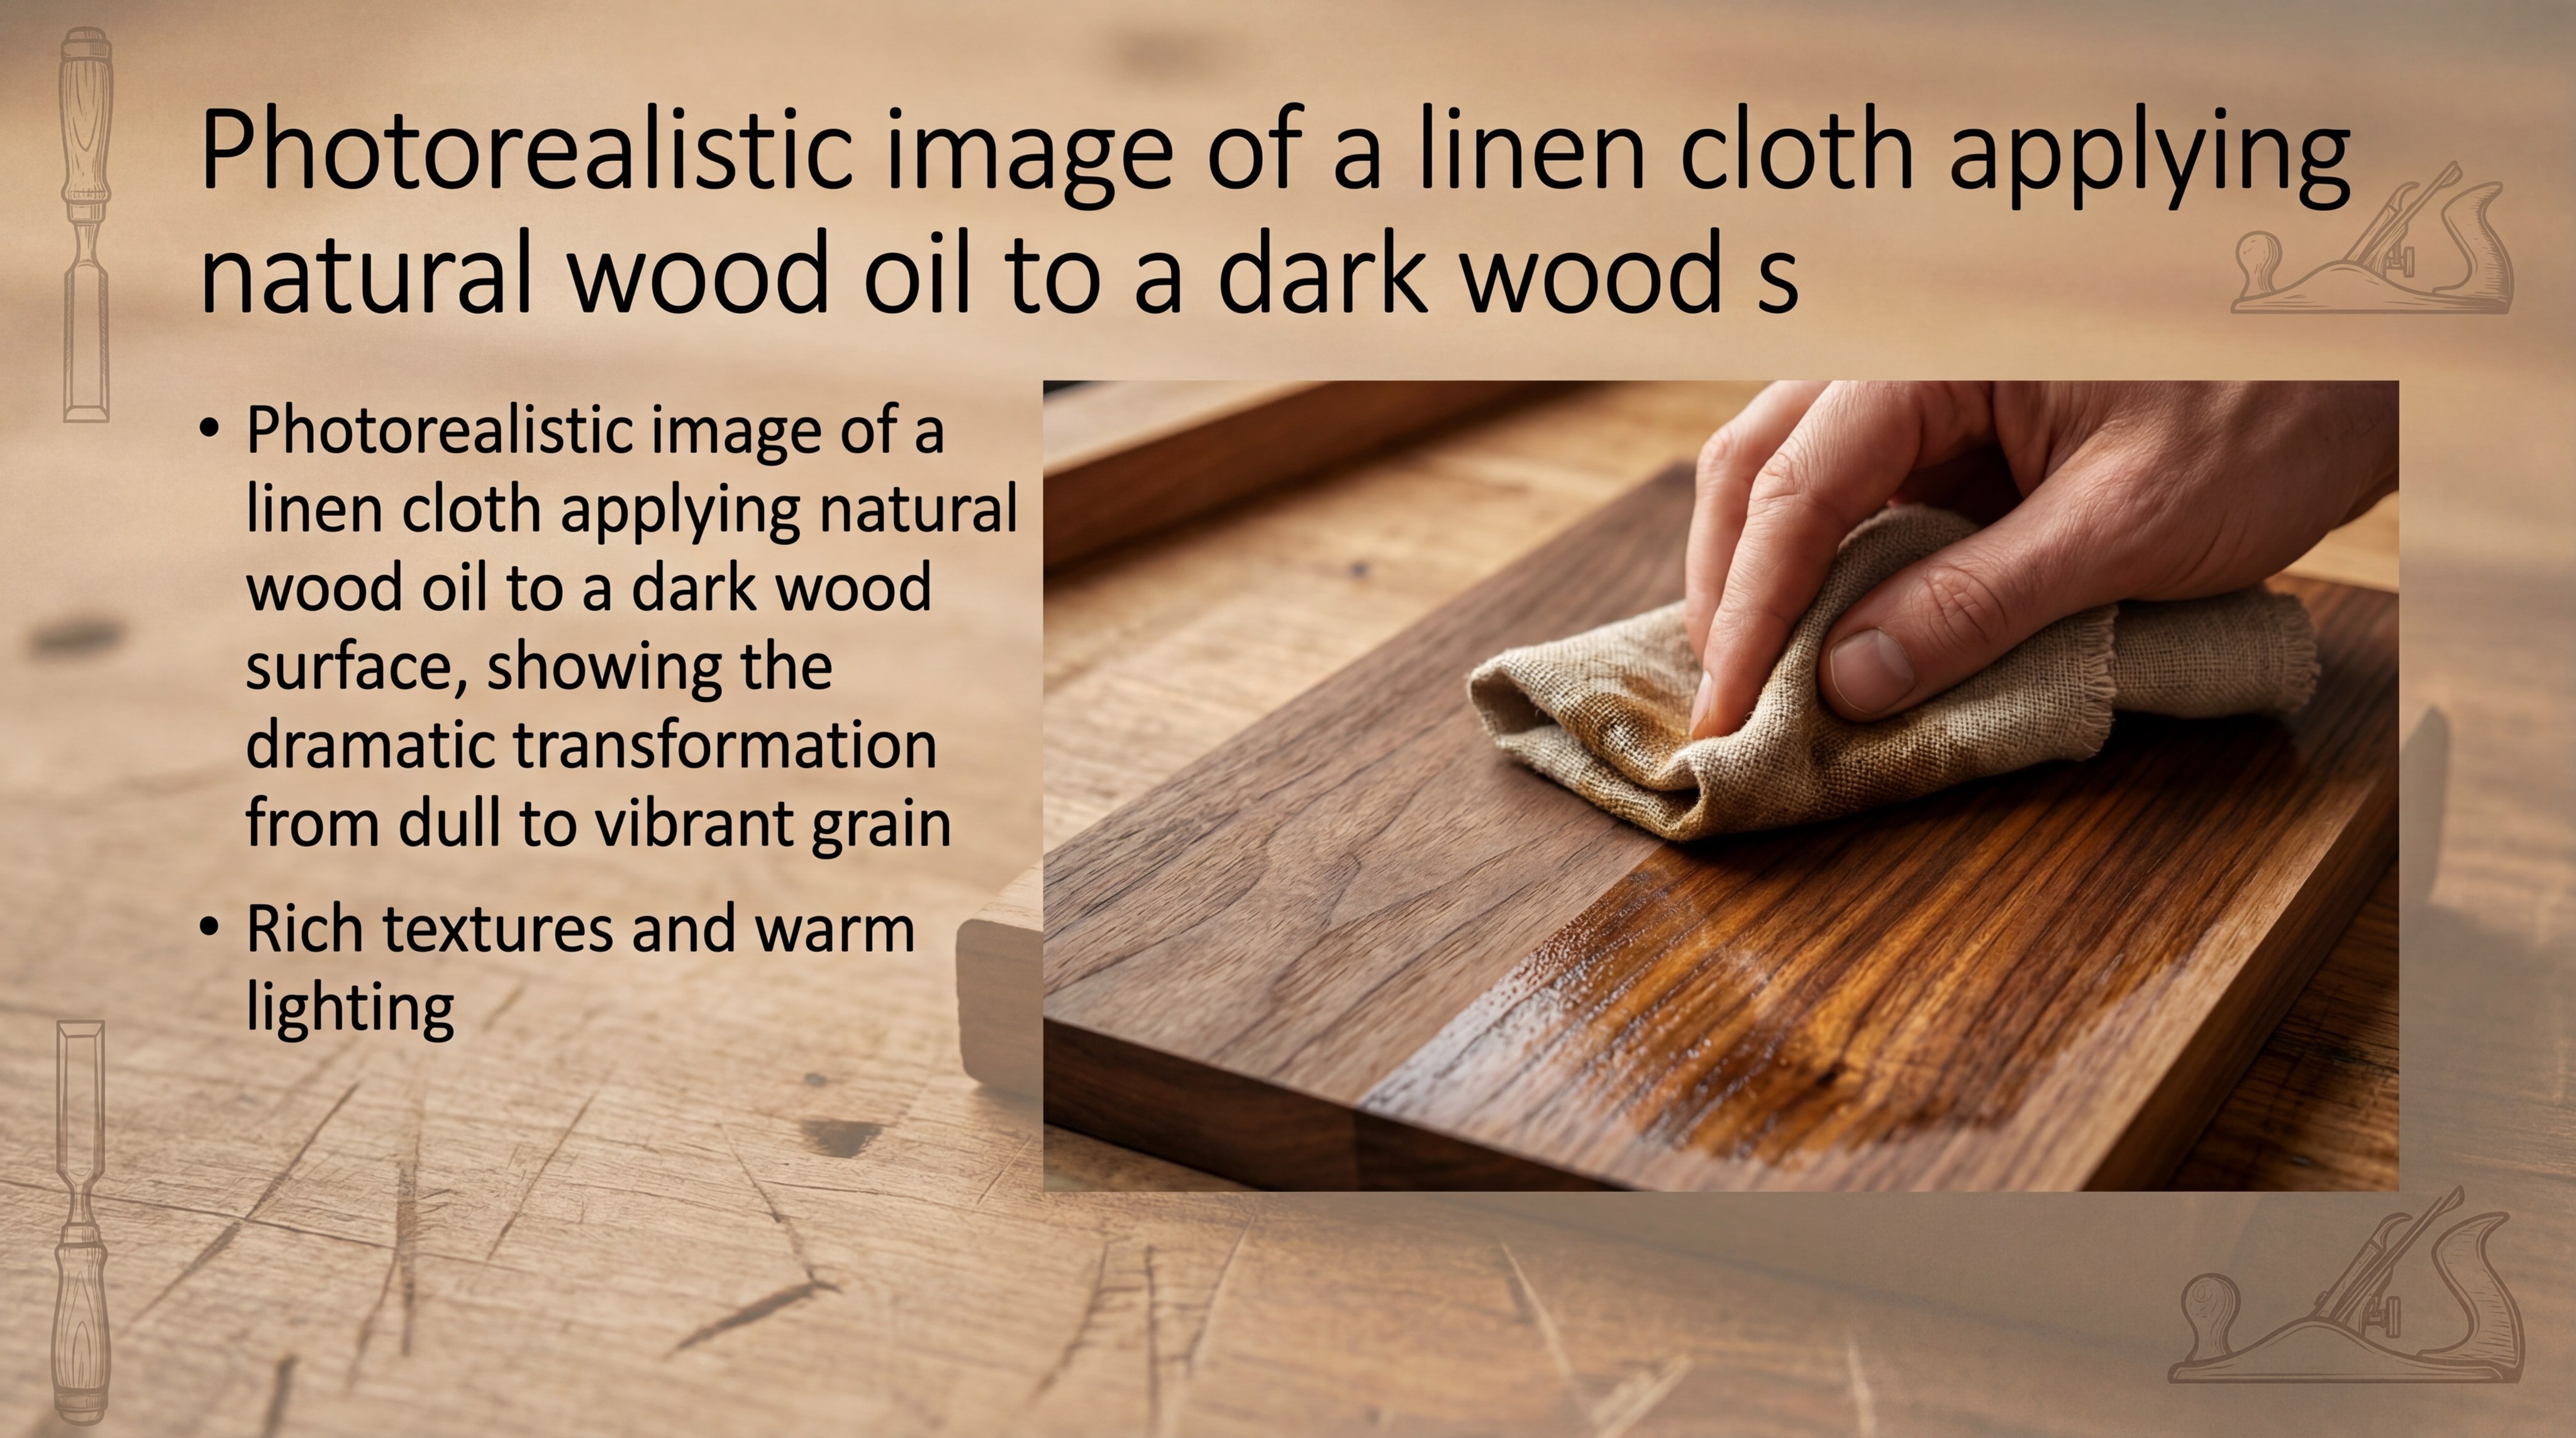
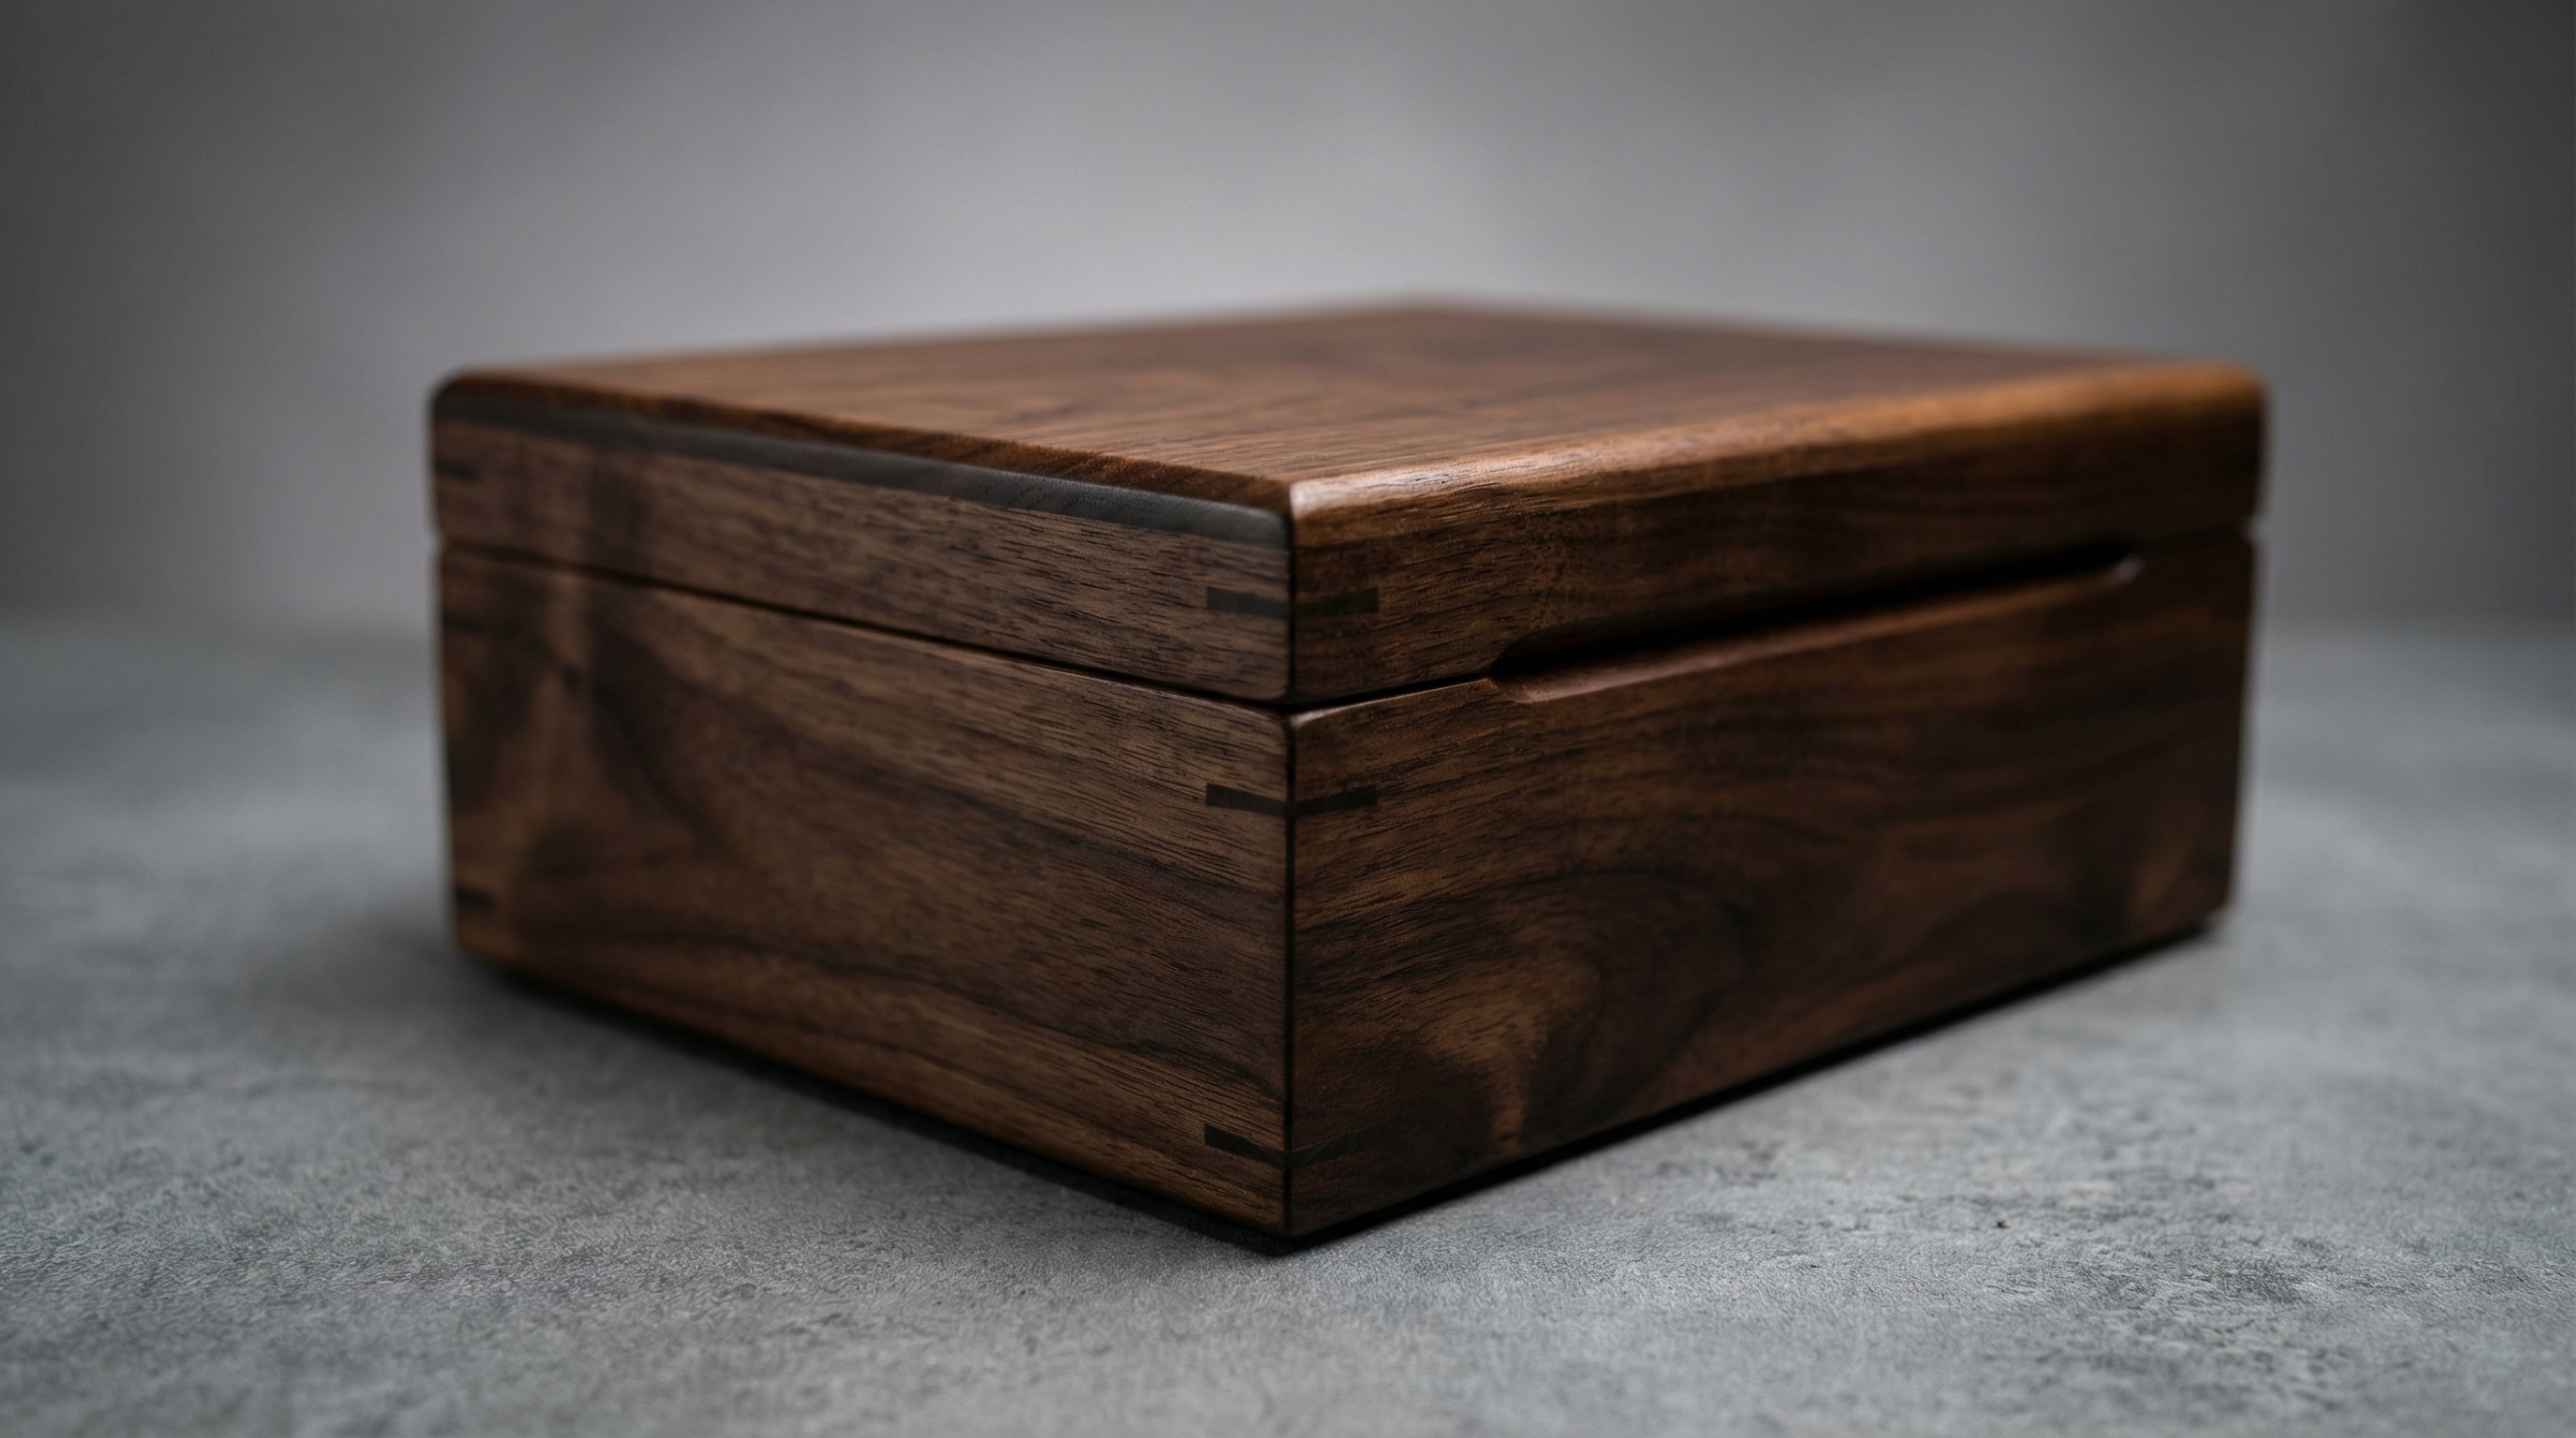
Applying a natural oil finish is the final step in how to make a small jewelry box out of wood. Oils penetrate the wood fibers to provide protection while significantly enhancing the natural color of the timber. This approach highlights the organic beauty of the wood without a plastic look.
Enhancing the wood grain
You will use a lint-free cloth to rub the oil into the wood, allowing it to soak in for several minutes. Here is the deal: a heavy varnish can often look like plastic and hide the unique character of your chosen hardwood. Buffing between thin coats results in a classic, breathable surface.
- Apply thin, multiple coats
- Buff between applications
- Allow to dry in a dust-free area
Key Takeaway: A hand-rubbed oil finish provides a classic, breathable protection that highlights the wood’s organic beauty.
| Finish Type | Appearance | Protection Level | |
|---|---|---|---|
| Tung Oil | Matte/Satin | Moderate | |
| Beeswax | Low Sheen | Light | |
| Polyurethane | Glossy | High |
Final aesthetics drive emotional appeal by highlighting the natural grain and providing a protective barrier against environmental wear.
Frequently Asked Questions
Can I make a jewelry box without power tools?Yes, it is entirely possible. You will need high-quality hand saws, chisels, and a lot of patience to achieve the same precision as power machinery.
What’s the best wood for a first-time project?Oak is generally the most forgiving choice. It is a sturdy hardwood that is widely available and hides minor mistakes well due to its prominent grain.
Can I use fabric other than velvet for the lining?Yes, you certainly can. Satin, silk, or even thin leather are excellent alternatives, provided they are non-abrasive to prevent scratching your jewelry.
What’s the best way to prevent the wood from warping?Acclimate your wood to your workshop’s environment for several days. This allows the moisture content to stabilize before you start cutting your joints.
Can I add a lock to my handmade box?Yes, small box locks are available at most hardware stores. You will need to use a sharp chisel to create a mortise for the lock mechanism to sit flush.
Building a custom box is more than a project; it is an investment in your jewelry’s future. For those looking to scale these concepts into professional collections or retail solutions, please contact us today . At YiXin Jewelry Packaging, we combine traditional craftsmanship with modern efficiency to create world-class display solutions for every jeweler.