You can make a watch box by selecting a sturdy wooden base, precision-cutting dividers, and lining the interior with premium velvet or skivertex paper. For the discerning professional or brand owner, the challenge often lies in finding a storage solution that balances logistical protection with a high-end aesthetic. Generic cases frequently fail to provide the exact fitment required for diverse timepiece dimensions, leading to unnecessary movement and potential surface damage during transit or display. Mastering the process of How to make a watch box allows you to bridge the gap between utility and luxury, ensuring every watch is showcased in a custom-engineered environment that reflects its true value.
What tools are needed for how to make a watch box?
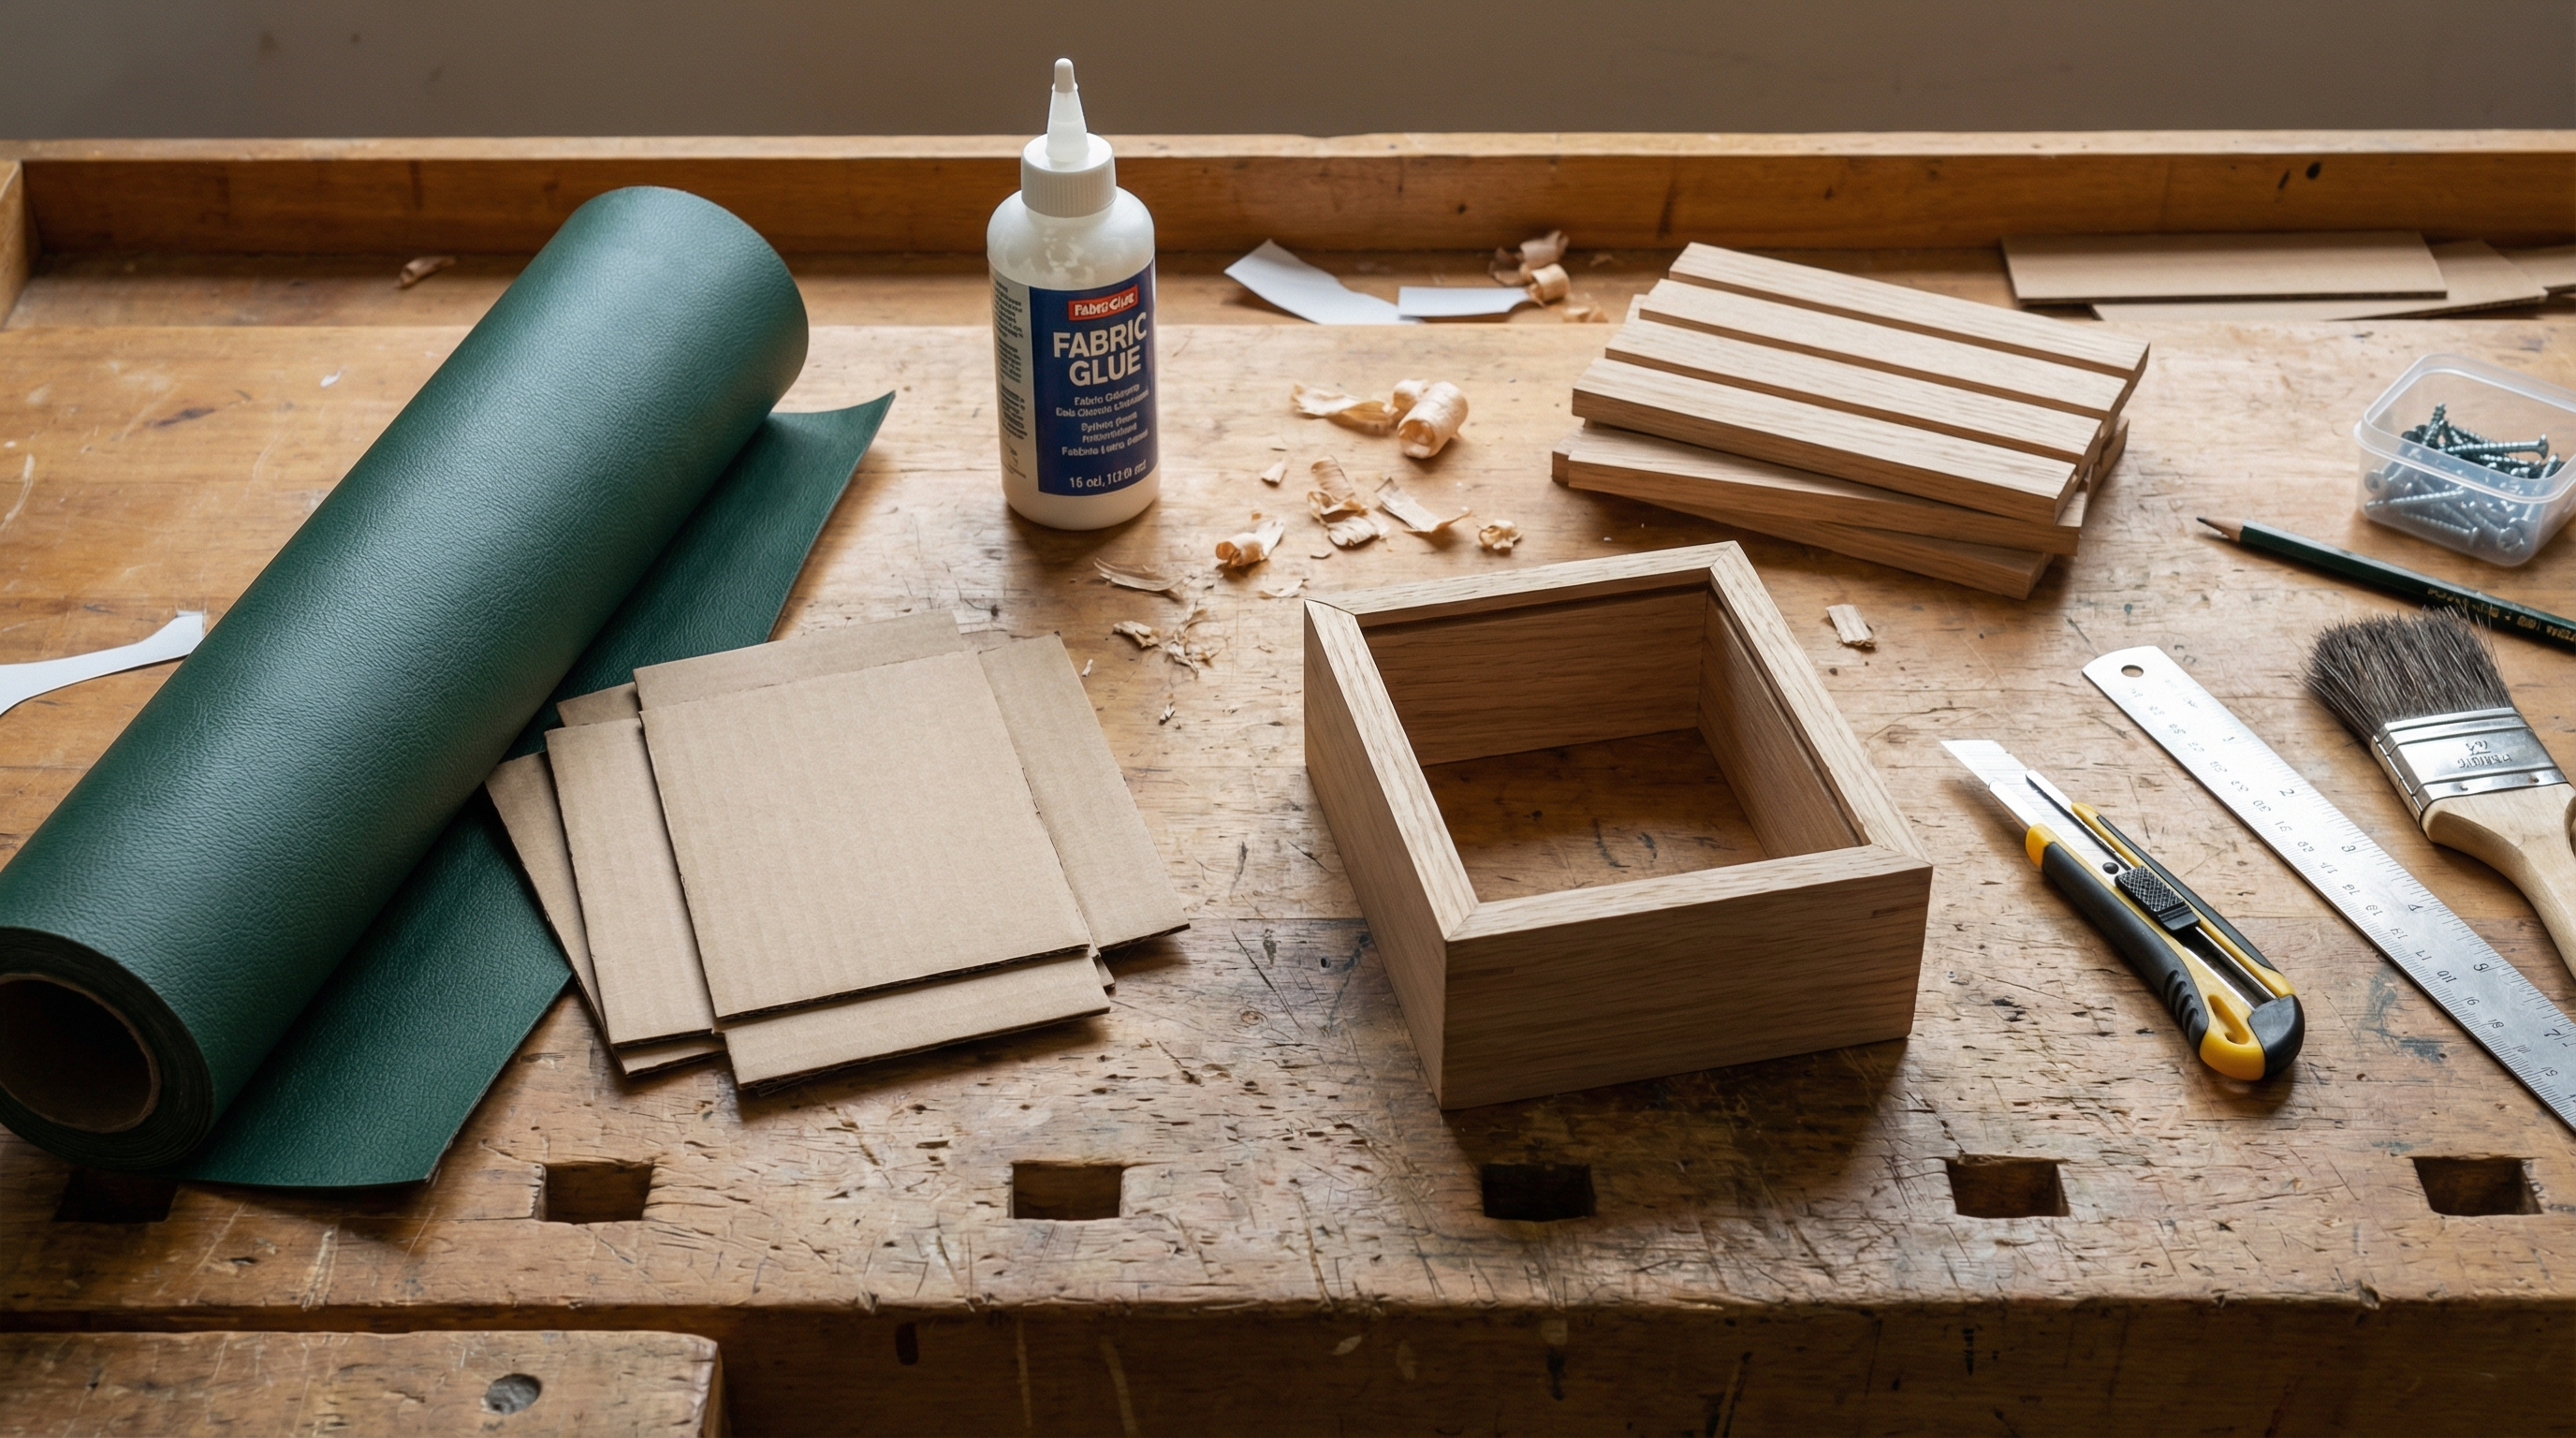
You require a specialized set of woodworking and bookbinding tools to ensure a retail-ready finish. When considering how to make a watch box, the quality of your output is directly dictated by the precision of your implements. Using professional-grade adhesives and sharp cutting blades prevents the frayed edges that often plague amateur DIY projects.
What are the essential hardware items?
You need to gather a wooden base, 2mm cardboard for structural dividers, and high-GSM decorative paper. Here is the kicker: selecting pH-neutral materials is vital to prevent the long-term oxidation of watch metals.
- Wooden outer shell (approx. 11x9x3 inches).
- Dense greyboard or chipboard for internal grids.
- Skivertex or faux leather paper for the exterior aesthetic.
- Premium velvet or suede for the interior touchpoints.
Which cutting tools ensure professional accuracy?
A heavy-duty utility knife and a stainless steel ruler are the foundation of your toolkit. But wait, there is more. A bone folder is also required to create crisp, professional creases in your lining materials.
Key Takeaway: High-quality input materials and sharp blades are non-negotiable for achieving a luxury-grade unboxing experience.
| Tool | Primary Function | B2B Standard | |
|---|---|---|---|
| Steel Ruler | Precise dimensional measurement | Metric/Imperial accuracy | |
| Utility Knife | Clean cardboard and paper cuts | Replaceable high-carbon blades | |
| Bone Folder | Smoothing and creasing liners | Natural bone or Teflon | |
| Fabric Glue | Permanent, wrinkle-free bonding | Non-toxic, quick-set |
The following chart outlines the foundational requirements for your initial production setup.
How to make a watch box with precise divider measurements?
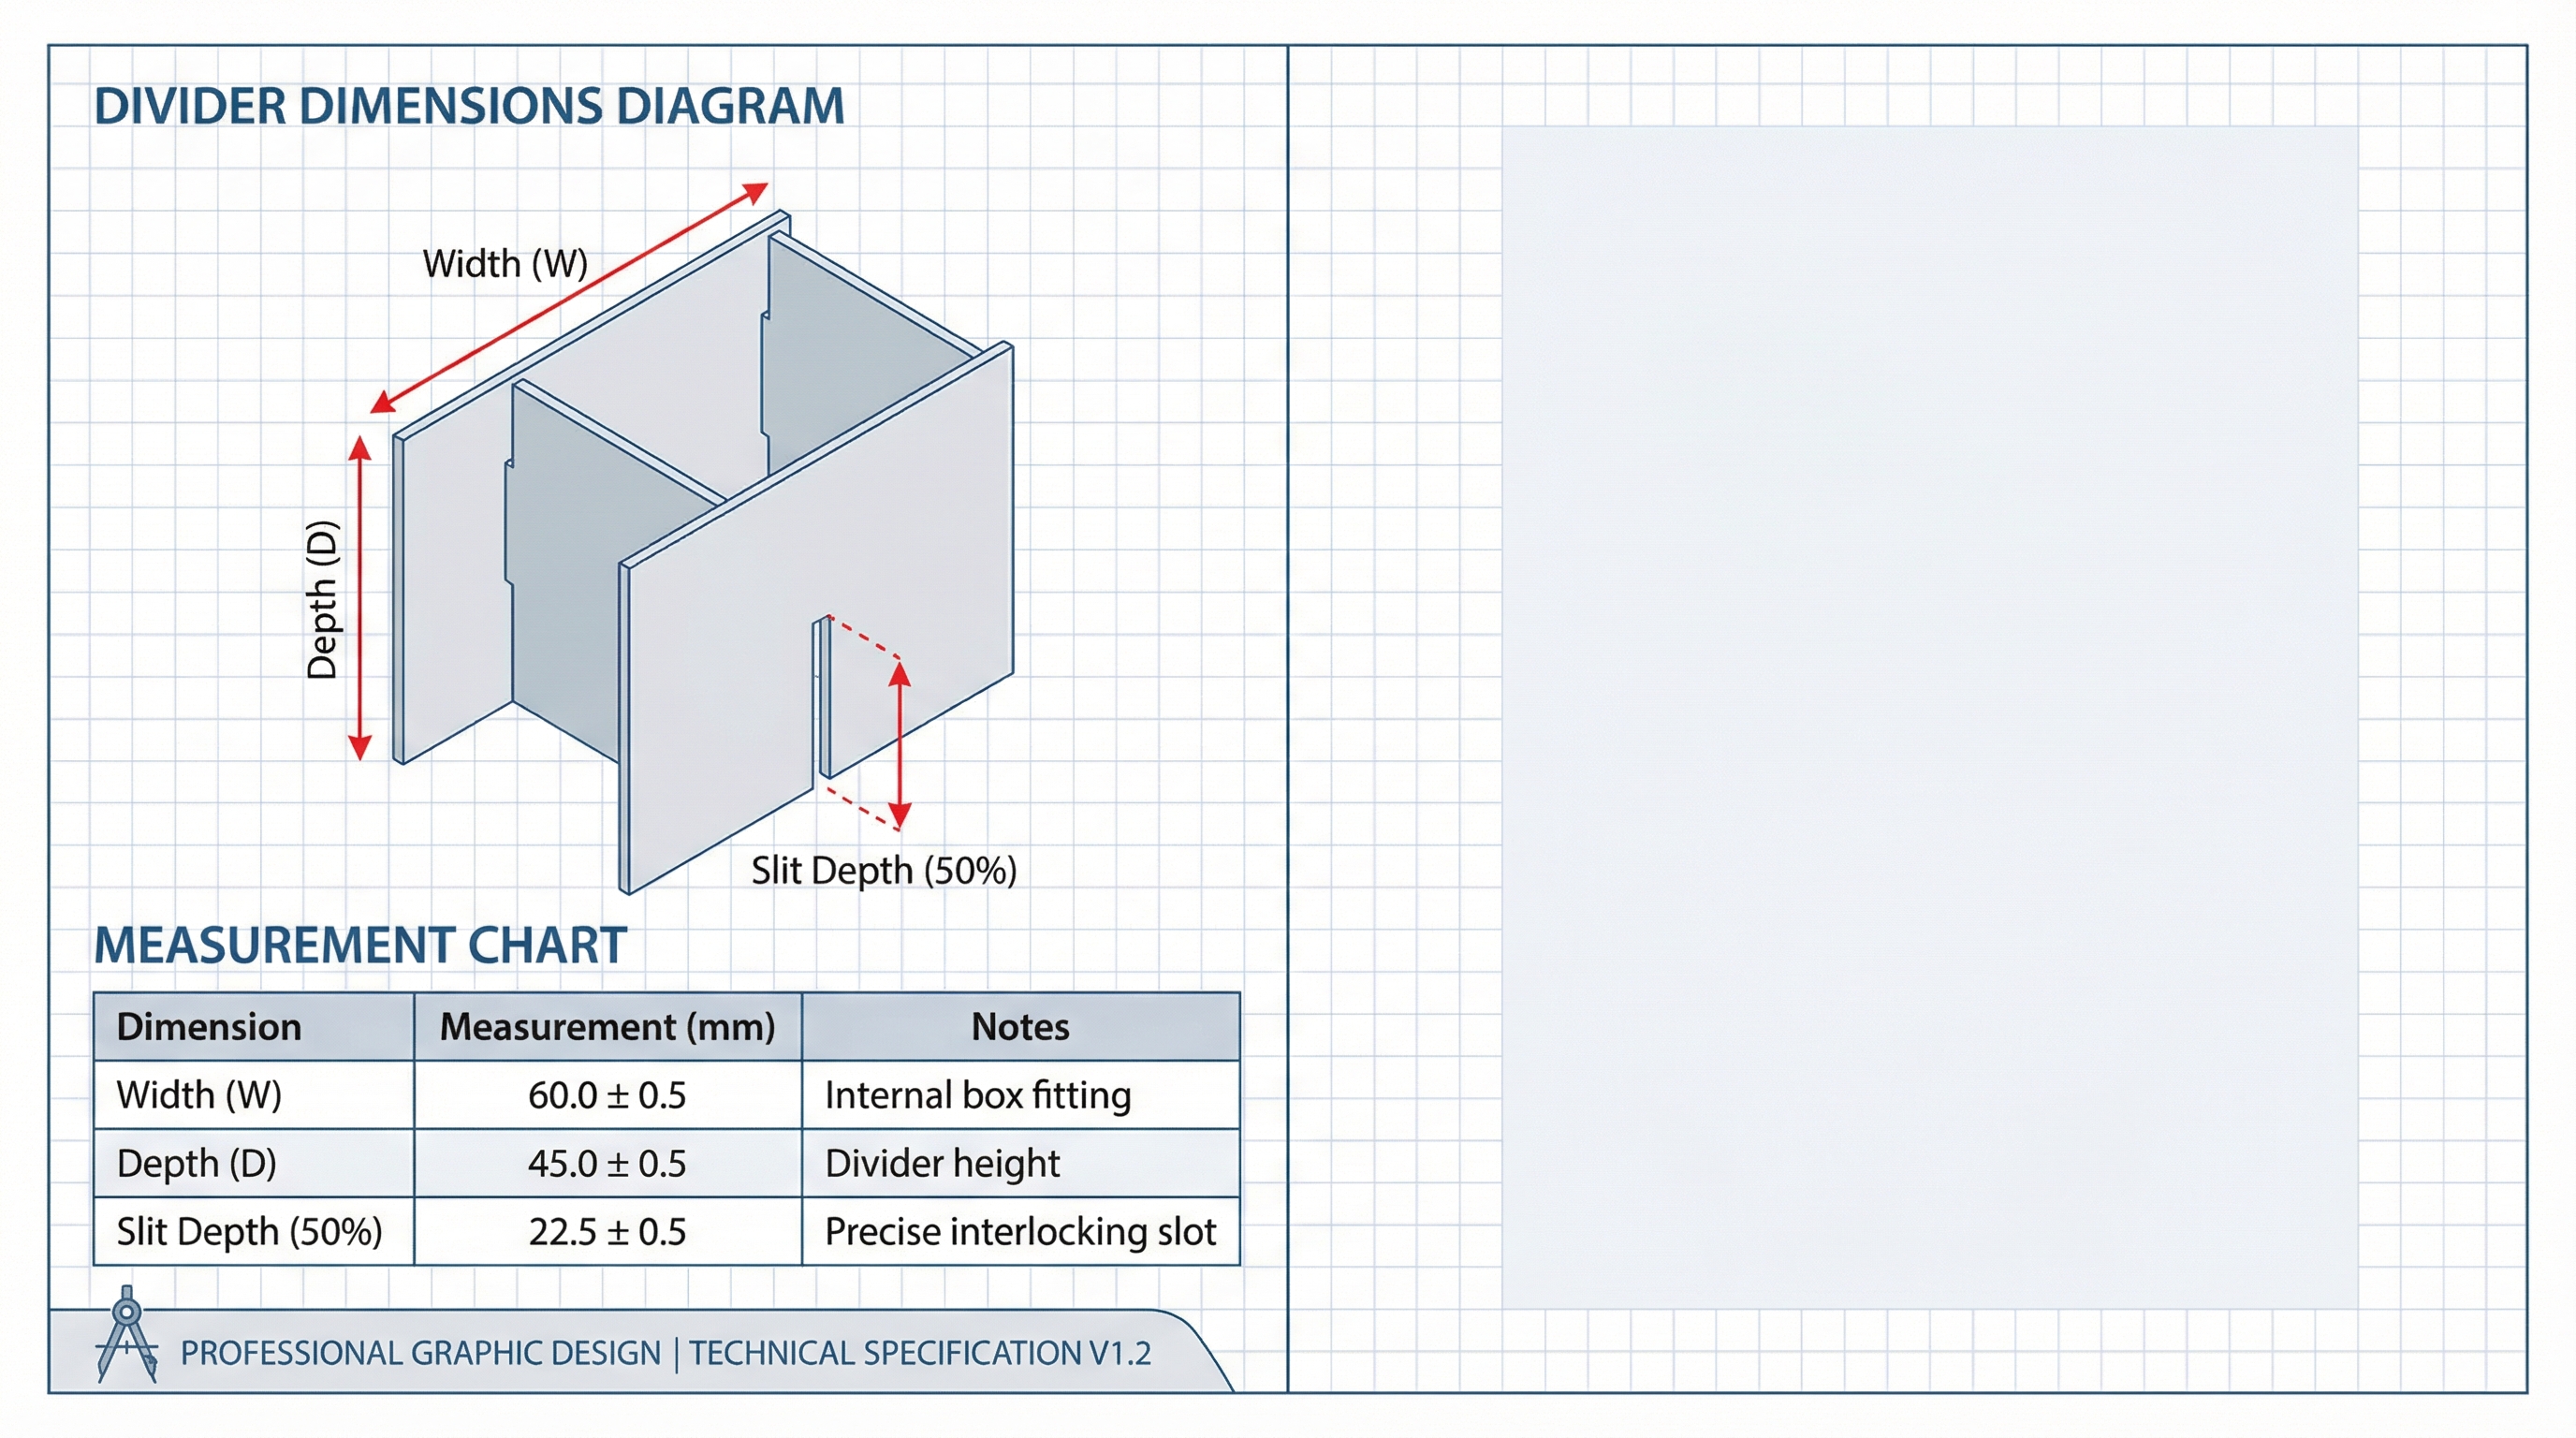
Calculations must account for the thickness of both the cardboard core and the surrounding decorative paper. To succeed in How to make a watch box , you must subtract approximately 2mm from each side of the internal box dimensions to allow the finished grid to slide in without bowing.
How to calculate individual slot sizes?
You should divide the total internal width and length by the number of desired compartments, usually aiming for a 3×3 grid in a standard box. You might be wondering: what is the ideal slot size? Typically, a 3-inch by 2.5-inch space accommodates most modern luxury watches including the crown.
Why is the half-slit method necessary?
This technique involves cutting slots exactly 50% through the height of your cardboard pieces so they interlock flush. But wait, there is more. If your slits are too wide, the grid will rattle; if too narrow, the cardboard will warp upon assembly.
- Measure the internal length and width.
- Mark slit locations at equal intervals.
- Execute vertical cuts to the 50% depth mark.
Key Takeaway: Accurate measurements prevent structural failure and ensure a seamless integration between the grid and the outer shell.
| Dimension | Calculation Rule | Tolerance | |
|---|---|---|---|
| Divider Length | Internal Box Length – 2mm | +/- 0.5mm | |
| Divider Height | Internal Box Depth – 5mm | +/- 0.5mm | |
| Slit Depth | 50% of Total Divider Height | Precision required |
The data above illustrates the technical tolerances required for a high-performance internal grid system.
How to make a watch box grid assembly for a snug fit?
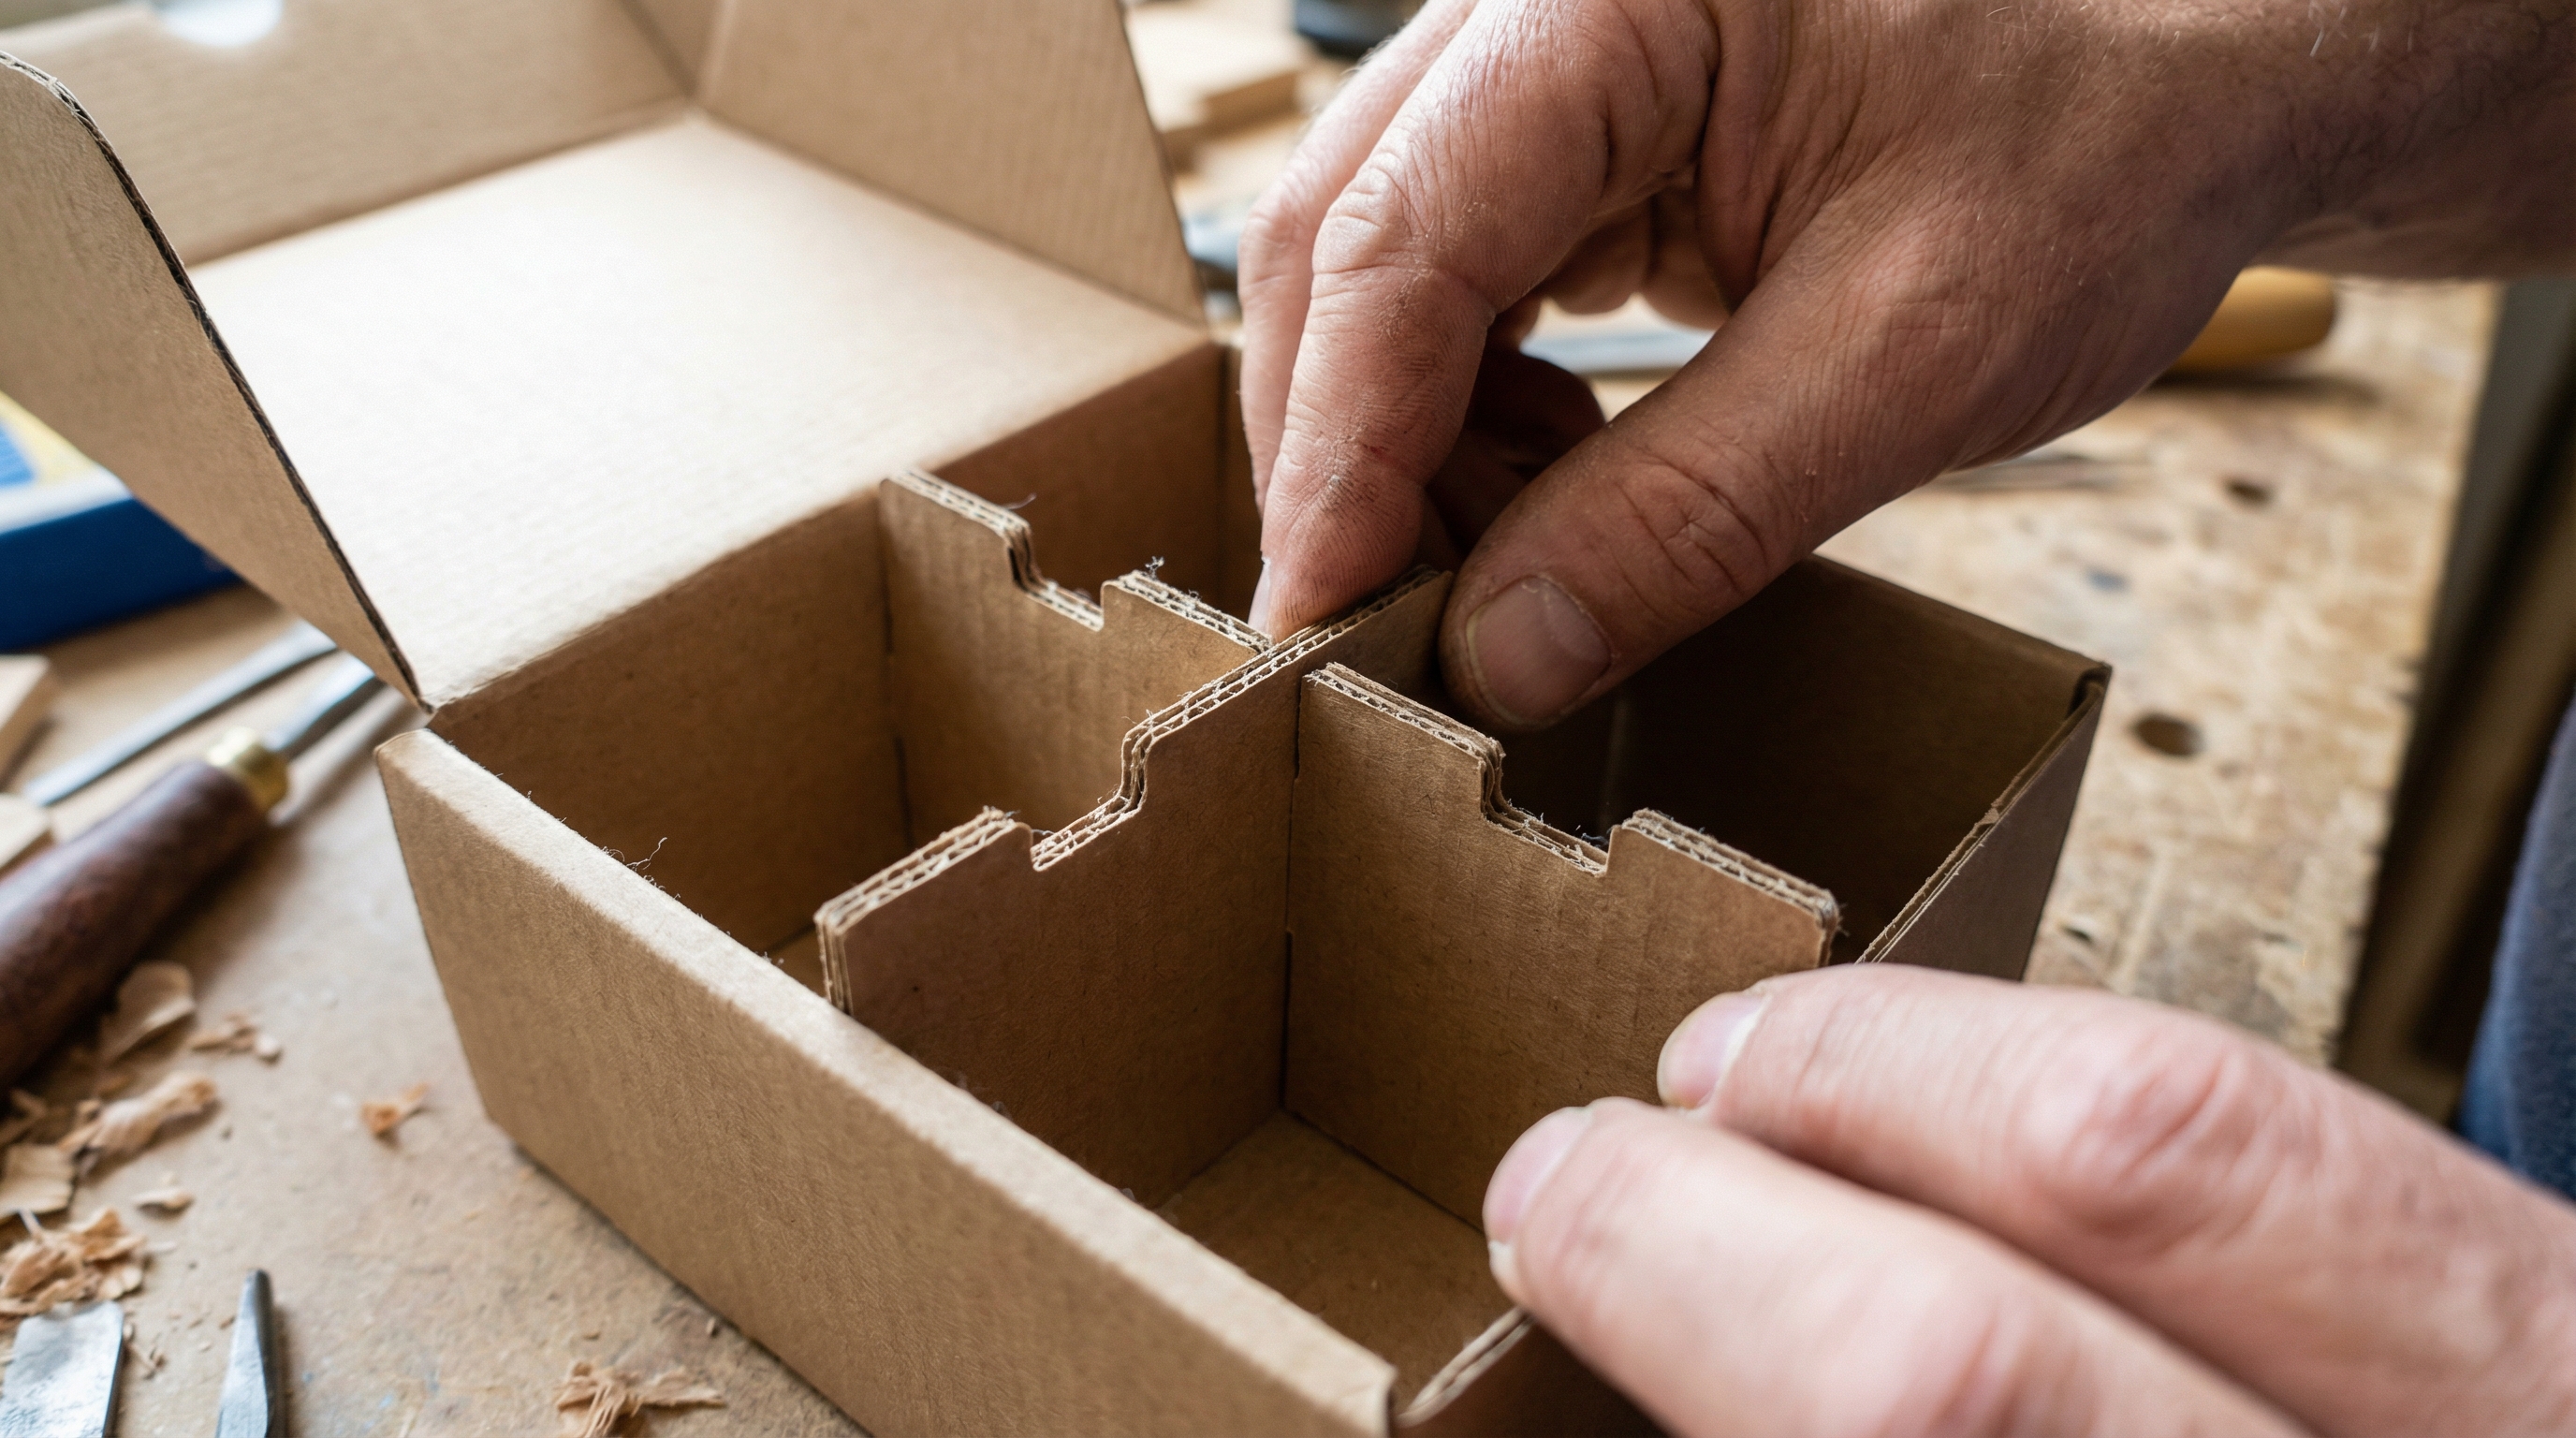
Assembly involves sliding the horizontal and vertical cardboard pieces together at their respective slit points to form a rigid matrix. This step in how to make a watch box is a critical quality control phase where you verify the structural integrity of your internal layout.
How to perform a dry fit test?
You must place the un-glued grid into the wooden box to check for clearance issues. Think about it: it is significantly easier to trim raw cardboard now than it is to adjust pieces that have already been wrapped in expensive skivertex.
- Align all horizontal pieces with vertical slits.
- Press firmly until the top edges are perfectly flush.
- Insert into the box to verify 90-degree corner alignment.
How to ensure the grid remains stable?
The interlocking nature of the slits should provide enough friction to hold the shape independently. The best part? A well-constructed grid actually reinforces the wooden walls of the box from the inside, adding to the overall durability of the unit.
Key Takeaway: A successful dry fit confirms that your mathematical calculations translate perfectly to the physical build.
| Fit Attribute | Desired Outcome | Action if Failed | |
|---|---|---|---|
| Corner Squareness | Perfect 90-degree angles | Re-cut misaligned slits | |
| Friction Level | Stays in place when inverted | Add shim or trim edges | |
| Top Alignment | All dividers at equal height | Sand or trim top edges |
Review these fitment criteria to ensure your grid meets the standards of professional horological storage.
How to make a watch box using skivertex paper wrapping?
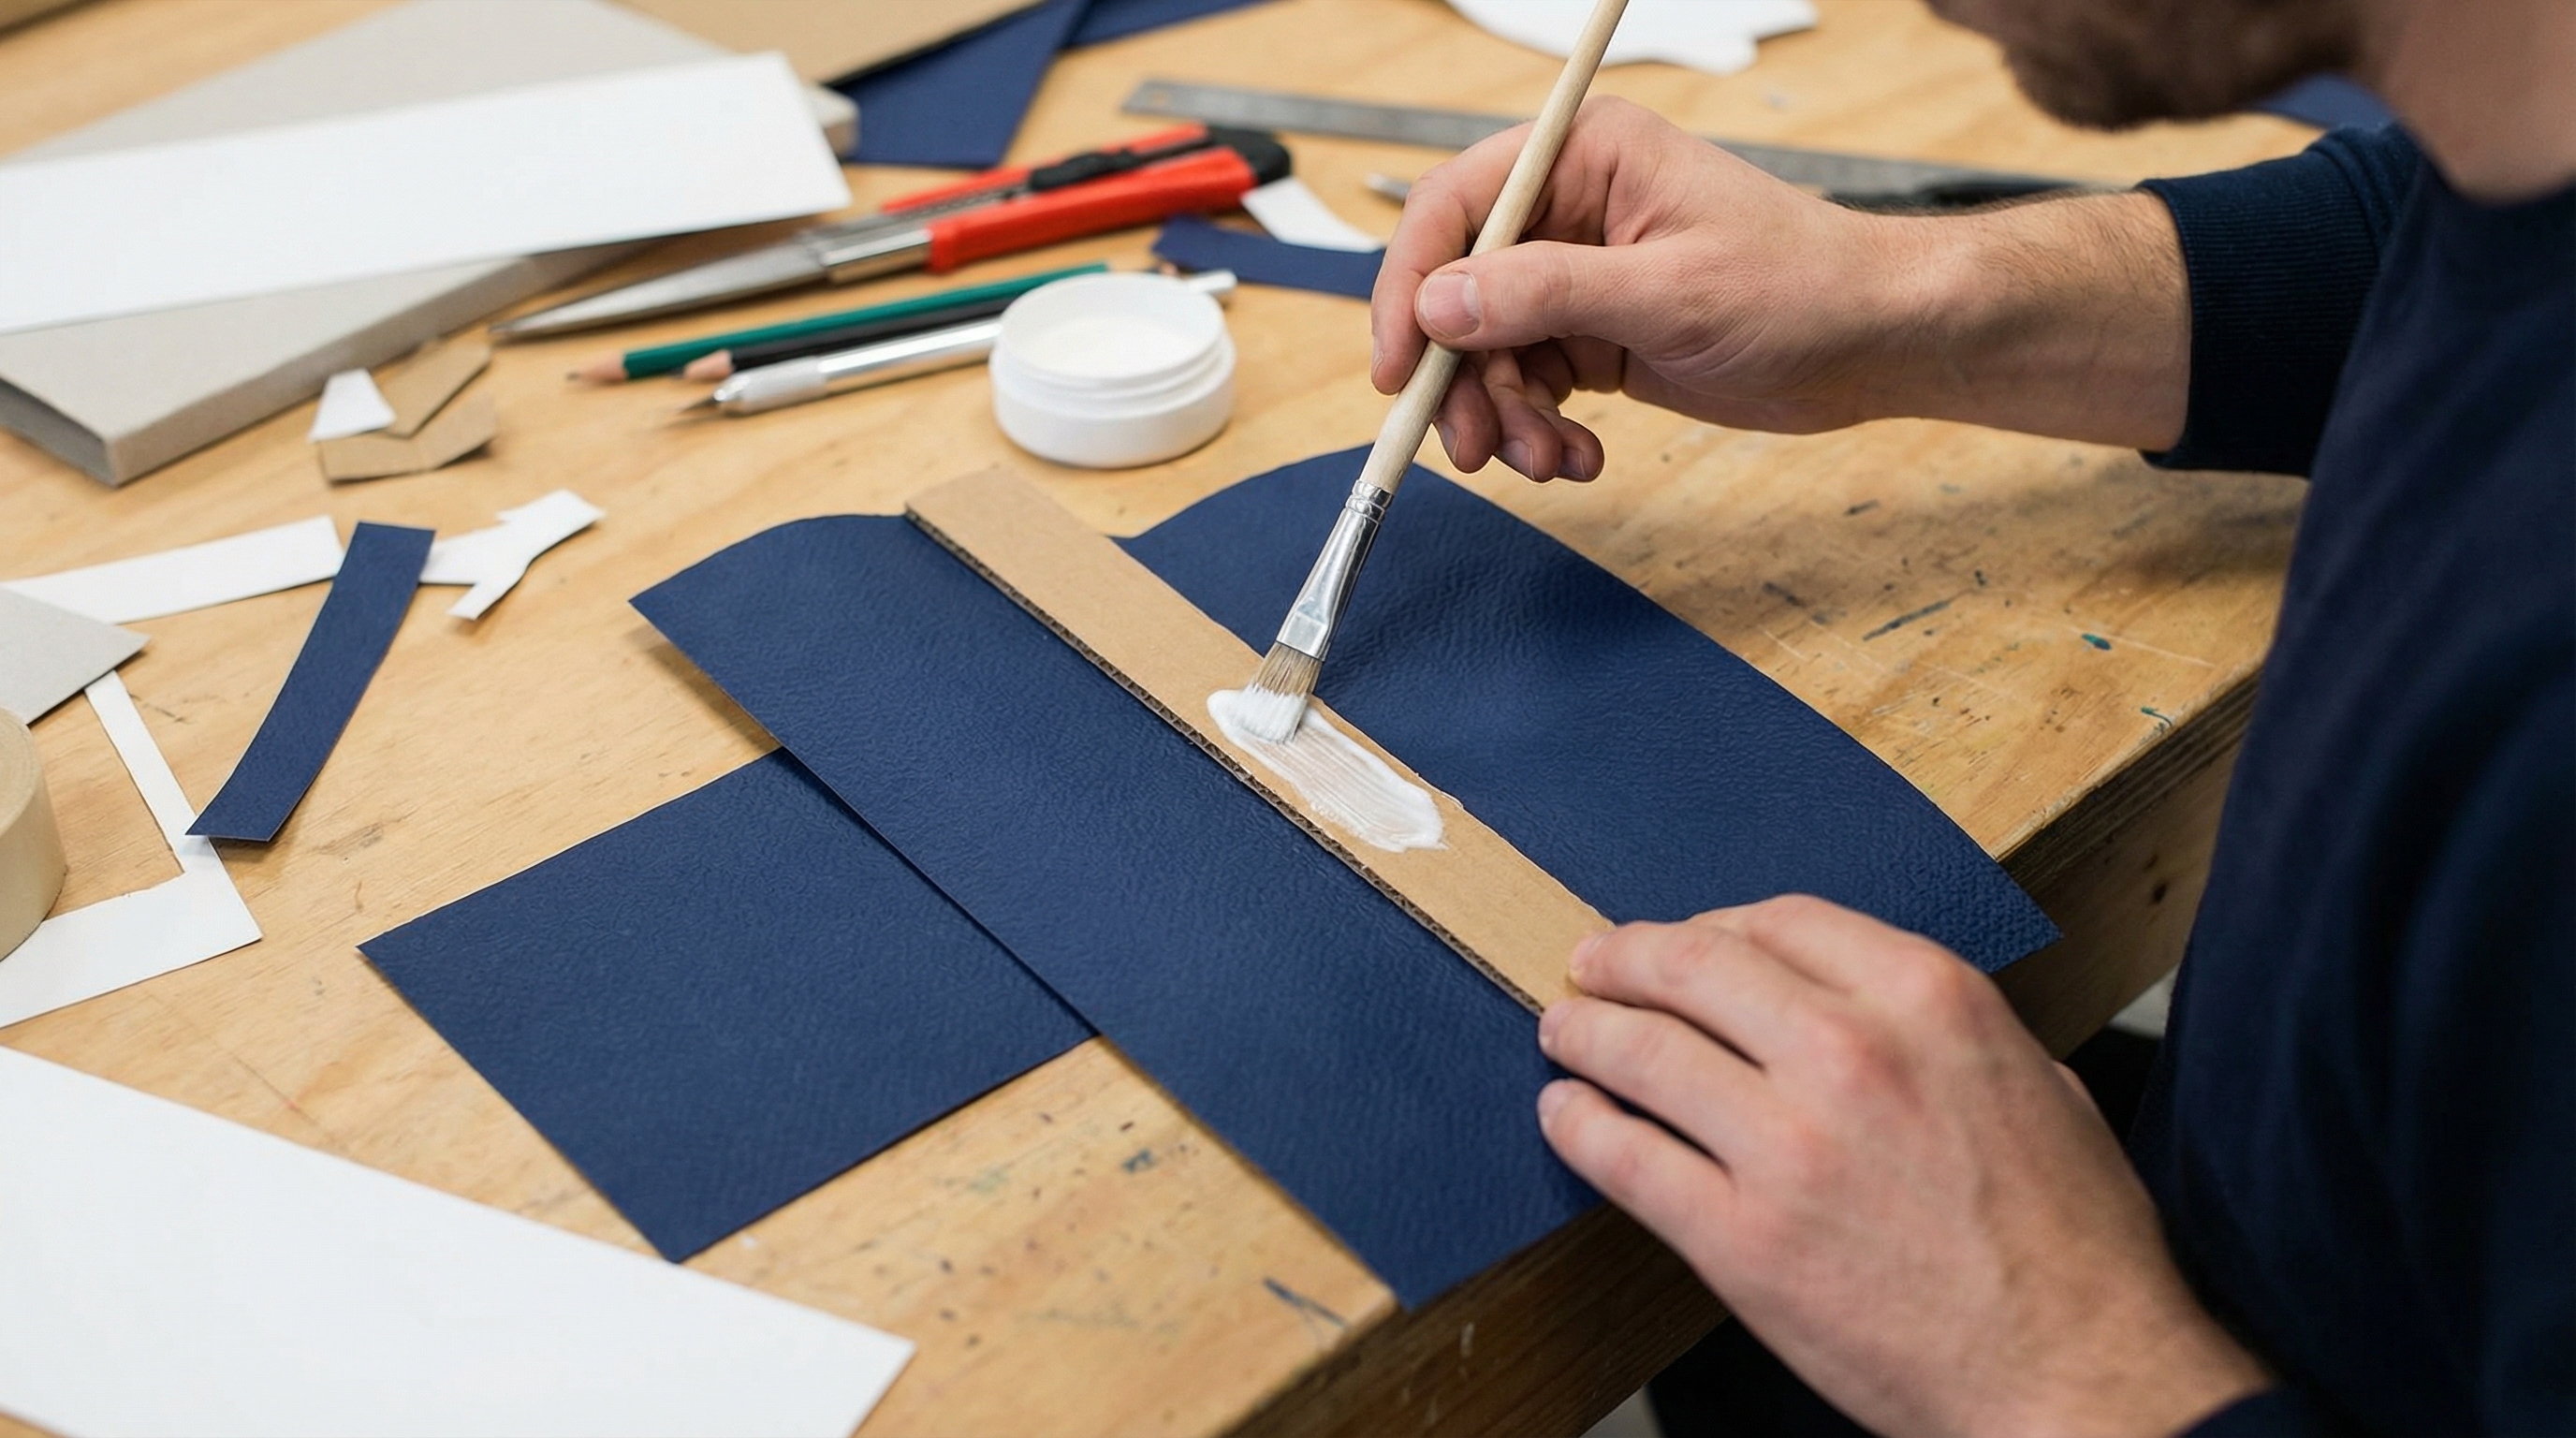
Wrapping your dividers in skivertex paper provides the leather-like texture and durability required for a B2B luxury product. When refining How to make a watch box , applying paper strips with a thin, even layer of adhesive ensures a smooth finish without unsightly air bubbles.
What is the best adhesive application?
You should use a fine-bristle brush to apply glue to the cardboard rather than the paper to prevent saturation and warping. Here is the secret: allow the glue to become slightly tacky before pressing the skivertex onto the surface for maximum immediate bond.
- Cut paper strips 1cm wider than the dividers.
- Apply glue evenly across the cardboard face.
- Wrap the paper over the top edge for a seamless look.
How to re-clear the assembly slits?
Once the paper is dried, you must use a fresh blade to carefully cut through the paper covering the original slits. You might be wondering: why not cut the paper first? Cutting after wrapping ensures the paper edges are perfectly aligned with the cardboard core.
Key Takeaway: Wrapping the top edge first hides all seams at the bottom of the box, creating a high-end retail appearance.
| Wrapping Step | Tool Needed | Professional Tip | |
|---|---|---|---|
| Surface Prep | Fine sandpaper | Remove cardboard burrs first | |
| Paper Positioning | Steel ruler | Keep grain direction consistent | |
| Corner Tucking | Precision tweezers | Avoid bulk in the slit area |
Applying these wrapping standards will elevate the internal components from raw materials to luxury components.
What lining techniques apply to how to make a watch box?
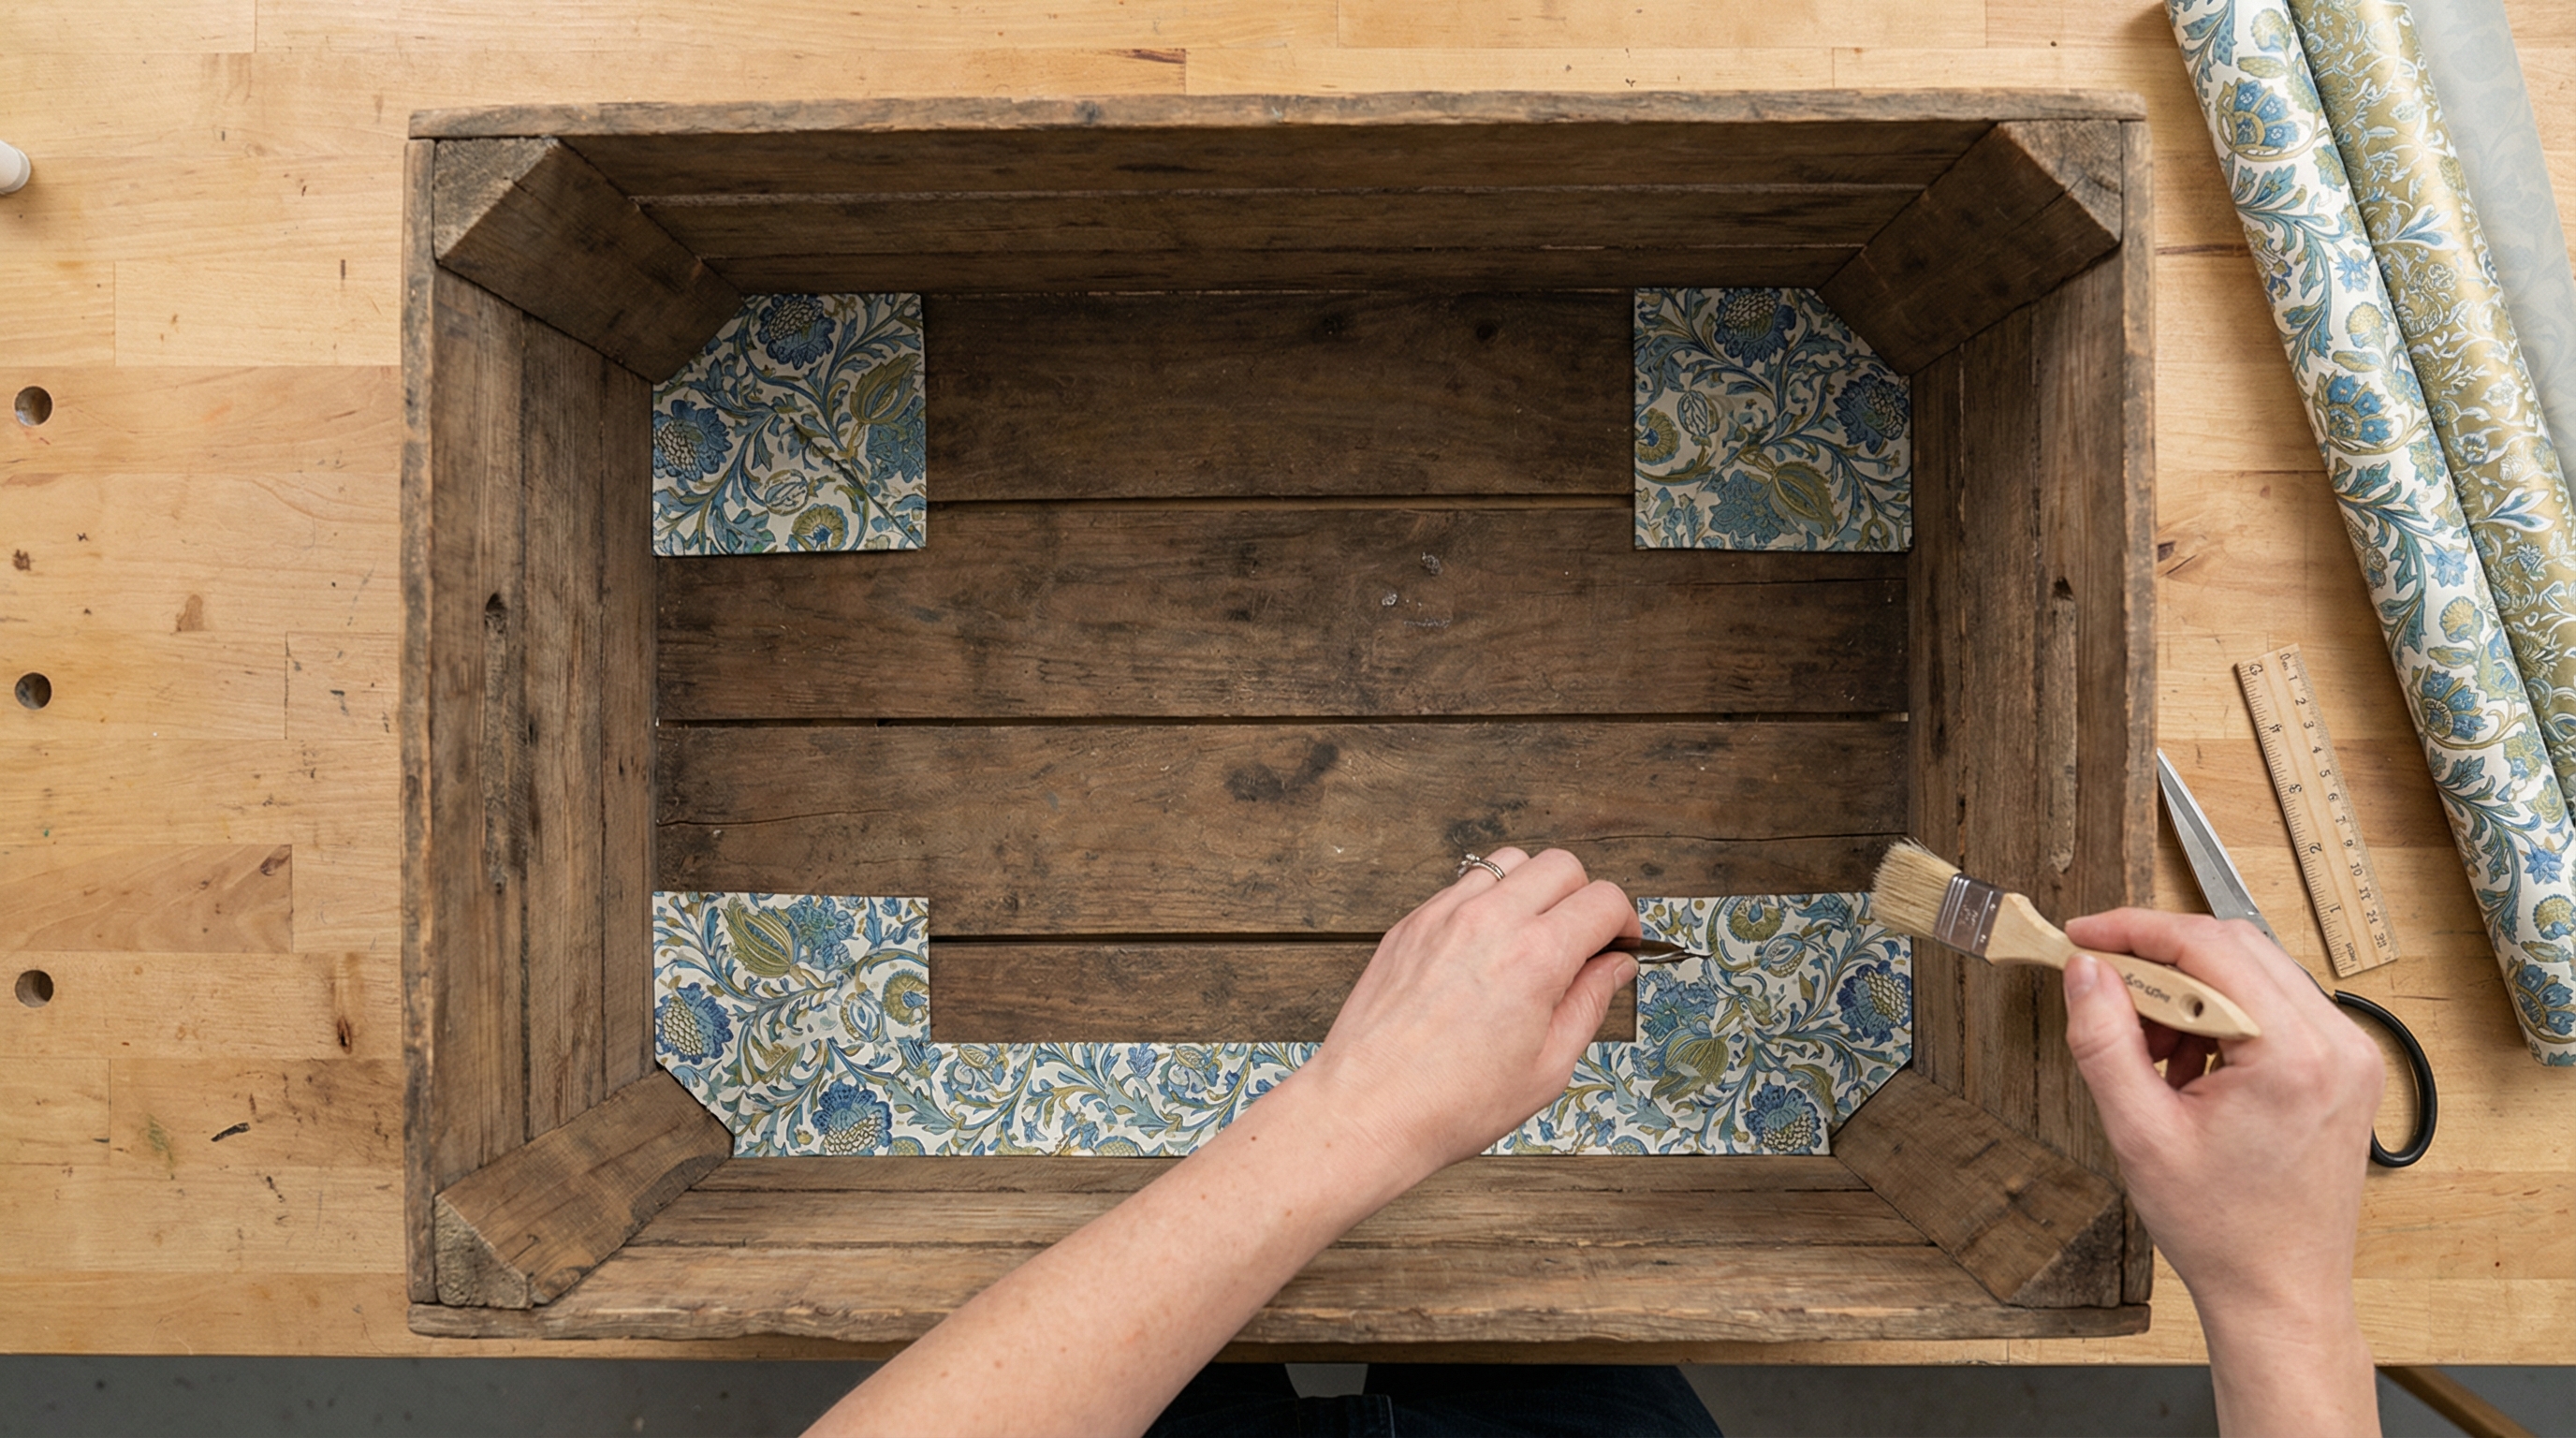
The internal lining should be constructed from a single template that covers the bottom and all four side walls. In the process of how to make a watch box, including “corner flaps” in your template drawing is the secret to ensuring no raw wood is visible at the seams.
How to draft a seamless lining template?
You should trace the bottom of the box and then extend the lines outward to match the height of the interior walls. It gets even better: by adding 1cm tabs to the side sections, you create an overlap that locks the corners into a clean, professional finish.
- Trace box floor dimensions as the center point.
- Draw side walls matching the interior depth.
- Add corner flaps for 100% wood coverage.
Why is paper grain direction important?
Decorative papers often have a grain that should run parallel to the longest side of the box for visual harmony. What is the bottom line? Ignoring grain direction can lead to uneven light reflection and makes the paper harder to fold cleanly.
Key Takeaway: A comprehensive template with built-in flaps eliminates the need for multiple small patches, reducing visible seams.
| Template Section | Purpose | Material Allowance | |
|---|---|---|---|
| Floor Panel | Bases the interior aesthetic | Exact fit to wood floor | |
| Wall Panels | Covers vertical surfaces | Height – 1mm for clearance | |
| Corner Flaps | Seals joints and prevents gaps | 10mm width recommended |
These template components are essential for creating a “chamber” effect within the wooden shell.
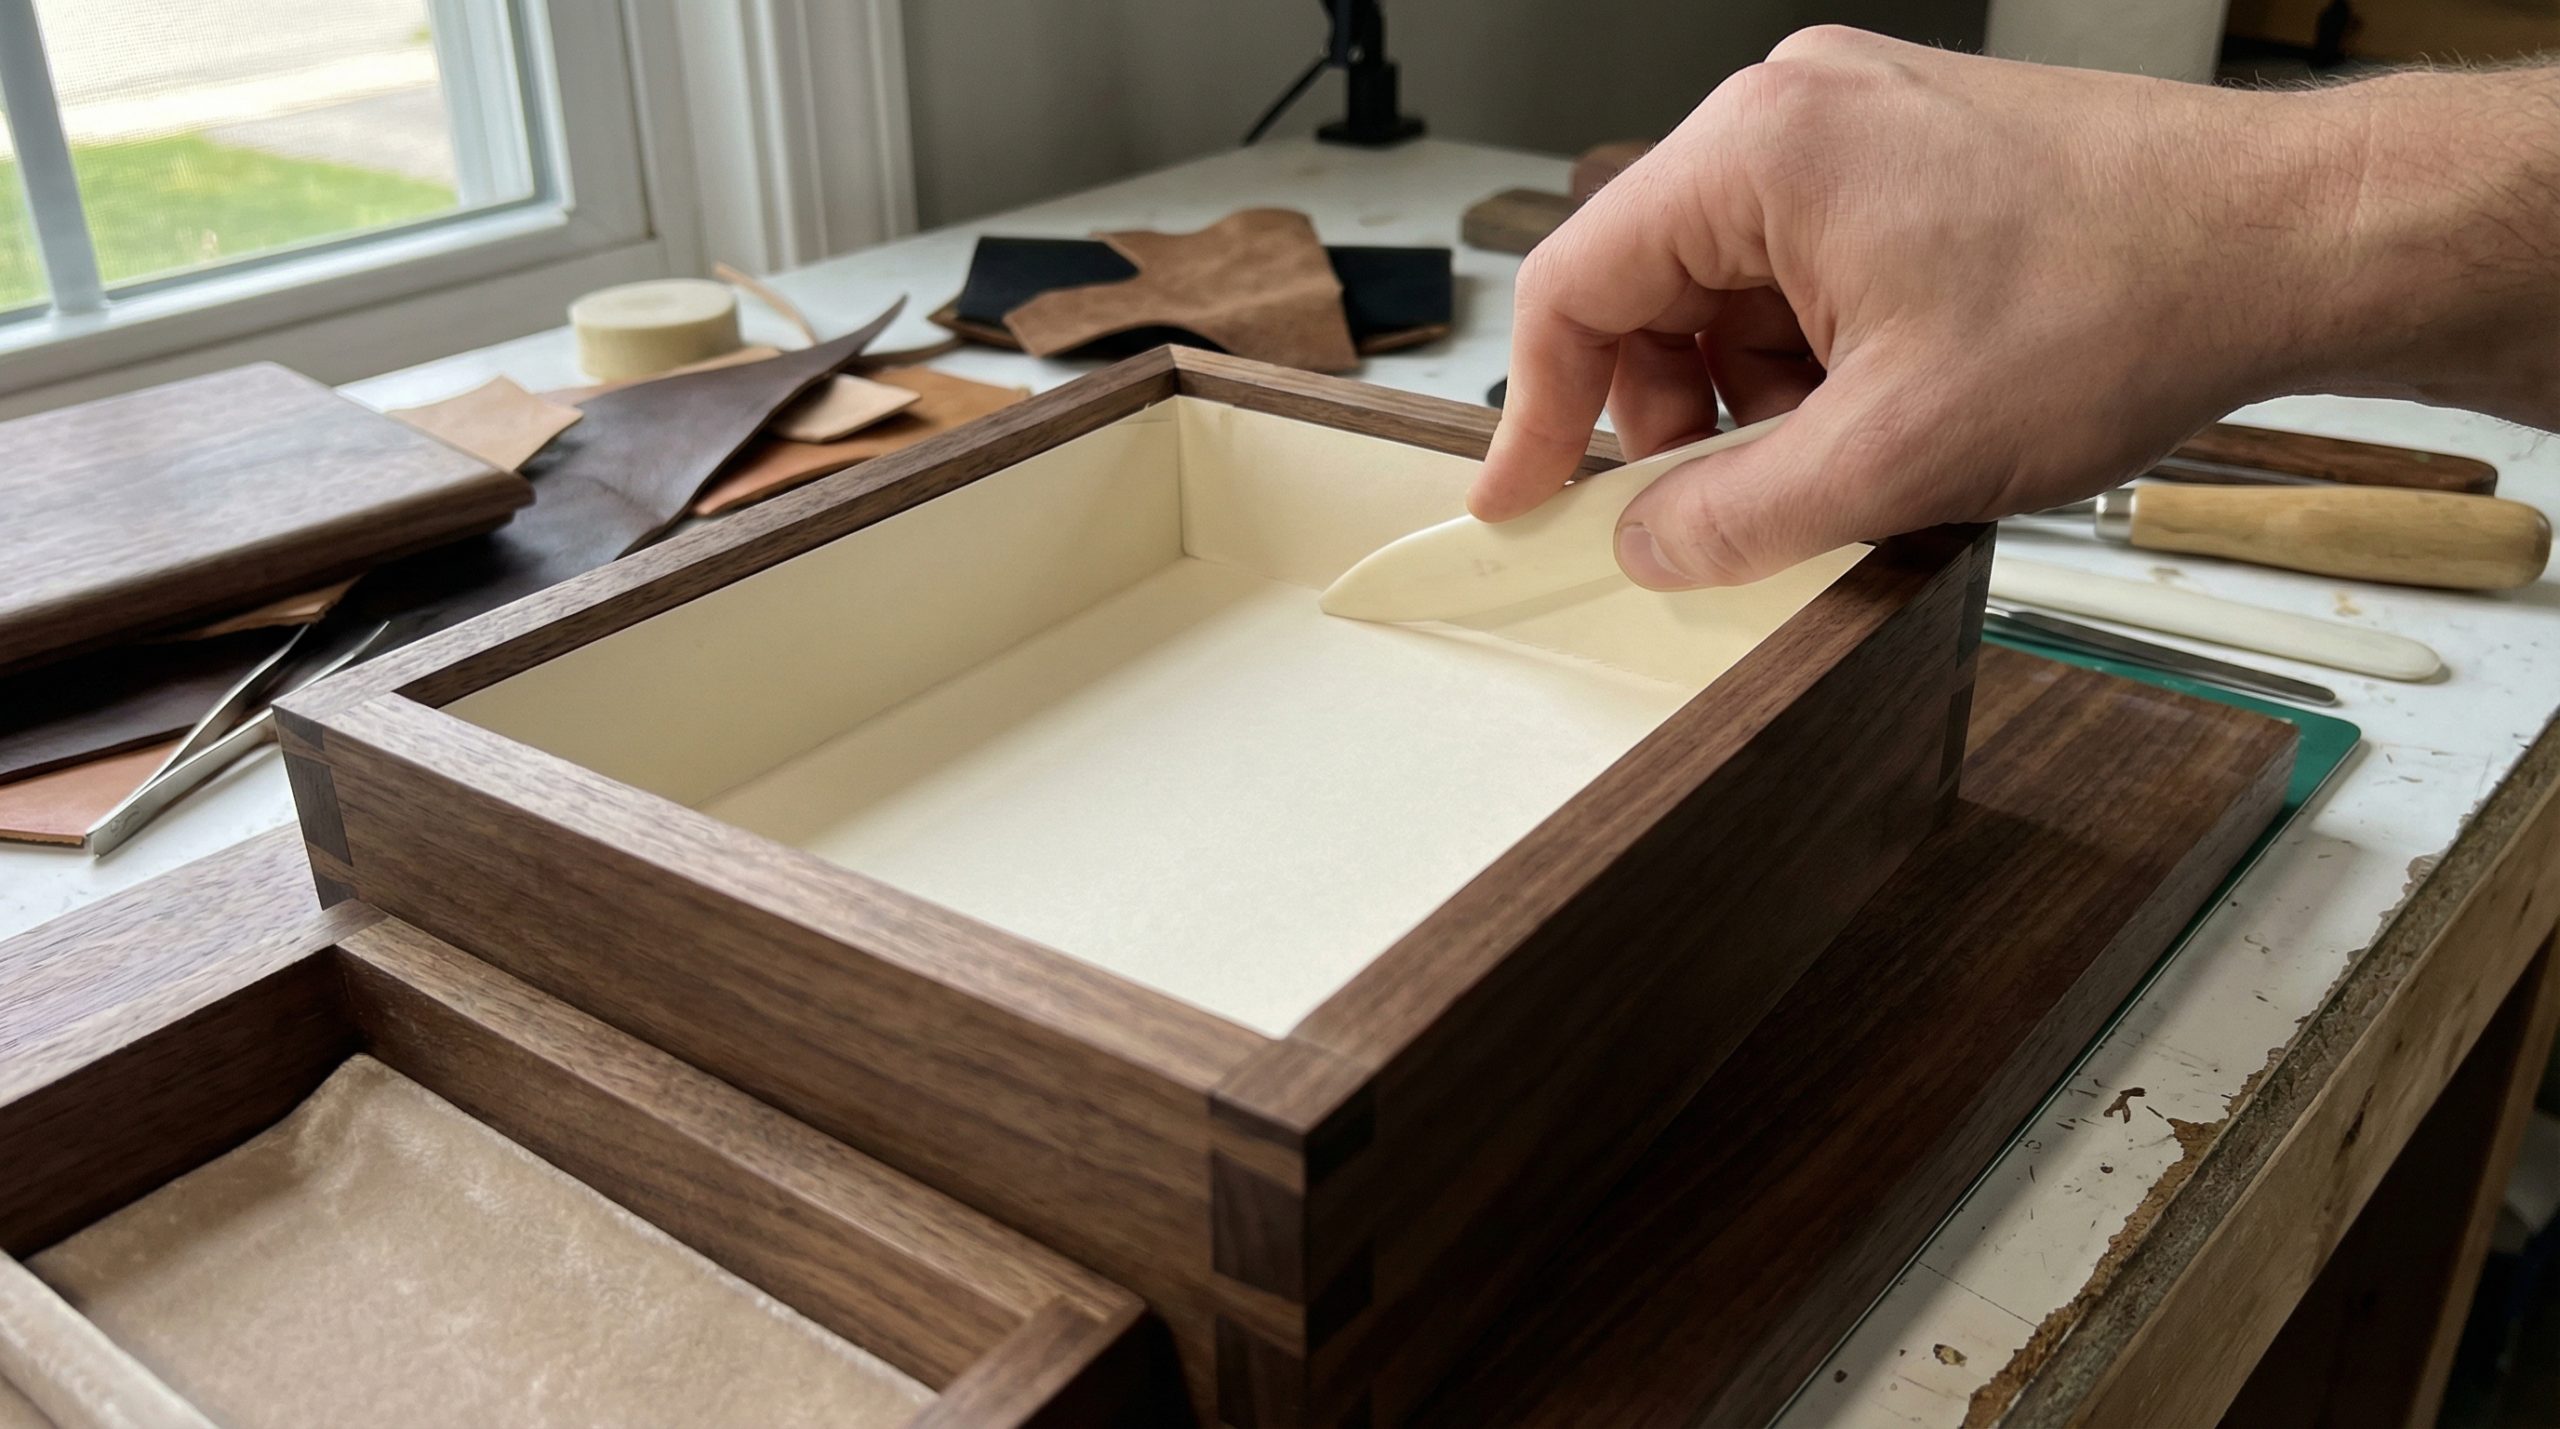
How to make a watch box with a professional bone folder?

A bone folder allows you to press the lining paper into the corners without tearing the material or leaving greasy fingerprints. When perfecting How to make a watch box , using this tool ensures that the adhesive bonds perfectly across the entire surface area of the interior.
How to eliminate air pockets effectively?
You should start from the center of the bottom panel and work the bone folder toward the edges in a “star” pattern. You might be wondering: can I just use my hands? Fingers often fail to reach the deepest crevices of the corners, leading to loose lining that may peel over time.
What is the correct pressure for corners?
Apply firm, steady pressure with the tip of the tool to “lock” the paper into the 90-degree angle where the wall meets the floor. But wait, there is more. Using the flat edge of the tool on the side walls prevents the “stretching” effect that can occur with high-moisture glues.
- Press from the center outwards.
- Use the pointed tip for deep corners.
- Run the flat edge along the rim for a crisp finish.
Key Takeaway: The bone folder is the difference between a “hand-made” look and a “factory-finished” professional product.
| Technique | Goal | Tool Surface | |
|---|---|---|---|
| Smoothing | Remove air and excess glue | Flat side of folder | |
| Creasing | Define sharp 90-degree bends | Narrow tip | |
| Burnishing | Enhance paper luster/bond | Side edge |
Mastering these tool-specific techniques ensures your lining remains taut and durable for years of use.
Can velvet enhance how to make a watch box lid design?
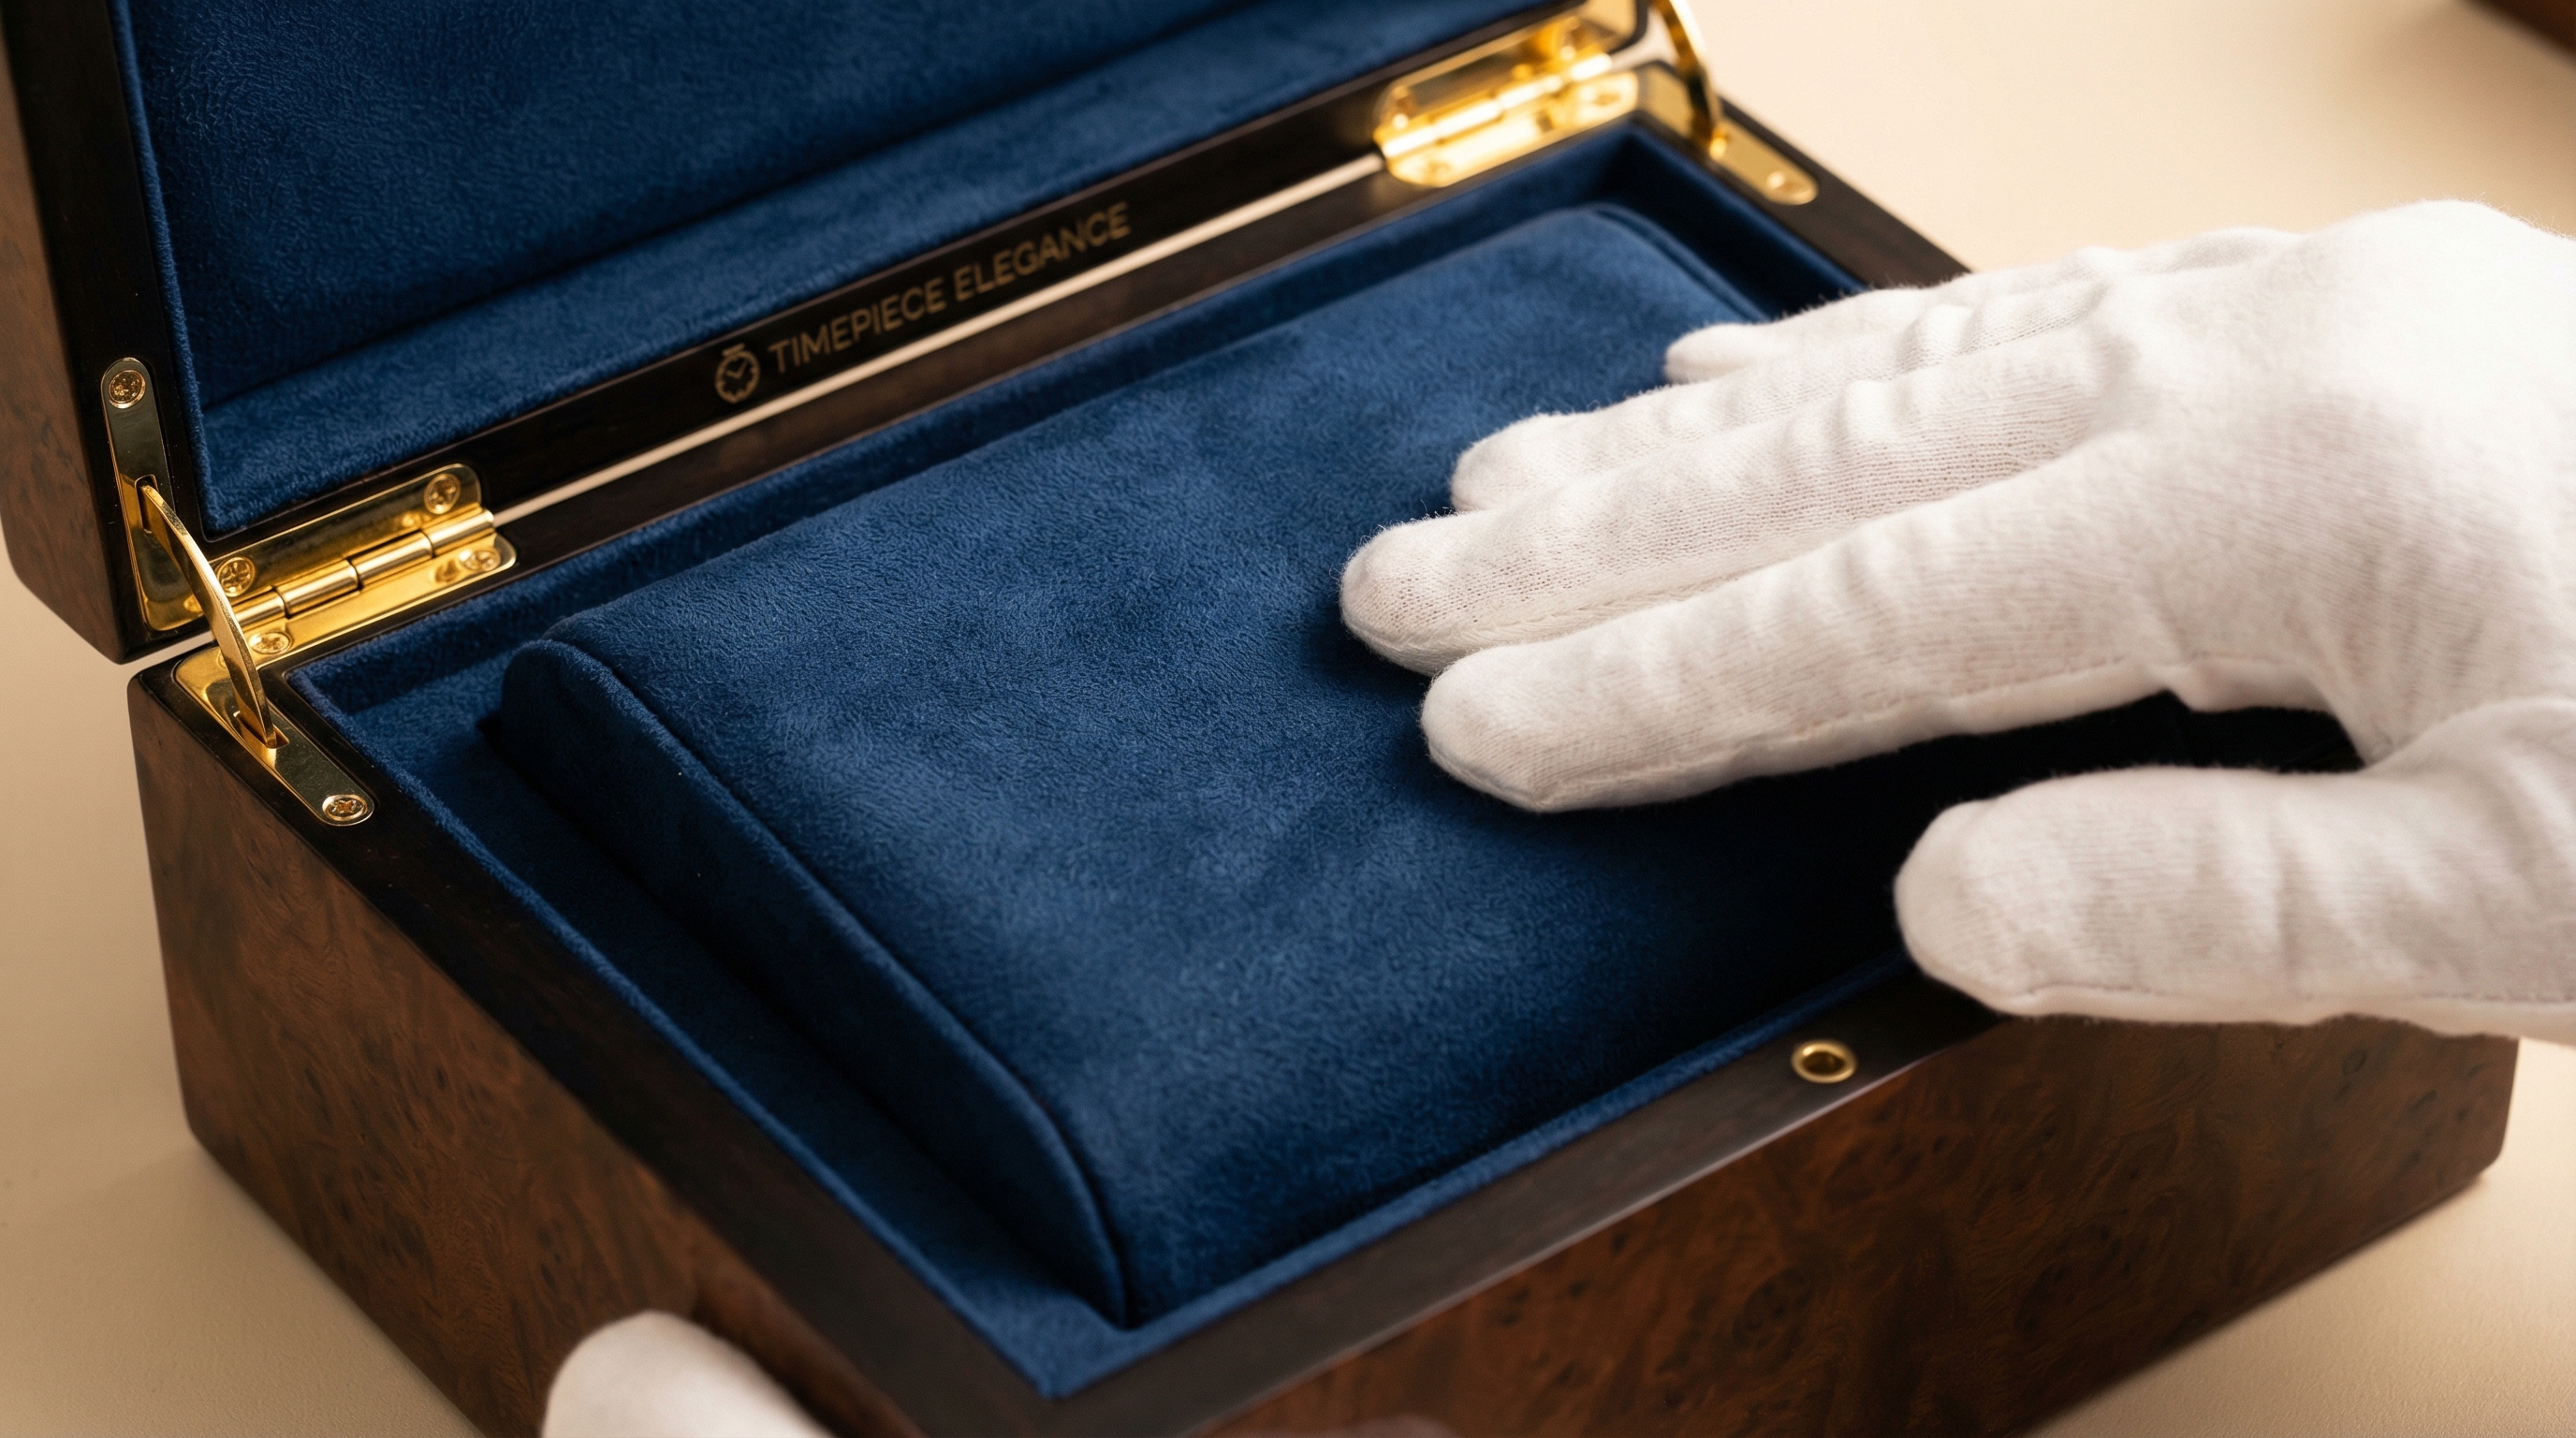
Lining the lid with velvet provides a soft buffer for the watch crystals and adds a significant layer of luxury to the unboxing experience. Incorporating premium fabric into how to make a watch box hides any exposed hinges or hardware, creating a unified interior aesthetic.
How to install a lid insert?
You should cut a piece of card slightly smaller than the lid’s interior, wrap it in velvet, and then glue the entire assembly into place. The best part? This “panel” approach allows you to emboss a brand logo or a personalized message onto the lid before installation.
- Measure the lid recess carefully.
- Wrap a thin card insert with velvet.
- Secure with high-tack adhesive.
Why choose velvet over paper for the lid?
Velvet offers superior shock absorption and prevents the “clatter” sound when the box is moved. Think about it: the lid is the first thing a customer or collector sees when they open the box, making it the most valuable real estate for brand impact.
Key Takeaway: A padded lid insert protects delicate watch faces while significantly increasing the perceived market value of the box.
| Material Choice | Benefit | Aesthetic Impact | |
|---|---|---|---|
| Silk Velvet | Extreme softness | High-gloss luxury | |
| Crushed Velvet | Texture and depth | Modern/Artisanal | |
| Suede/Microfiber | Durability | Professional/Minimalist |
Choosing the right lid material is a strategic decision that defines the brand’s position in the market.
How to make a watch box structure using specialized adhesive?
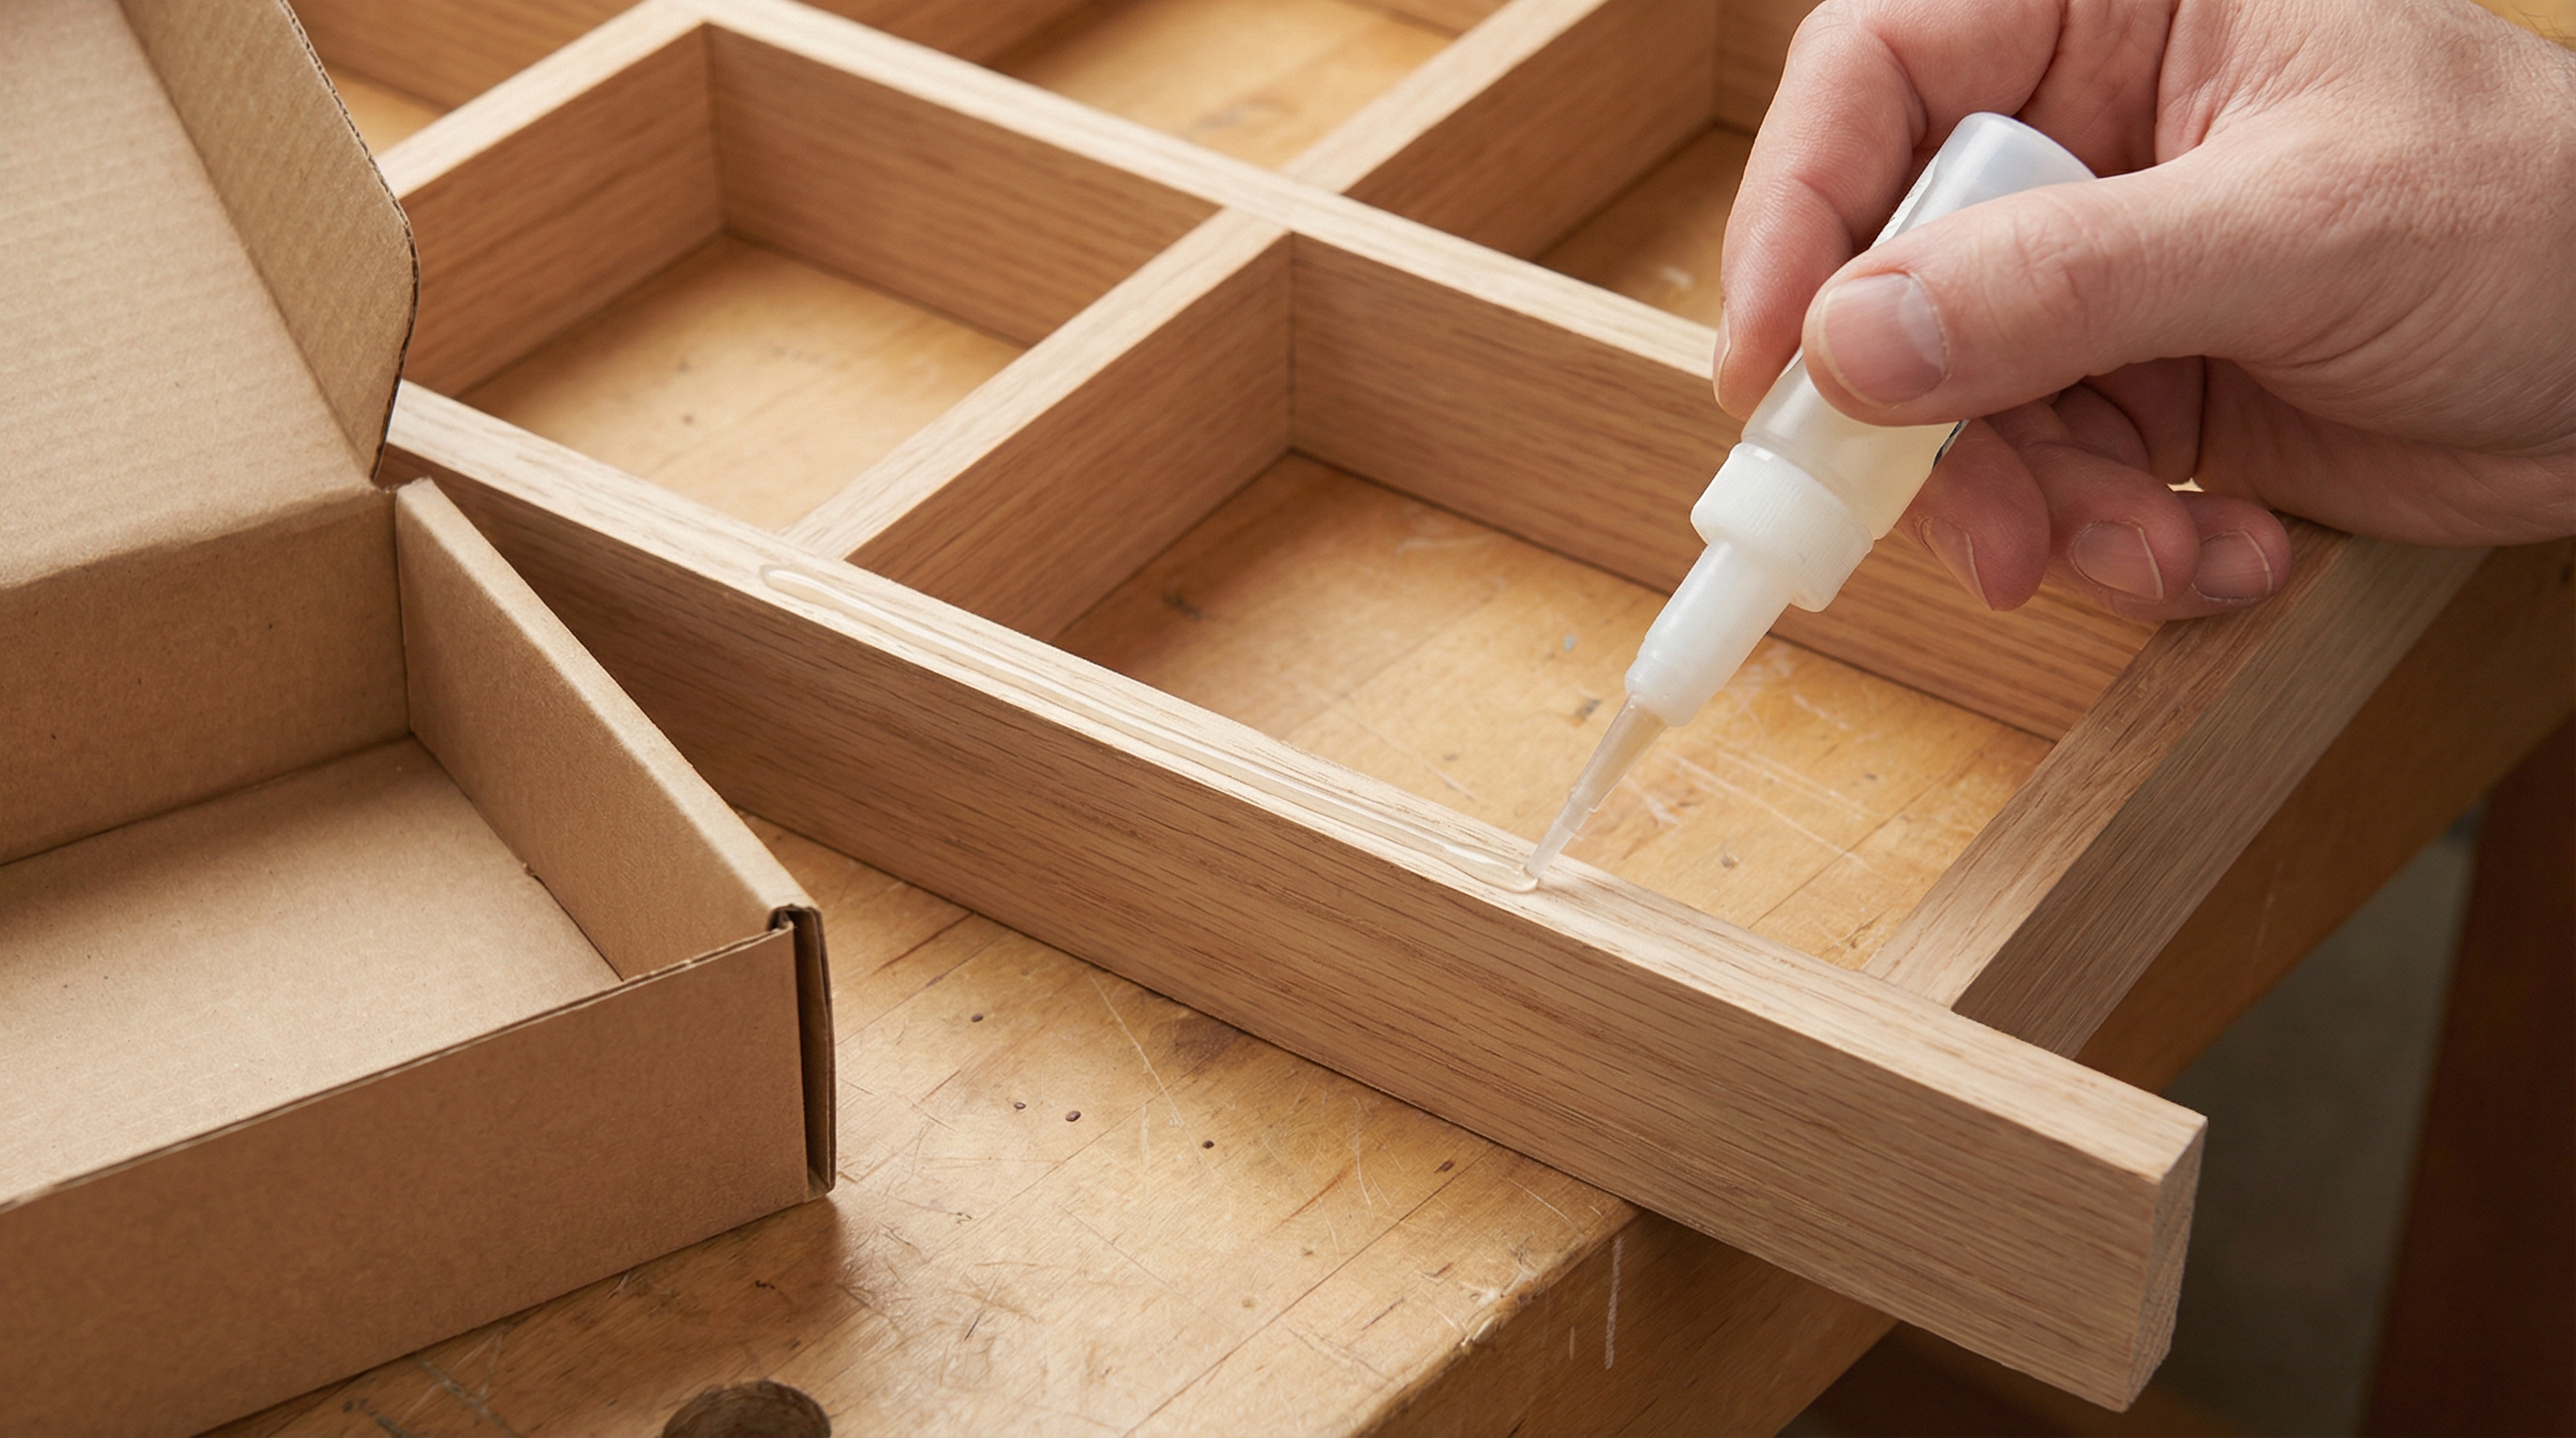
Secure the internal grid by applying a thin bead of specialized adhesive to the bottom and side edges of the dividers. For those utilizing How to make a watch box techniques for commercial retail, using a fast-setting but flexible glue prevents the grid from shifting during rough shipping conditions.
How to avoid glue squeeze-out?
You should apply the adhesive in a “dashed” line rather than a continuous thick bead to allow for expansion when the grid is pressed down. Here is the kicker: if glue seeps onto your velvet or skivertex, it is nearly impossible to remove without leaving a permanent stain.
What is the ideal curing time?
Most professional adhesives require at least 2 hours of undisturbed setting time before you add the watch cushions. But wait, there is more. Placing a heavy object on top of the grid during the drying process ensures a permanent bond to the box floor.
- Apply glue only to contact edges.
- Lower the grid vertically into position.
- Apply weighted pressure for 30 minutes.
Key Takeaway: Strategic glue placement maintains the cleanliness of the interior while ensuring the dividers become an integral part of the box’s structure.
| Adhesive Type | Setting Time | Best Use Case | |
|---|---|---|---|
| PVA Glue | 30 – 60 mins | Paper and cardboard bonding | |
| Hot Glue | Instant | Temporary tacking (not recommended for luxury) | |
| Polyurethane | 2 – 4 hours | High-strength wood/fabric bonds |
The selection of adhesive determines the longevity and “heft” of the finished watch storage unit.
How to make a watch box with custom-sewn velvet cushions?
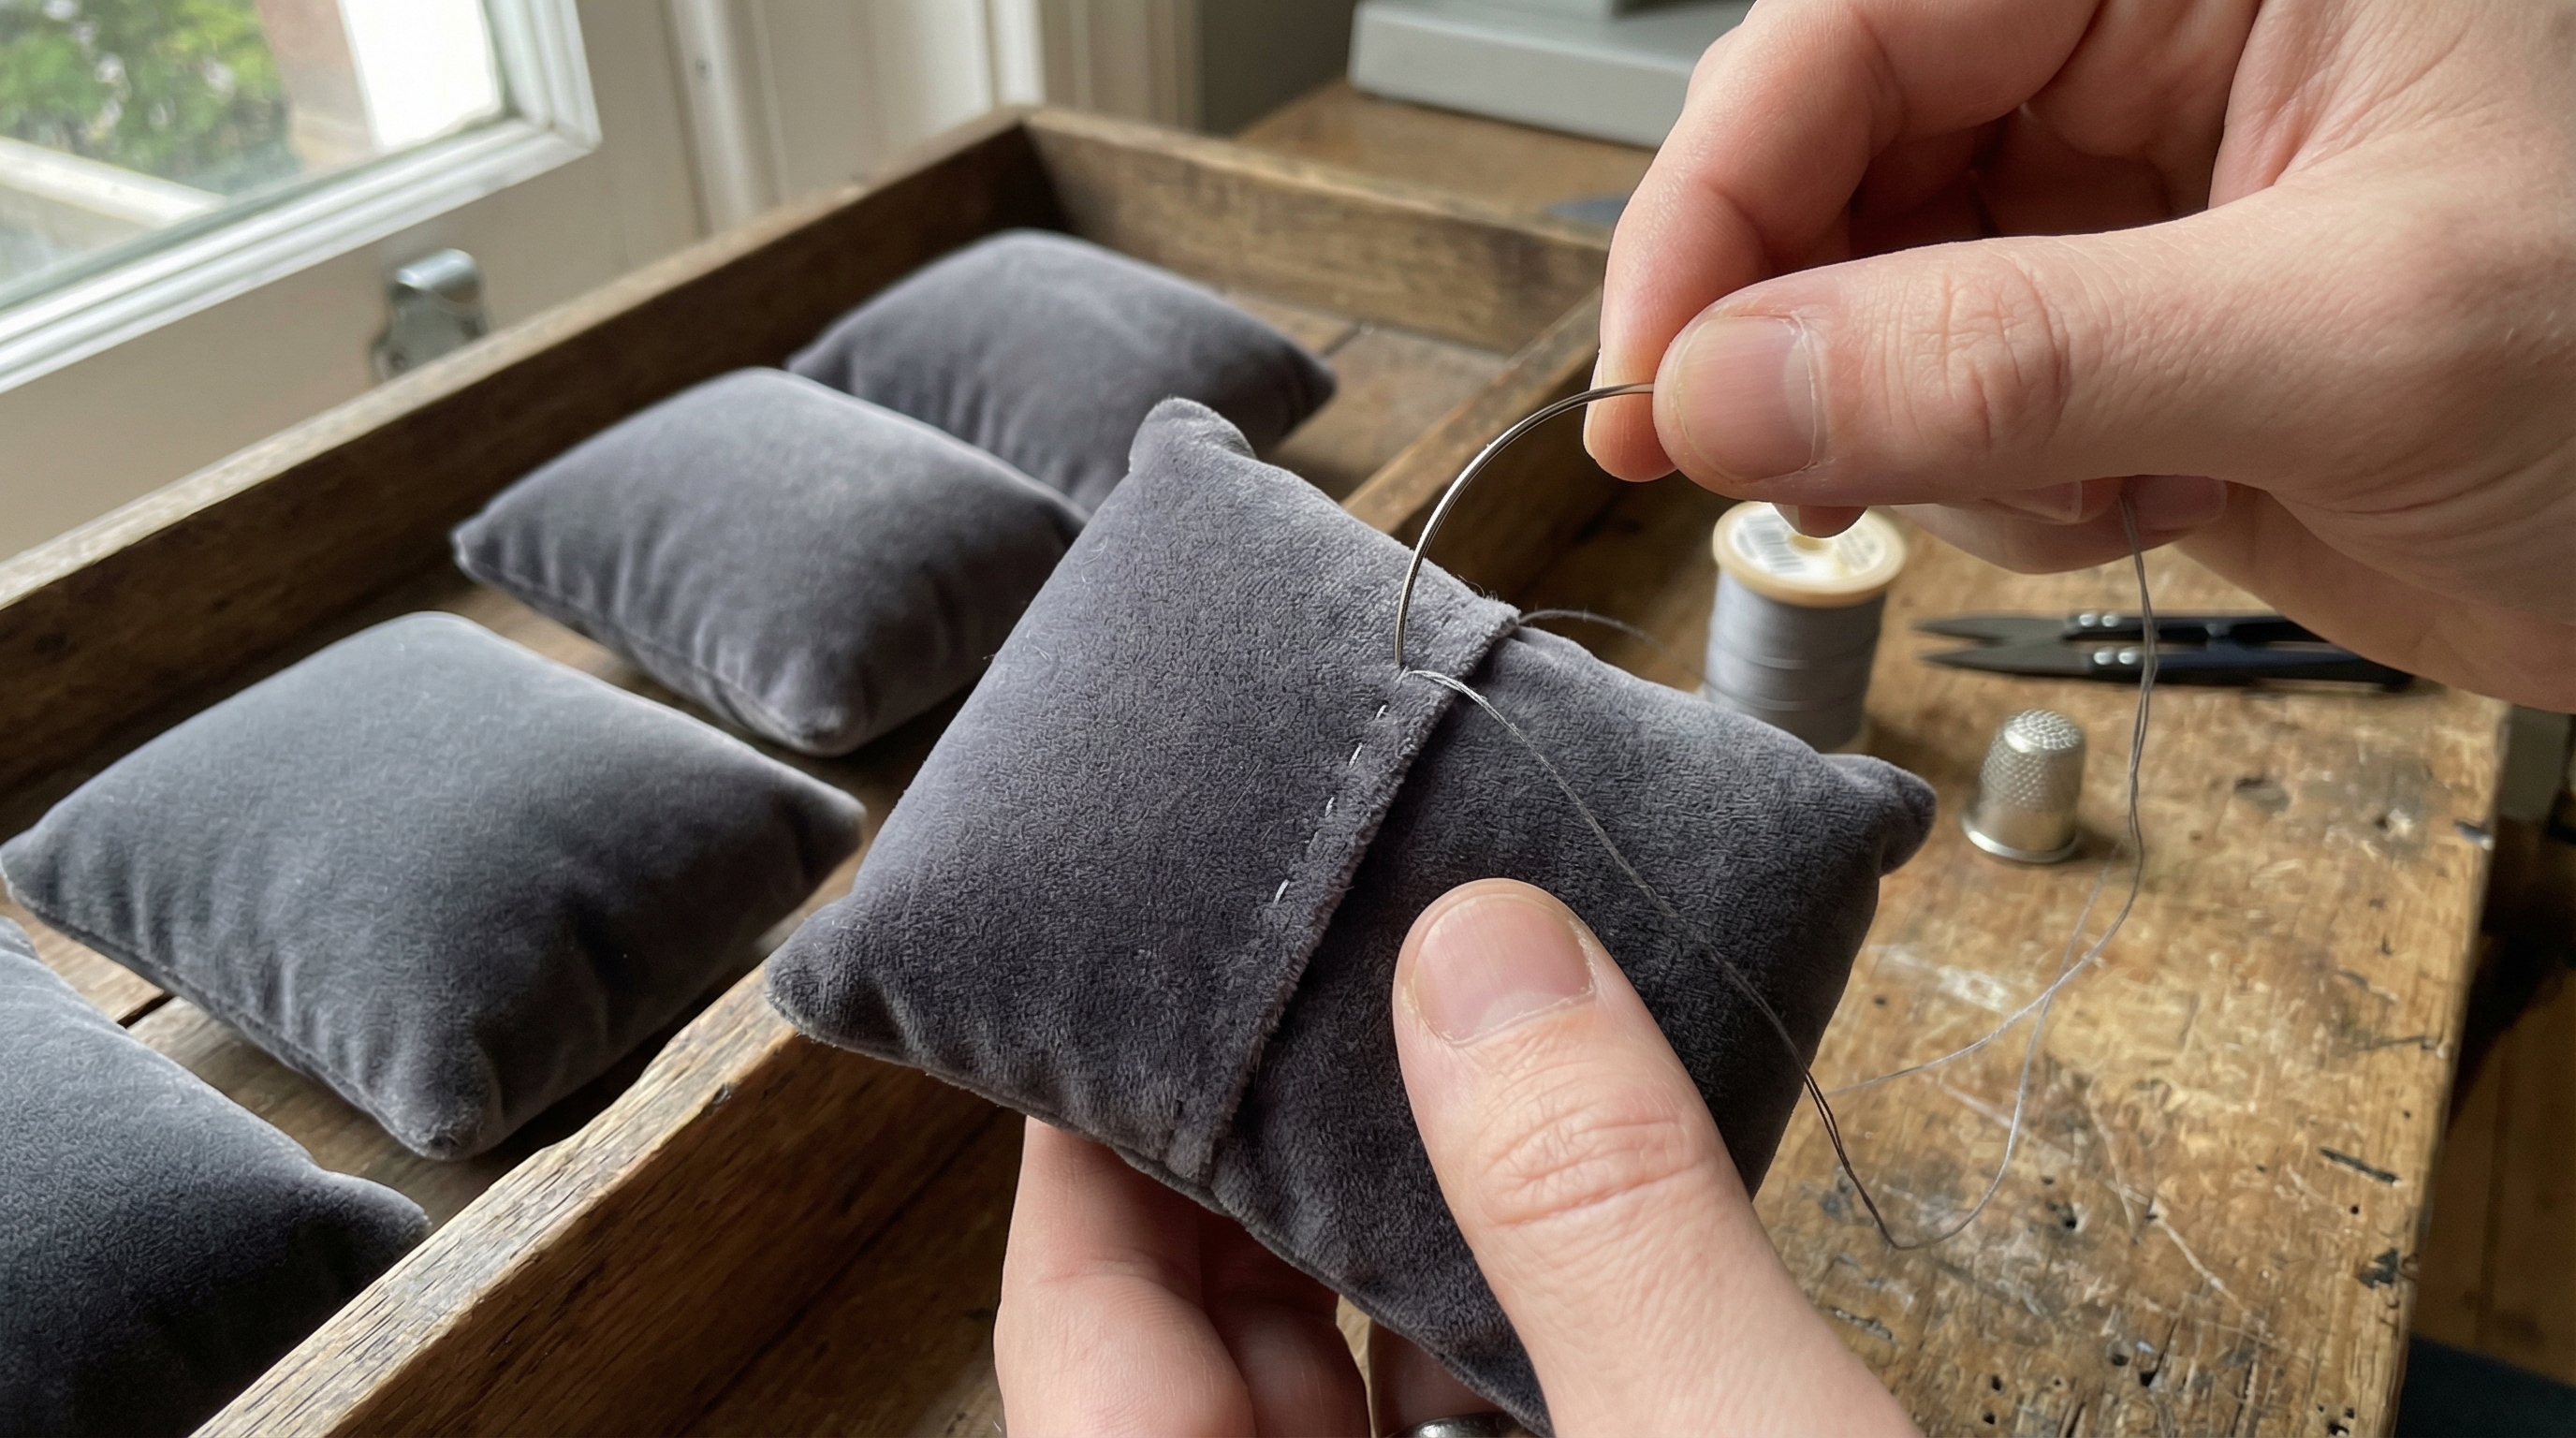
Watch cushions are created by sewing fabric rectangles, turning them right-side out, and stuffing them with high-density foam or poly-fill. In the final stages of how to make a watch box, the cushions must be sized slightly larger than the slots to ensure they stay snug and hold the watch bands under light tension.
How to achieve invisible seams?
You should use a ladder stitch to close the final opening after the stuffing has been inserted. You might be wondering: why not just machine sew the whole thing? A hand-finished ladder stitch creates a “seamless” pillow look that is standard in high-end jewelry packaging.
- Cut fabric to 4×5 inches for standard slots.
- Machine sew three sides with a 1/4 inch allowance.
- Hand-stitch the final closure after stuffing.
Which filling material holds shape best?
High-density upholstery foam is preferred because it maintains its structure even when heavy steel watches are strapped around it. It gets even better: you can wrap a thin layer of batting around the foam before the final fabric casing for an extra-plush feel.
Key Takeaway: Custom-sized cushions are the hallmark of a bespoke watch box, preventing the “tilting” common in mass-produced cases.
| Cushion Component | Recommendation | Function | |
|---|---|---|---|
| Outer Fabric | Velvet or Brushed Suede | Scratch prevention | |
| Core | 2-inch High-Density Foam | Shape retention | |
| Closure Thread | Matching Silk Thread | Invisible finishing |
A well-made cushion is as much a piece of engineering as the box itself, ensuring the timepiece is displayed at the perfect angle.
How to make a watch box for a luxury retail presentation?
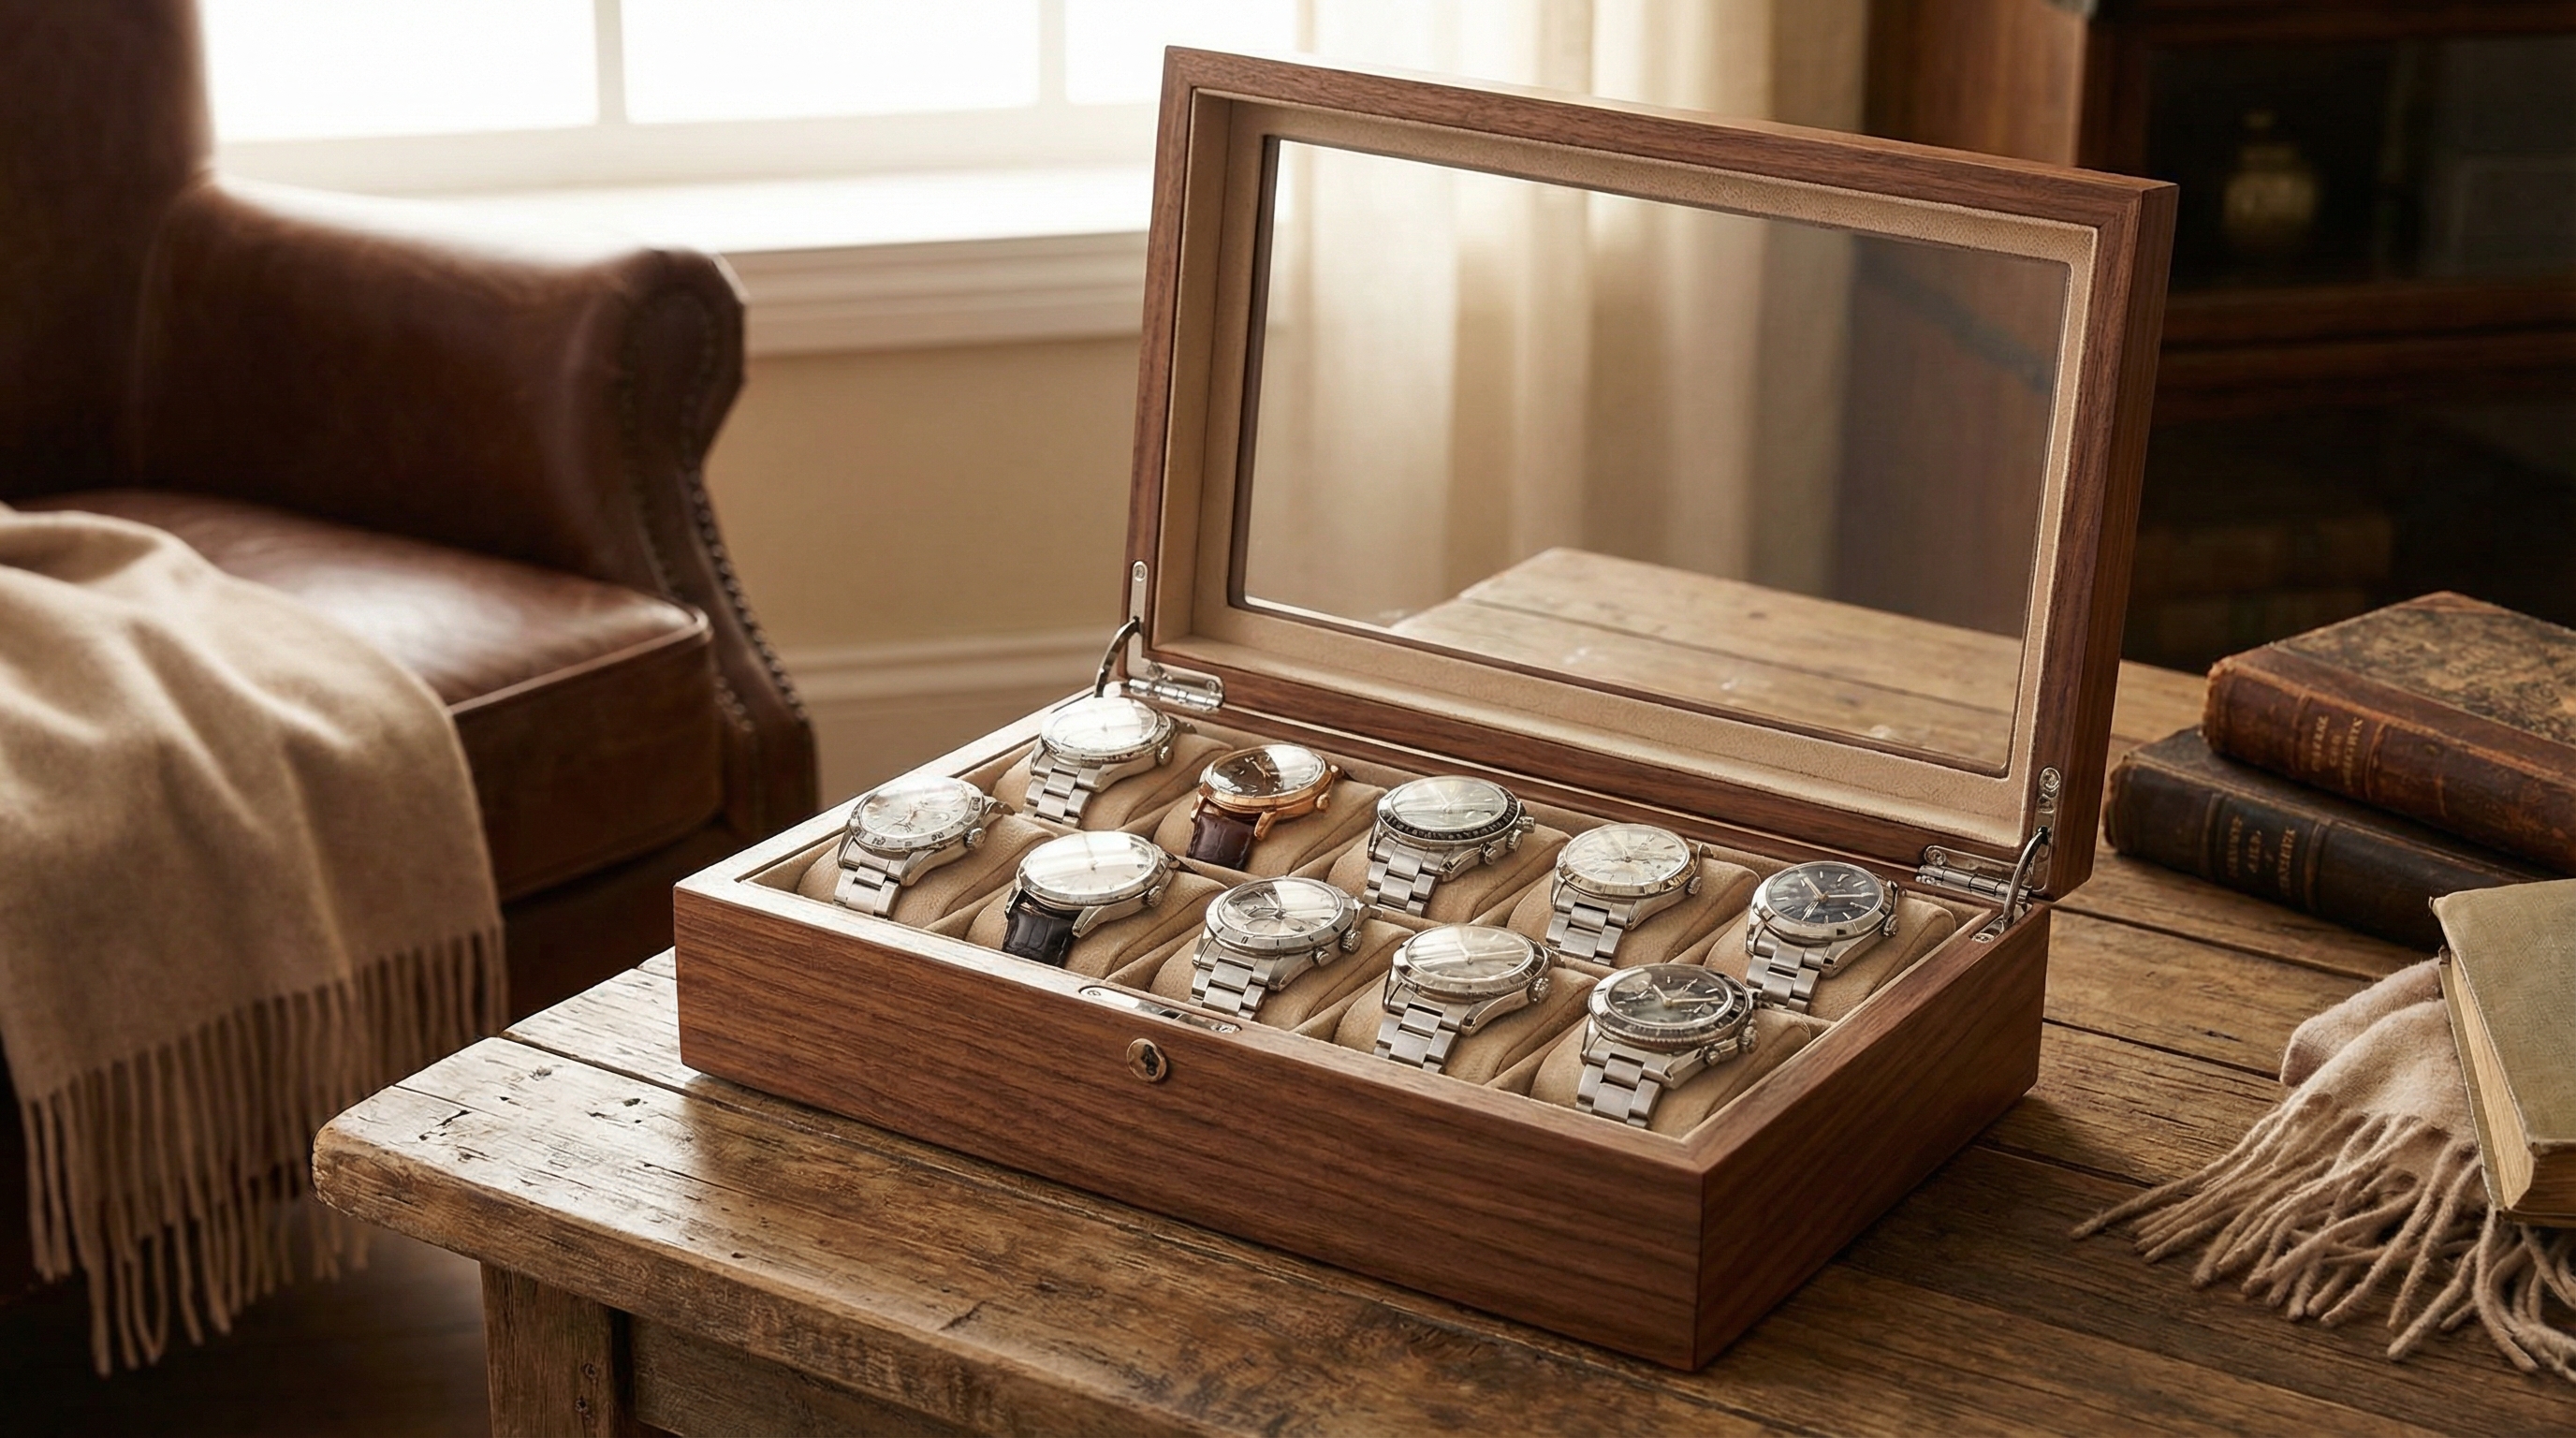
Final presentation involves orienting all watch faces in the same direction and ensuring each strap is fastened securely around its cushion. When finalizing your How to make a watch box project, the consistency of the display is what separates a collection from a professional inventory.
How to arrange watches for impact?
You should place your primary “hero” pieces in the center row to draw the eye immediately upon opening the lid. What is the bottom line? An organized box facilitates quick selection and protects the crowns of adjacent watches from knocking against one another.
What are the final QC checks?
Verify that no glue residue remains on the lining and that the lid closes with a satisfying “thud” rather than a click. But wait, there is more. Checking the tension of the cushions ensures that even smaller-diameter watches won’t slide or rotate within their slots.
- Align all crowns to the right.
- Fasten straps to the tightest comfortable setting.
- Wipe crystals with a microfiber cloth before closing.
Key Takeaway: The final arrangement is a marketing tool in itself, turning a simple storage box into a high-end display stage.
| Display Element | Standard | Result | |
|---|---|---|---|
| Face Alignment | Parallel to the front edge | Uniform visual flow | |
| Cushion Tension | Snug (no rattling) | Secure transport | |
| Material Cleanliness | Dust-free surface | Luxury retail standard |
Follow these final steps to ensure your handmade watch box meets the highest B2B standards of excellence.
Creating a professional watch box is an exercise in precision and material selection. By following these structured steps—from the initial wood preparation to the final cushion stitching—you ensure that your timepieces are housed in a vessel that matches their horological significance. At YiXin Packaging, our vision is to empower brands with packaging that tells a story of quality and craftsmanship. If you require large-scale production or custom design services to elevate your brand’s physical presence, please contact us today for a professional consultation.
Frequently Asked Questions
Can I use standard cardboard for the dividers?While you can, it is highly recommended to use 2mm high-density greyboard to ensure the dividers do not warp or bend over time under the weight of metal watches.
What’s the best way to clean the velvet lining?You should use a soft lint roller or a piece of masking tape to gently lift dust and debris; avoid liquid cleaners which can ruin the pile and weaken the adhesive.
Can I add a glass window to the lid?Yes, you can modify the lid by cutting a center aperture and securing a piece of tempered glass or acrylic from the inside before applying the final velvet lining.
What is the best adhesive for skivertex paper?A pH-neutral PVA glue is the industry standard, as it provides a strong bond without the acidity that could damage the paper or the watches over several years.
Can I customize the slot sizes for oversized watches?Absolutely; the primary benefit of the DIY approach is that you can adjust your divider measurements to accommodate 50mm+ divers or extra-thick pilot watches.