How to make custom jewelry box inserts for organization involves selecting high-density core materials, measuring exact internal dimensions, and tailoring slots to specific jewelry pieces. Imagine a customer opening a premium box only to find tangled necklaces and scratched metal surfaces. This lack of organization diminishes your brand value and risks damaging high-value inventory during transit. By mastering how to make jewelry box inserts , you provide a secure, professional-grade solution that protects assets and elevates the customer’s unboxing experience.
Why should you learn how to make jewelry box inserts?
Learning the process gives you total control over the security and presentation of your retail collections. Understanding how to make jewelry box inserts allows you to move beyond generic foam fillers that often fail to hold delicate items in place. This skill is essential for B2B brands looking to reduce damage claims and improve their perceived market quality.
What are the main benefits of custom inserts?
Customized inserts ensure that every ring, earring, or watch stays perfectly stationary regardless of how the package is handled. This is particularly vital for international shipping where movement is the primary cause of gemstone loosening.
Think about it: A secure piece is a protected investment.
- Prevents metal-on-metal friction.
- Displays the product at the optimal viewing angle.
- Reduces the need for excessive external bubble wrap.
How does customization impact brand perception?
When a buyer sees a perfectly fitted insert, they immediately associate the precision with the quality of the jewelry itself. It signals that you care about the long-term maintenance of the product they just purchased.
The best part? It creates a “luxury” feeling at a minimal production cost.
- Enhances the visual symmetry of the layout.
- Permits the inclusion of branded color schemes.
- Allows for integrated compartments for certificates or cleaning cloths.
Key Takeaway: Custom inserts are the bridge between simple storage and high-end retail presentation, ensuring both safety and style.
| Benefit | Impact on Business | |
|---|---|---|
| Precision Fit | Zero product movement | |
| Material Choice | Premium tactile feel | |
| Visual Order | Faster inventory checks |
Effective organization starts with a clear understanding of the specific physical requirements of your jewelry line.
What materials are best for professional jewelry inserts?
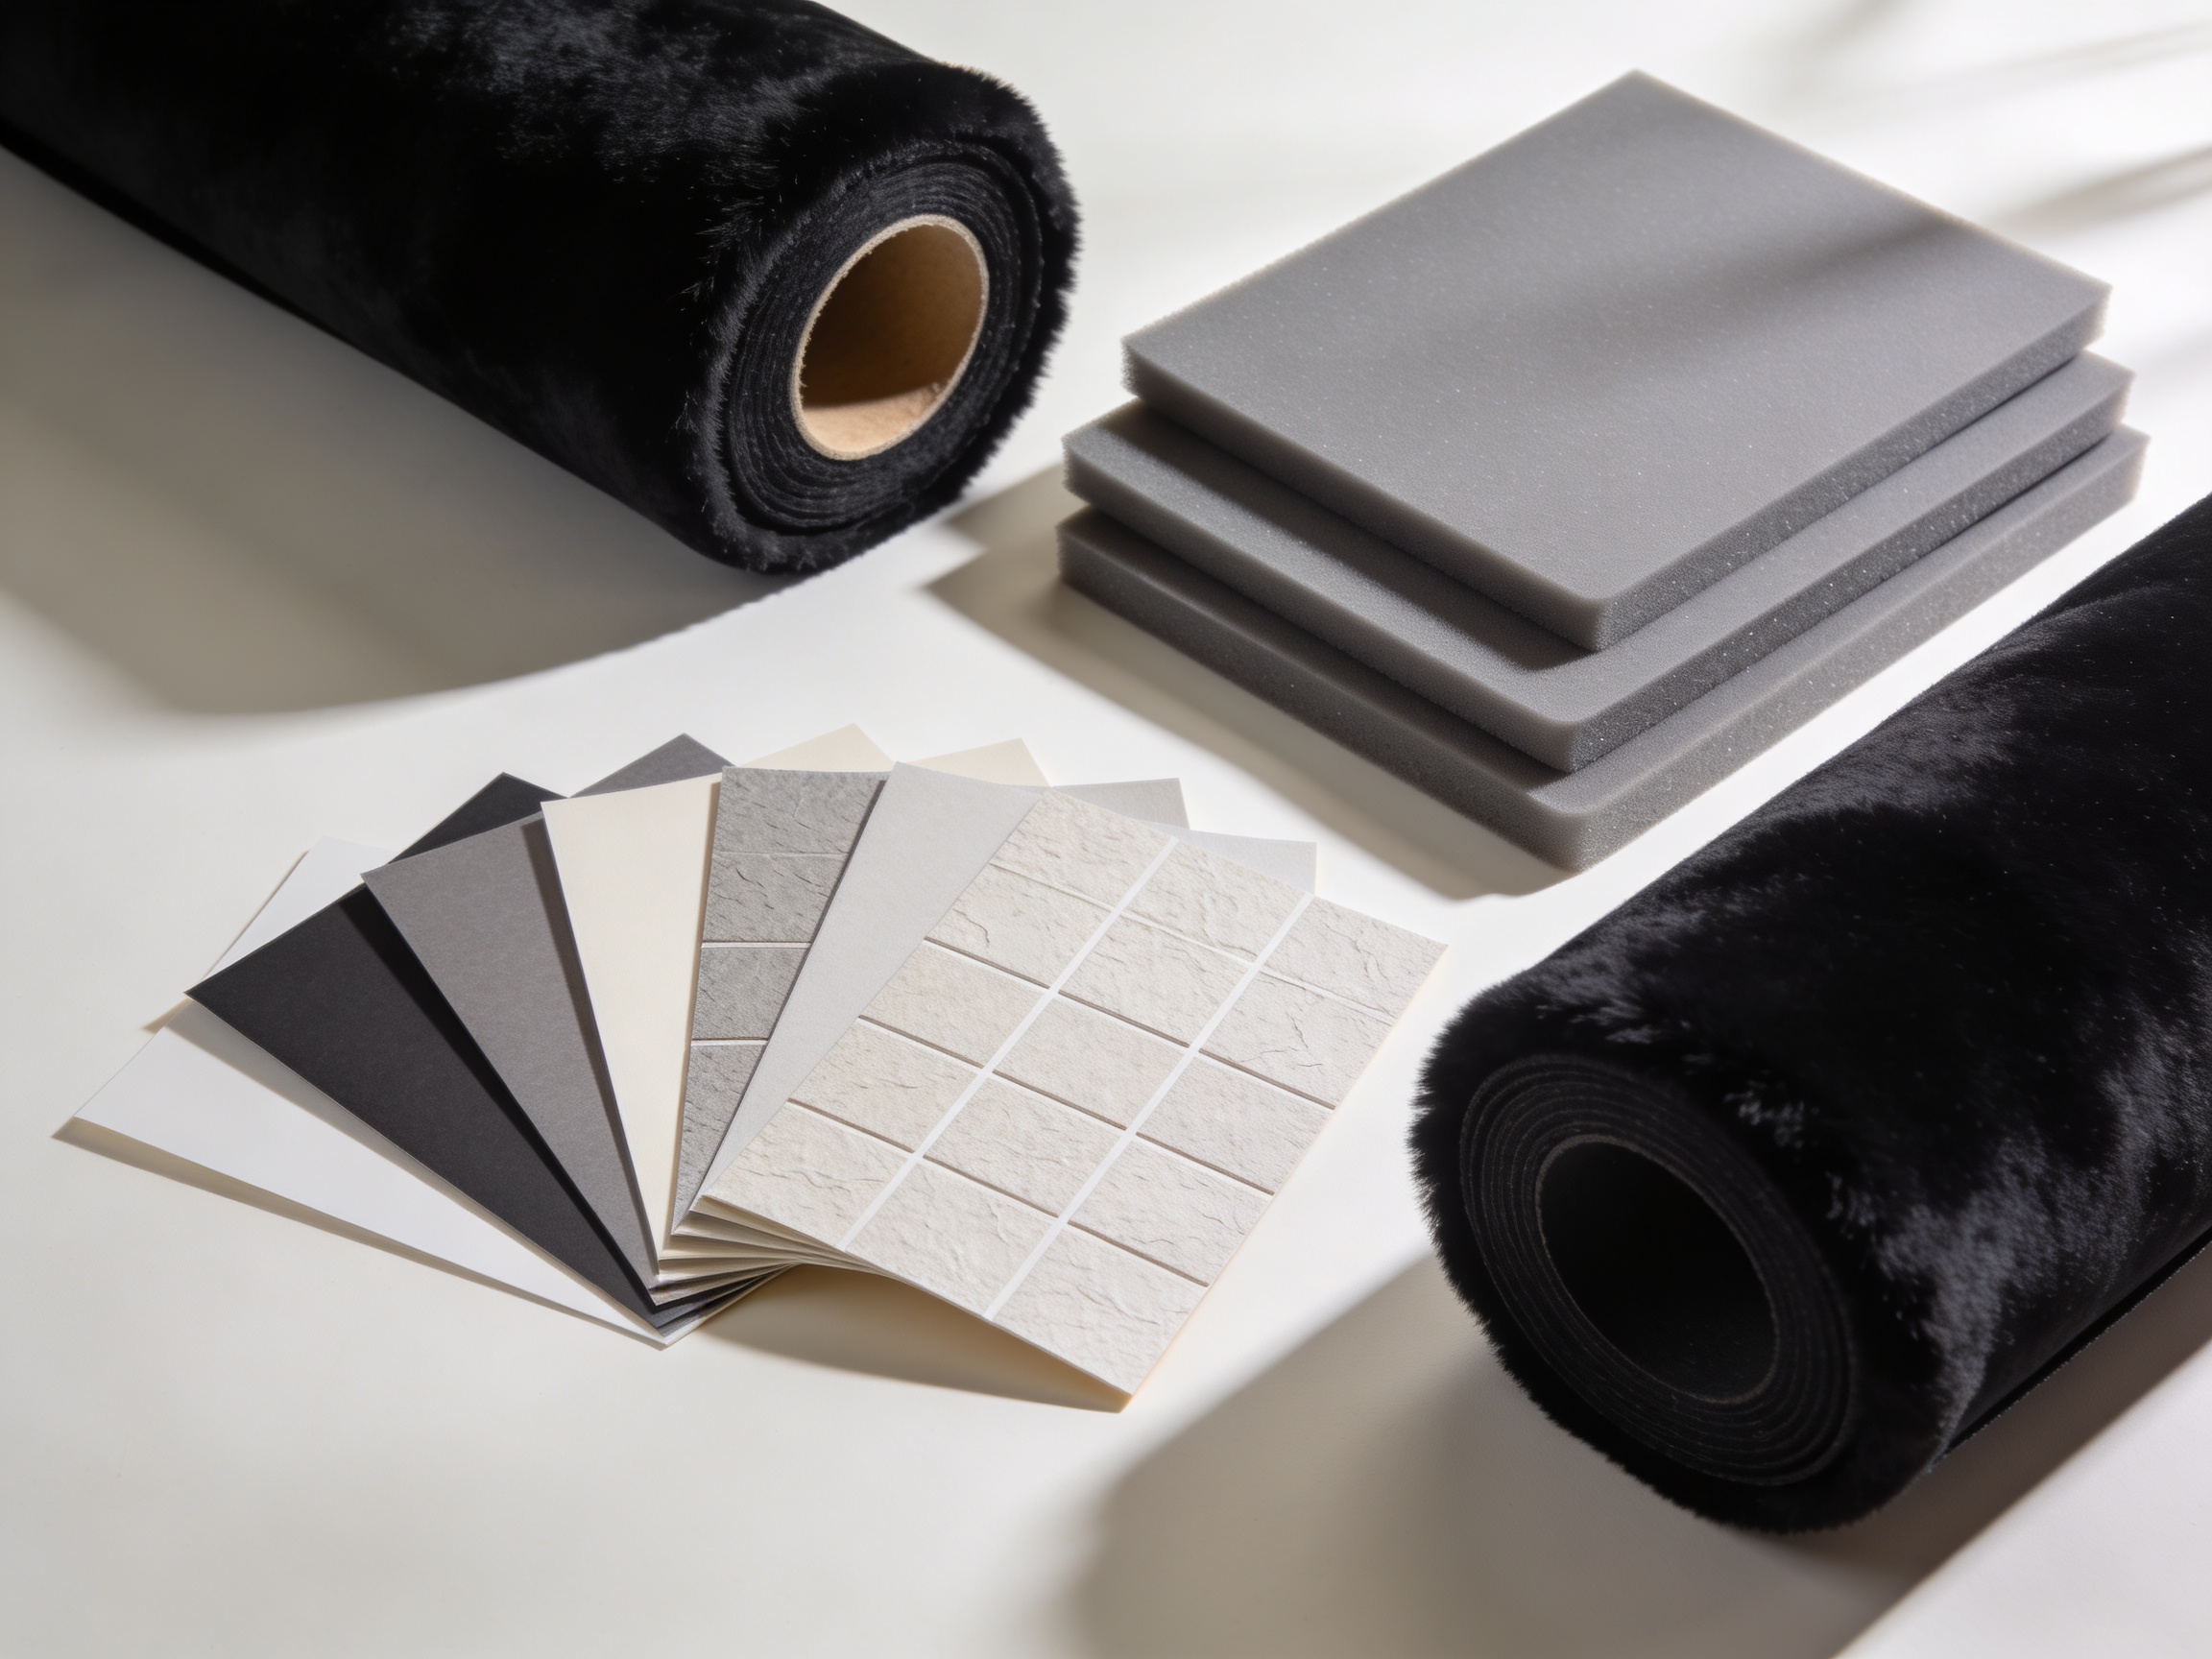
Selecting the right substrate is the first technical hurdle in learning how to make jewelry box inserts . You need a balance between rigidity for support and softness for surface protection. Professional manufacturers typically utilize EVA foam or high-density PE foam because they do not crumble or lose their shape over time.
Why is foam density important for organization?
Low-density foam will compress under the weight of heavier items like watches or thick silver bracelets. This results in the jewelry sinking and becoming disorganized within the box.
Here is the kicker: Density dictates the lifespan of the organizer.
- EVA Foam: Best for heavy items and precision cuts.
- PU Foam: Ideal for soft, delicate earring backing.
- Cardboard: Best for flat, lightweight necklace cards.
Which fabrics should you use for the finish?
The top layer is what the customer interacts with, so it must be both aesthetically pleasing and non-abrasive. Velvet remains the industry standard, but microfiber and silk are gaining popularity for modern minimalist brands.
Believe it or not: The fabric choice can actually prevent tarnish.
- Treated Velvet: Chemically neutral to prevent silver oxidation.
- Suede: Provides a high-grip surface for rings.
- Satin: Offers a high-sheen look for luxury gift sets.
Key Takeaway: High-density foam paired with non-abrasive fabrics provides the most durable and professional organizational foundation.
| Material | Durability | Best Use Case | |
|---|---|---|---|
| EVA Foam | High | Rings & Watches | |
| PE Foam | Medium | Earrings & Studs | |
| Paperboard | Low | Flat Necklaces |
Selecting materials based on the weight and fragility of your pieces ensures long-term organizational success.

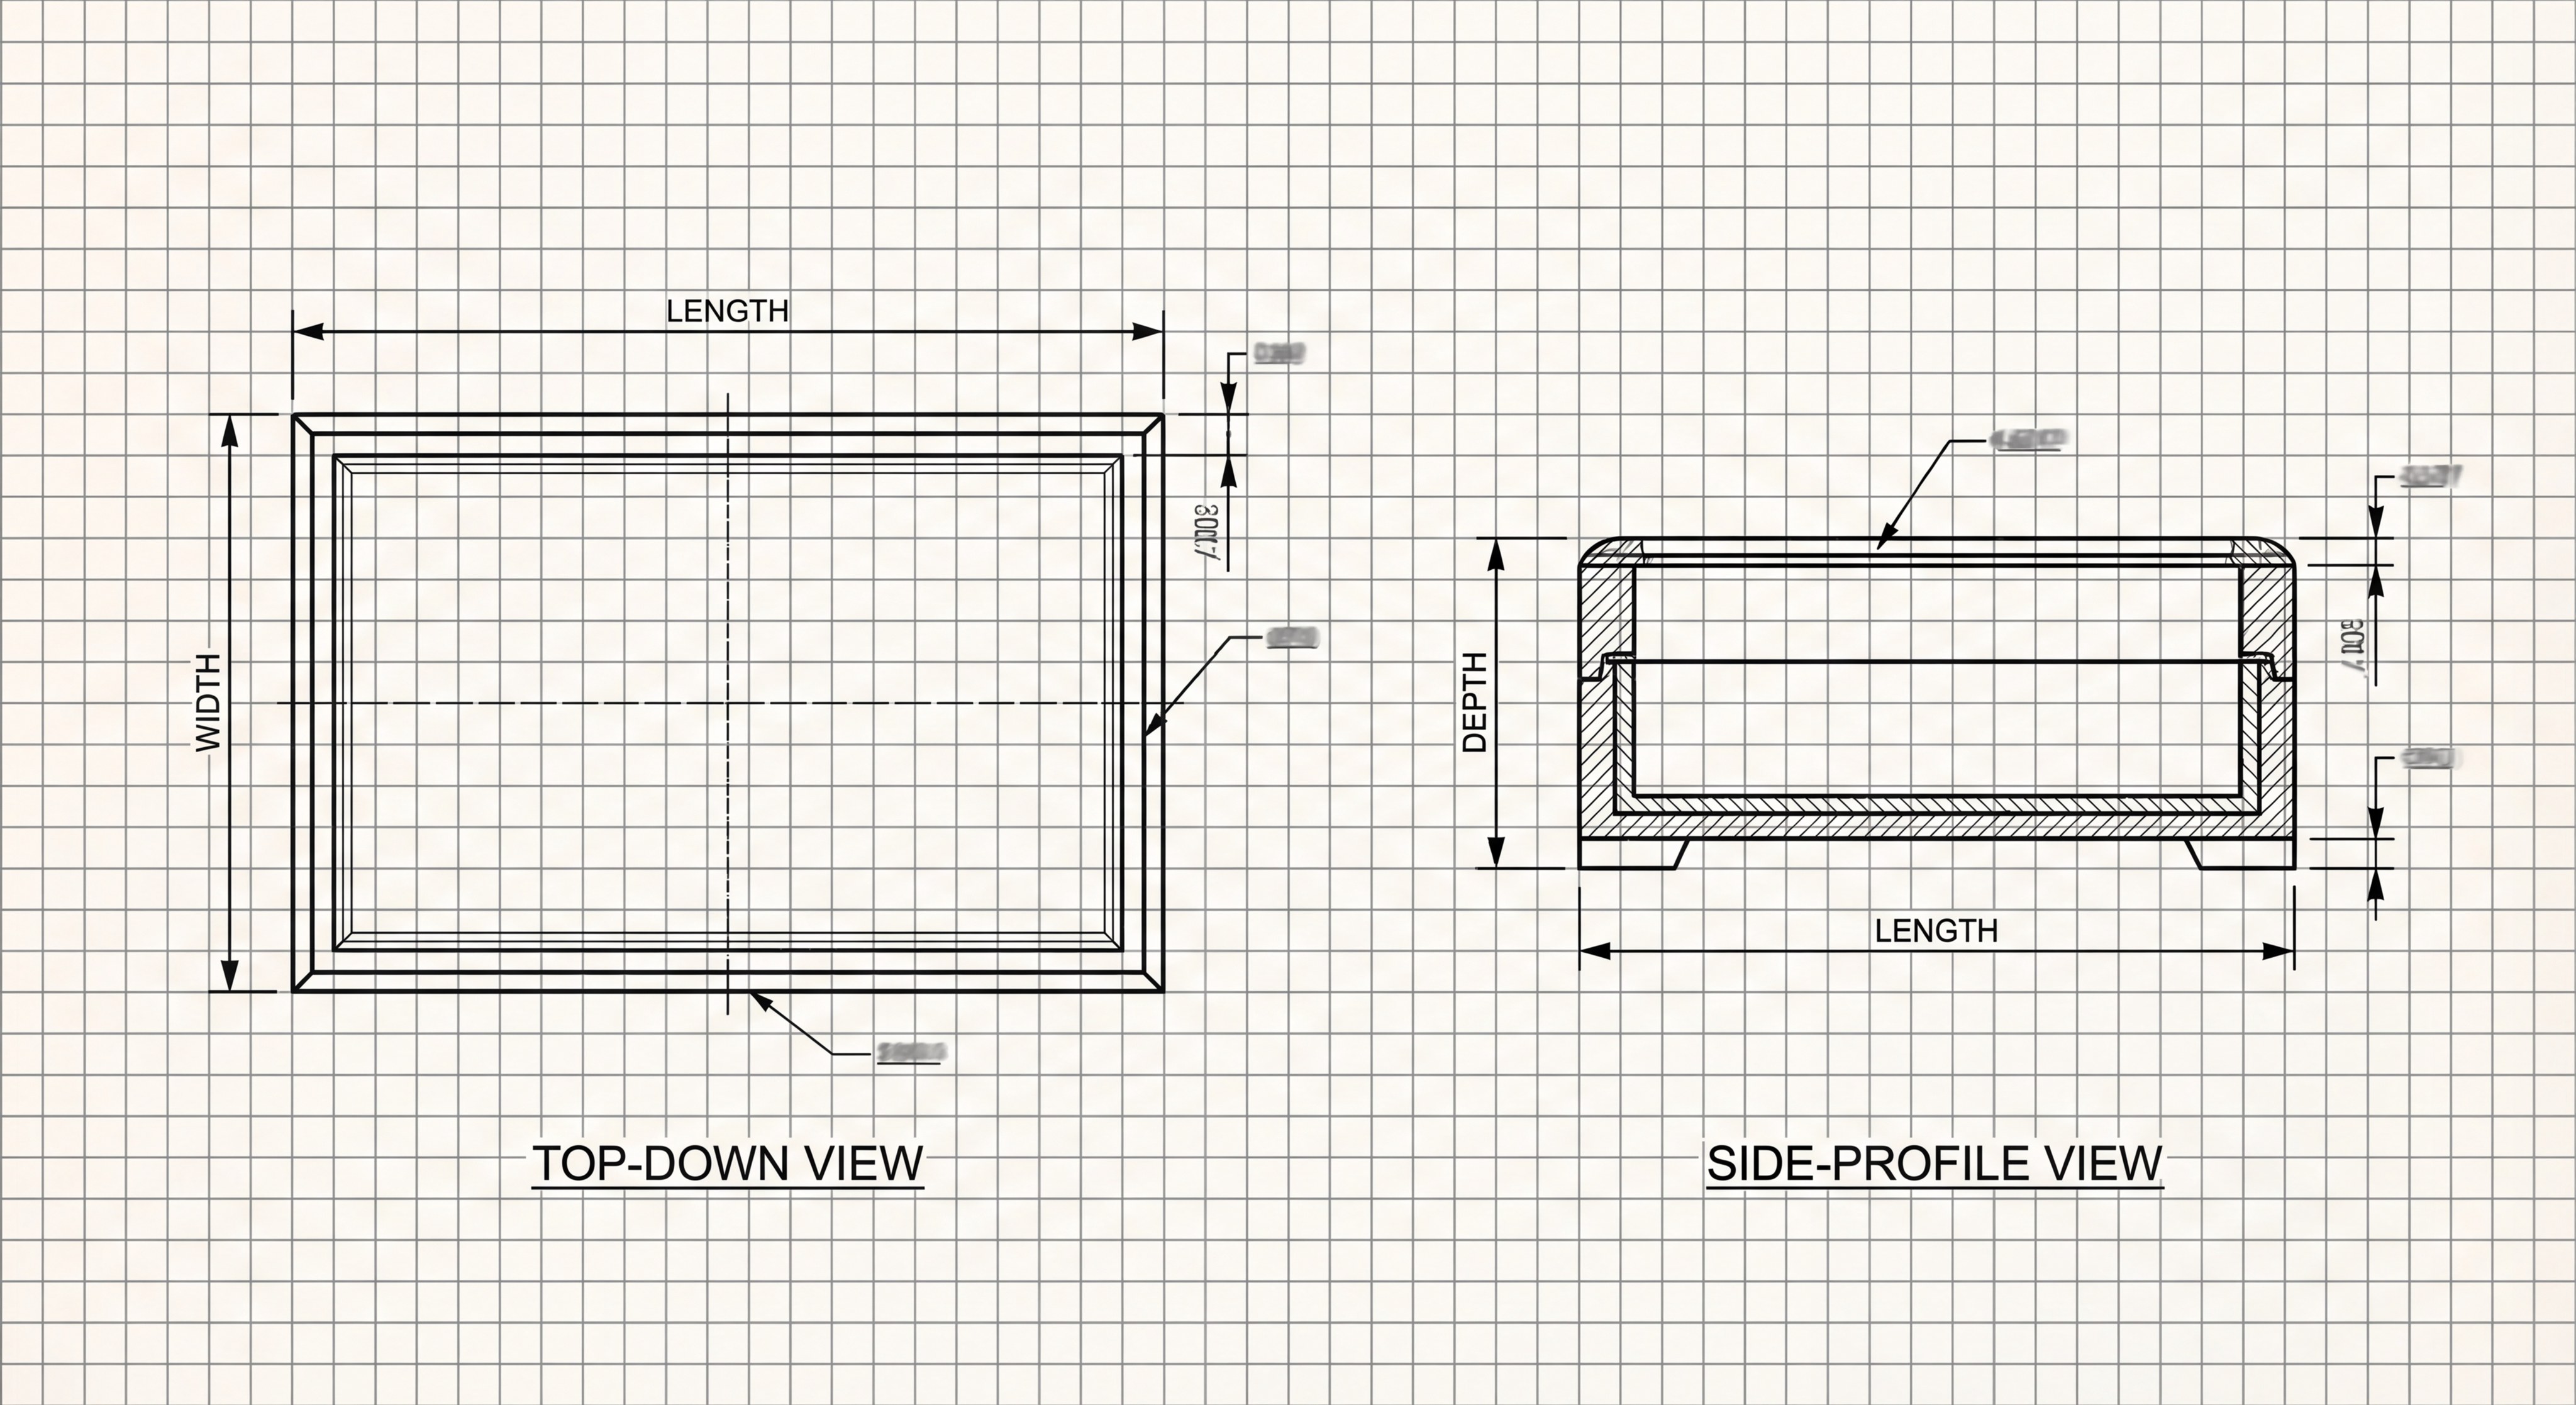
How do you measure dimensions for custom jewelry box inserts?
Precision measurement is the core of understanding how to make jewelry box inserts that don’t rattle or slide. You must account for the internal wall thickness of the box and the thickness of the fabric wrap. A common mistake is measuring only the exterior, which leads to inserts that are physically impossible to fit into the container.
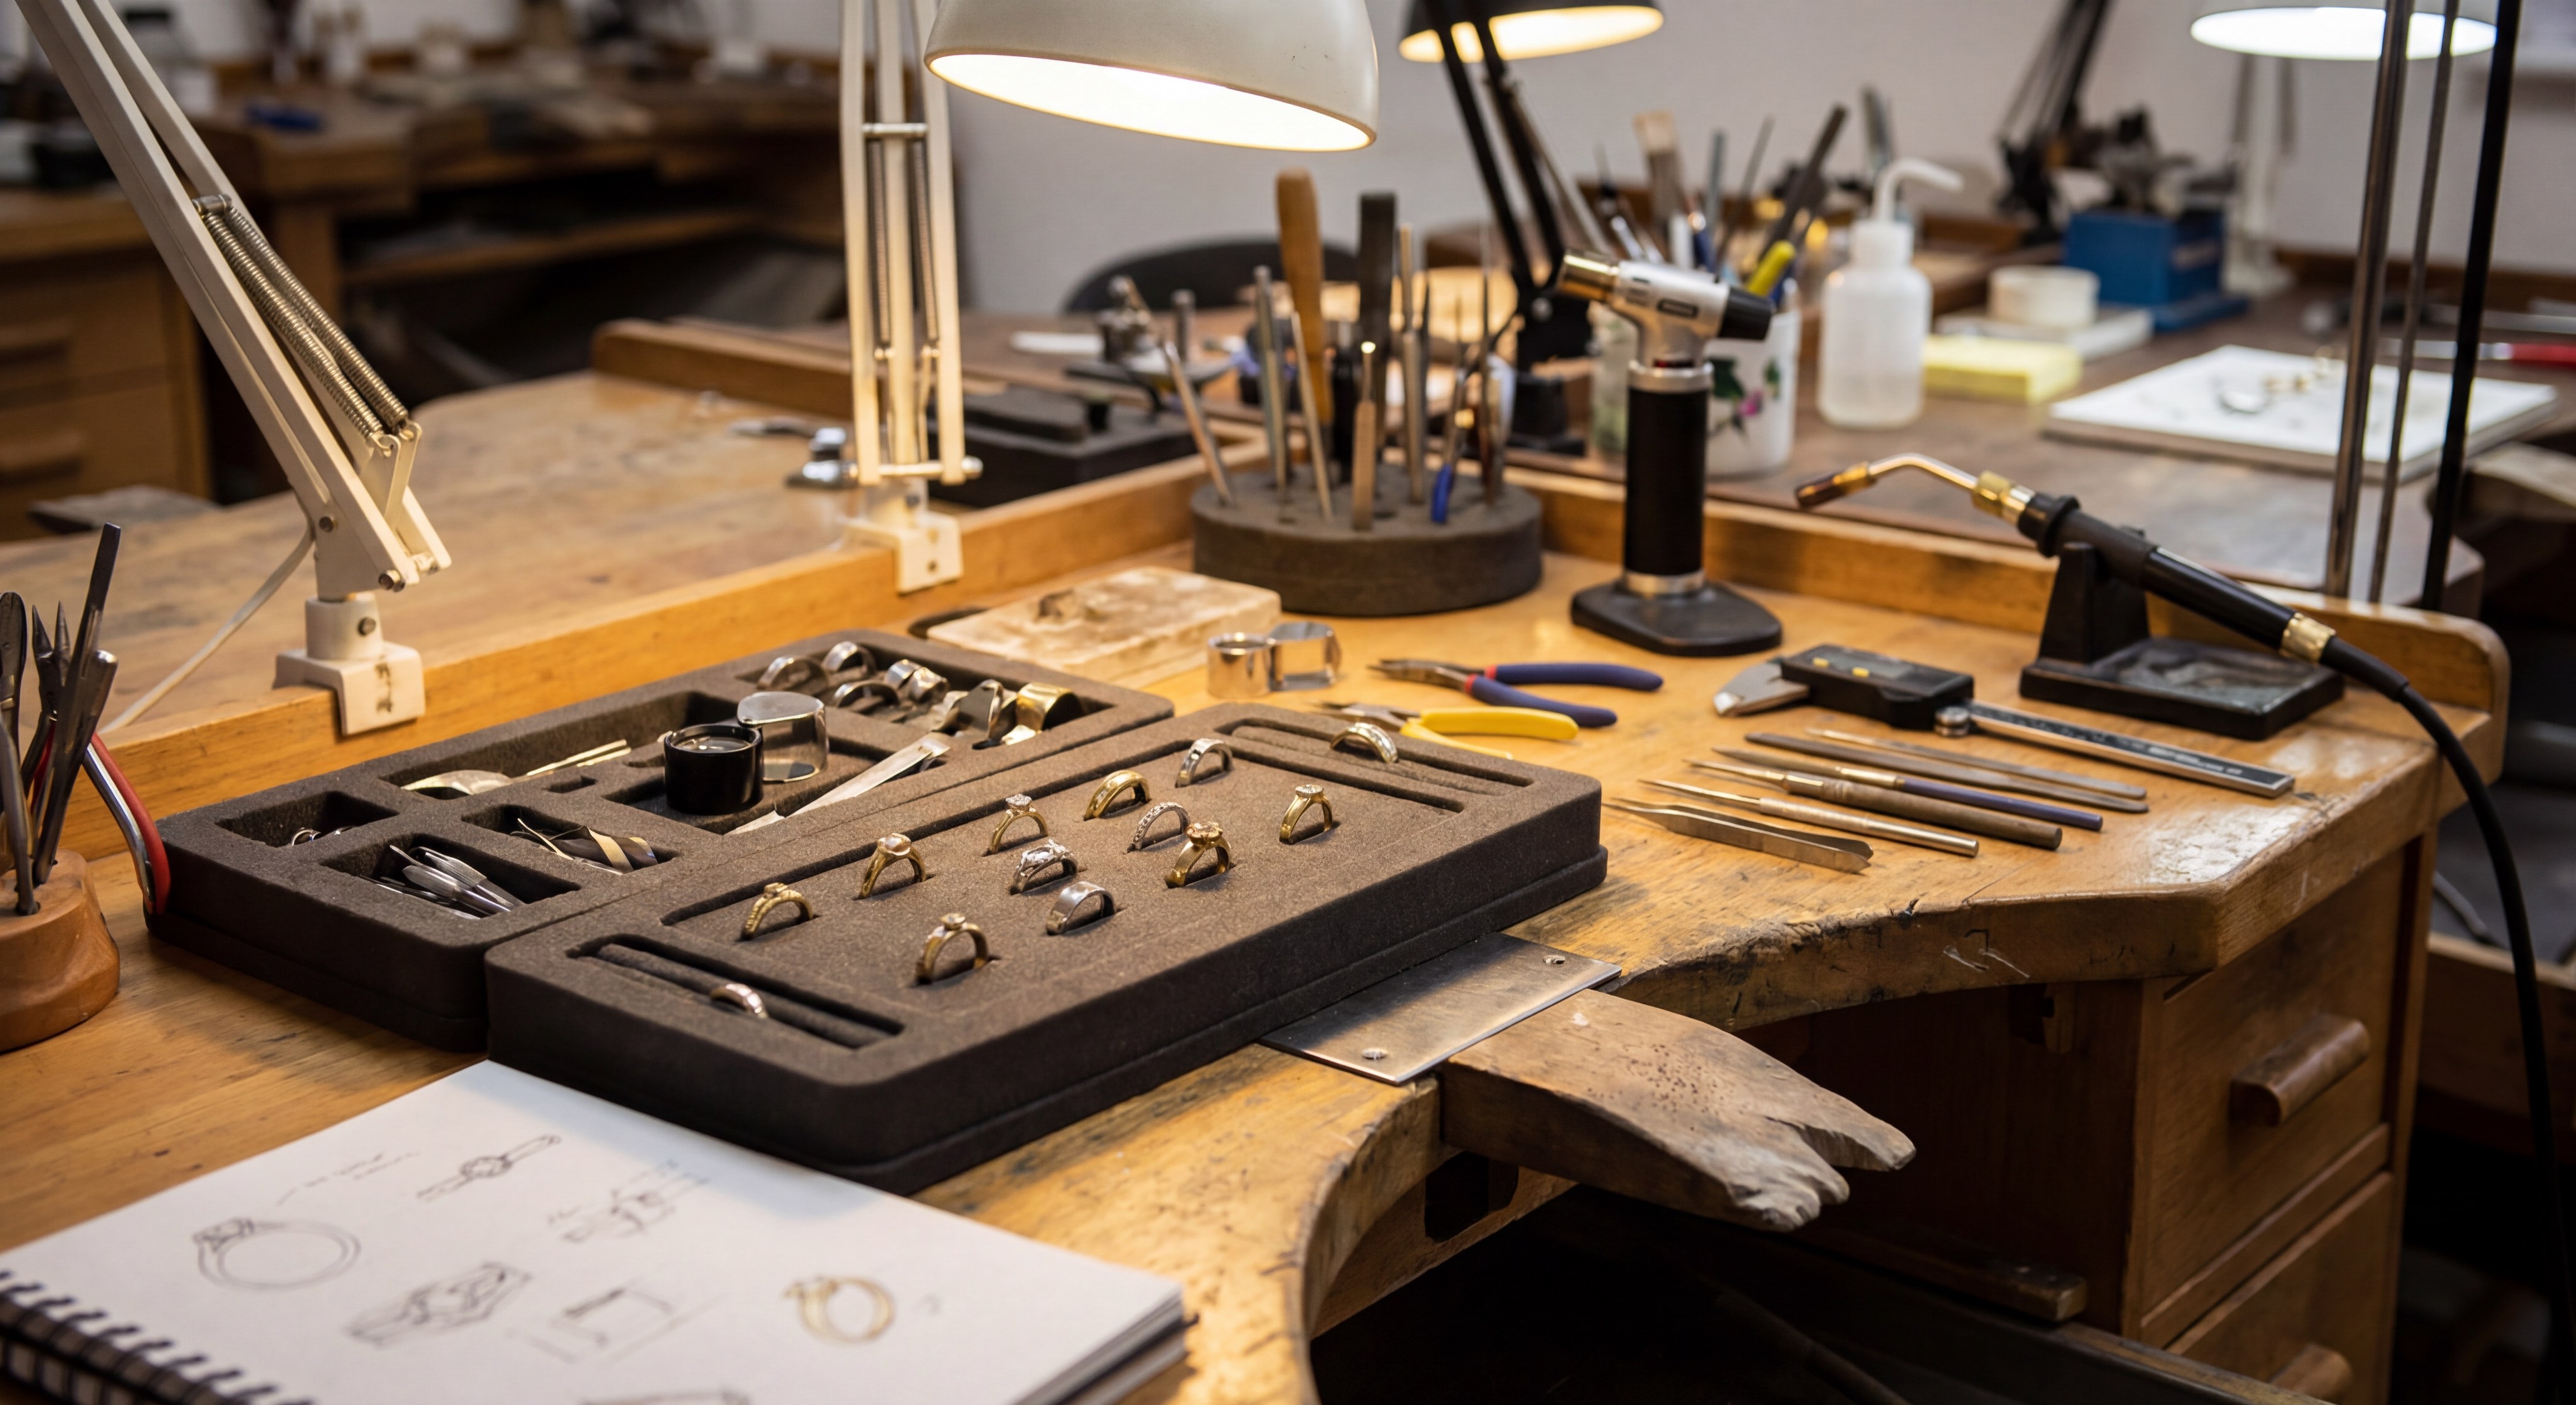
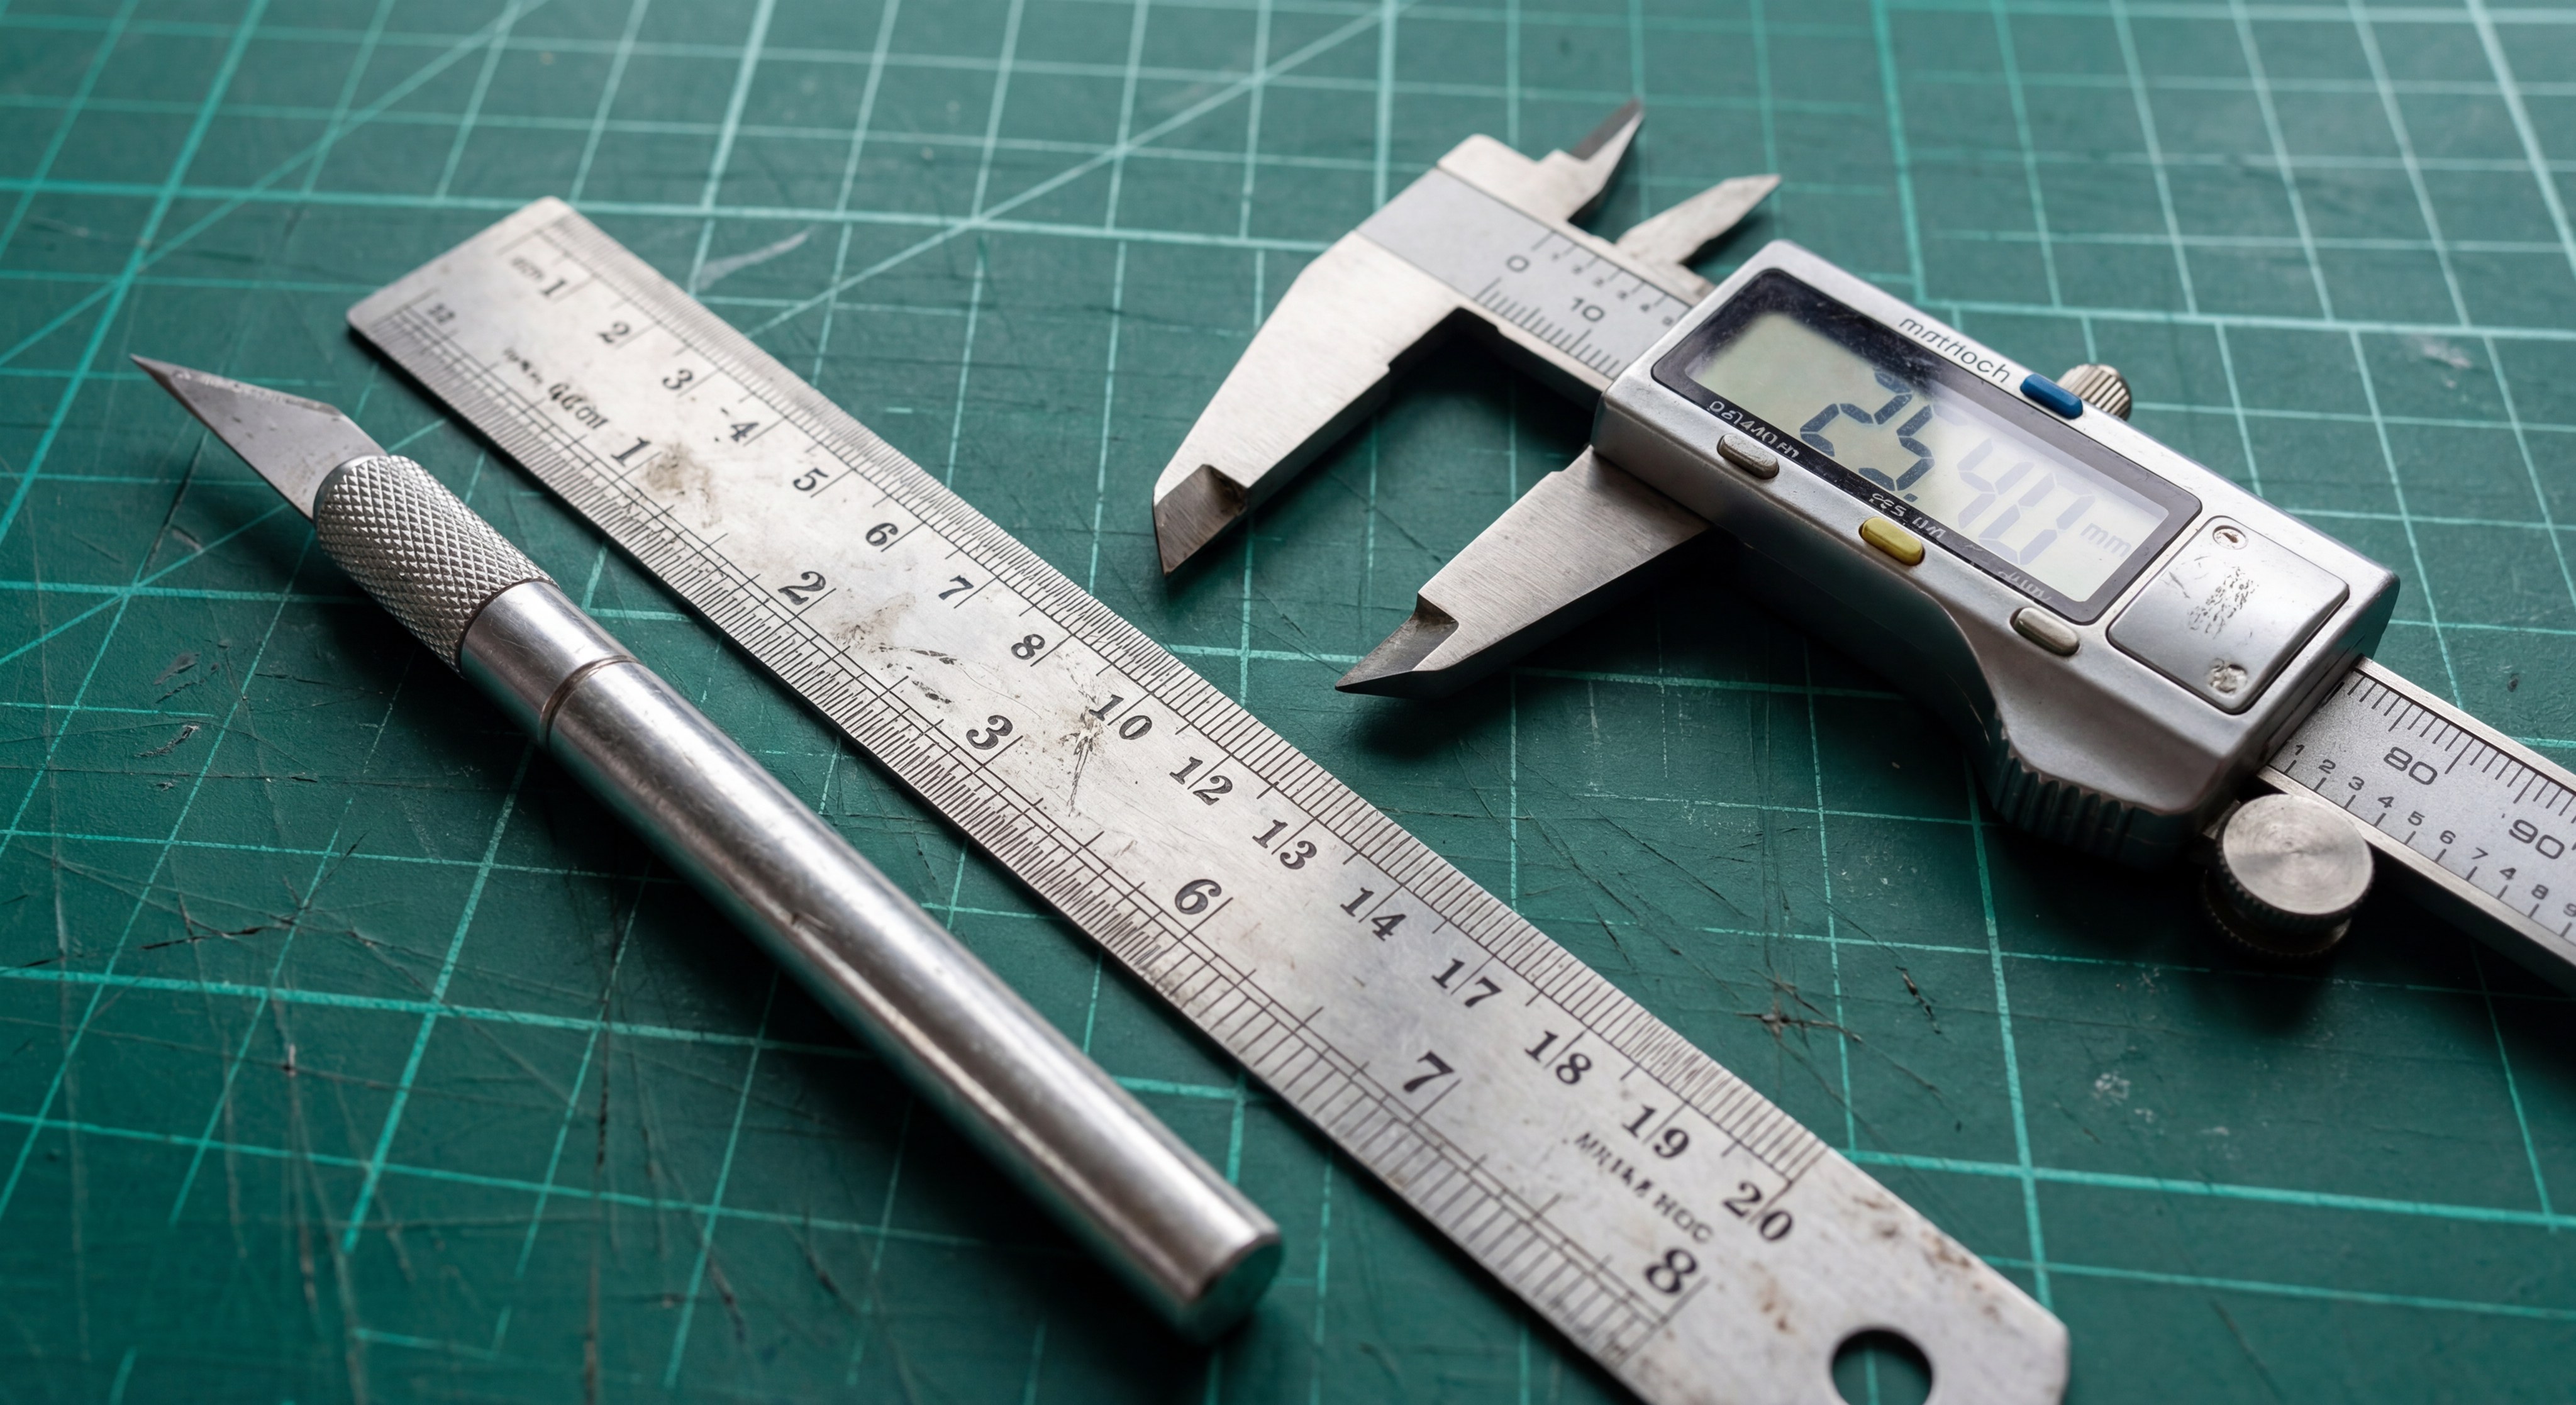
What tools provide the best measurement accuracy?
Digital calipers are far superior to standard rulers for this task because they can measure internal depth and width with sub-millimeter precision. When you are designing for thousands of units, even a 0.5mm error can cause significant assembly delays.
Think about this: Small errors lead to big losses in bulk production.
- Digital Caliper: For exact internal width and length.
- Depth Gauge: To ensure the insert doesn’t interfere with the lid.
- Protractor: For boxes with unique hexagonal or octagonal shapes.
How do you calculate the “tolerance” for fabric?
Fabric has a physical thickness that must be subtracted from your foam measurements. If you are using a thick velvet, you must reduce the foam dimensions by at least 1mm on all sides to ensure a smooth fit.
The secret is simple: Always measure the wrapped sample, not just the raw foam.
- Subtract 0.5mm for thin silk linings.
- Subtract 1.0mm for standard velvet wraps.
- Subtract 1.5mm for padded or “pillowed” inserts.
Key Takeaway: Precise internal measurements combined with a calculated fabric tolerance ensure a snug, professional fit every time.
| Dimension | Tool | Critical Factor | |
|---|---|---|---|
| Internal Width | Caliper | Tightness against walls | |
| Insert Height | Depth Gauge | Lid closure clearance | |
| Slot Depth | Ruler | Jewelry visibility |
Using a technical approach to sizing eliminates the risk of inserts becoming loose or difficult to remove.
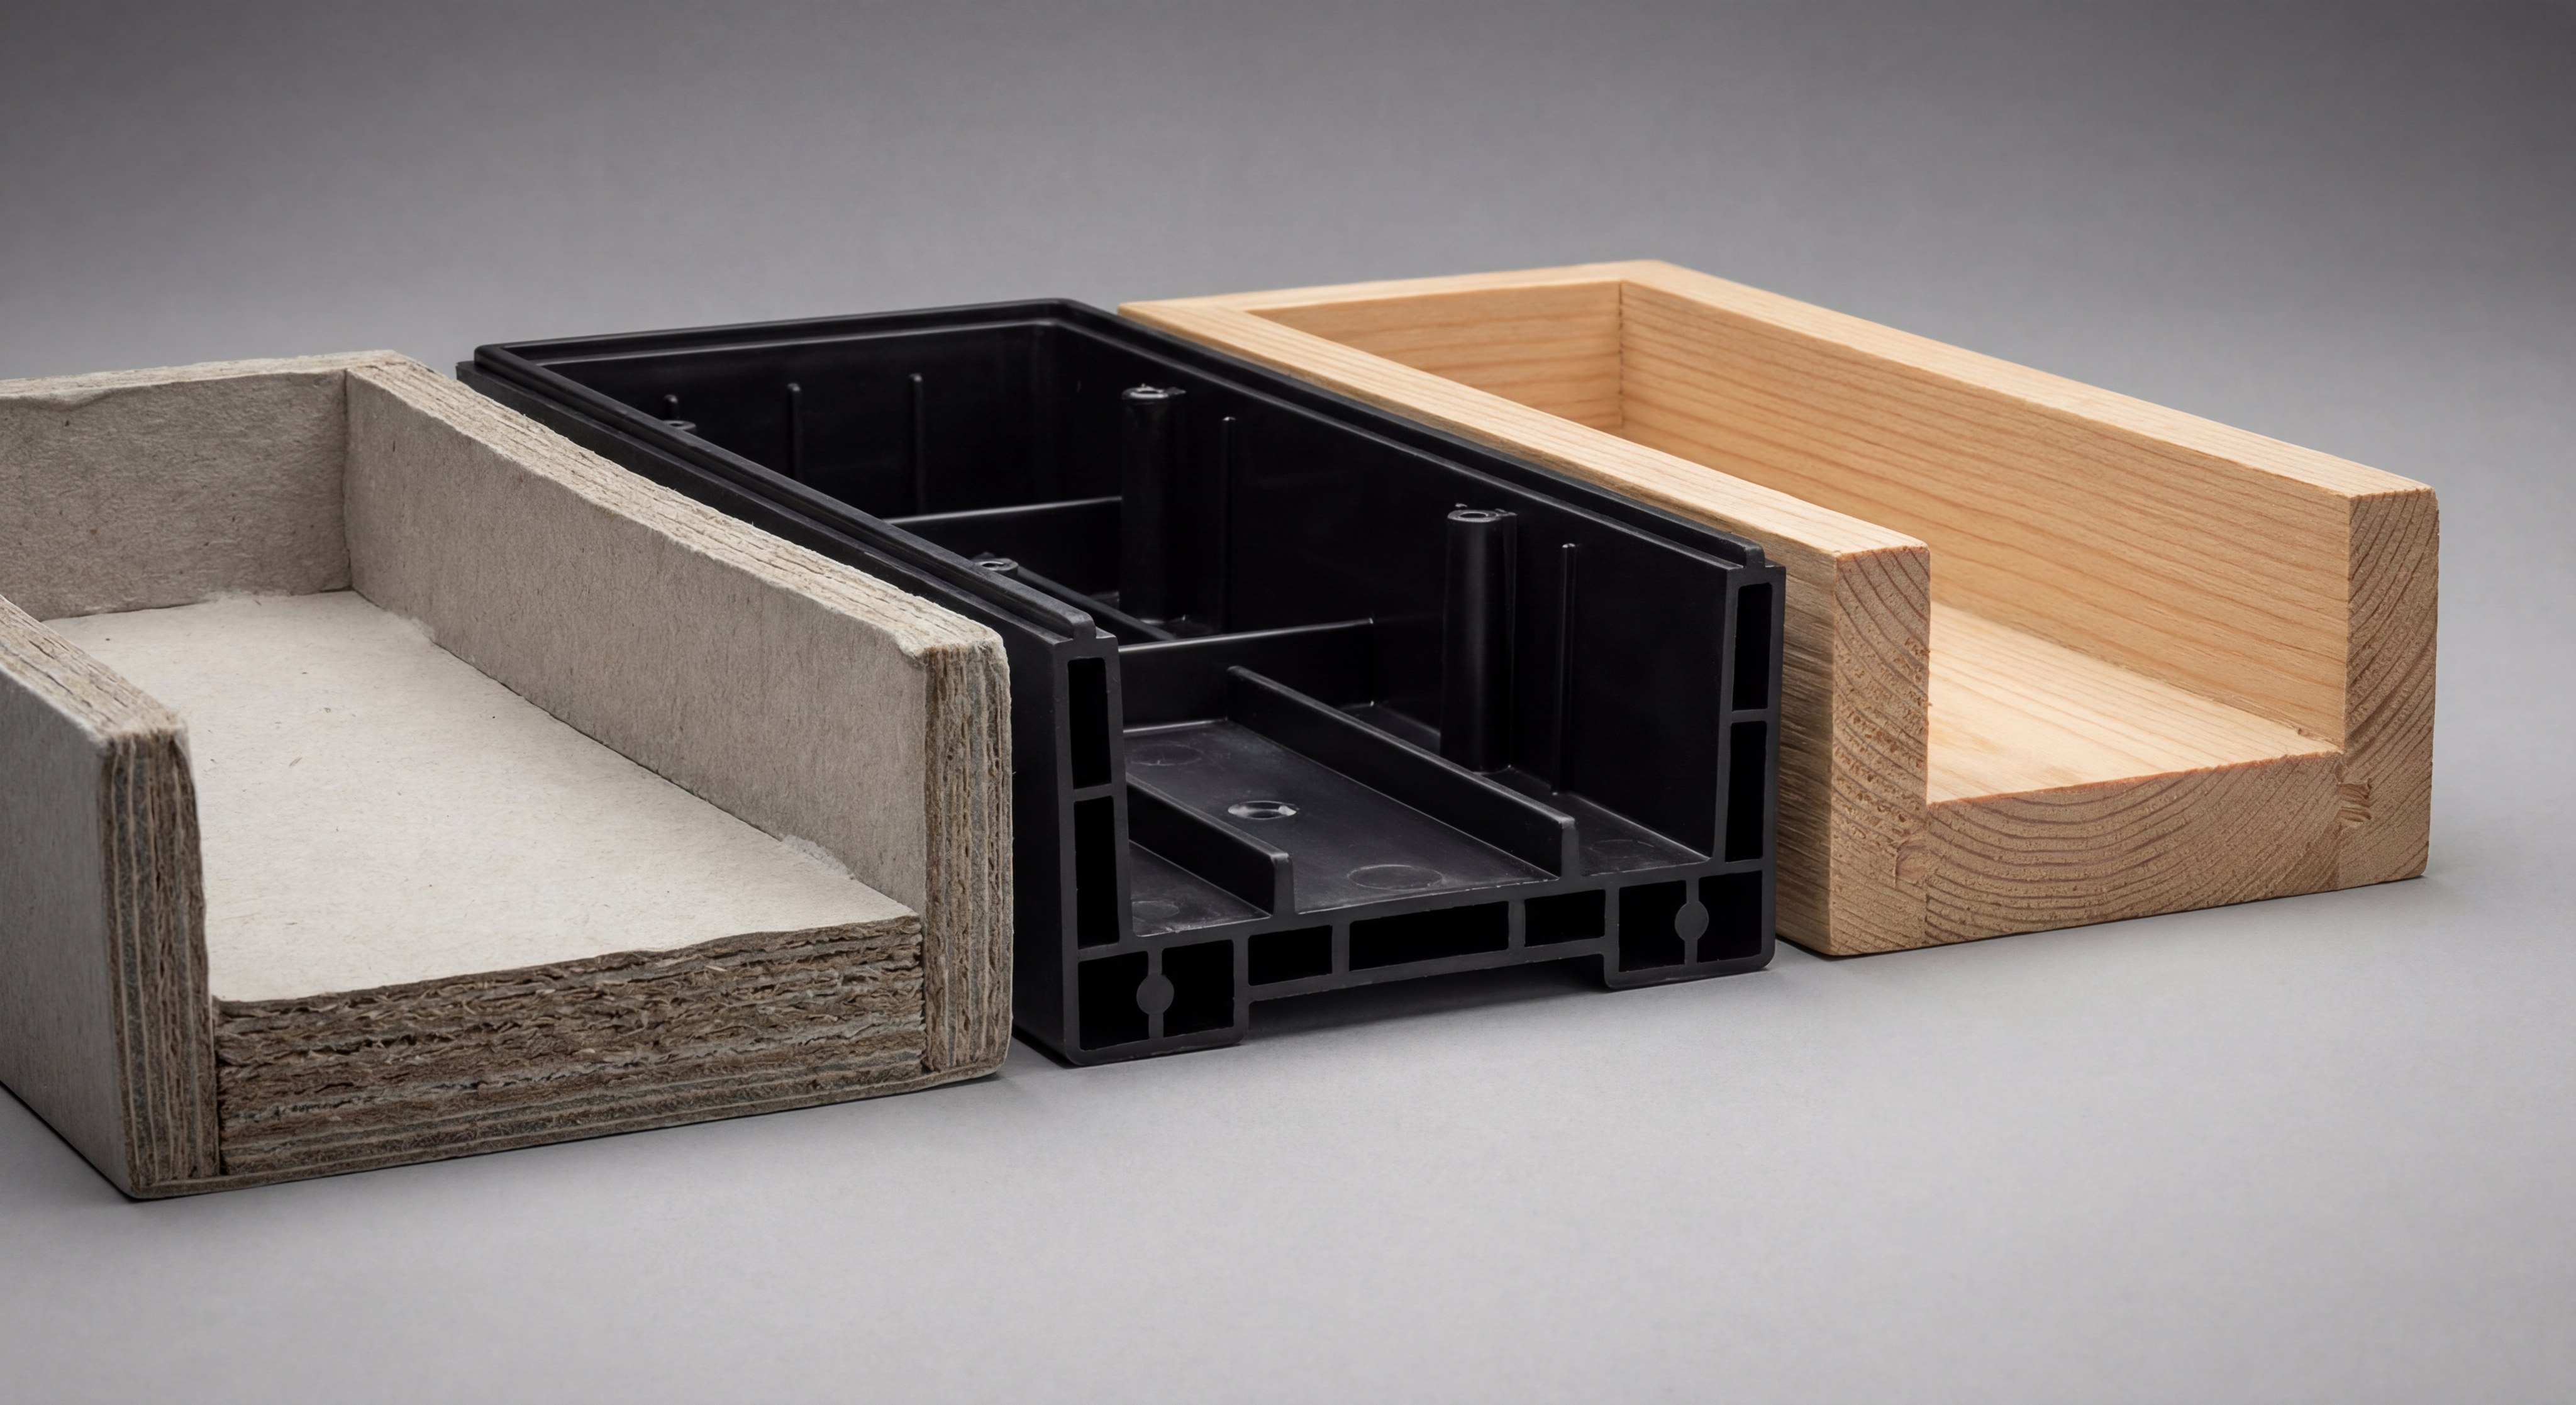
Which base materials provide the most structural support?
A rigid base is the skeleton of any high-quality organizer when you are researching how to make jewelry box inserts . Without a solid foundation, multi-piece trays will bow or bend when lifted, potentially spilling the jewelry. Professional-grade inserts often use a combination of greyboard and plastic to maintain a perfectly flat profile.
Is plastic or cardboard better for heavy items?
For heavy collections like luxury watches or chunky gemstone necklaces, a plastic base offers the best resistance to warping. However, for standard retail sets, high-thickness greyboard is usually sufficient and more eco-friendly.
Keep this in mind: The base must support the weight without flexing.
- ABS Plastic: Water-resistant and extremely rigid.
- Greyboard (1200gsm): Stiff, affordable, and easy to glue.
- Plywood: Used only for ultra-luxury or oversized display cases.
How do you bond the insert to the base?
The adhesive used must be strong enough to withstand temperature changes during global shipping. If the glue fails, the organizational layers will delaminate, causing the jewelry to shift and potentially sustain damage.
Here’s the deal: Chemical compatibility is key for long-term bonding.
- Hot Glue: Fast for prototyping but can become brittle.
- Spray Adhesive: Best for large surface areas and fabric.
- pH-Neutral Glue: Prevents corrosion of sensitive jewelry metals.
Key Takeaway: Choose a base material that matches the weight of your jewelry to prevent the insert from bowing or failing.
| Base Material | Rigidity | Sustainability | |
|---|---|---|---|
| Plastic | Excellent | Low | |
| Greyboard | Good | High | |
| Wood | Superior | Medium |
Evaluating structural support early in the design phase prevents costly failures in the final product.
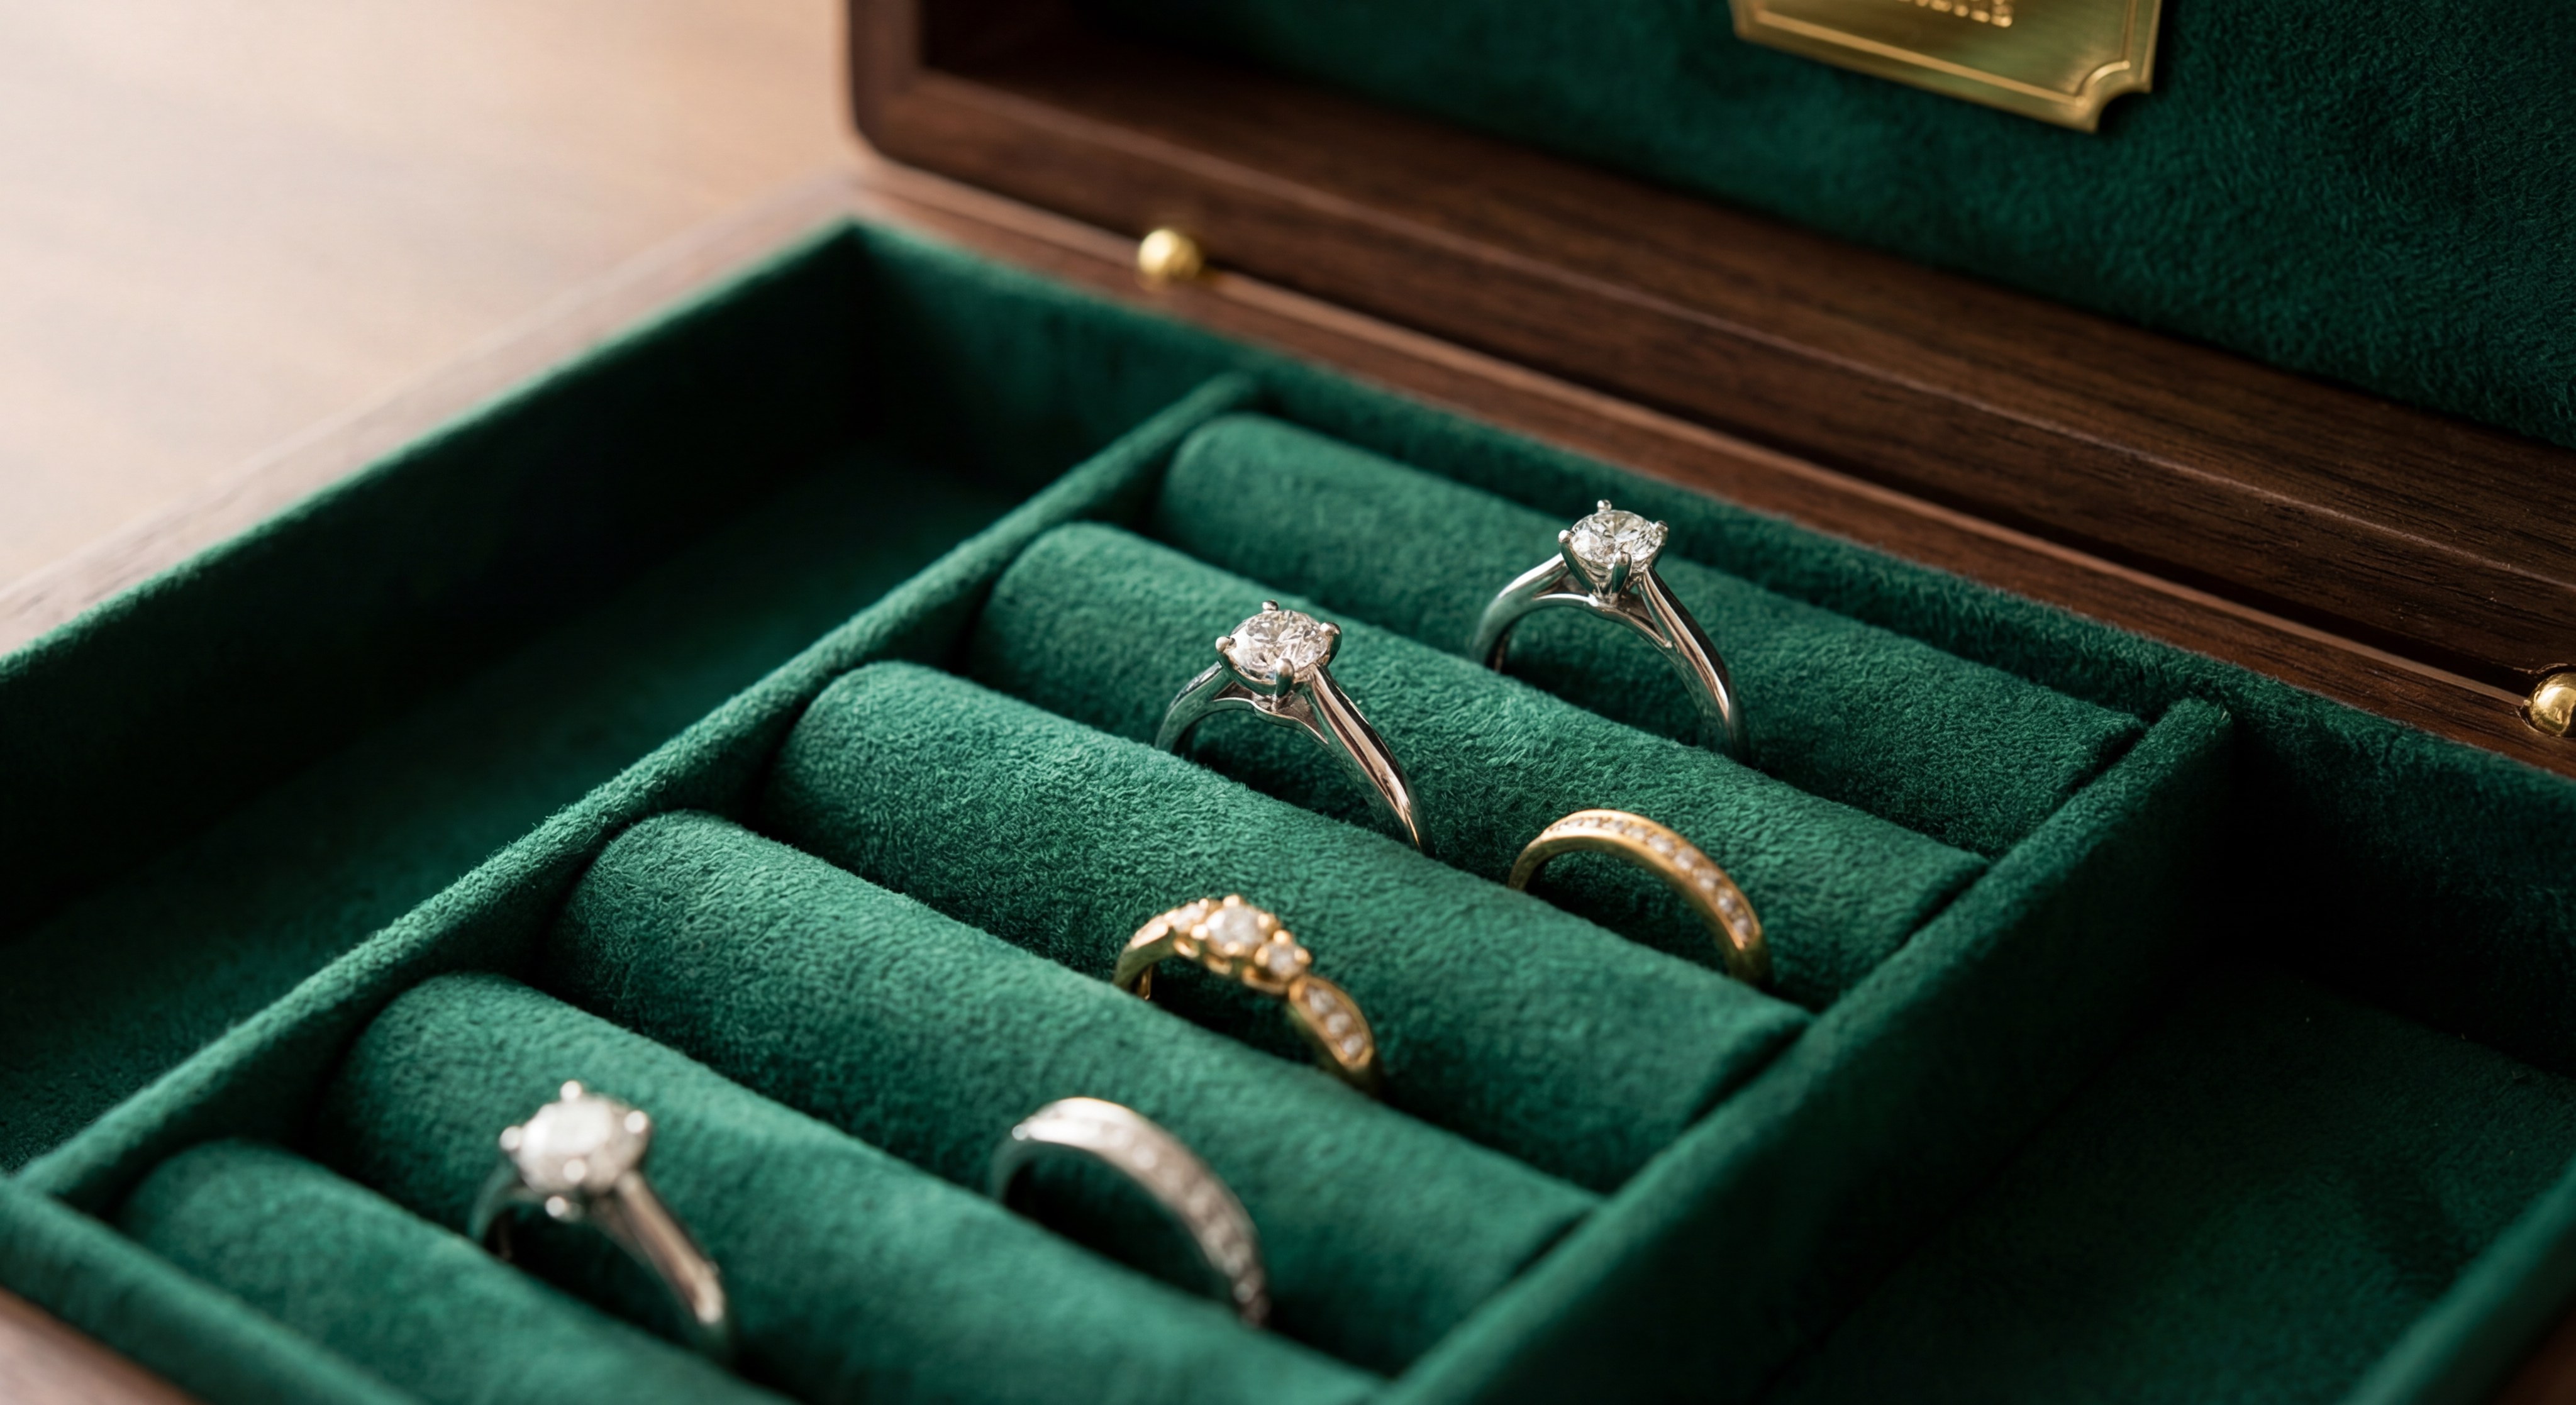
How can you create specific slots for ring organization?
Designing ring slots requires a balance between tension and visibility in the context of how to make jewelry box inserts. The slot must be tight enough to hold a thin band upright but flexible enough to accommodate wider statement rings. Using pre-formed foam cylinders or “ring rolls” is the most efficient way to achieve this professional look.
What is the advantage of using ring rolls?
Ring rolls provide a continuous valley of compression that can hold multiple rings of various sizes in a single row. This maximizes the space within the box while keeping the rings perfectly aligned for a clean visual.
Think about it: Alignment is the hallmark of a professional collection.
- Allows for adjustable spacing between pieces.
- Creates a “cradling” effect that protects the entire band.
- Simplifies the unboxing process for the customer.
How do you ensure the rings stay upright?
Tension is created by slightly oversizing the foam cylinders before they are wedged into the insert frame. If the tension is too loose, the rings will flop to the side, ruining the organized presentation.
The best part? You can test the tension with a standard band before final assembly.
- Use high-compression EVA foam for the core.
- Wrap with high-friction velvet to “grip” the metal.
- Leave 2mm of space between rolls for the band to slide in.
Key Takeaway: Precision-tensioned ring rolls offer the best combination of security and visibility for any ring collection.
| Component | Material | Purpose | |
|---|---|---|---|
| Core | Foam Cylinder | Provides compression | |
| Covering | Velvet Fabric | Protects metal/adds grip | |
| Spacing | 1.5cm Gap | Visual clarity |
Consistency in slot tension ensures that every ring is presented at the same angle for maximum impact.
What is the process for cutting foam to fit jewelry?
Clean cuts are the most visible indicator of quality when you explore how to make jewelry box inserts . Using the wrong tools or rushing the process results in jagged edges that look amateurish and may trap dust. For small batches, a sharp utility knife is sufficient, but bulk production requires specialized die-cutting equipment.
What are the best tools for DIY foam cutting?
A high-carbon steel utility knife or a scalpel provides the cleanest entry point into high-density foam. Always use a fresh blade for every ten inserts to ensure the foam is sliced rather than torn by a dull edge.
Look at it this way: A sharp blade is your most important asset.
- Self-healing mat: Protects your work surface and the blade.
- Metal ruler: Acts as a guide for perfectly straight lines.
- Cardboard templates: Ensures consistency across multiple pieces.
How do you handle complex or organic shapes?
For intricate designs like brooches or uniquely shaped earrings, creating a custom template is non-negotiable. Trace the jewelry onto a piece of cardstock first, then use that to guide your knife on the foam surface.
Believe it or not: Cutting from the back side prevents visible errors on the front.
- Lightly “score” the surface before making the final cut.
- Use a slow, continuous motion to avoid “sawing” marks.
- Remove the center piece carefully to avoid stretching the foam.
Key Takeaway: Sharp tools and steady movements are required to achieve the “factory-made” look essential for B2B standards.
| Cut Type | Tool Recommended | Difficulty | |
|---|---|---|---|
| Straight Lines | Utility Knife | Low | |
| Circular Slots | Hollow Punch | Medium | |
| Custom Shapes | Laser or Scalpel | High |
Maintaining tool sharpness is the most effective way to reduce waste and improve the finish of your inserts.
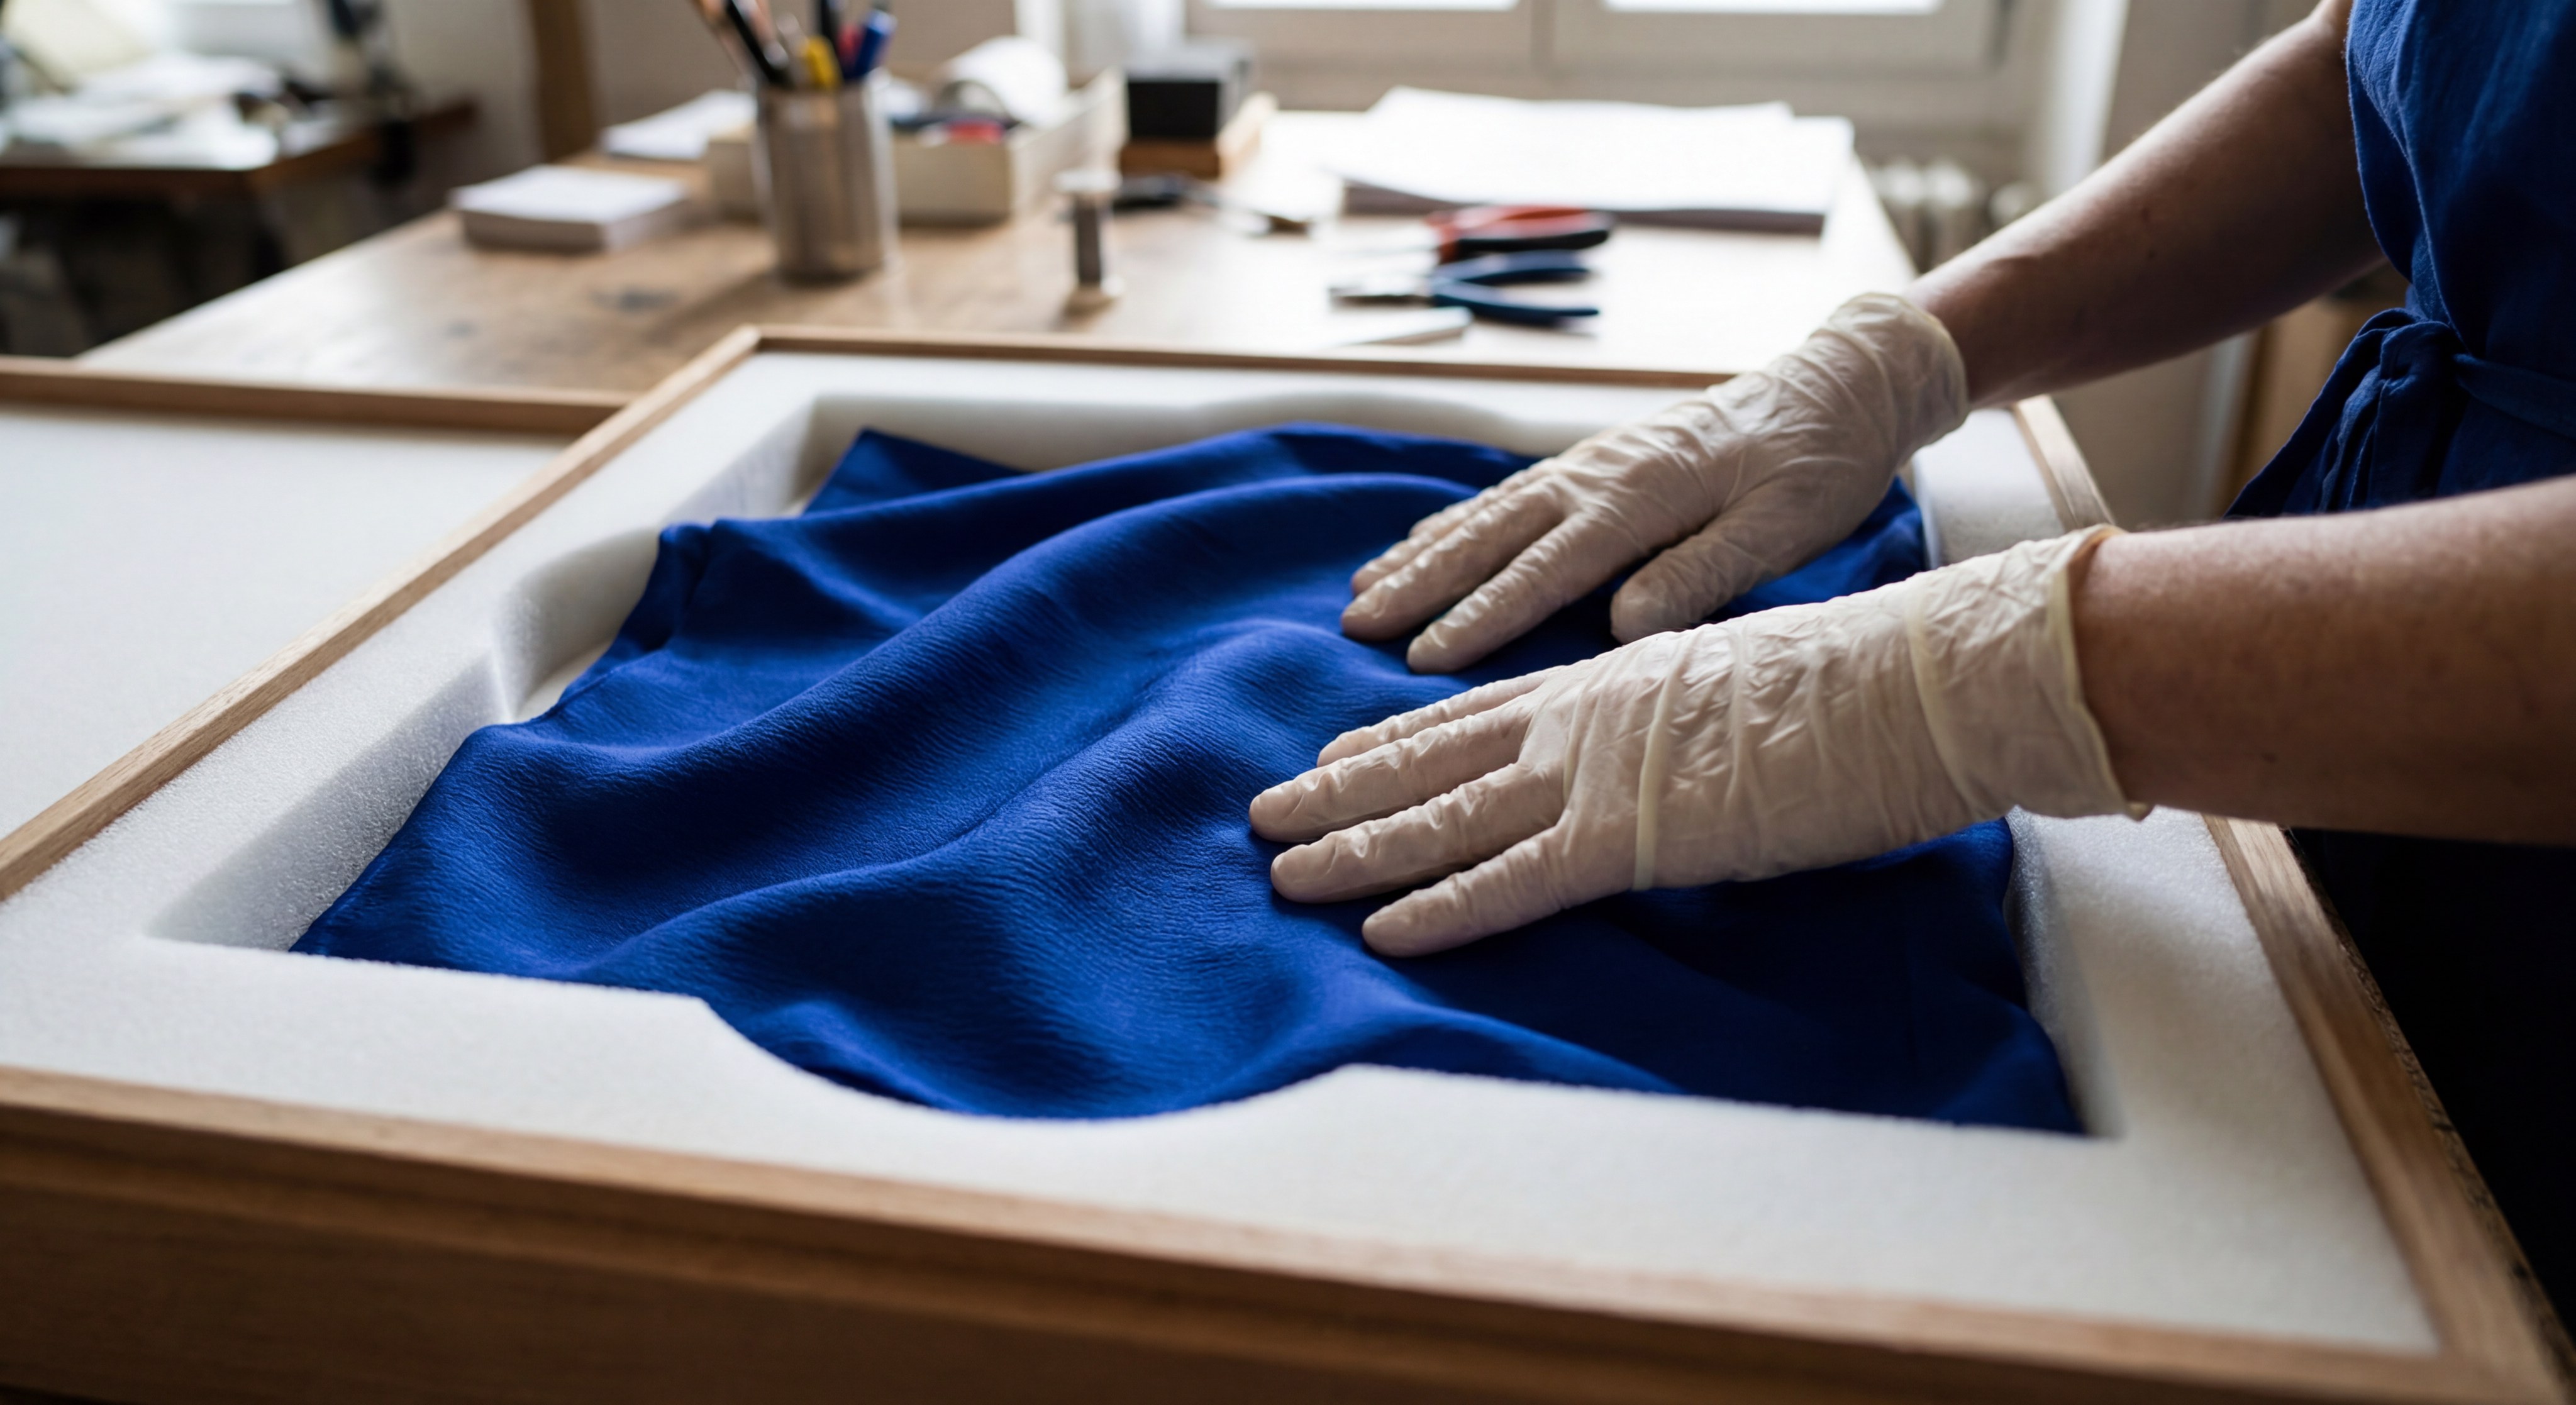
How do you add luxury finishes like velvet to inserts?
The application of fabric is where the true aesthetic value is created in the journey of how to make jewelry box inserts. A poorly glued fabric will bubble or peel, instantly devaluing the jewelry inside. The goal is a smooth, tensioned surface with no visible glue residue or uneven corners.
What adhesive works best for fabric lining?
Spray adhesive is generally preferred because it provides a thin, even mist that doesn’t “soak through” the fabric. If the glue penetrates the velvet, it will ruin the texture and leave hard, unsightly spots on the display surface.
Think about it: The glue should be felt, not seen.
- Apply glue to the foam, not the fabric.
- Wait for the glue to become “tacky” before applying the lining.
- Use a bone folder to smooth out air bubbles.
How do you achieve perfect mitered corners?
Corners are the most difficult part of the wrapping process and require a specific “fold and trim” technique. You must remove the bulk of the fabric at the corner points to prevent the insert from becoming too thick to fit in the box.
The secret is simple: The “V” cut is the key to a flat corner.
- Trim fabric at a 45-degree angle near the corner.
- Fold the sides first, then the top and bottom.
- Secure with a small amount of high-tack glue on the underside.
Key Takeaway: Even adhesive application and precise corner trimming are the secrets to a professional fabric finish.
| Finish Step | Tool | Goal | |
|---|---|---|---|
| Gluing | Spray Adhesive | Even coverage | |
| Smoothing | Bone Folder | Zero bubbles | |
| Cornering | Fabric Scissors | Flush fit |
Mastering the fabric wrap transforms a simple piece of foam into a luxury display asset.
Can you design inserts for necklace tangle prevention?
Tangles are a major pain point for retailers, and learning how to make jewelry box inserts is the only way to solve it permanently. By incorporating hooks, notches, or rear-mounted pockets, you can keep the chain under slight tension. This prevents the “rat’s nest” effect that often occurs when a box is shaken during transport.
What are the best ways to secure chains?
Using two small incisions at the top of a rigid display card allows you to “hang” the necklace within the box. The excess chain is then tucked into a soft pouch on the back of the insert, keeping the front presentation clean.
Think about it: Gravity is your enemy during shipping.
- Elastic bands: Hold the chain flat against the insert.
- Notches: Keep the pendant centered and visible.
- C-clips: For thicker chains that cannot be easily folded.
How do you design a “floating” necklace display?
A floating display uses a recessed area in the center of the insert to allow the pendant to sit lower than the chain. This adds depth to the presentation and highlights the most valuable part of the jewelry.
Here is the kicker: Depth creates a more dramatic unboxing experience.
- Use a dual-layer foam system for different heights.
- Ensure the tension isn’t so high that it snaps delicate links.
- Provide a pull-tab for easy removal of the entire tray.
Key Takeaway: Integrated notches and rear storage pockets are essential for delivering tangle-free necklaces to your customers.
| Feature | Function | Benefit | |
|---|---|---|---|
| Top Slits | Pendant Positioning | Aesthetic appeal | |
| Back Pouch | Chain Storage | Tangle prevention | |
| Elastic Strap | Secondary Security | Zero movement |
Designing for necklace stability reduces the time retail staff spend preparing items for display.
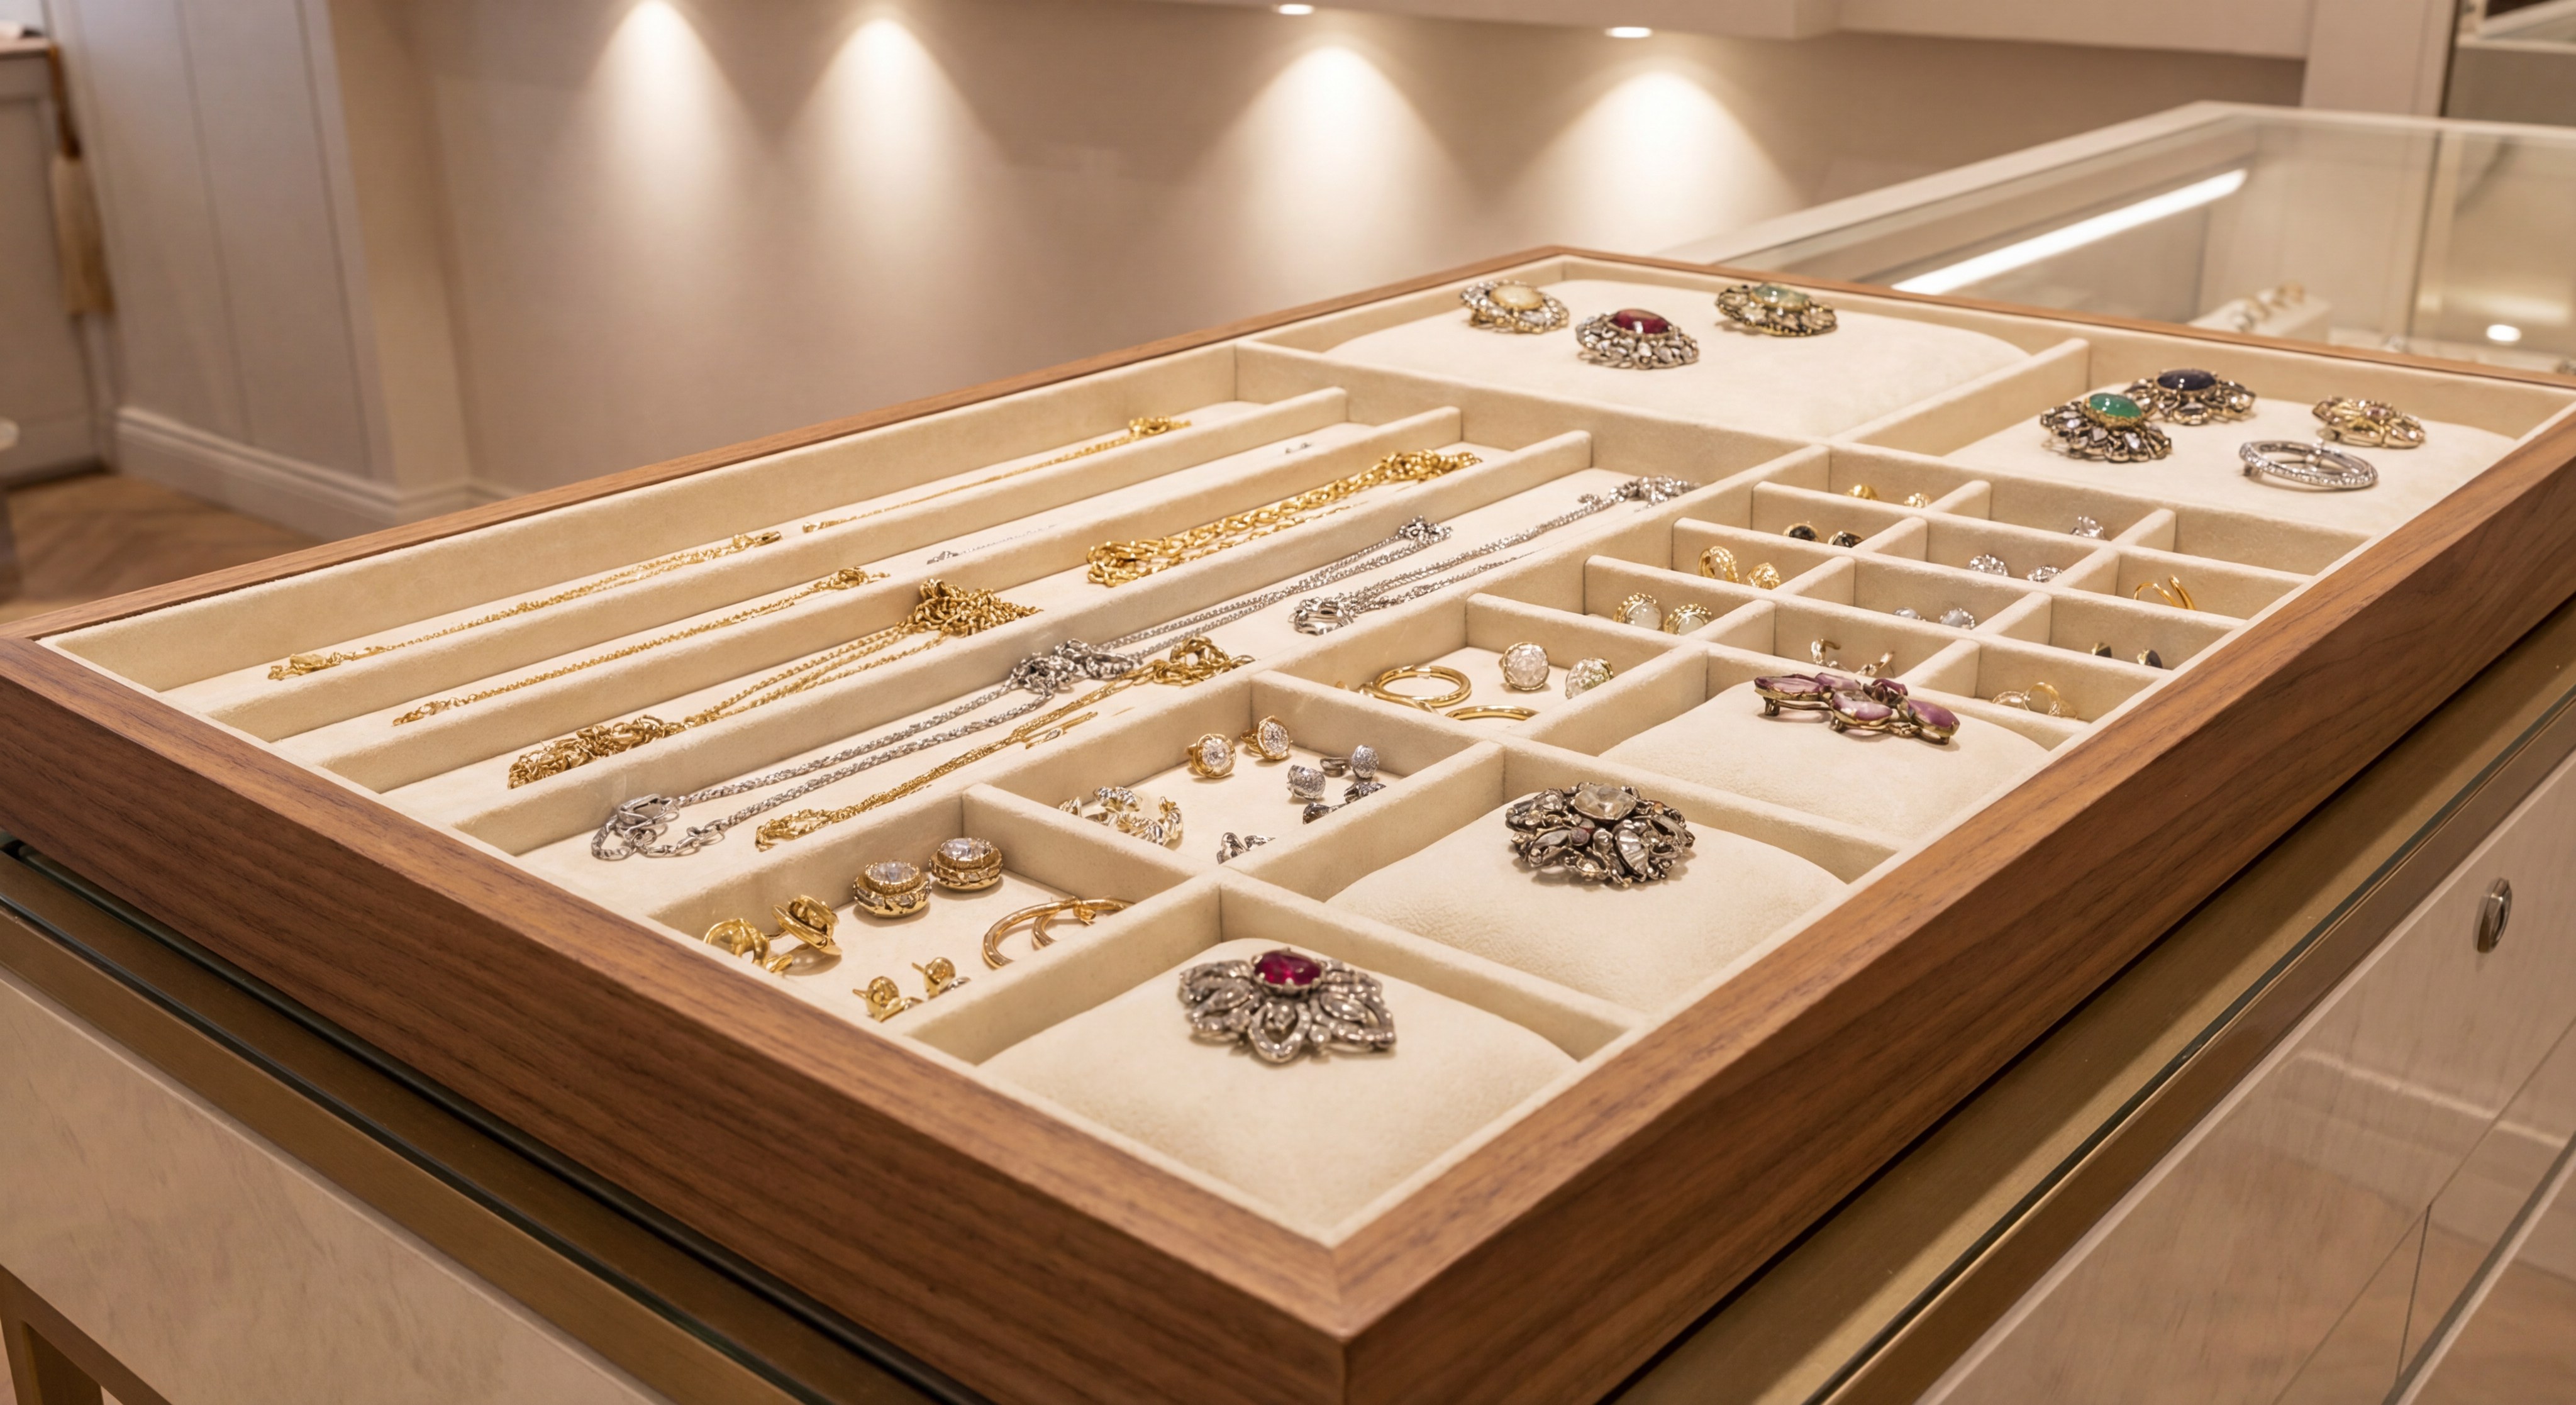
How do you assemble stackable jewelry organization trays?
Stackability is a critical feature for B2B clients who need to maximize storage in safes or display cases. When you understand how to make jewelry box inserts for stacking, you create a modular system where trays nest perfectly on top of one another. This requires a “ledge” or “lip” design on the outer frame of each insert.
How do you ensure trays nest securely?
The outer frame of the insert must be slightly taller than the jewelry it contains. This creates a protective air gap that prevents the bottom of the top tray from crushing the items in the tray below.
The best part? It allows for high-density storage without any risk of damage.
- Standardize outer dimensions for total interchangeability.
- Use a rigid plastic or wood frame for the stacking lip.
- Incorporate “male and female” notches for a locking fit.
What features make stackable trays easier to use?
Since stacked trays are often deep within a cabinet, adding ribbon pulls or finger notches is essential for accessibility. Without these, users are forced to tip the entire stack to reach the bottom layer, which defeats the purpose of organization.
Think about it: Ease of access is just as important as protection.
- Color-coded ribbon tabs for different jewelry types.
- Transparent lids for the top layer to allow quick identification.
- Felt-lined bottoms to prevent the trays from scratching each other.
Key Takeaway: A standardized frame with a protective “lip” is the foundation of any successful stackable organization system.
| Layer Detail | Dimension | Requirement | |
|---|---|---|---|
| Stacking Lip | 3mm – 5mm | Rigid Material | |
| Clearance | +2mm over item | Prevent crushing | |
| Pull Tab | 2cm Ribbon | Durability |
Modular systems allow for scalable storage solutions as your jewelry collection or inventory grows.

How do you maintain custom inserts for long-term use?
Maintaining the cleanliness of your organizers is the final step in the lifecycle of how to make jewelry box inserts . Dust, skin oils, and metallic debris can accumulate in the slots over time, making the presentation look dingy. A proactive maintenance schedule ensures that your luxury packaging continues to reflect your brand’s high standards.
How do you remove dust from velvet slots?
A soft-bristled makeup brush or a small air canister is the most effective way to clean deep inside ring slots. Avoid using wet cloths on velvet, as this can flatten the “pile” of the fabric and leave permanent water marks.
Keep this in mind: Mechanical cleaning is safer than chemical cleaning.
- Use an adhesive lint roller for flat surfaces.
- Use a dedicated “jewelry vacuum” for delicate crevices.
- Rotate high-use inserts to prevent permanent foam compression.
Can you repair damaged fabric or foam?
Small tears in the fabric can often be fixed with a tiny amount of fabric glue and a precision toothpick. However, if the internal foam has lost its “memory” and no longer holds jewelry securely, the insert should be replaced to avoid product damage.
Here’s the deal: Replacement is cheaper than a damaged diamond.
- Check the “grip” of ring slots every six months.
- Inspect for glue failure near the corners and edges.
- Keep the inserts away from direct sunlight to prevent fading.
Key Takeaway: Regular dusting and slot-tension checks will double the lifespan of your custom jewelry box organizers.
| Task | Tool | Frequency | |
|---|---|---|---|
| De-linting | Roller | Weekly | |
| Deep Dusting | Soft Brush | Monthly | |
| Tension Test | Manual Check | Bi-annually |
Proper maintenance preserves the tactile and visual appeal of your packaging for years of retail use.
Conclusion
Creating custom jewelry box inserts is a strategic investment in your brand’s logistics and customer satisfaction. By focusing on precision measurements, high-density materials, and luxury finishes, you transform a simple box into a powerful organizational tool. At our facility, we are dedicated to helping brands define their signature look through engineering excellence and premium craftsmanship. We believe that every piece of jewelry deserves a home that is as beautiful and secure as the item itself. To elevate your unboxing experience and protect your valuable inventory, contact us today for a consultation on bespoke packaging solutions.
Frequently Asked Questions
Can I use recycled materials for jewelry box inserts?
Yes, you can. Recycled greyboard and molded pulp are excellent sustainable bases that offer high structural integrity while appealing to eco-conscious consumers.
What’s the best way to prevent rings from falling out during shipping?
The best way is to ensure the ring slot is slightly undersized compared to the band width. This creates the necessary compression to hold the piece firmly even when the box is upside down.
How do I know if the foam I chose is too hard?
You know it is too hard if it leaves marks on the jewelry or if it is difficult to insert the pieces without excessive force. The foam should yield slightly under pressure but return to its original shape immediately.
Can I add a custom logo to the fabric-covered insert?
Yes, you can use hot foil stamping or silk-screen printing. It is best to print on the fabric before it is glued to the foam to ensure the logo remains perfectly crisp and aligned.
What’s the best fabric for long-term silver storage?
The best fabric is an anti-tarnish velvet or a high-quality microfiber. These materials are free from the sulfur-based chemicals found in cheaper fabrics that react with silver to cause oxidation.