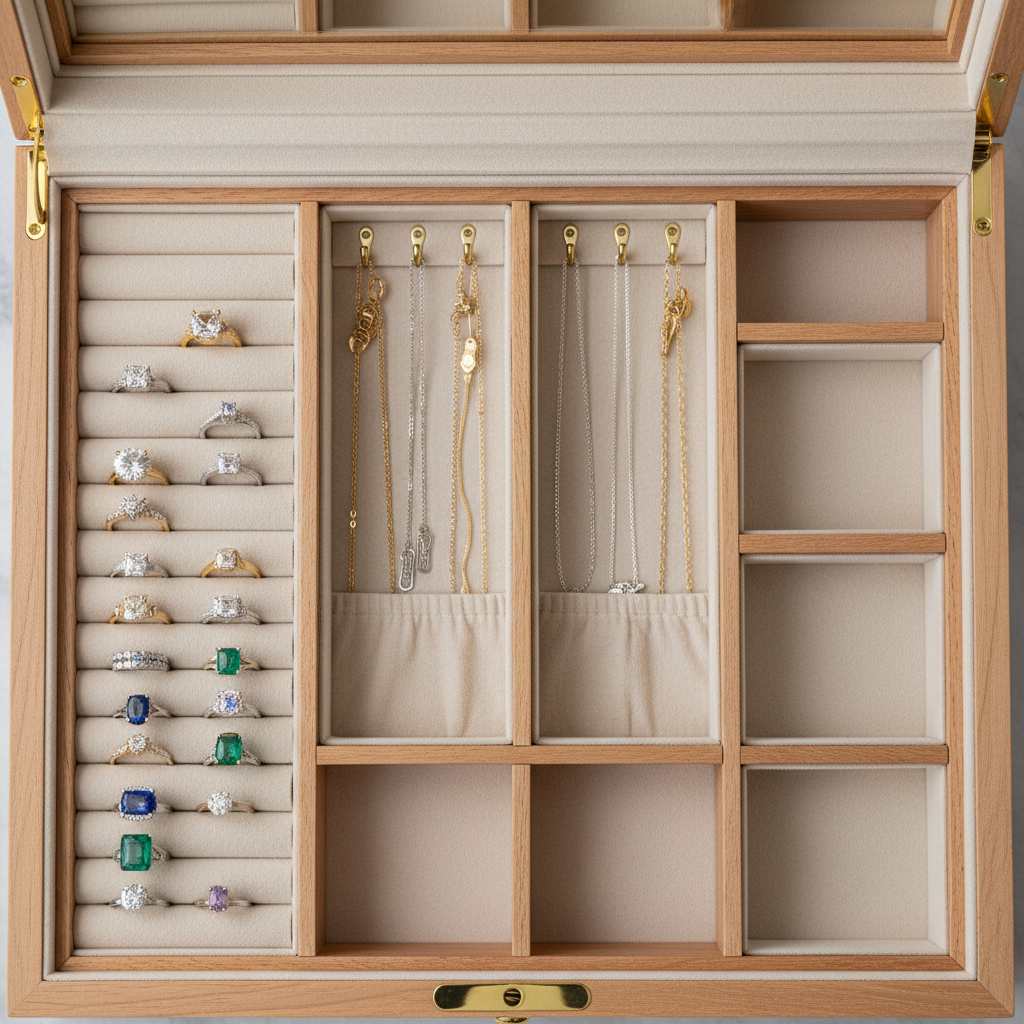
You can discover how to make jewelry box units by following a professional woodworking sequence involving material breakdown, joinery, and high-end finishing. Storing precious heirlooms in generic plastic containers or disorganized drawers often leads to tangled necklaces and scratched gemstones. This lack of proper organization doesn’t just frustrate you; it actively devalues your investment and ruins the unboxing experience of your finest pieces. By building a custom wooden vessel, you solve these storage headaches while creating a legacy piece of furniture that reflects your brand’s commitment to quality.
How do I choose and prepare the wood?

Selecting the right timber is the first critical phase in learning how to make jewelry box masterpieces with a modern aesthetic. For a high-contrast look, many professionals pair dark Wenge with lighter White Oak to define the exterior and interior sections. You must mill your stock down to precise 1/2″ and 3/4″ thicknesses using a planer and jointer.
Believe it or not, the grain pattern you choose now dictates the final visual flow of the box. Be selective with your boards to ensure consistent color and straight grain throughout the build.
Selecting Premium Hardwoods
- Wenge: Provides a deep, architectural dark tone for the outer case.
- White Oak: Offers durability and a bright contrast for drawer interiors.
- Milling: Ensure all panels are perfectly flat to prevent joinery gaps.
Preparing the Raw Stock
- Cross-cut boards to rough length.
- Joint one face and one edge.
- Plane to final thickness.
Key TakeawayStarting with perfectly squared and milled material is the non-negotiable foundation for all subsequent joinery and assembly steps.
| Step | Action | Tools Required | |
|---|---|---|---|
| 1 | Material Breakdown | Table Saw, Miter Saw | |
| 2 | Milling | Jointer, Planer | |
| 3 | Grain Selection | Visual Inspection |
Precise thicknessing at this stage eliminates 90% of assembly frustrations during the final glue-up phase.
What is the secret to a perfect box carcass?
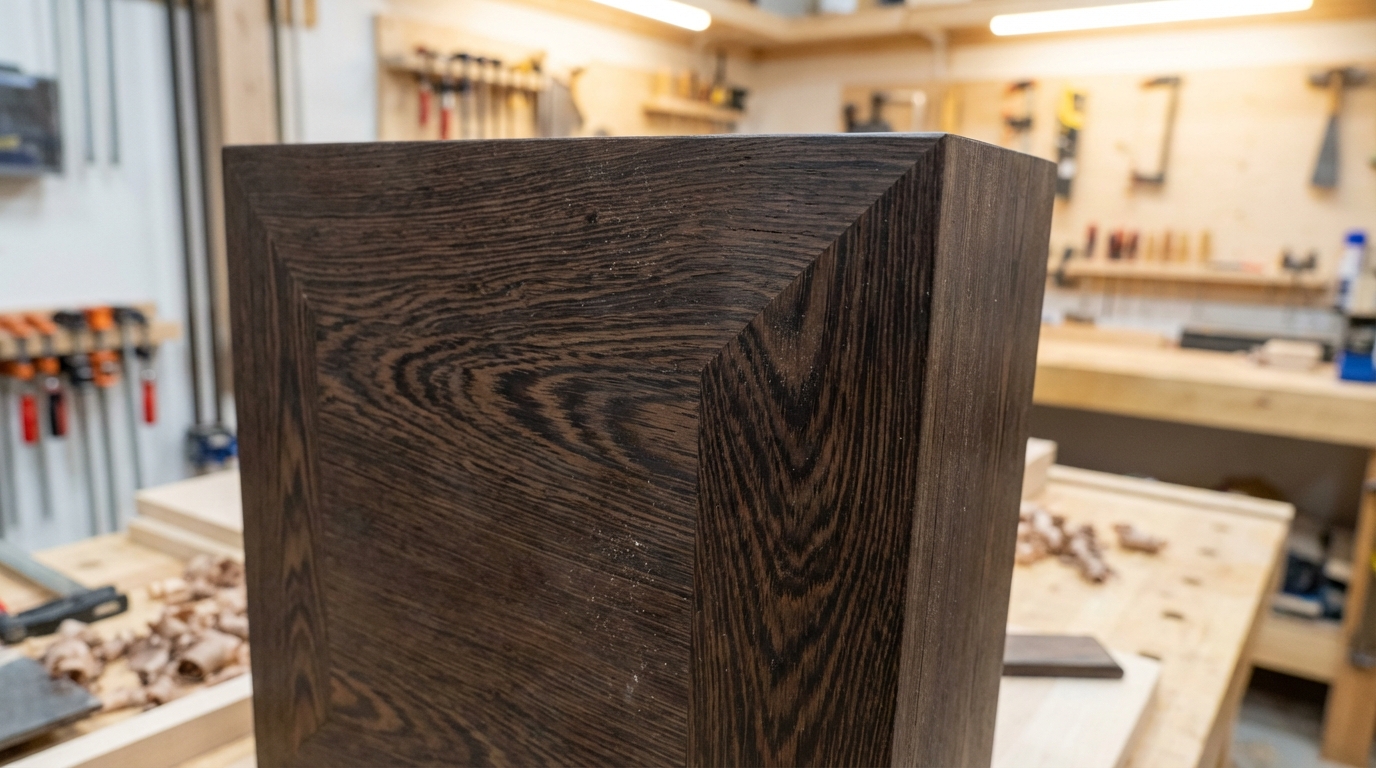
Creating a seamless outer shell is a major milestone when understanding how to make jewelry box structures that look professional. You achieve this by gluing up continuous panels and using 45-degree miters to wrap the grain around the corners. This technique ensures that the wood grain appears to flow uninterrupted from the front to the sides.
The best part? Once the carcass is glued, you can relieve the back panel and cut the faux drawer slots with a table saw.
Carcass Construction Steps
- Panel Glue-up: Use dark wood glue for Wenge to hide seam lines effectively.
- Miter Cutting: Use a dedicated cross-cut sled for absolute 45-degree accuracy.
- Back Relief: Cut a small rabbet to house the rear panel securely.
Joinery Refinement
- Dry-fit all four sides.
- Check for squareness with a machinist square.
- Apply even clamping pressure.
Key TakeawayA continuous grain wrap is the hallmark of high-end jewelry packaging and provides a sophisticated, modern silhouette.
| Component | Joinery Type | Material | |
|---|---|---|---|
| Outer Shell | 45-Degree Miter | Wenge | |
| Back Panel | Rabbet Joint | Plywood or Solid Wood | |
| Shelf Support | Dado / Groove | Wenge |
Achieving a light-tight miter joint requires a table saw calibrated to within a tenth of a degree of accuracy.
How do I fit the internal shelf and fronts?
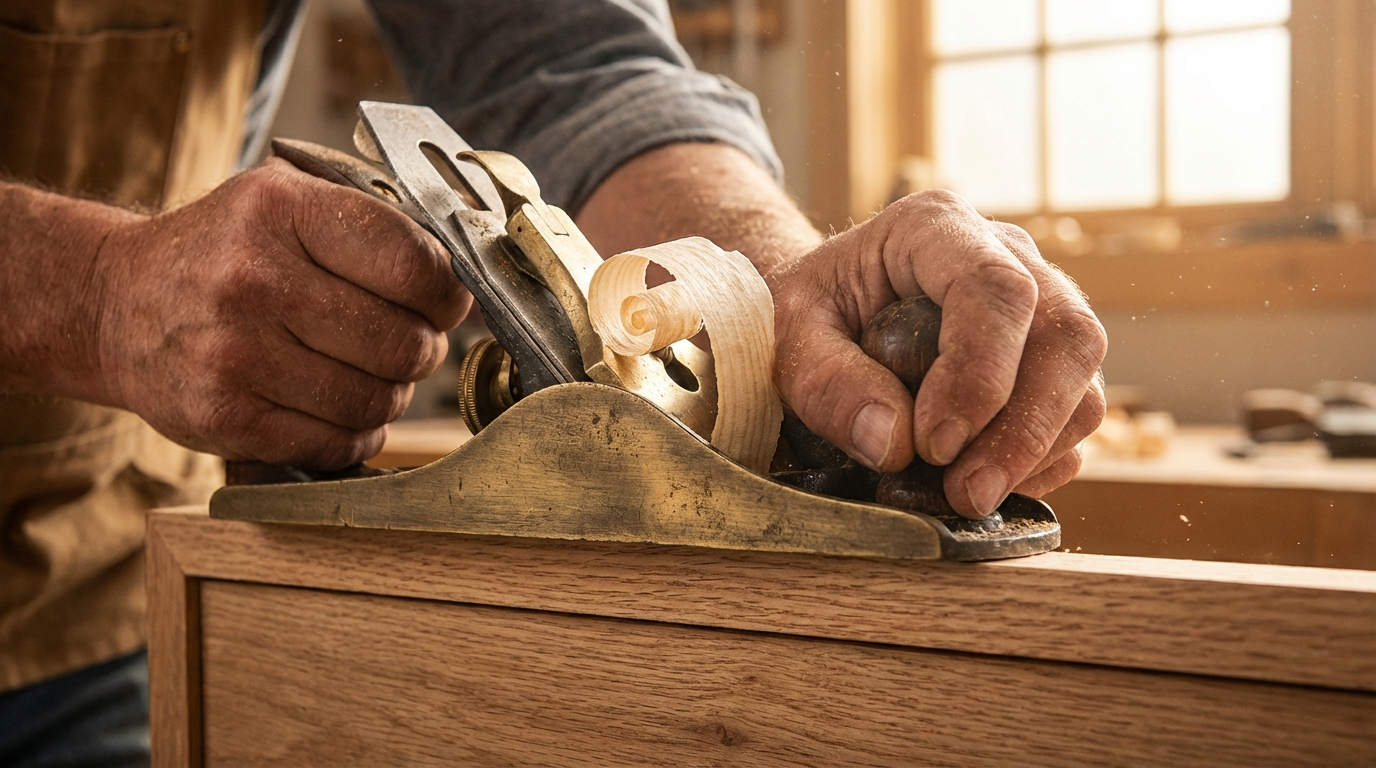
Fitting the interior components requires a delicate touch to ensure the how to make jewelry box process results in a snug, high-quality feel. You must measure the interior space of the carcass carefully before rough-cutting the shelf and faux drawer fronts. The goal is a fit that is firm enough to stay in place but loose enough to accommodate seasonal wood movement.
But here is the kicker: even a fraction of a millimeter can make the difference between a drawer that glides and one that sticks. Use a hand plane for final adjustments.
Interior Fitting Tips
- Snug Fit: The shelf should slide in with light hand pressure only.
- Reveal Management: Maintain a consistent 1/16″ gap around the drawer fronts.
- Faux Fronts: Match the grain of the faux front to the surrounding case.
Achieving Precision
- Measure interior width and height.
- Trim components 1/32″ oversized initially.
- Shave edges with a block plane for the perfect reveal.
Key TakeawayUsing hand tools for final fitting provides a level of precision and “feel” that power tools simply cannot replicate.
| Part | Material | Fitting Strategy | |
|---|---|---|---|
| Internal Shelf | White Oak | Friction fit | |
| Faux Front | Wenge | Even reveal | |
| Dividers | White Oak | Bridle or CA glue |
The tactile response of a perfectly fitted drawer front is the primary indicator of luxury craftsmanship in custom cabinetry.
Why is drawer spacing so critical?
Even spacing is the visual “glue” that holds your how to make jewelry box design together. You should use shims and hand planes to get the spacing perfect before you even begin the drawer joinery. Proper spacing ensures that the drawers look balanced and symmetric within the Wenge frame.
Let’s face it, nothing ruins a modern look faster than crooked drawer lines or uneven gaps. Taking the time now prevents headaches once the finish is applied.
Spacing Guidelines
- Uniformity: Use consistent shims (like playing cards) to set gaps.
- Hand Planing: Fine-tune the height of the fronts for a parallel look.
- Pre-Joinery Fit: Always fit the fronts to the opening before building the drawer boxes.
Symmetry Calibration
- Insert all fronts into the openings.
- Place shims on the bottom and sides.
- Mark any areas requiring material removal.
Key TakeawayPerfect drawer alignment transforms a collection of wooden parts into a high-end, cohesive jewelry storage solution.
| Spacing Element | Ideal Dimension | Adjustment Tool | |
|---|---|---|---|
| Vertical Gap | 1/16 inch | Block Plane | |
| Horizontal Gap | 1/16 inch | Shoulder Plane | |
| Depth Reveal | Flush | Sanding Block |
A consistent 1.5mm reveal around all moving parts provides the necessary clearance for wood expansion while maintaining a tight aesthetic.
How are half-blind dovetails constructed?
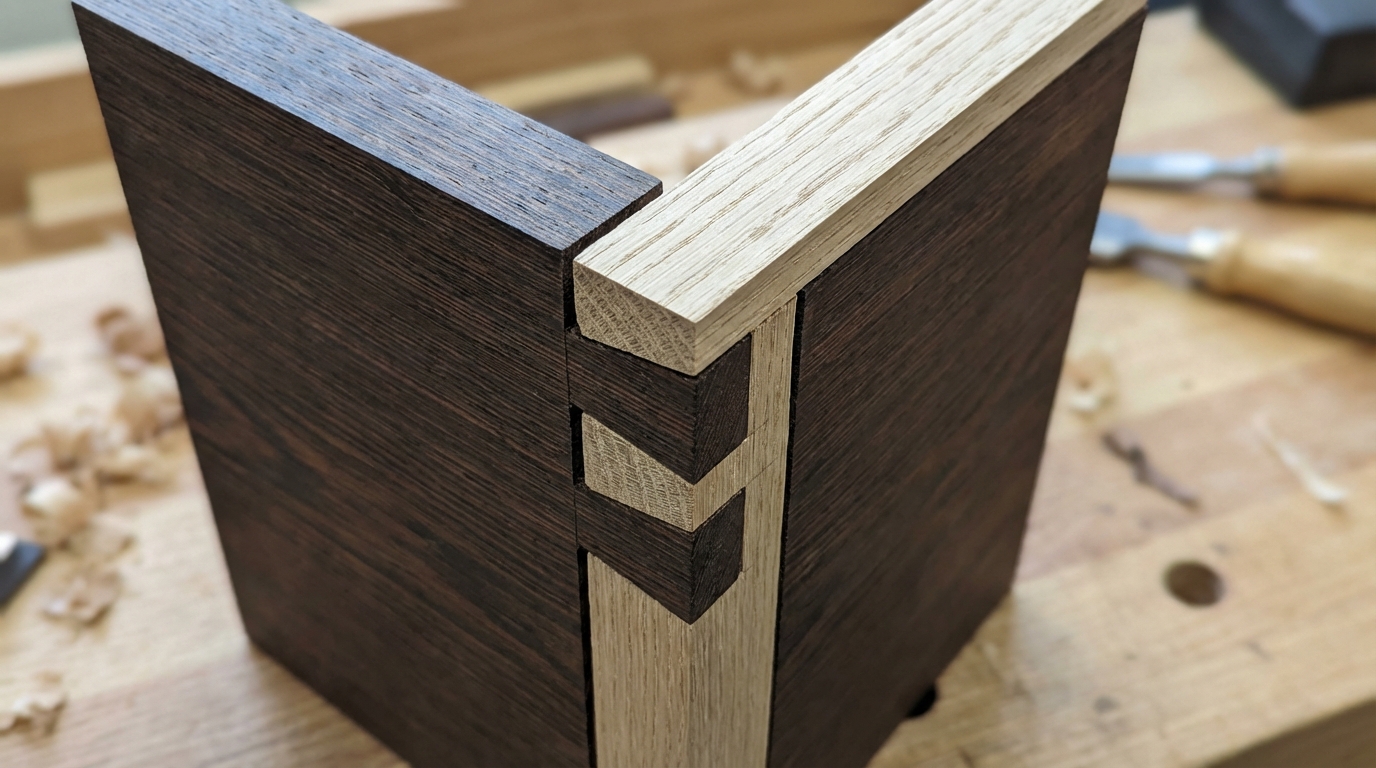
Mastering half-blind dovetails is the pinnacle of learning how to make jewelry box drawers that last for generations. This joinery style hides the end grain of the tails on the front of the drawer while showcasing the beautiful interlocking pins on the sides. You should use White Oak for the drawer sides to create a striking contrast against the dark Wenge fronts.
Make no mistake, this step requires patience and a sharp chisel to ensure the joints seat without gaps.
Dovetail Construction Steps
- Layout: Carefully mark the pins and tails to align the center pin with the slide rail.
- Cutting: Use a fine-tooth dovetail saw for the initial cuts.
- Chiseling: Remove waste gradually to avoid splitting the delicate White Oak.
Joinery Refinement
- Saw the shoulders of the tails.
- Transfer the layout to the pin board.
- Paring the sockets for a “piston” fit.
Key TakeawayHalf-blind dovetails offer unmatched structural integrity while preserving the clean, modern look of the jewelry box face.
| Feature | Tail Board | Pin Board | |
|---|---|---|---|
| Material | White Oak | Wenge (Front) | |
| Visible Grain | Side of Box | None (from front) | |
| Strength | Very High | Very High |
Hand-cut dovetails serve as a “maker’s mark” that instantly signals the high value and artisan nature of the project.
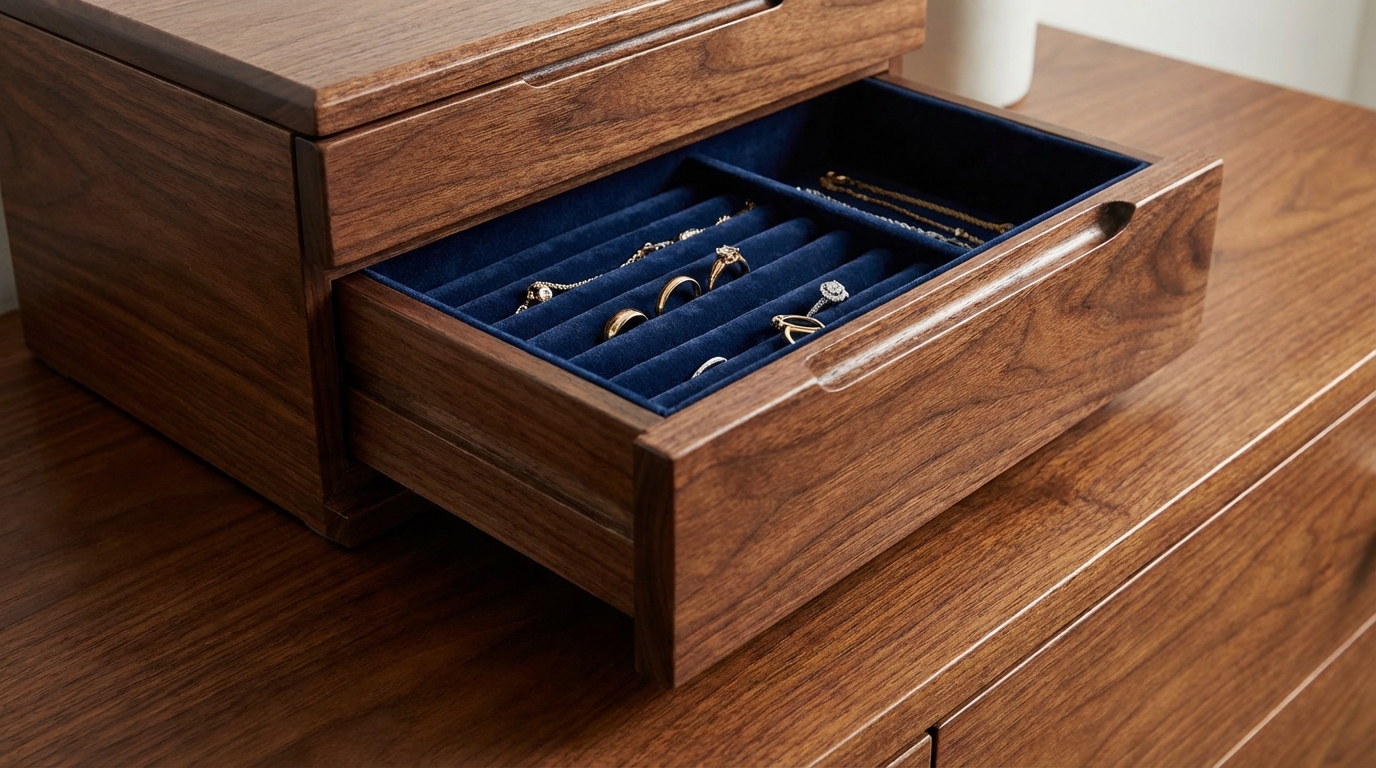
What makes wooden drawer slides so smooth?
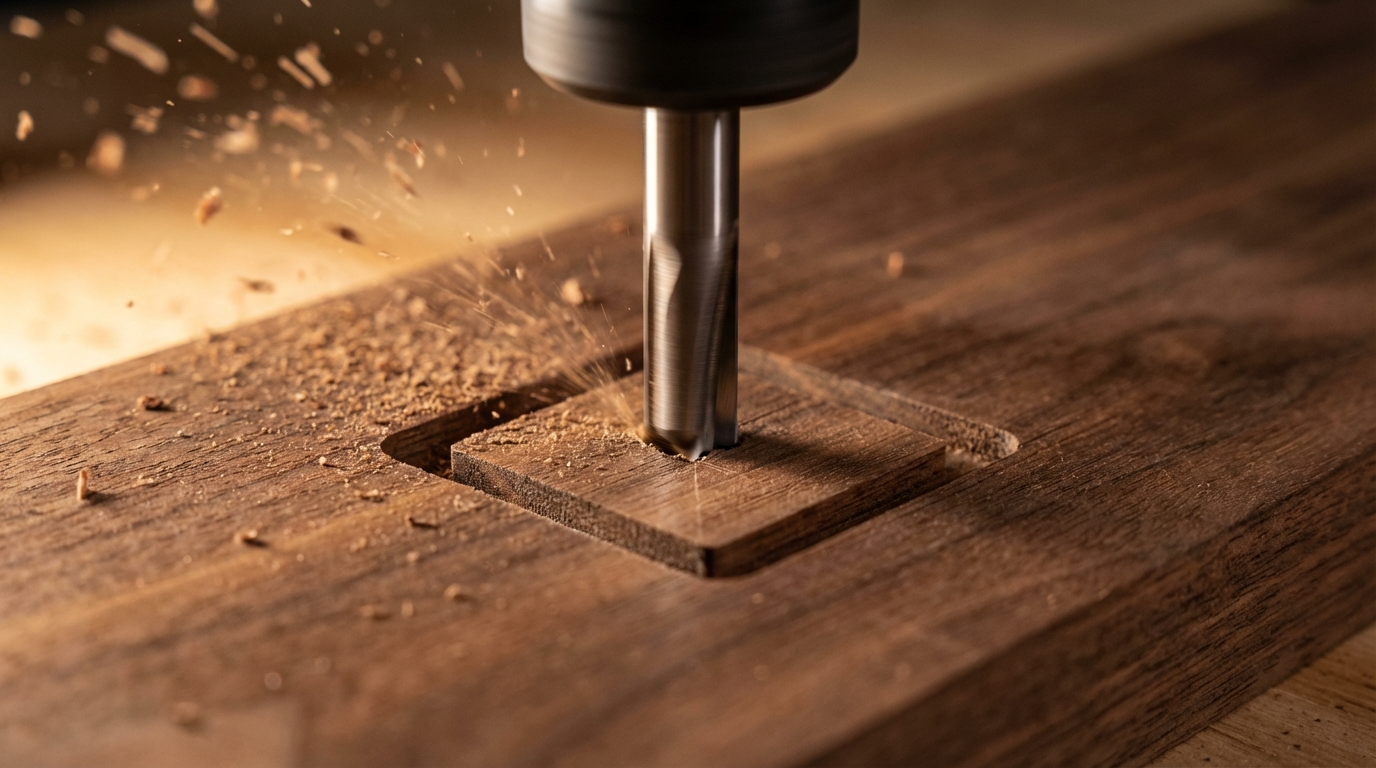
Using traditional wooden slides is a sophisticated way to handle the how to make jewelry box movement without bulky metal hardware. You cut 1/4″ x 1/4″ grooves into the sides of the box case and the drawer sides. This creates a hidden track system that is both timeless and extremely reliable.
As it turns out, adding a bit of paste wax to these wooden tracks makes them glide with surprising fluidity.
Slide Engineering
- Material: Use a stable wood or a dense hardwood for the rails.
- Joinery: Cut the grooves before gluing up the box for easier access.
- Alignment: Ensure the rails are perfectly parallel to prevent binding.
Installation Steps
- Route the 1/4″ grooves in the carcass.
- Cut corresponding rails to length.
- Test the fit with the drawer box before final glue-up.
Key TakeawayIntegrated wooden slides provide a silent, premium movement that complements the luxury nature of jewelry storage.
| Slide Component | Dimensions | Material | |
|---|---|---|---|
| Groove | 1/4″ x 1/4″ | Wenge (Carcass) | |
| Rail | 1/4″ x 1/4″ | Hardwood | |
| Lubrication | Thin layer | Paste Wax |
Eliminating mechanical hardware in favor of wood-on-wood joinery enhances the organic feel and longevity of the finished piece.
How do I ensure a strong drawer glue-up?
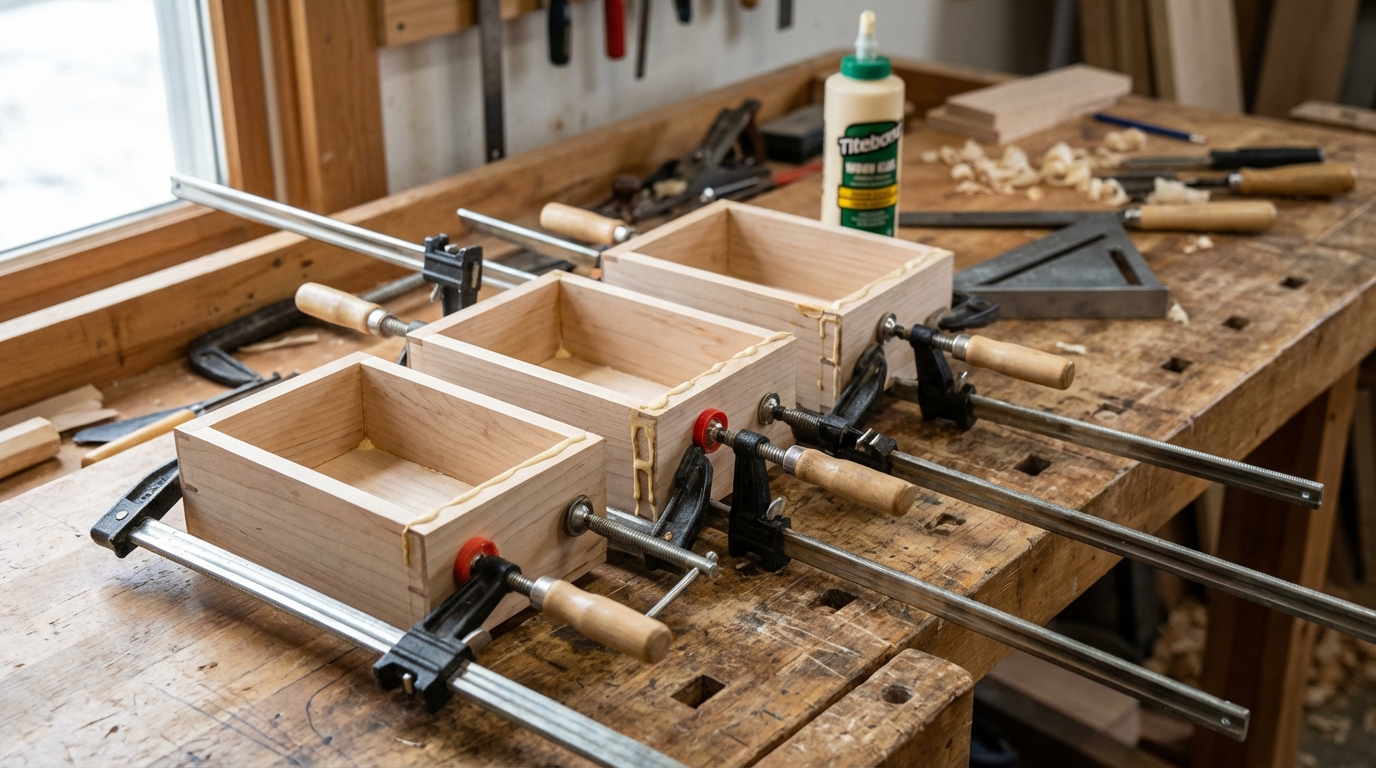
The assembly phase is where your how to make jewelry box project finally takes its 3D form. You must apply glue to the dovetail pins and tails, ensuring full coverage without excessive squeeze-out. Because the interiors will likely be flocked, you don’t need to worry about every drop of glue, but keeping it neat is still best practice.
It’s worth noting that checking for squareness during the glue-up is the most important part of this entire step. If the drawer is out of square, it will never slide correctly.
Assembly Best Practices
- Clamping: Use light pressure; the dovetails should do most of the work.
- Squareness: Measure diagonals to ensure the drawer box is perfectly rectangular.
- Clean-up: Wipe away external glue immediately with a damp cloth.
Gluing Sequence
- Dry-fit all parts one last time.
- Apply glue to the joinery faces.
- Tap together with a rubber mallet and clamp.
Key TakeawayA methodical glue-up process ensures the structural longevity and functional smoothness of every internal drawer.
| Assembly Check | Target | Tool | |
|---|---|---|---|
| Squareness | 0° Deviation | Machinist Square | |
| Diagonals | Equal Length | Tape Measure | |
| Joint Seating | No Gaps | Visual Inspection |
A drawer that is even 1mm out of square can cause significant friction, undermining the luxury “gliding” experience.
How is a modern lid frame built?
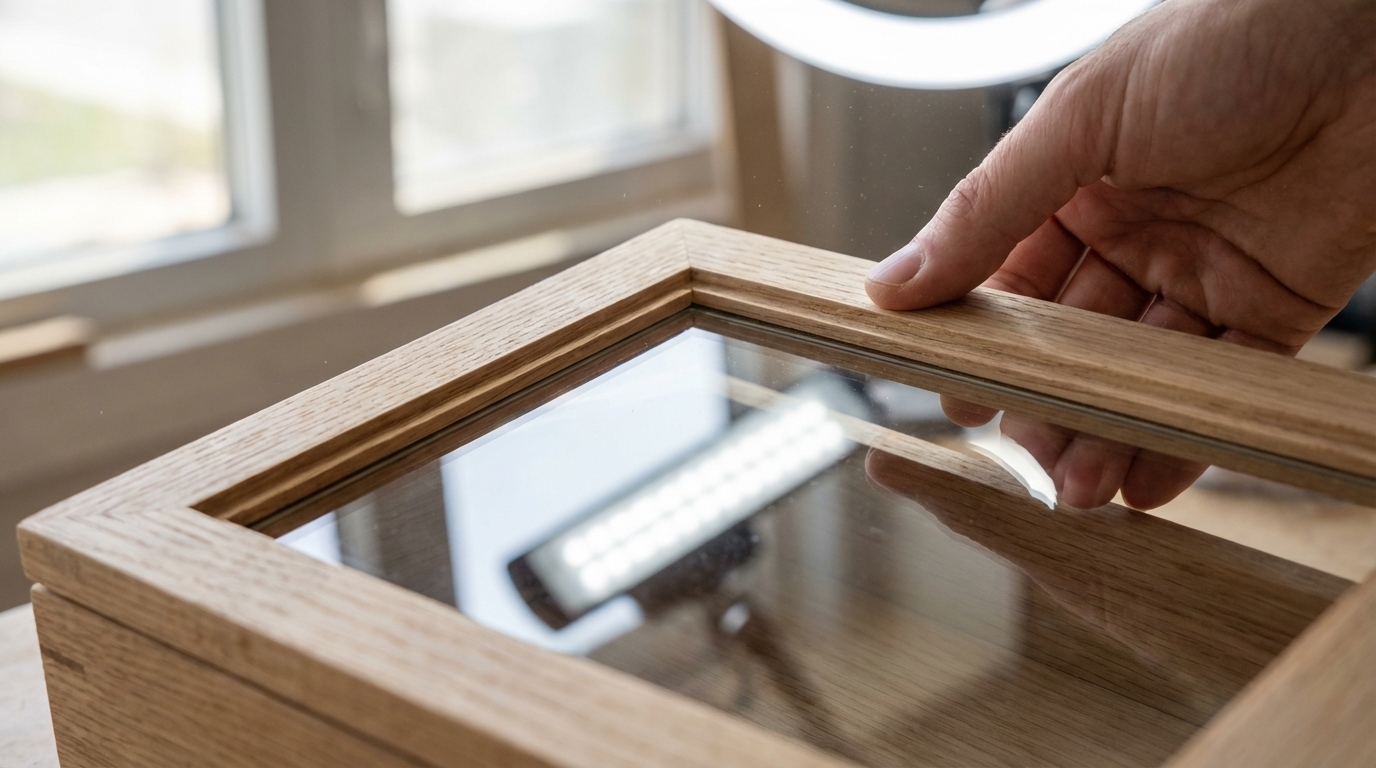
The lid is the crowning jewel of the how to make jewelry box assembly, often featuring a glass insert for visibility. You should use 1/2″ x 1 1/4″ stock and cut precise miters for the frame. A chamfer on the inside reveal adds a professional, architectural touch to the design.
Keep this in mind: you should sand the interior profiles of the lid before gluing it up, as reaching those corners later is nearly impossible.
Lid Construction Tips
- Glass Relief: Cut a relief on the inside of the frame to house the glass.
- Chamfering: Add a 45-degree bevel to the interior edges for a modern look.
- Hinge Mortising: Pre-drill for high-quality hinges like the Brusso 95-degree variety.
Lid Assembly Steps
- Cut the four mitered frame pieces.
- Route the glass relief and chamfers.
- Glue and clamp the frame, ensuring it is flat.
Key TakeawayA glass-top lid not only protects the contents from dust but also transforms the jewelry box into a beautiful display case.
| Component | Size | Material | |
|---|---|---|---|
| Frame Stock | 1/2″ x 1 1/4″ | White Oak or Wenge | |
| Insert | 1/8″ Thick | Clear Glass | |
| Hardware | 95-Degree | Brass Hinges |
Using glass allows for a “jewelry store” display at home, making it easier to select pieces while keeping them protected from the elements.
Can I make custom metal hardware at home?
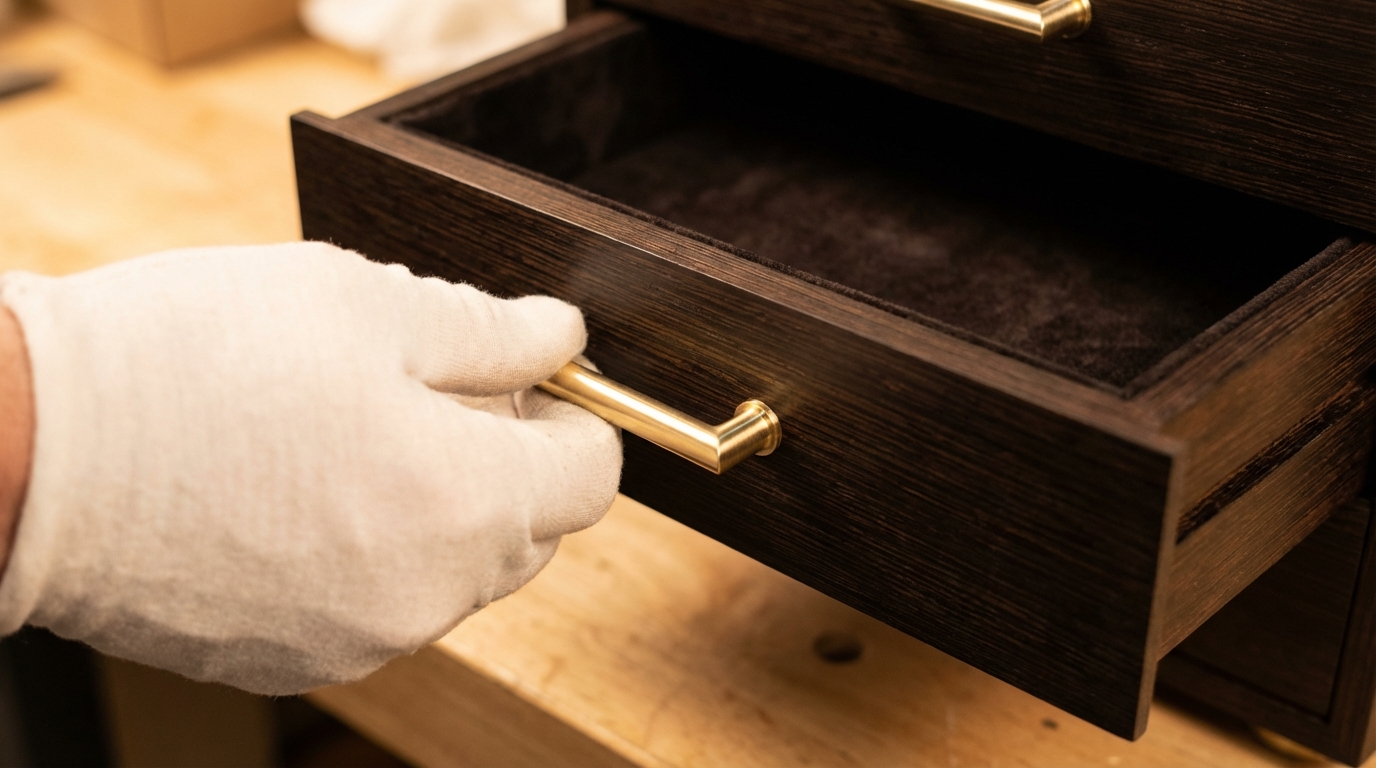
Custom drawer pulls are a fantastic way to personalize the how to make jewelry box experience. You can use soft brass blocks and shape them with a bandsaw and belt sander. This allows you to create unique, ergonomic pulls that perfectly match the modern aesthetic of your dark Wenge box.
You might think metalworking is difficult, but brass is soft enough to be worked with standard woodworking equipment. Once shaped, buff the brass to a high sheen.
Hardware Customization
- Shaping: Print a scaled template to ensure all three pulls are identical.
- Sanding: Move through grits up to 600 for a smooth, mirror-like finish.
- Insetting: Use a palm router and a sharp chisel to create a flush pocket in the drawer front.
Fitting the Pulls
- Trace the pull onto the drawer front with a marking knife.
- Route out the bulk of the material.
- Chisel the corners for a tight, gap-free fit.
Key TakeawayHand-shaped brass pulls add a layer of bespoke luxury that stock hardware simply cannot provide.
| Material | Tool for Shaping | Finishing Step | |
|---|---|---|---|
| Brass Block | Bandsaw | 600 Grit Sanding | |
| Wenge Front | Palm Router | Chisel Cornering | |
| Attachment | Two-part | Epoxy Resin |
Bespoke metal accents bridge the gap between hobbyist woodworking and professional-grade luxury packaging design.
How do I finish the interior and exterior?
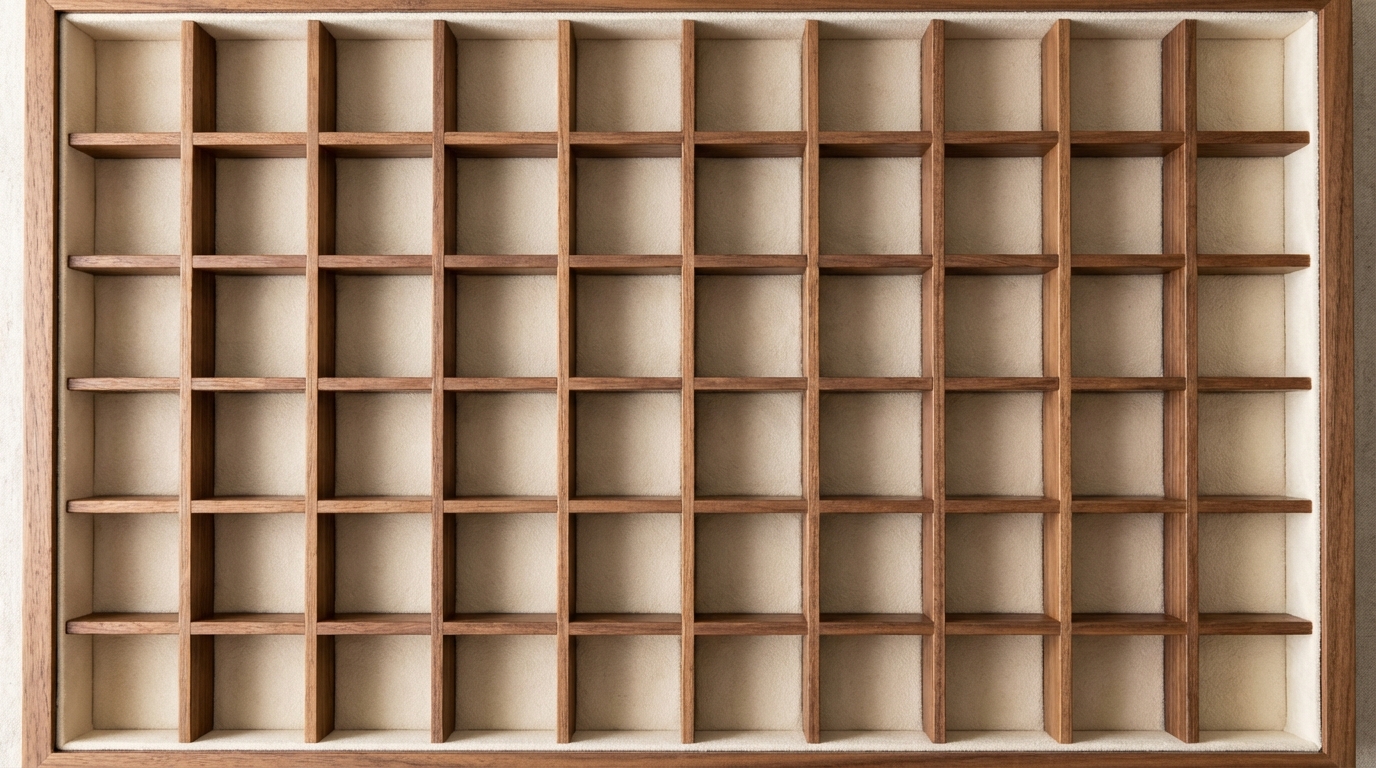
The final steps of how to make jewelry box masterpieces involve interior organization and finishing. You should create custom dividers for the “faux” drawer and flock the interiors to protect delicate jewelry. For the exterior, thinned shellac followed by a coat of paste wax provides a silky, durable sheen.
Bottom line: the flocking protects against scratches, while the wax finish highlights the natural beauty of the Wenge and Oak.
Finishing & Lining
- Dividers: Use CA glue to secure small White Oak dividers in the top compartment.
- Flocking: Apply a color-matched adhesive and spray on nylon fibers for a velvet feel.
- Exterior Finish: Sand to 220 grit and apply multiple thin coats of shellac.
Final Assembly Sequence
- Install the interior dividers.
- Apply the flocking to drawers and top sections.
- Mount the lid, glass, and brass hardware.
Key TakeawayA professional finish and soft interior lining are what truly elevate a jewelry box to a commercial-quality luxury item.
| Finish Type | Application | Benefit | |
|---|---|---|---|
| Shellac | Wipe-on | Seals oily woods | |
| Paste Wax | Buff-on | Silky tactile feel | |
| Flocking | Spray-on | Scratch protection |
Analytical Sentence: The integration of flocking ensures that even the most fragile pearls and stones remain pristine during long-term storage.
Conclusion
Making a modern jewelry box is an intricate journey that combines traditional joinery with contemporary design. By following these 15 steps—from selecting the finest Wenge to hand-shaping brass hardware—you create more than just a box; you create a sanctuary for your most valued possessions. This process ensures your brand’s jewelry is presented with the prestige it deserves, offering both security and a stunning unboxing experience.
If you are looking to elevate your brand with premium packaging solutions or need professional guidance on large-scale manufacturing, we are here to help. Please contact us today to explore how our expertise can support your growth and deliver excellence to your customers.
FAQ
Can I use fabric instead of flocking for the interior? Yes, but flocking is often preferred for modern boxes because it provides a seamless finish without the fraying or bulk of traditional fabric.
What is the best wood for a beginner jewelry box? Walnut is an excellent choice as it is stable, easy to machine, and offers a beautiful dark tone without being as difficult to glue as Wenge.
Do I really need to use epoxy for the brass pulls? Yes, a high-quality two-part epoxy is recommended because it provides a permanent bond between the metal and the wood that standard wood glue cannot achieve.
How do I prevent the glass from rattling in the lid? Apply a very thin bead of clear silicone or use small rubber glass stops in the relief before securing the glass.
How often should I re-apply wax to the exterior? Typically, a light buffing with paste wax once every year or two is sufficient to maintain the luster and smooth feel of the wood.