Imagine presenting a high-end luxury watch or a bespoke engagement ring, only to have the recipient notice micro-scratches caused by a rough, unlined wooden interior. This poor presentation doesn’t just look cheap; it actively devalues your brand and risks damaging precious inventory. To solve this, you can master our professional method of how to make the inside of a jewelry box using premium velvet. This guide provides a step-by-step roadmap for creating a scratch-free, elegant sanctuary for your most valuable treasures.
Why learn how to make the inside of a jewelry box?
Protecting delicate gemstones and soft metals from abrasion is the primary goal of this process. When you understand how to make the inside of a jewelry box properly, you elevate the perceived value of the product instantly. Velvet provides a non-slip, plush surface that keeps items from shifting during transport.
Think about it. A professional liner reflects attention to detail that customers equate with high quality.
- Aesthetic Appeal: Velvet offers a rich, deep color profile that makes gold and silver pop.
- Protection: The soft pile prevents friction-related damage to polished surfaces.
- Organization: Custom linings allow you to create specific slots for different jewelry types.
Does velvet improve brand perception?
Luxurious textures create an emotional connection during the unboxing experience. By focusing on a high-quality interior, you signal to the buyer that the contents are truly special.
How does lining prevent tarnish?
Many professional velvet linings are treated to be “non-tarnish” materials. This chemical property helps slow down the oxidation of silver and copper-based alloys significantly.
Key Takeaway: A velvet interior is the hallmark of luxury packaging that safeguards your reputation and your product.
| Feature | Impact | Level | |
|---|---|---|---|
| Plush Texture | Scuff Protection | High | |
| Deep Color | Visual Contrast | Premium | |
| Non-Slip Pile | Item Stability | High |
This analysis confirms that velvet is the superior choice for both functional protection and high-end visual marketing.
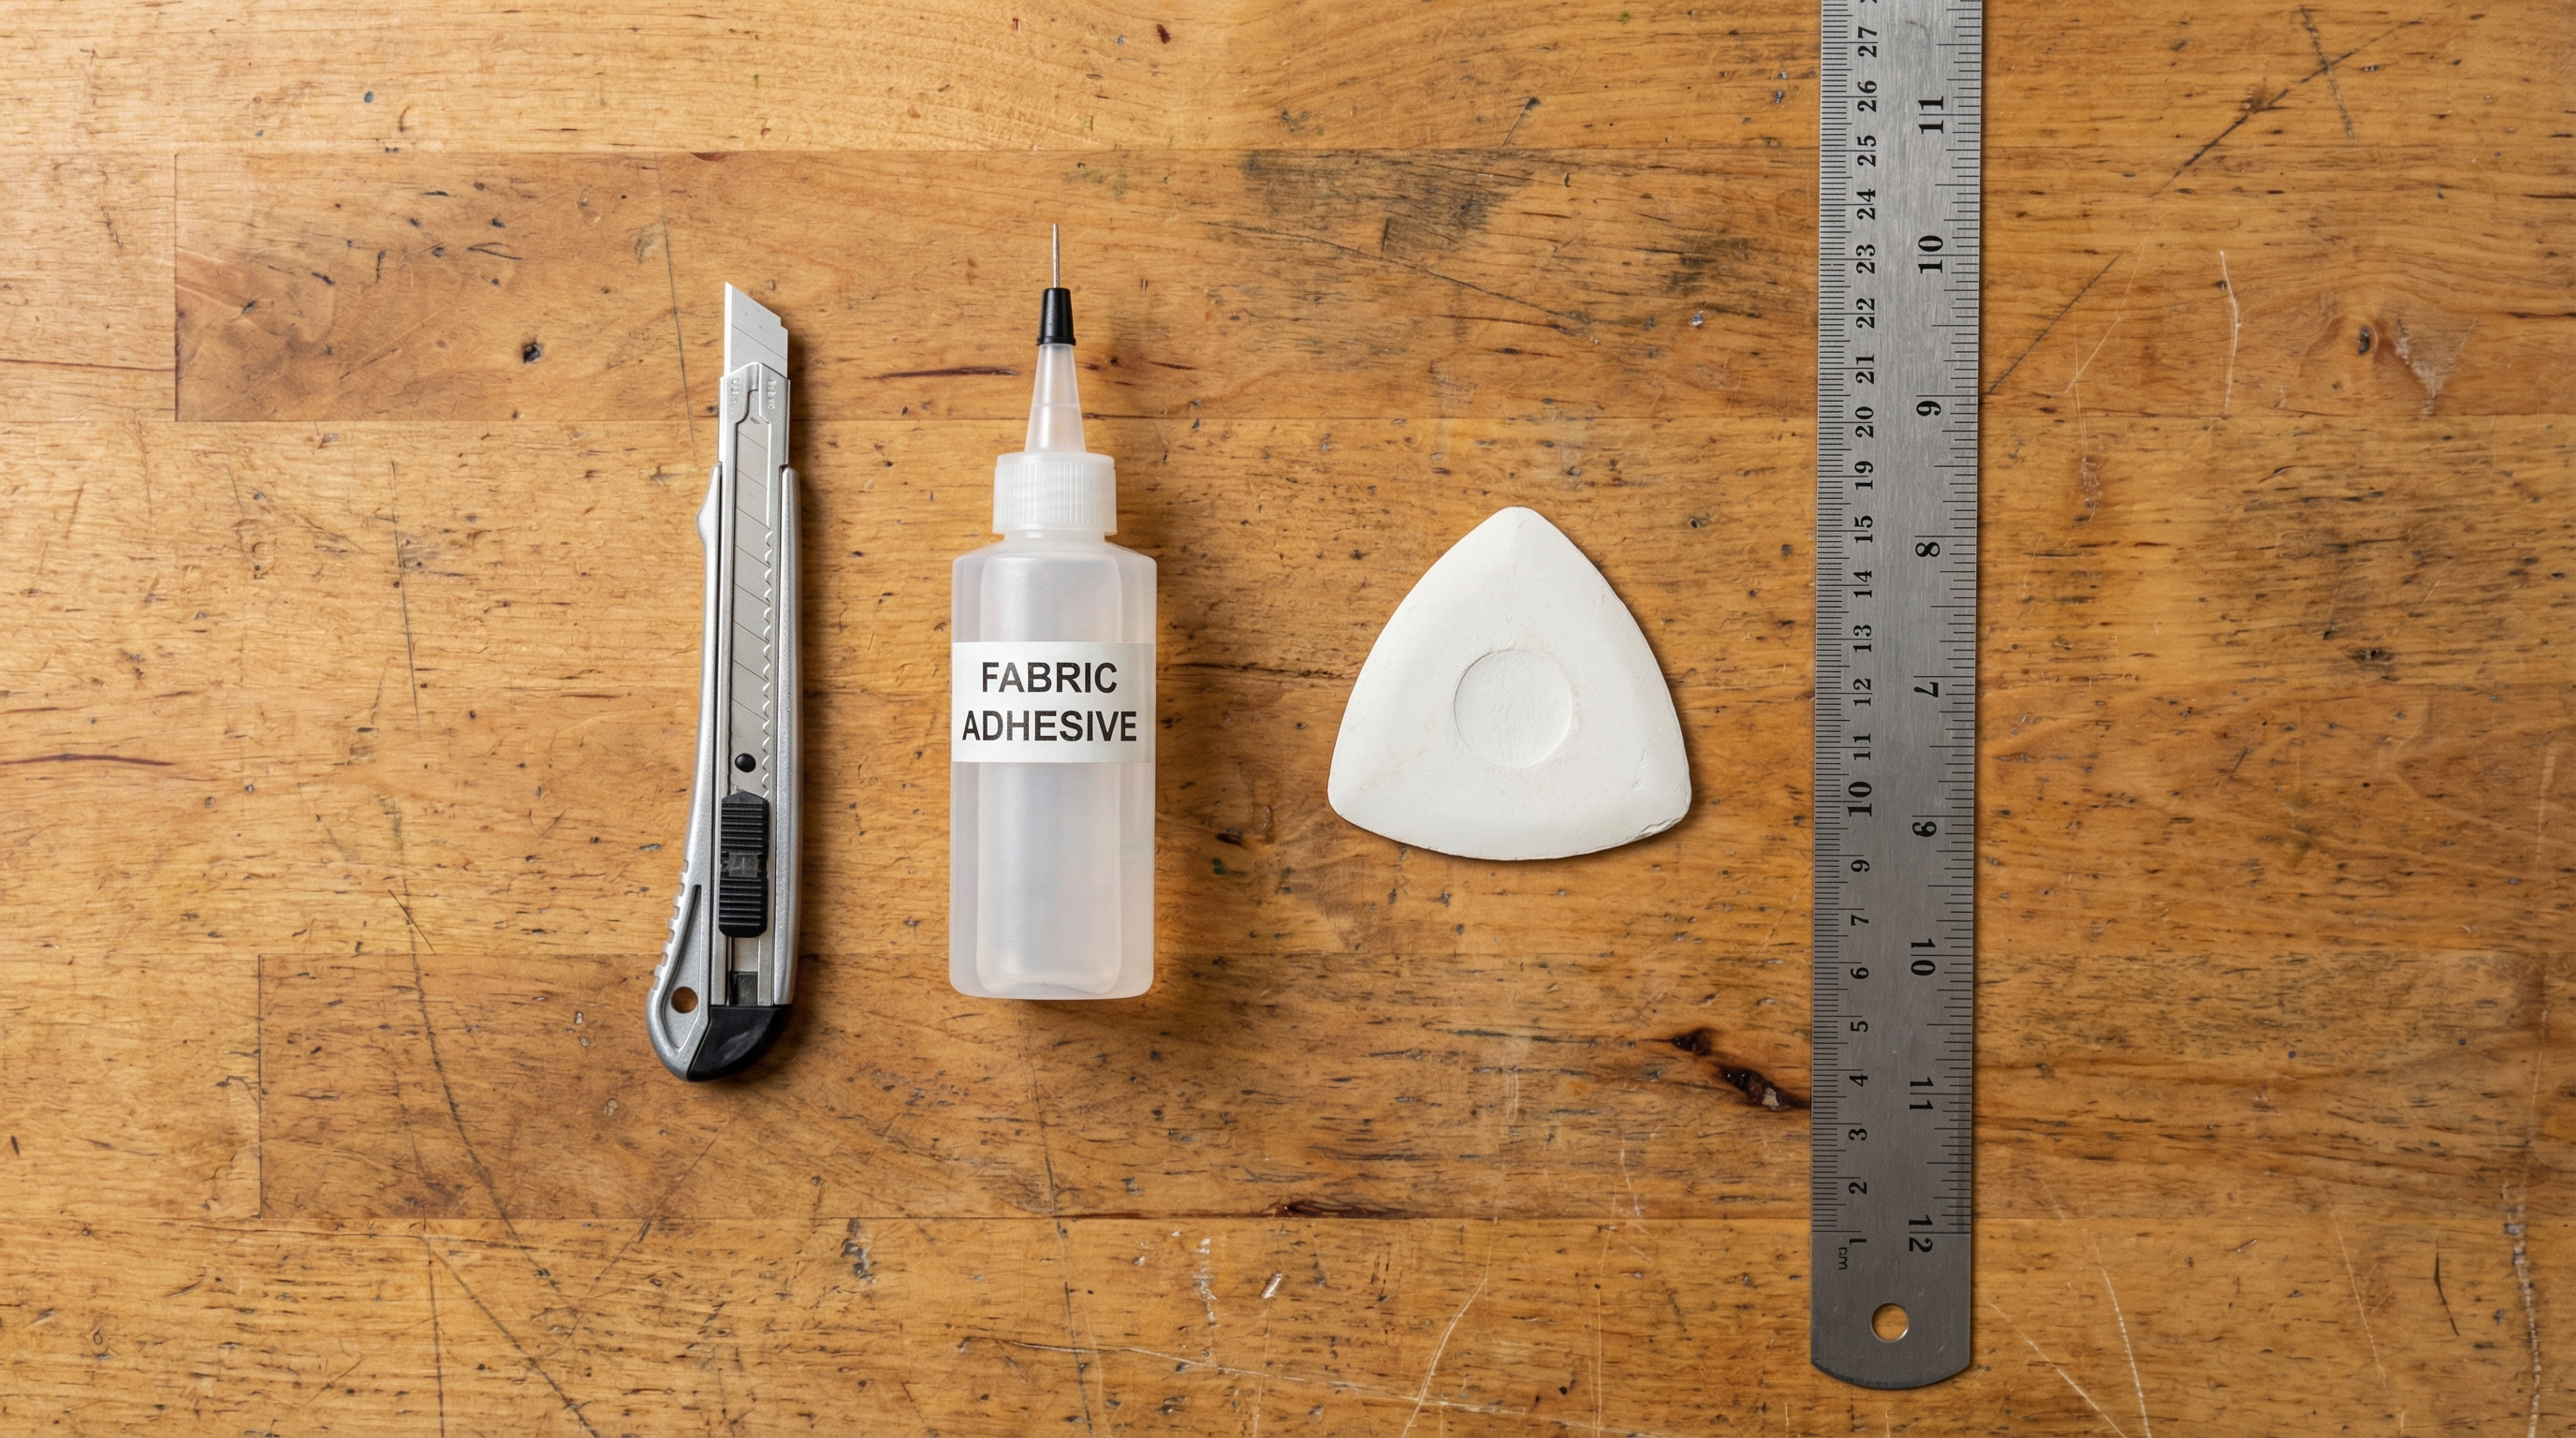
What tools help you how to make the inside of a jewelry box?
You need a set of precision instruments including a sharp craft knife, specialized fabric glue, and a metal ruler. Getting how to make the inside of a jewelry box right depends heavily on the quality of your cutting and measuring tools. Using dull blades will cause the velvet pile to fray, ruining the clean edges required for a professional look.
Here is the deal: shortcuts in tooling lead to a DIY appearance that fails in the B2B market.
- Rotary Cutter: Best for long, straight lines without pulling the fabric.
- Fabric Glue: Must be a “tacky” formula that won’t soak through the velvet.
- Tailor’s Chalk: Essential for marking measurements on the back of the fabric.
Which glue is best for velvet?
Spray adhesives are excellent for large flat surfaces because they provide even coverage. However, for corners and small dividers, a liquid fabric glue with a precision tip is often more effective.
Why use a metal ruler?
Wooden or plastic rulers can be easily nicked by a craft knife during the cutting phase. A heavy metal ruler provides a stable guide that ensures every edge is perfectly straight and consistent.
Key Takeaway: Professional tools are an investment that guarantees a seamless, fray-free finish for every box interior.
| Tool Name | Primary Purpose | Material Benefit | |
|---|---|---|---|
| Craft Knife | Precision trimming | Clean edges | |
| Fabric Adhesive | Secure bonding | No staining | |
| Tailor’s Chalk | Non-permanent marking | Precise layout |
The right equipment allows for the high level of repeatability needed when producing custom velvet jewelry boxes at scale.
How much fabric for how to make the inside of a jewelry box?
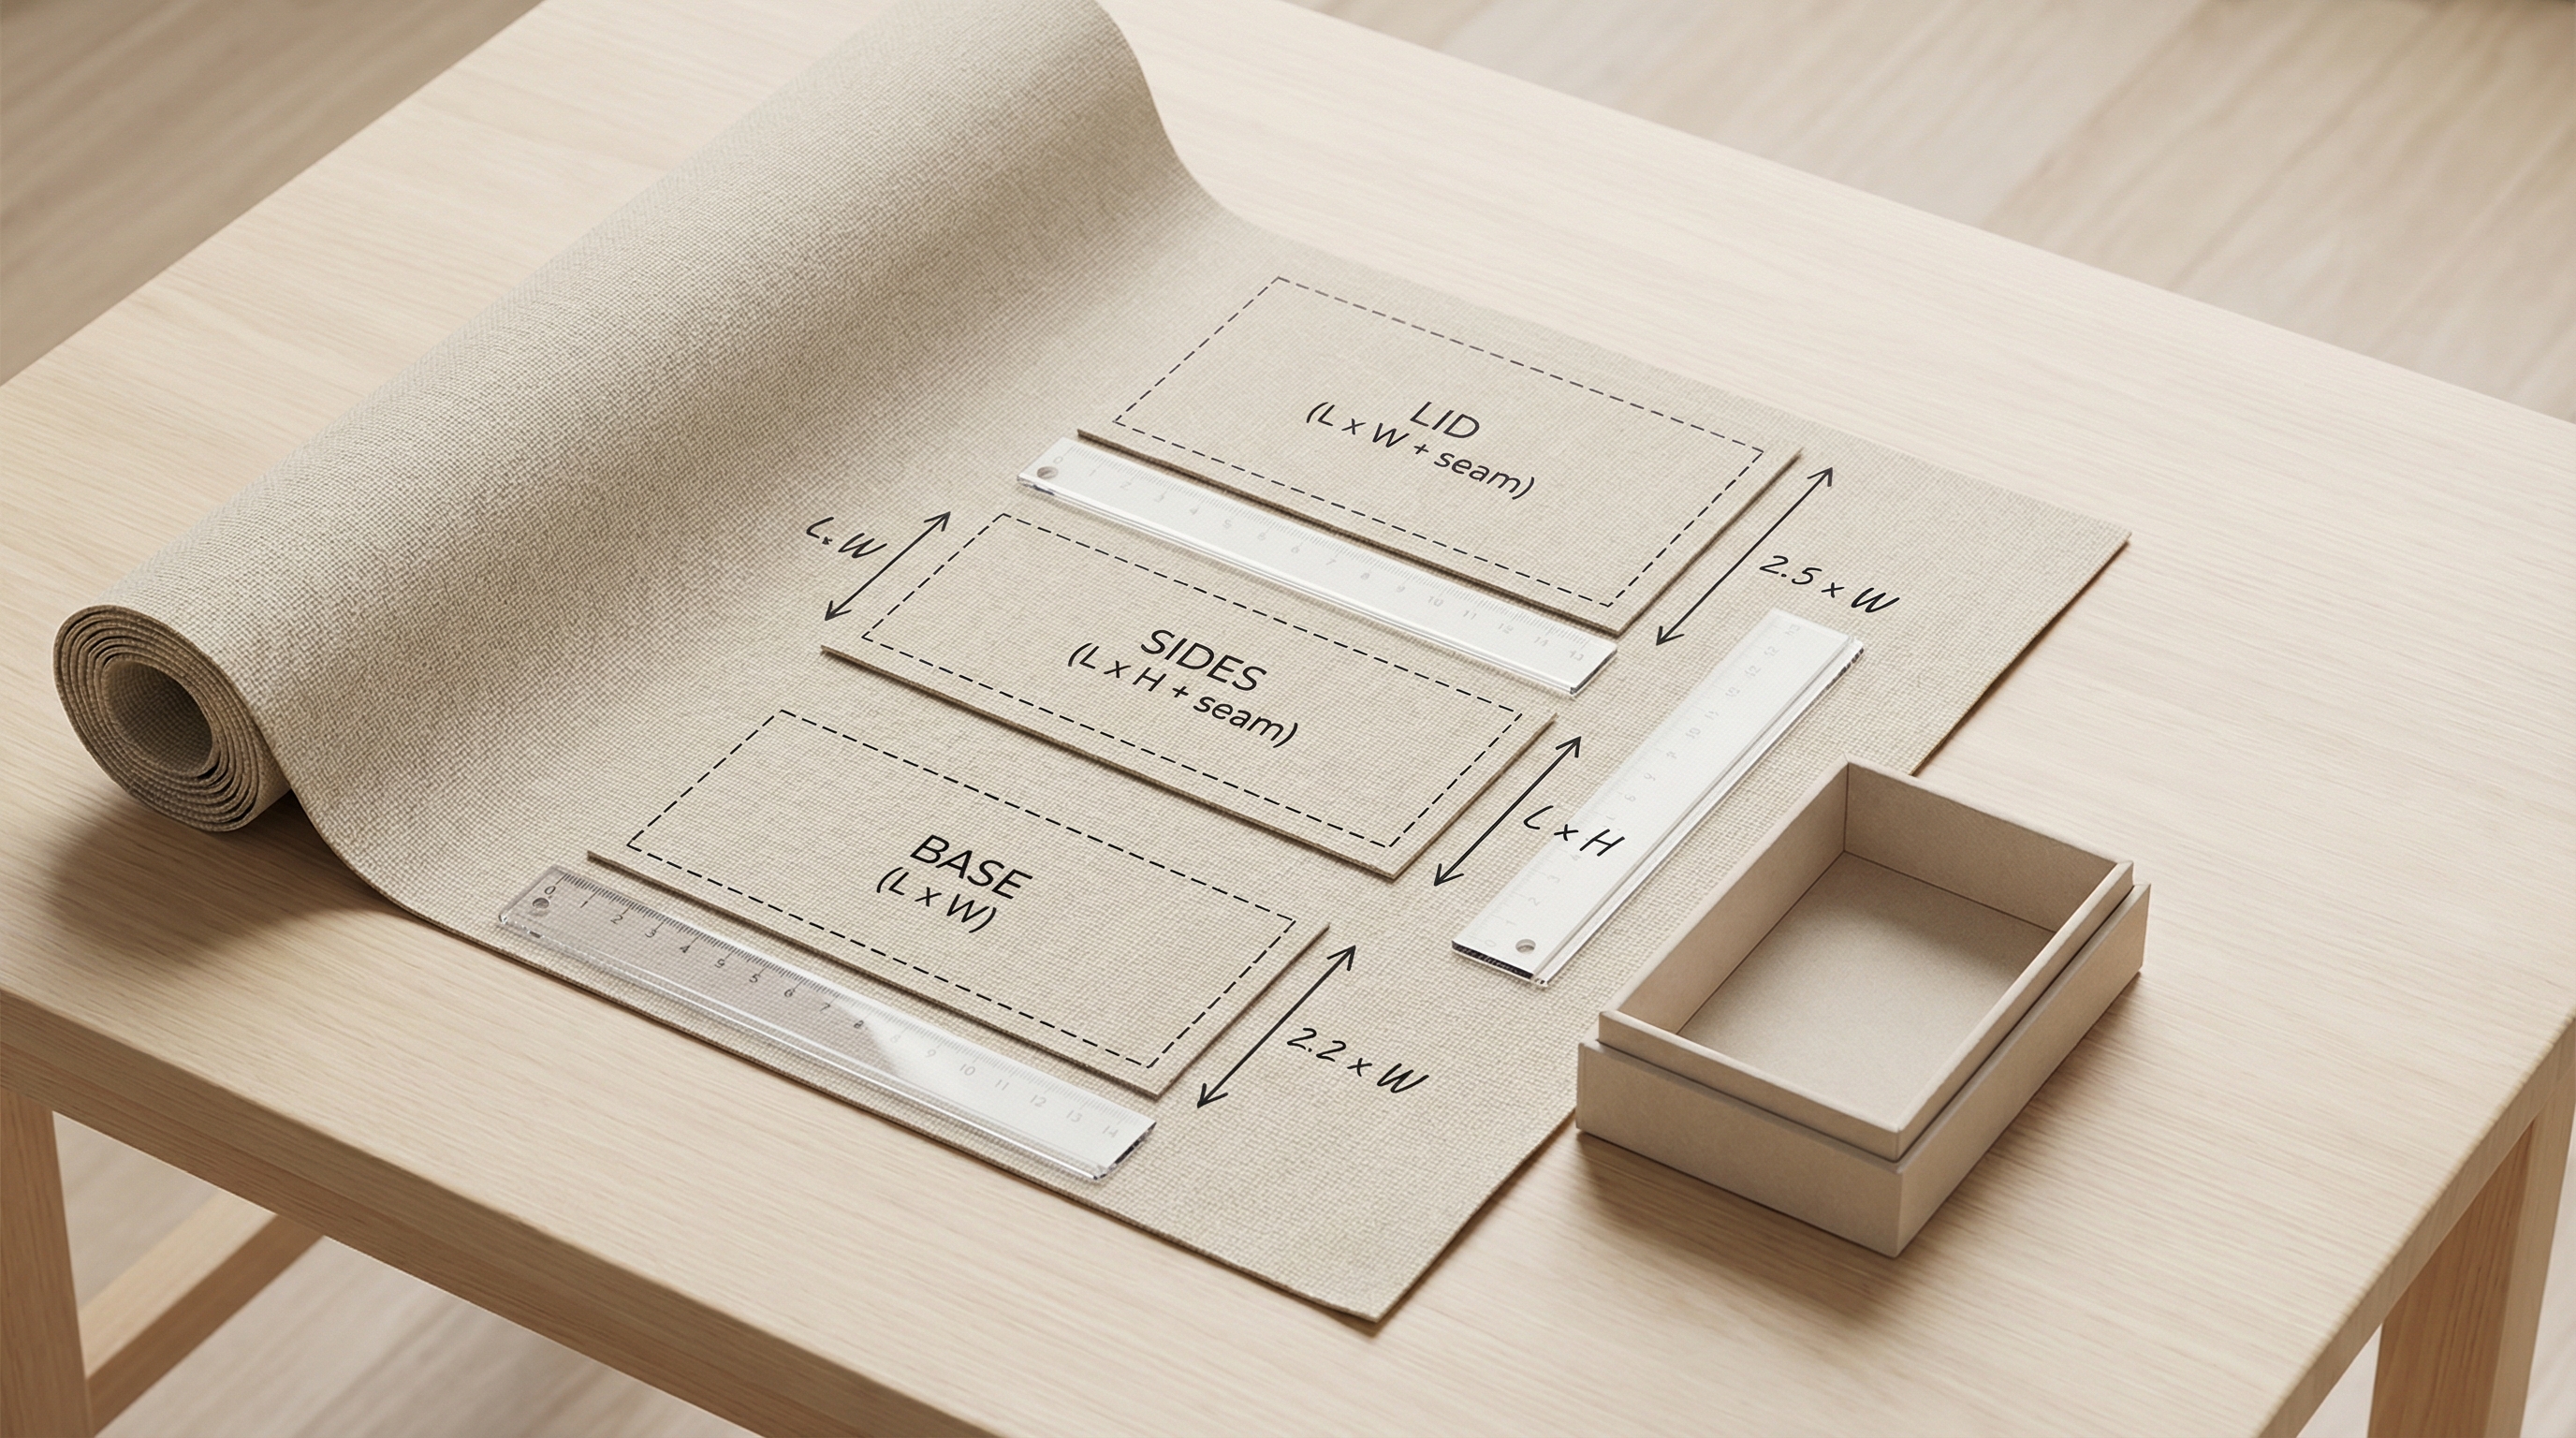
Generally, one yard of velvet is sufficient to line a standard-sized box including its base, lid, and internal dividers. Calculating yardage correctly is a vital part of how to make the inside of a jewelry box to avoid wasting expensive materials. You must account for the “fold-over” margins which usually require an extra half-inch on all sides of each panel.
The bottom line? Always order 20% more than your calculated measurements to allow for mistakes or double-layering.
- Main Base: Measure the floor area plus the height of the four internal walls.
- Lid Panel: Typically a single flat piece, but may require extra for padding.
- Removable Trays: These require fabric on both the inside and outside surfaces.
Should you layer the fabric?
Double-layering can provide a more cushioned, “plush” feel that screams luxury. This technique requires more fabric but significantly improves the tactile feedback when a customer touches the lining.
How to calculate for dividers?
Dividers are the most material-intensive part of the box interior. Since they must be wrapped on both sides, you need to double the height measurement for every vertical partition you plan to install.
Key Takeaway: Accurate material estimation prevents project delays and ensures a uniform color dye lot across the entire box interior.
| Box Component | Average Fabric Need | Margin Allowance | |
|---|---|---|---|
| Inner Base | 0.25 Yards | 0.5 inches | |
| Internal Lid | 0.15 Yards | 0.25 inches | |
| Dividers (Set) | 0.30 Yards | 1.0 inch |
Mastering fabric calculations ensures cost-efficiency when moving from a single prototype to custom jewelry box production.
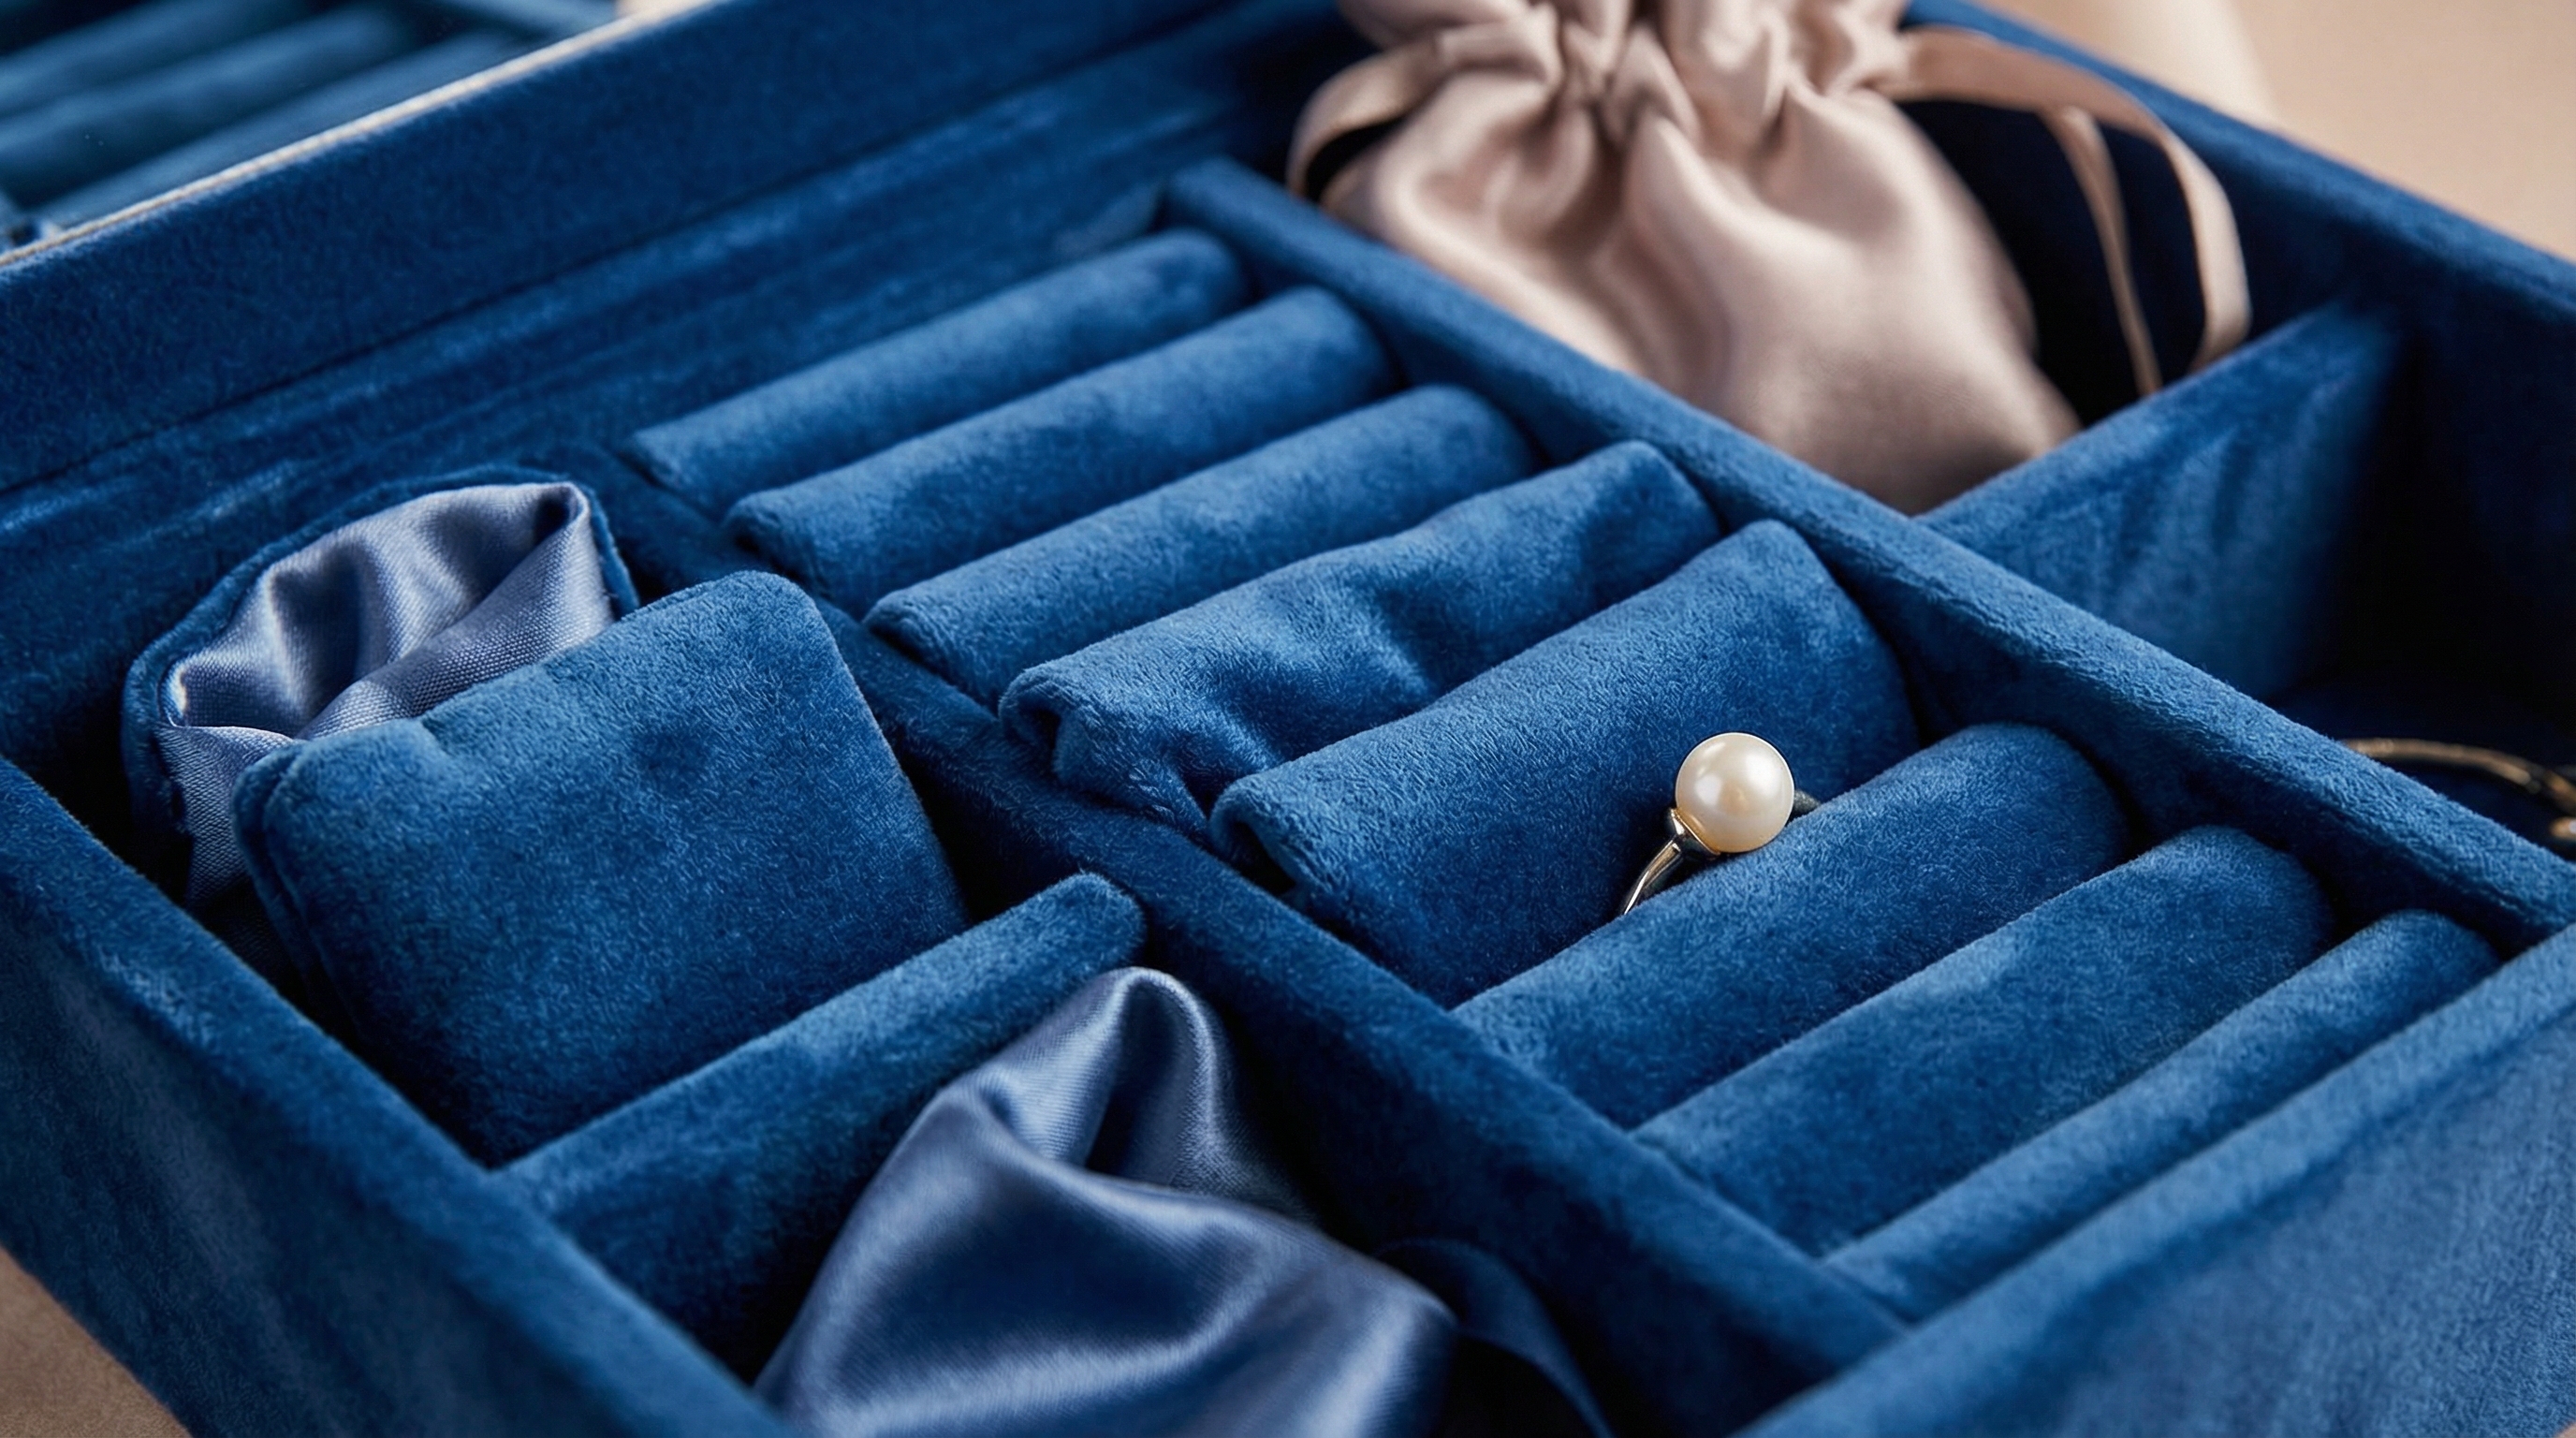
How to plan how to make the inside of a jewelry box layout?
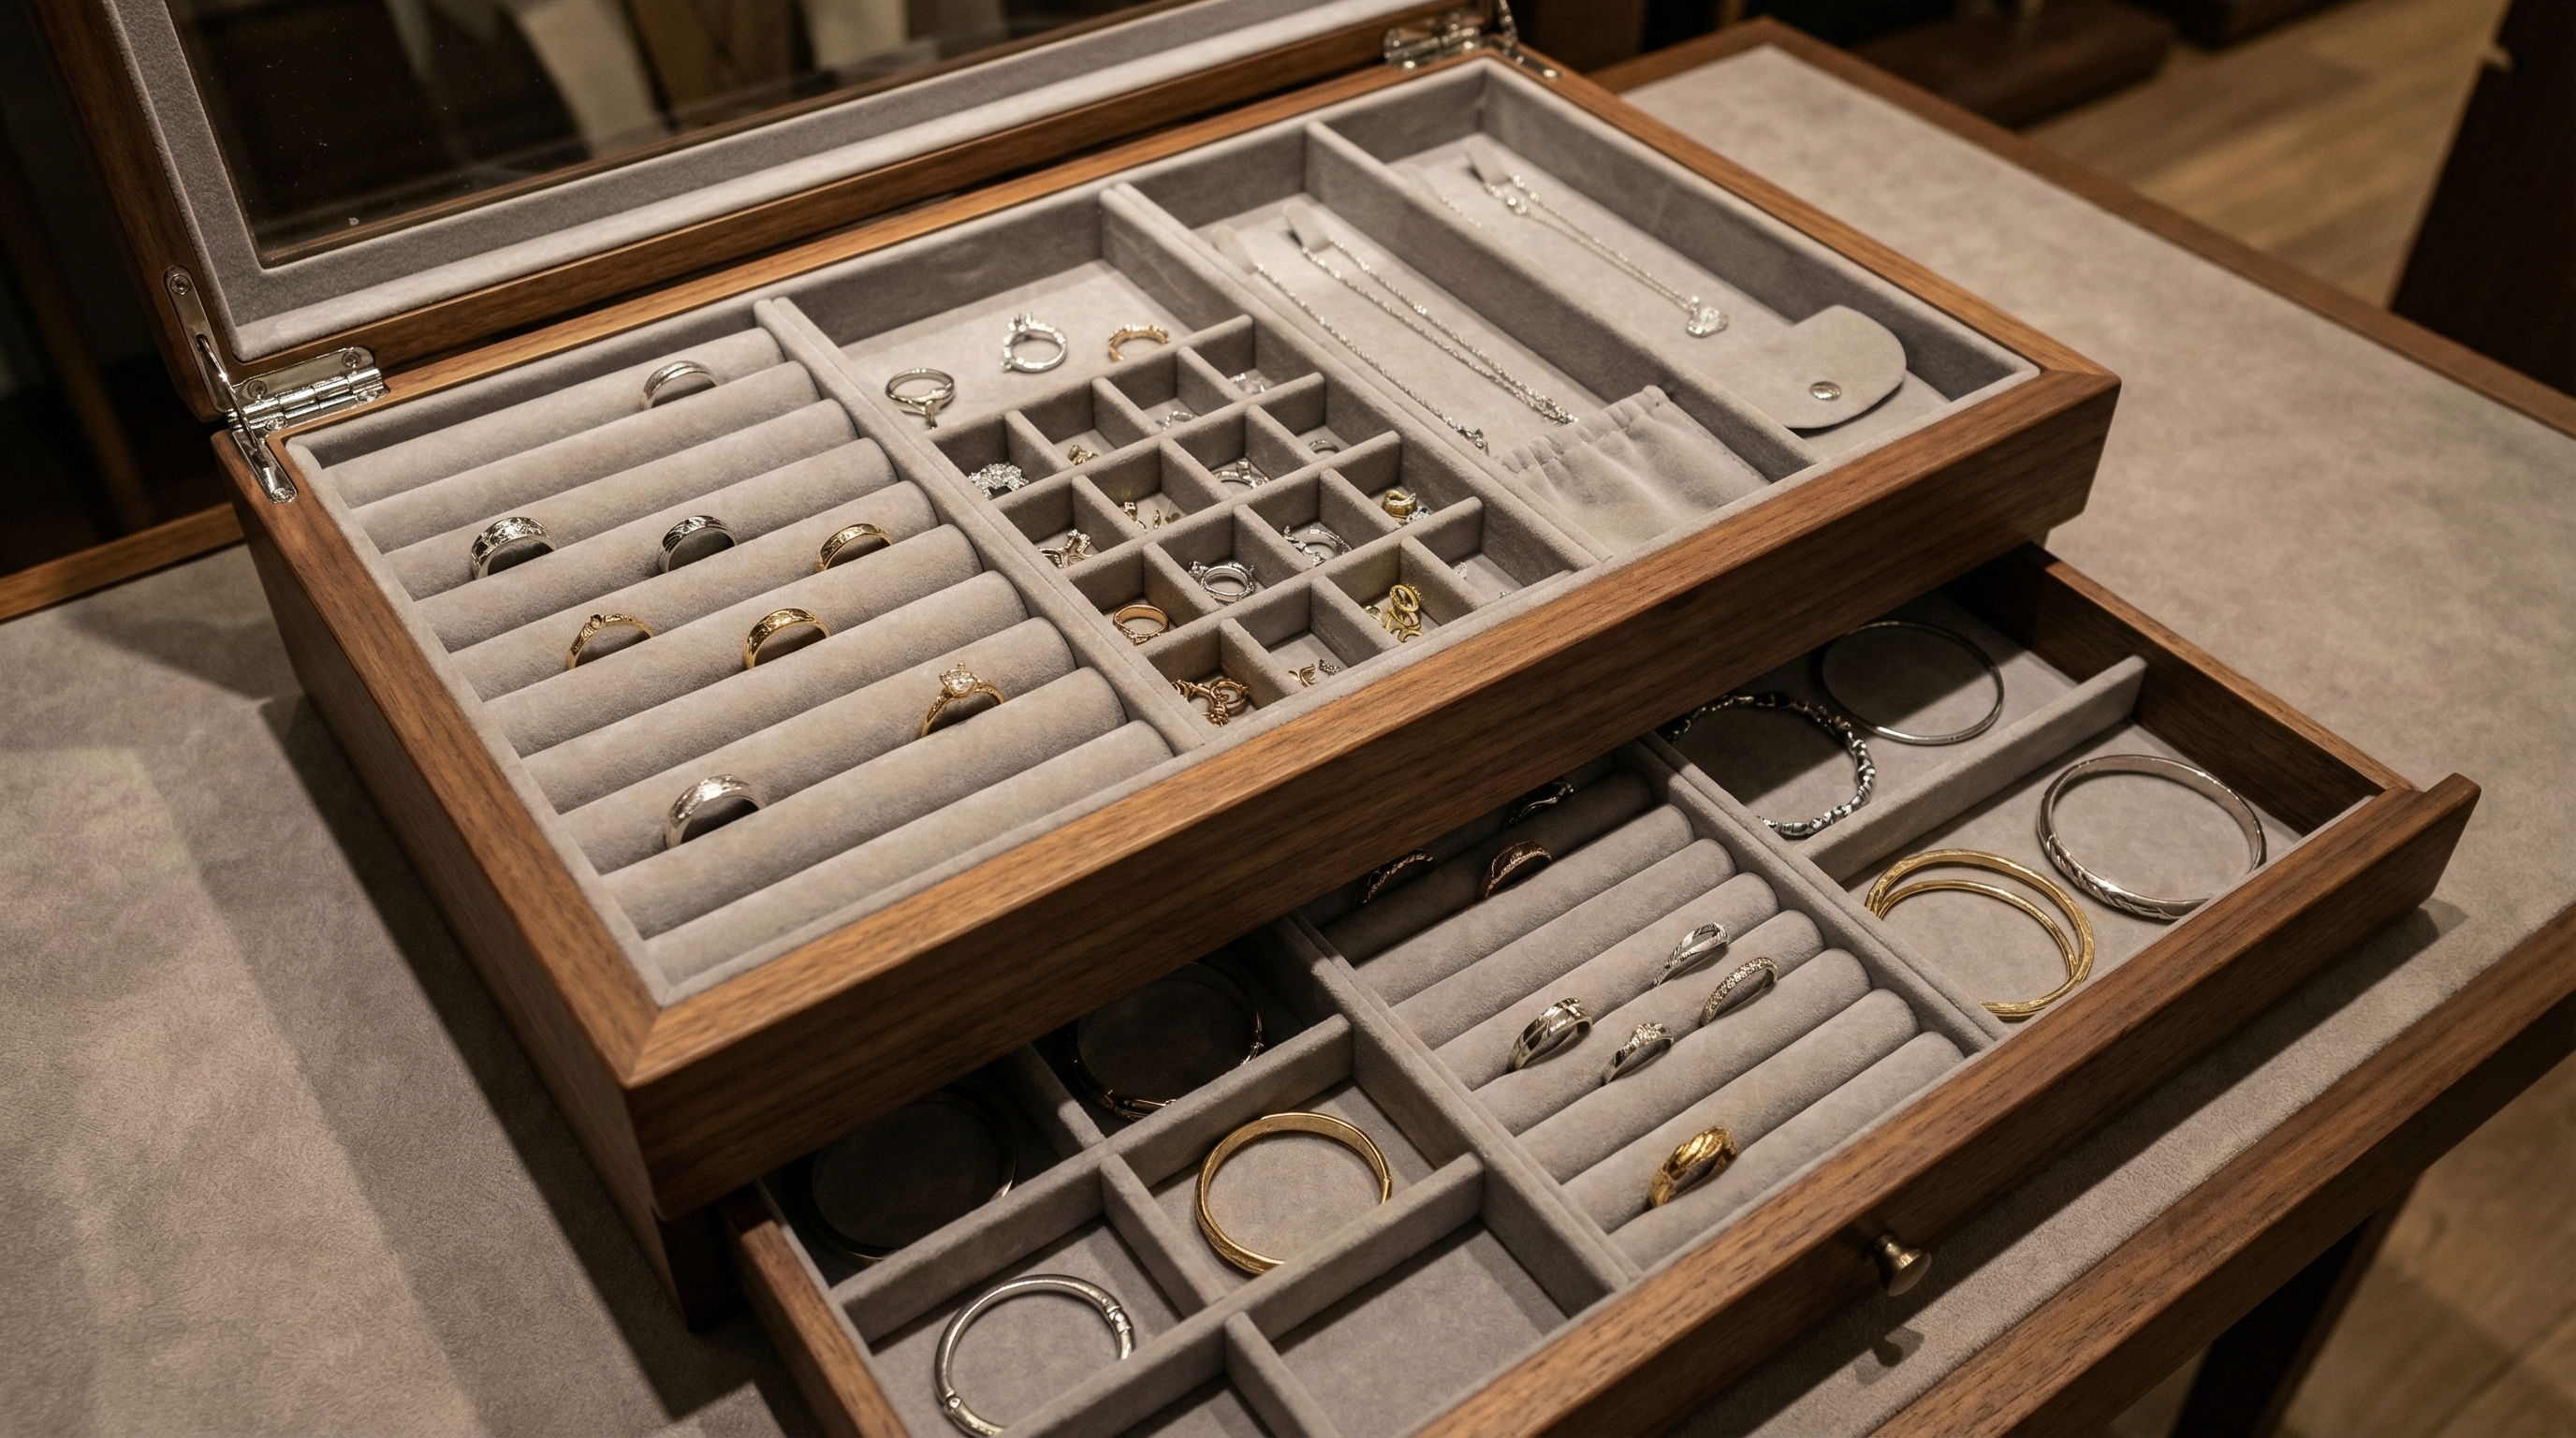
You should begin by sketching a diagram that allocates specific space for rings, necklaces, and earrings based on your inventory needs. Effective layout planning is the foundation of how to make the inside of a jewelry box that is both functional and beautiful. Consider the size of your largest pieces to ensure they don’t overlap or touch, which could cause scratches.
It gets better. A well-planned layout can double your storage capacity without increasing the box size.
- Ring Rolls: Use foam cylinders wrapped in velvet for a secure, organized display.
- Necklace Hooks: Plan for a soft pouch at the bottom to catch dangling chains.
- Earring Slats: Thin, reinforced cards can hold dozens of pairs in a small footprint.
How to maximize small spaces?
Modular jewelry box inserts are the secret to versatility. By planning removable trays, you allow the user to customize their storage as their collection grows over time.
Where should the mirror go?
If you include a mirror, it should be centered on the lid. Ensure your velvet lining creates a clean frame around the glass edges for a high-end, integrated appearance.
Key Takeaway: A strategic layout turns a simple container into a sophisticated organization system that protects every specific piece.
| Layout Zone | Best For | Spacing Tip | |
|---|---|---|---|
| Deep Slot | Bangles/Watches | 3″ diameter | |
| Narrow Channel | Chains | 0.5″ width | |
| Foam Roll | Rings | 1″ height |
Careful spatial planning ensures that the final box meets the ergonomic needs of the end consumer perfectly.
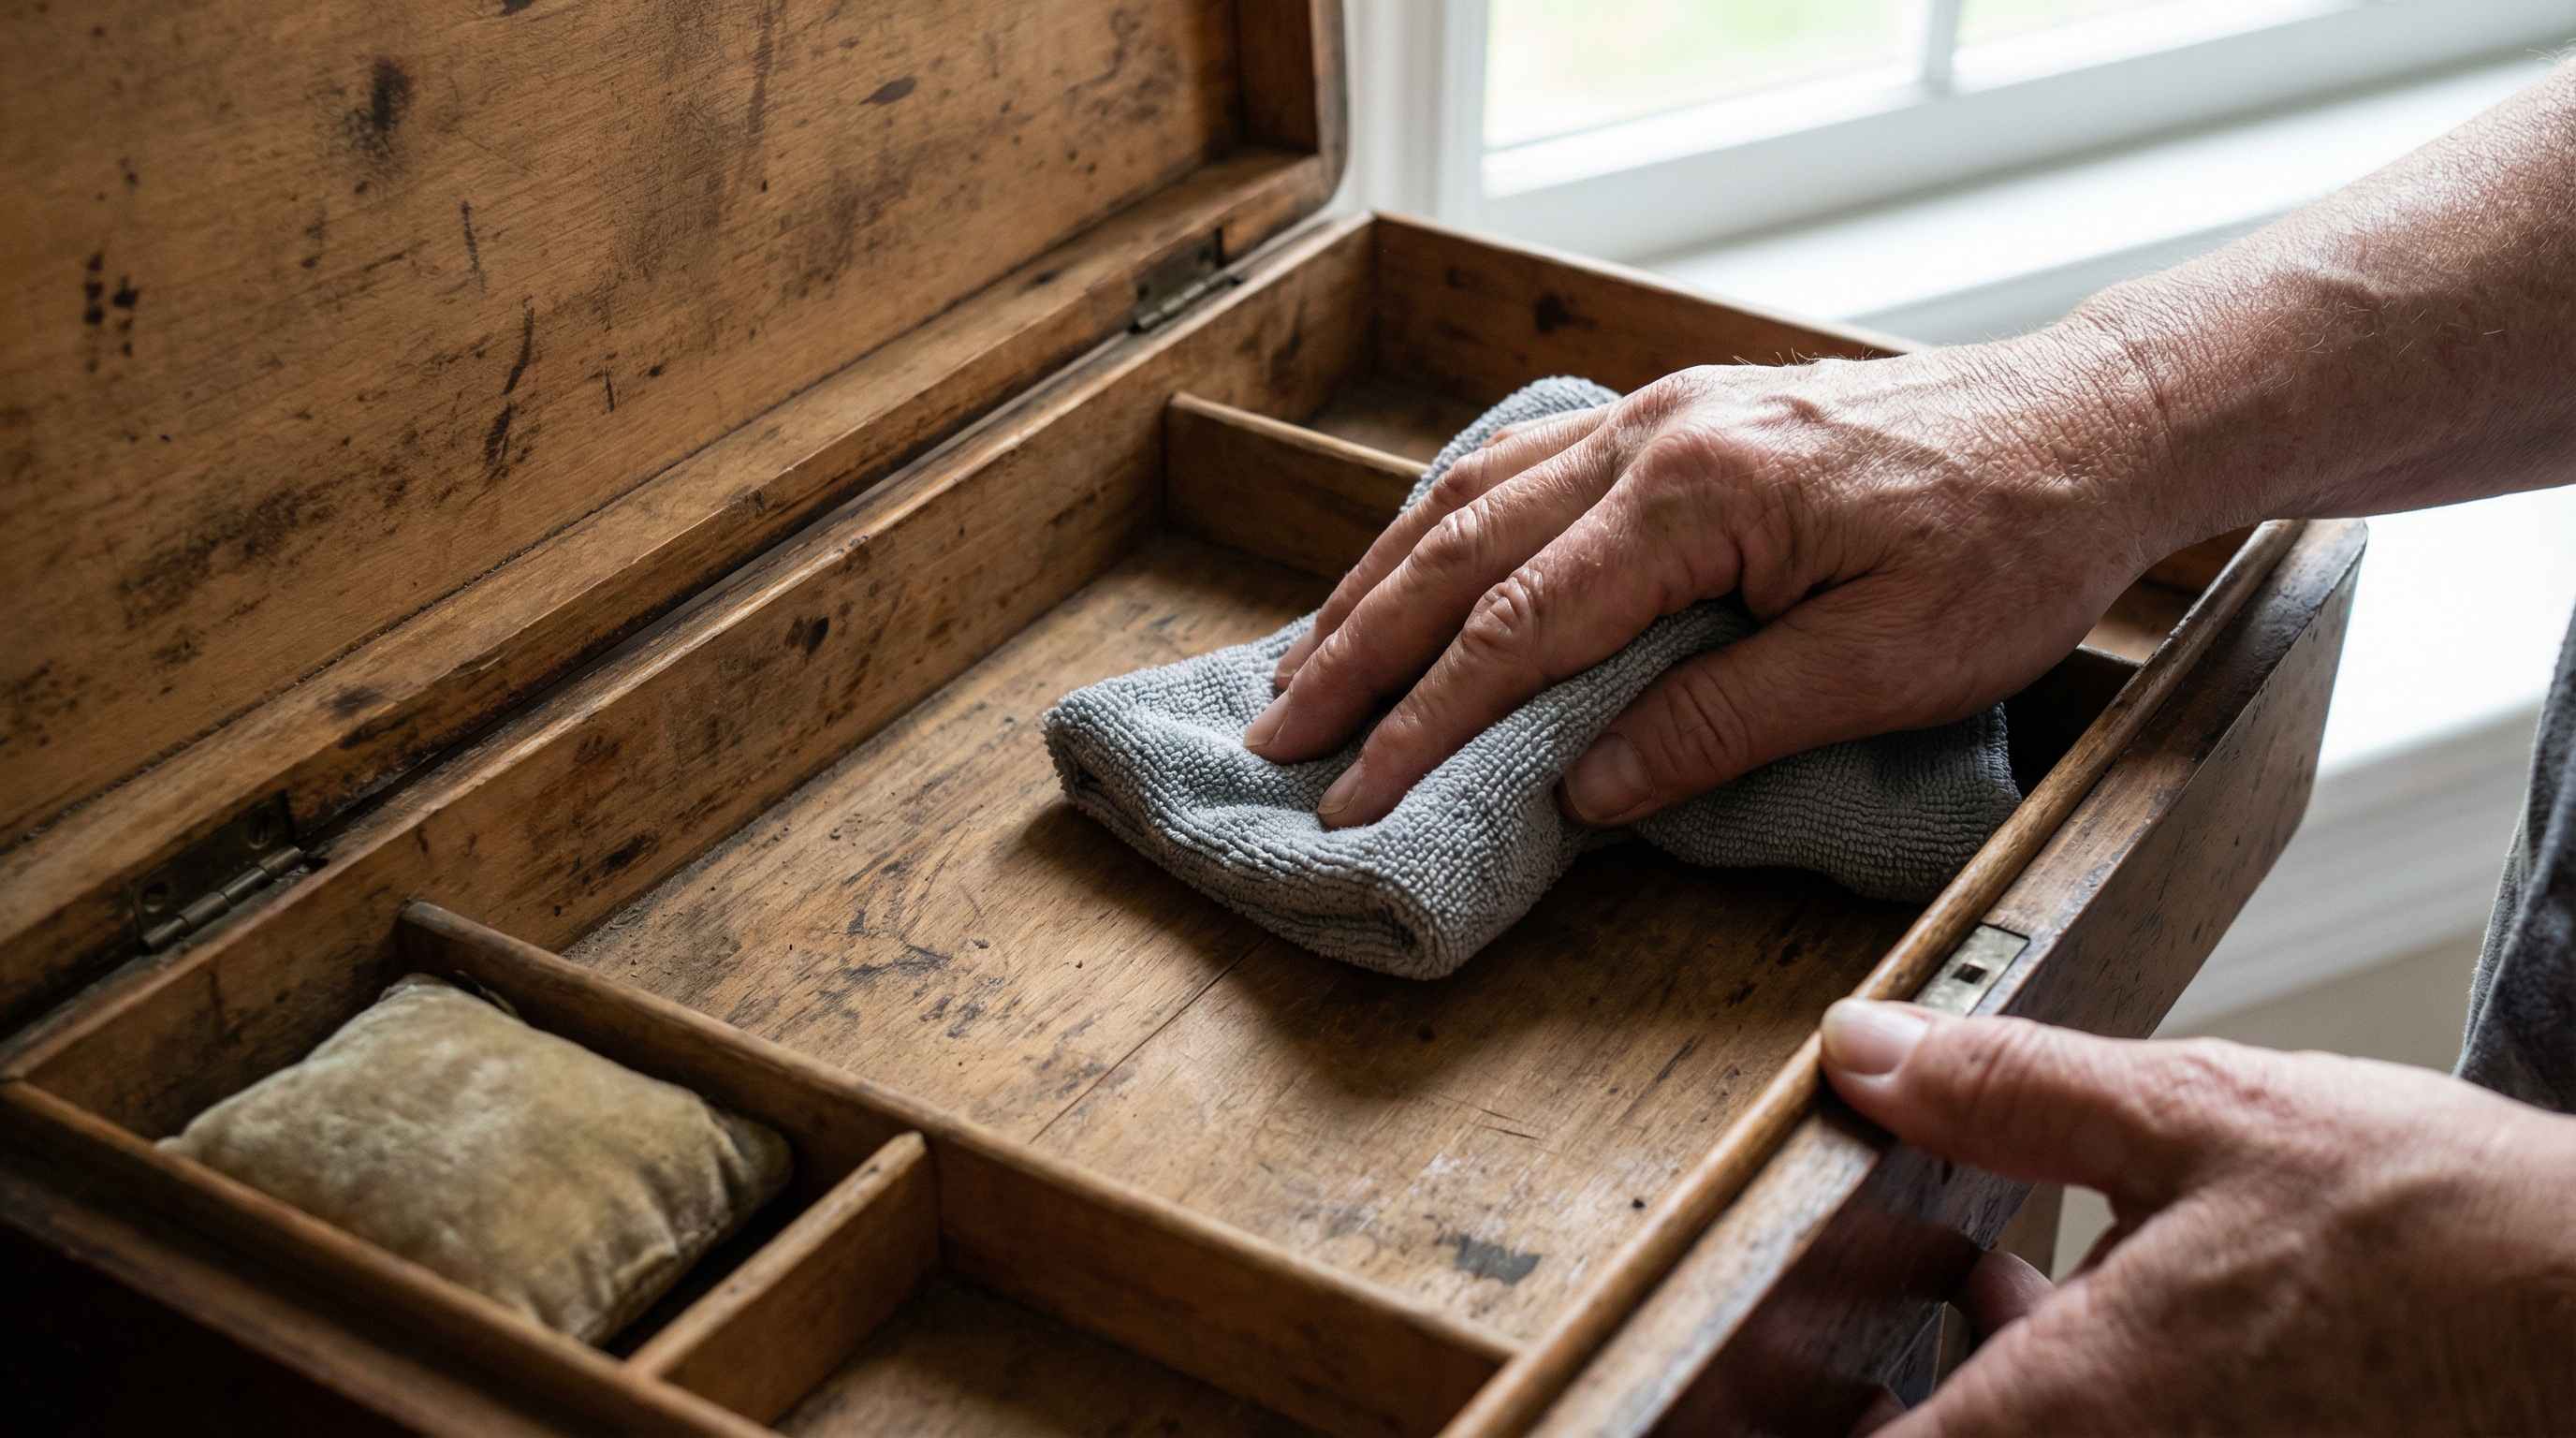
How to prep how to make the inside of a jewelry box project?
You must start by thoroughly cleaning the raw interior surfaces and sanding down any rough wood or paper edges. Preparation is arguably the most critical stage of how to make the inside of a jewelry box because velvet will highlight every imperfection underneath. Use a microfiber cloth to remove all dust, as particles can create visible lumps once the fabric is glued down.
Make no mistake: a poorly prepped surface will cause the adhesive to fail or the fabric to peel prematurely.
- Degreasing: Wipe plastic or metal boxes with alcohol to ensure the glue bonds.
- Sanding: Use fine-grit sandpaper on wooden boxes to create a smooth, porous surface.
- Stripping: Remove any old, crumbling liners completely before starting the new application.
Why is dust so dangerous?
Velvet is highly sensitive to texture. Even a single grain of sawdust under the fabric can create a permanent “pimple” on the surface that ruins the luxury aesthetic.
Can you line over old fabric?
It is almost always better to strip the box to its core. Lining over old materials often results in a “bulky” look and prevents the box from closing correctly due to the added thickness.
Key Takeaway: Flawless preparation is the difference between a box that lasts decades and one that fails within weeks.
| Prep Step | Tool | Goal | |
|---|---|---|---|
| Sanding | 400-grit paper | Smooth substrate | |
| Cleaning | Tack cloth | Zero debris | |
| Priming | Light sealant | Uniform adhesion |
This rigorous preparation phase ensures that your leatherette jewelry boxes or wooden cases maintain their structural integrity and beauty.
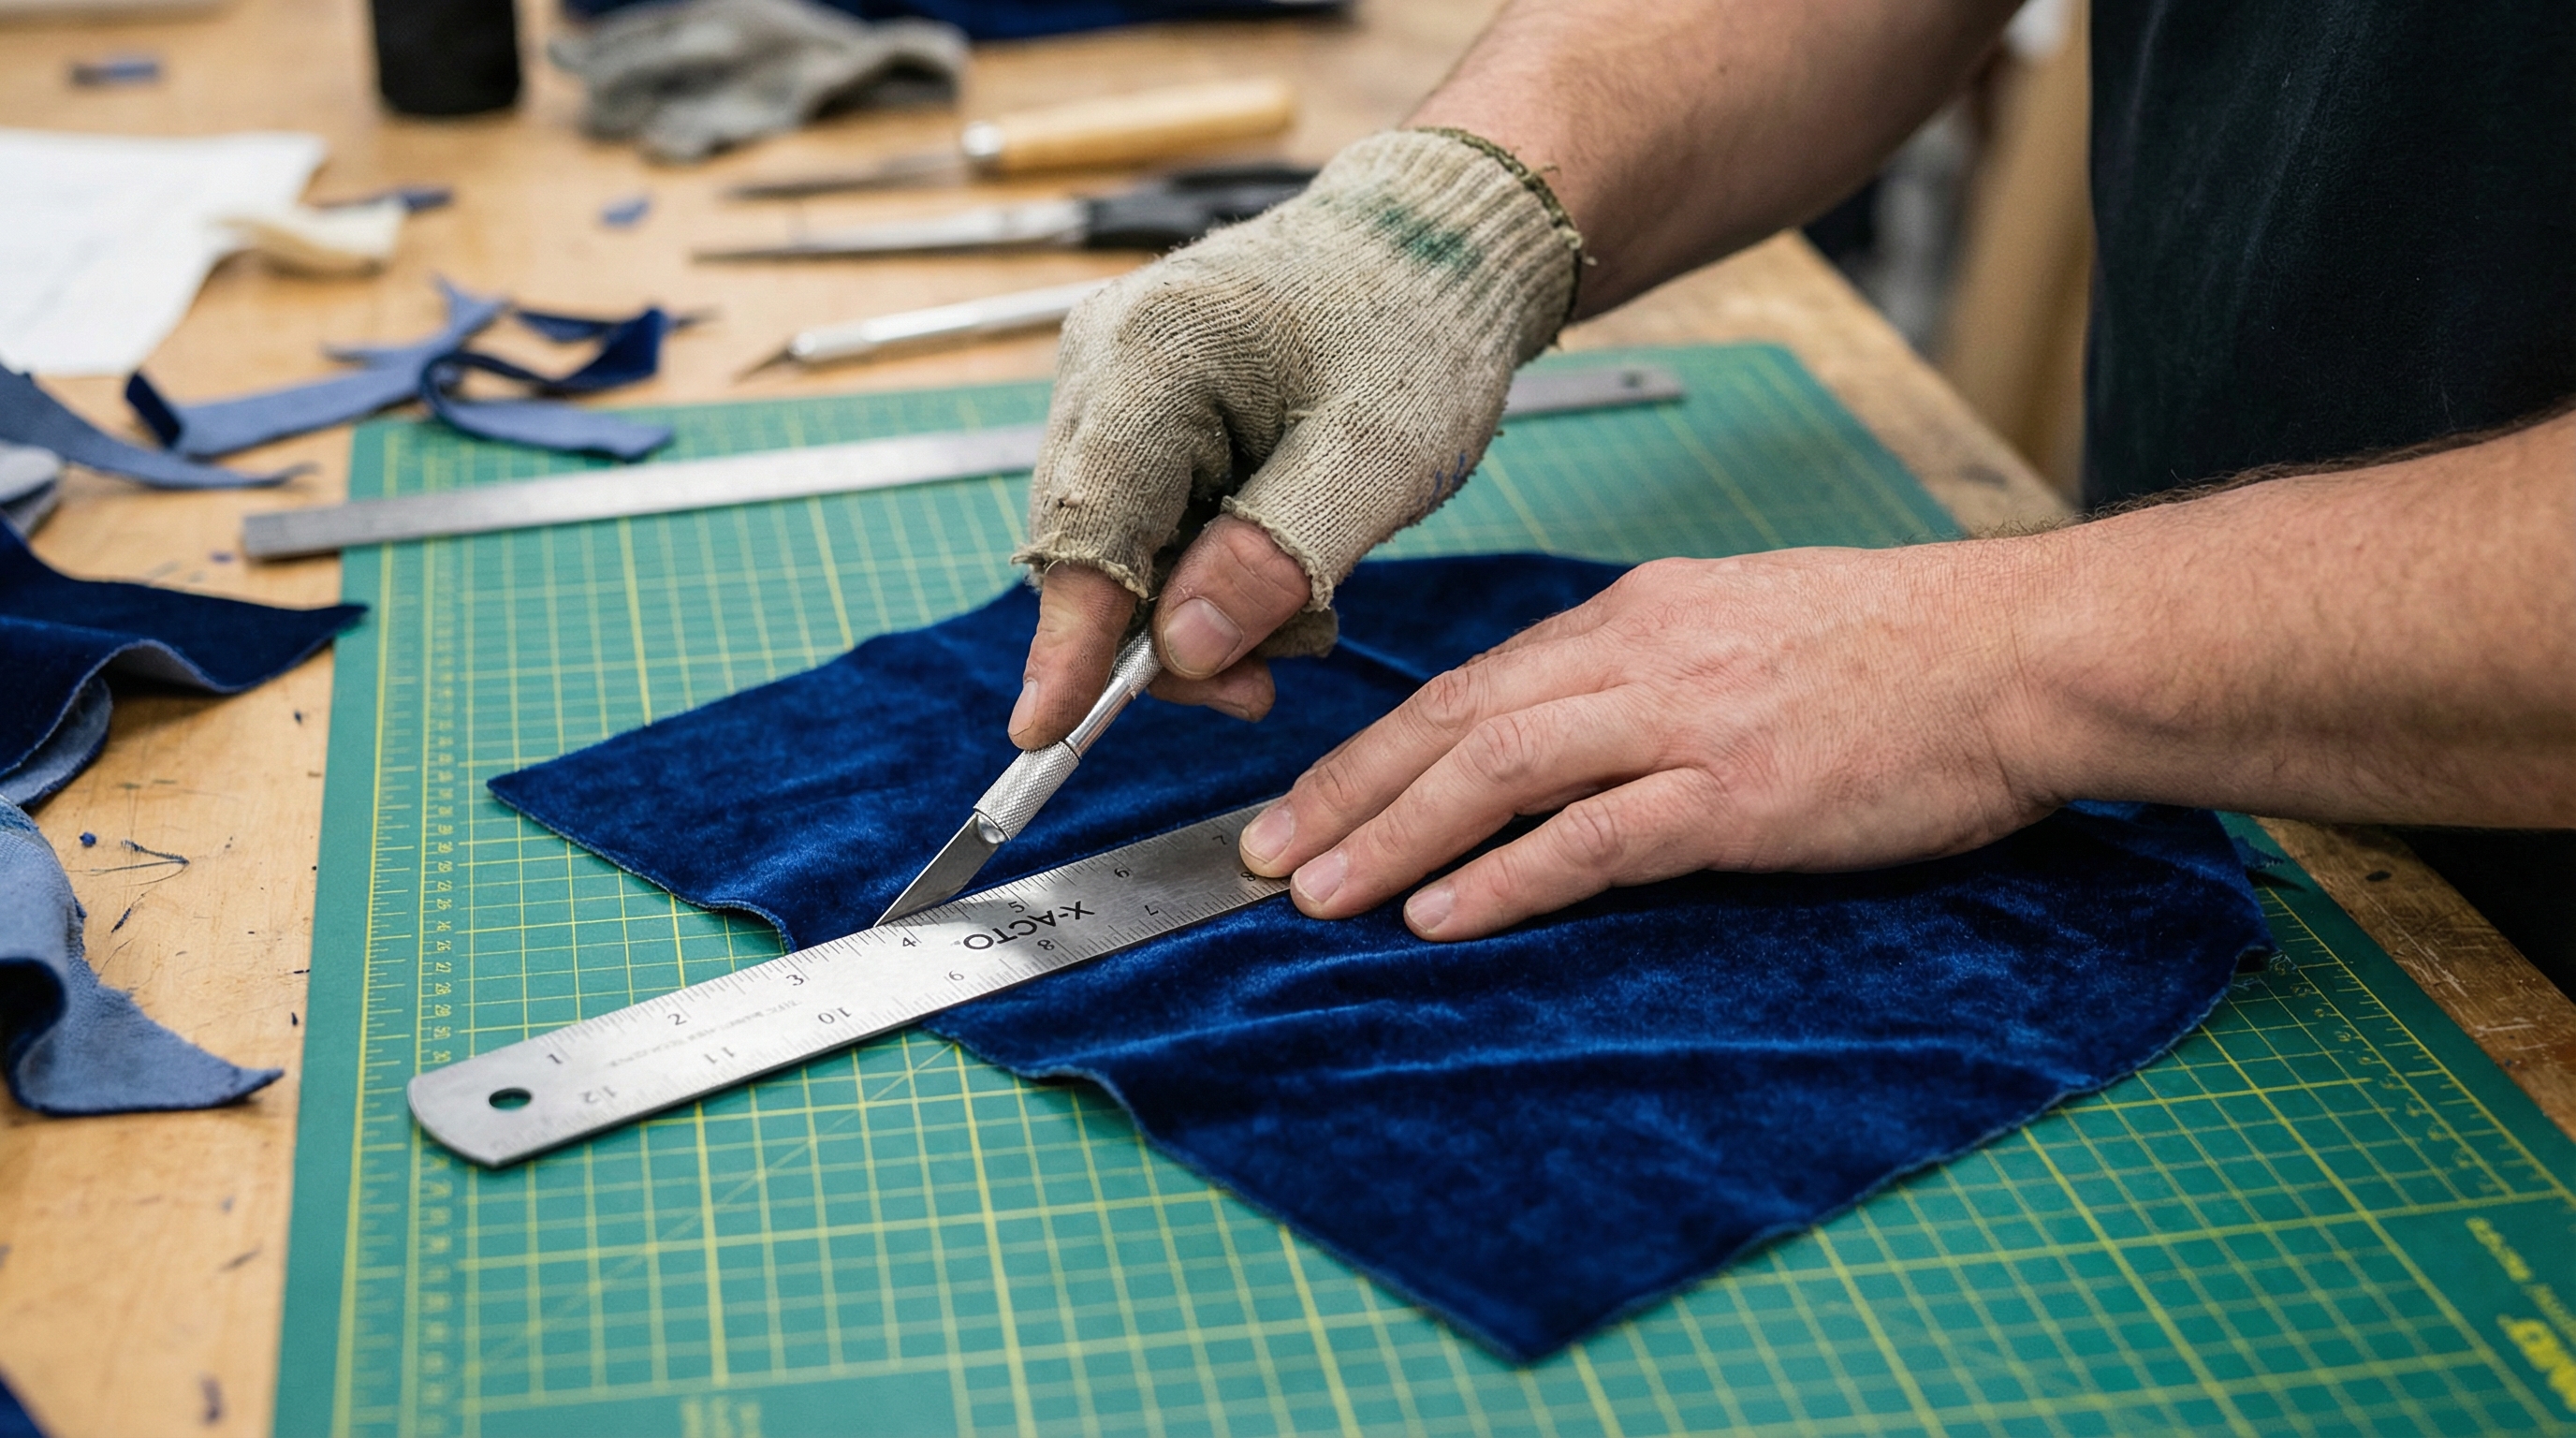
How to cut parts for how to make the inside of a jewelry box?
You need to measure each internal wall separately and cut velvet panels with a half-inch allowance for overlapping. Precision cutting is a central skill when learning how to make the inside of a jewelry box because gaps between panels are highly visible. Using a mitered cut for corners allows the fabric to meet seamlessly without creating bulky folds that interfere with dividers.
Wait, there’s more. Cutting the fabric on a self-healing mat will keep your lines straighter and protect your work surface.
- Base Panel: Cut this first, as all other panels will sit on top of it.
- Side Panels: Measure these slightly longer so they can “tuck” behind the front and back pieces.
- Divider Strips: Cut these as one long piece that wraps around the entire divider core.
How to handle curved edges?
Curved sections require “notching.” By cutting small V-shapes into the fabric allowance, you can wrap the velvet around a curve smoothly without it bunching or wrinkling.
Why use a template?
For B2B orders involving hundreds of boxes, creating a rigid cardboard template is essential. This ensures that every single cut is identical, maintaining strict quality control across the entire production run.
Key Takeaway: Precision in the cutting phase eliminates the need for unsightly “filler” glue and creates the tight, crisp corners of a luxury product.
| Cut Type | Usage | Margin | |
|---|---|---|---|
| Straight Cut | Main walls | 0.5″ | |
| Mitered Cut | Corners | 45-degree angle | |
| Notched Cut | Curved lids | V-shaped nicks |
Accurate cutting techniques result in a clean finish that rivals the world’s most prestigious wooden jewelry boxes .
How to glue when you how to make the inside of a jewelry box?
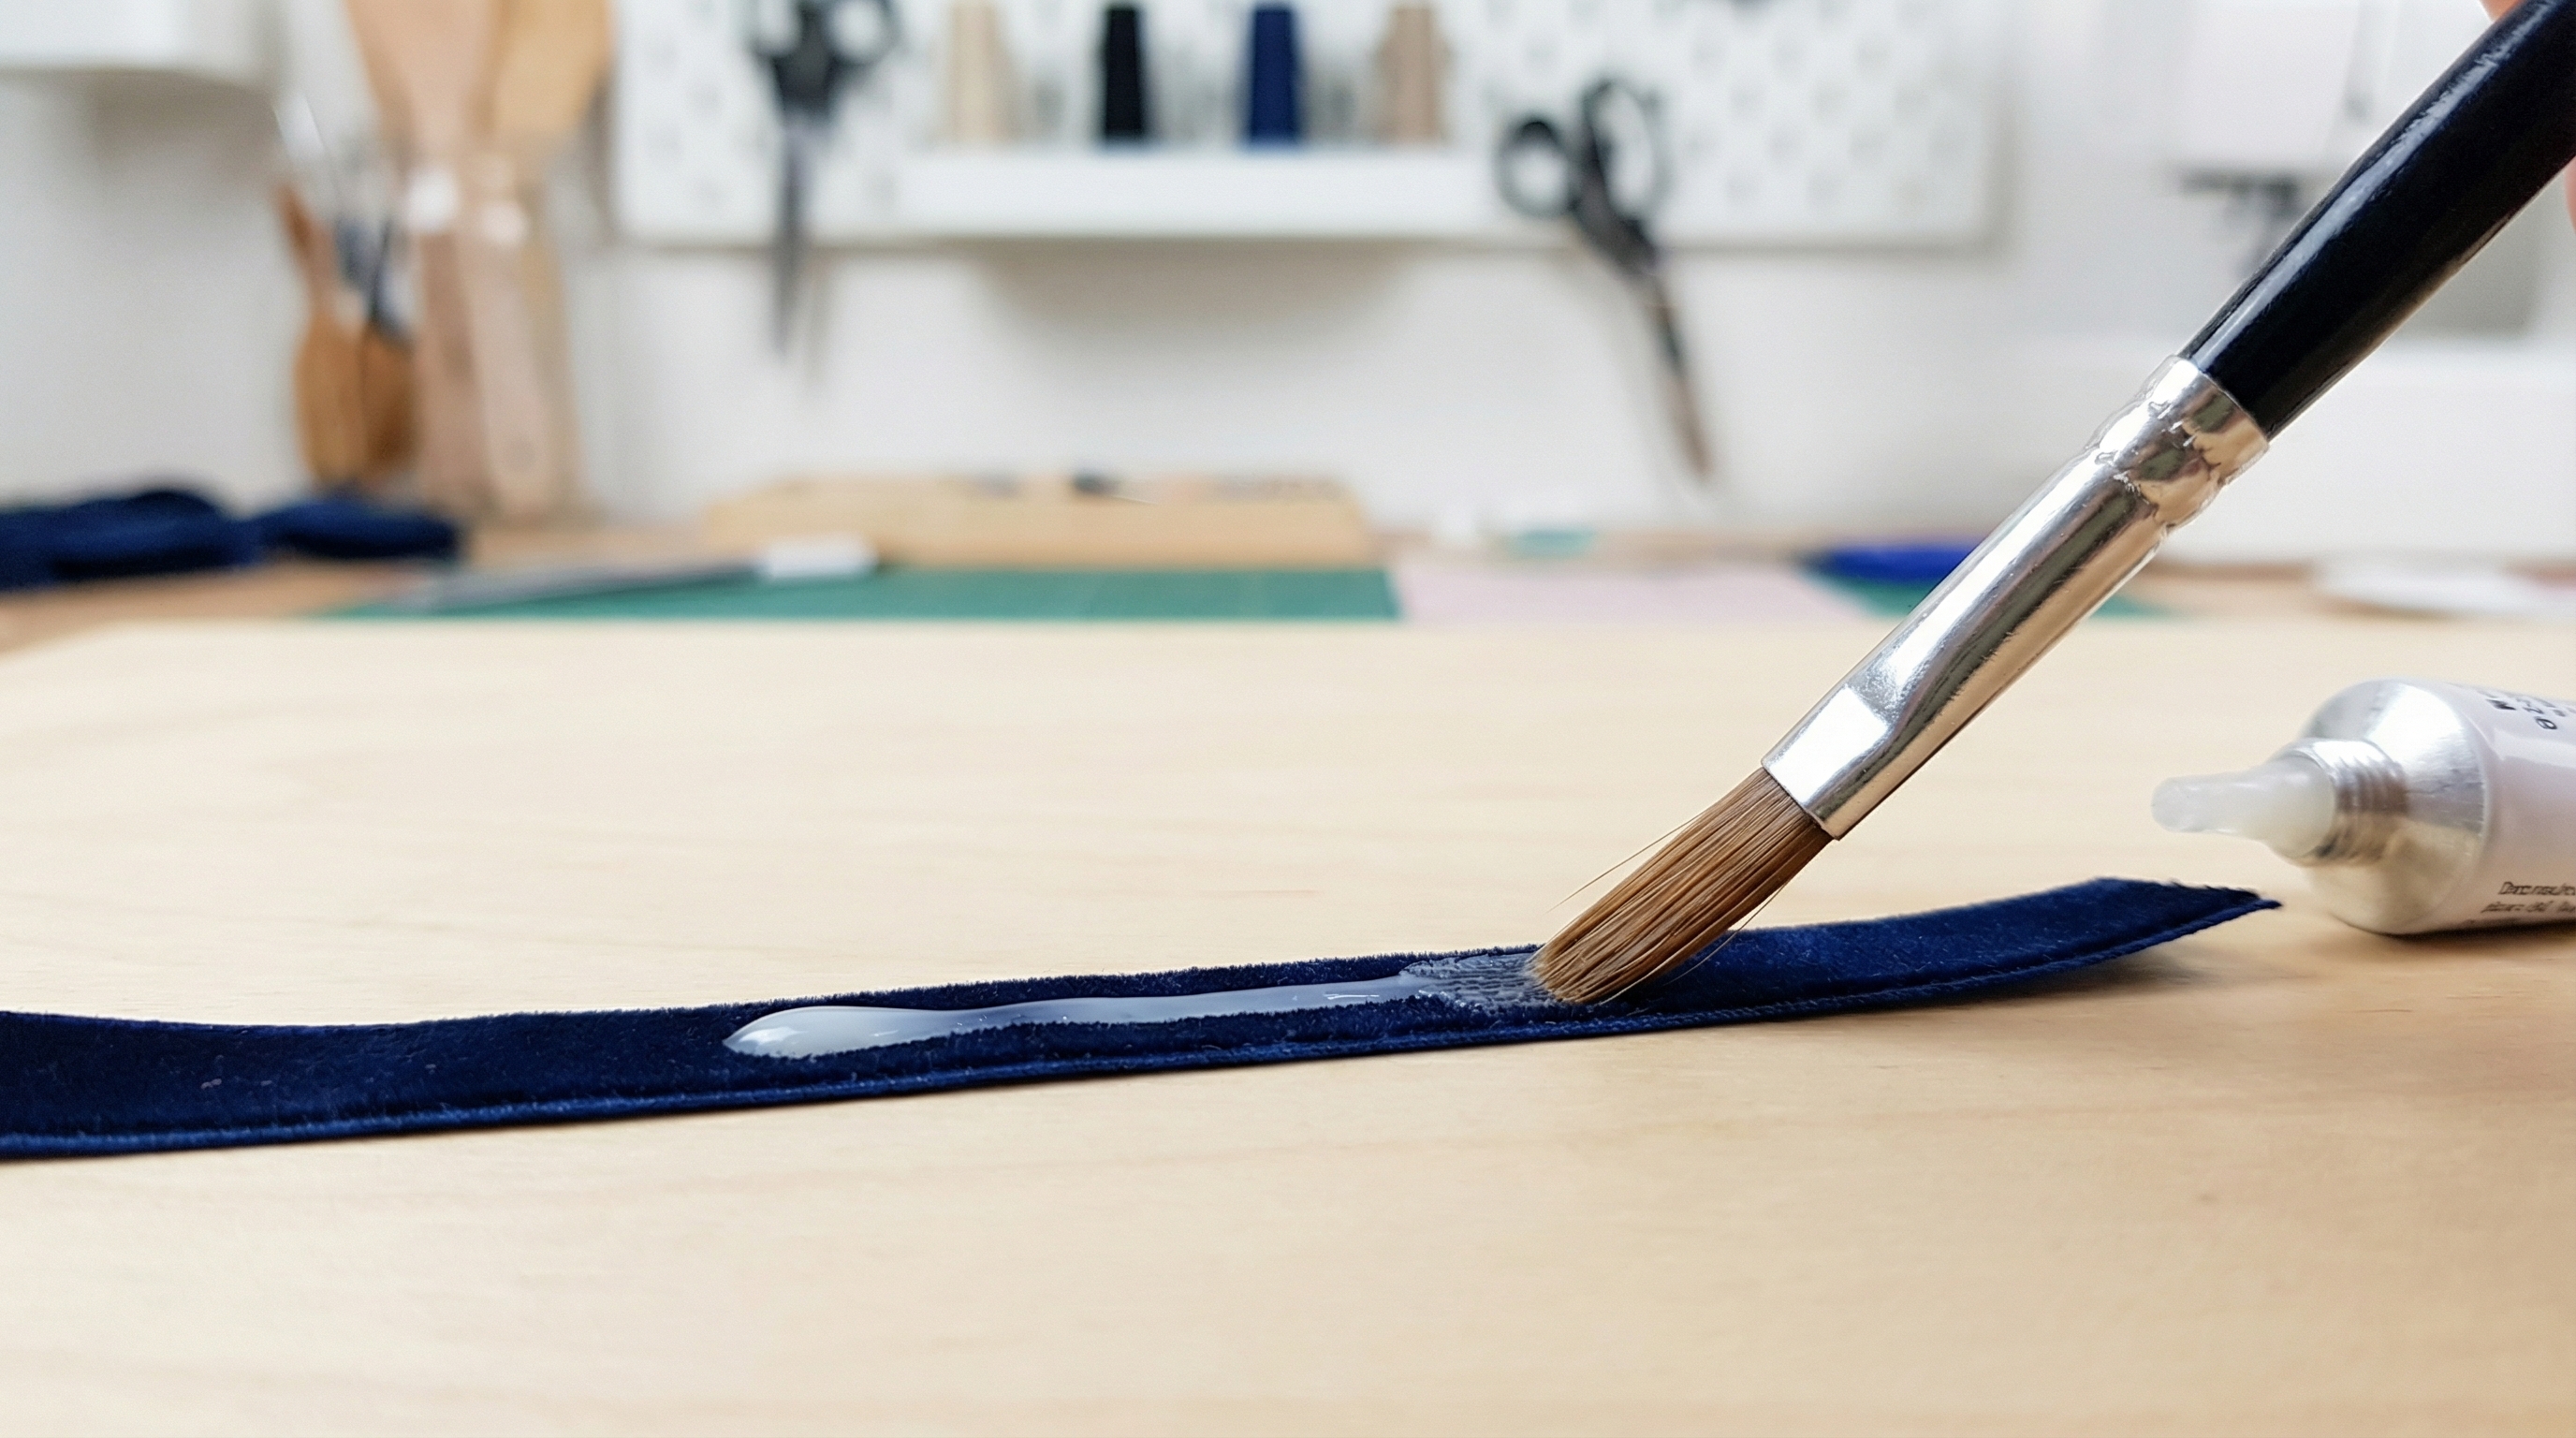
You should apply a thin, even layer of adhesive and wait for it to reach a “tacky” state before pressing the velvet into place. The bonding stage of how to make the inside of a jewelry box is where most errors occur, usually from using too much glue. If the glue is too wet, it will soak through the fabric fibers, creating permanent, dark stains on the plush side.
The secret? Use a foam brush to spread the glue to the very edges without leaving thick clumps.
- Center-Out Method: Always press the center of the panel first and smooth outward to the edges.
- Tacky Phase: Wait 30-60 seconds after application before attaching the velvet.
- Edge Sealing: Use a small toothpick to apply extra glue to the very tips of the corners.
Can you use a glue gun?
Hot glue is generally discouraged for velvet interiors. It cools too quickly, creating thick ridges that are easily felt through the fabric and make the bottom of the box uneven.
How to fix glue bleed-through?
If glue seeps through, it is very difficult to remove. The best approach is to act immediately with a damp (not dripping) cloth, though usually, a stained panel must be removed and replaced.
Key Takeaway: Controlled adhesive application is the only way to achieve a professional, stain-free velvet finish that remains securely bonded.
| Glue Style | Best Surface | Drying Time | |
|---|---|---|---|
| Spray | Large flat panels | 2 Minutes | |
| White Liquid | Wood/Paper | 15 Minutes | |
| Double-Tape | Plastic edges | Immediate |
Correct gluing techniques ensure that the interior layout remains permanent and looks pristine for years.
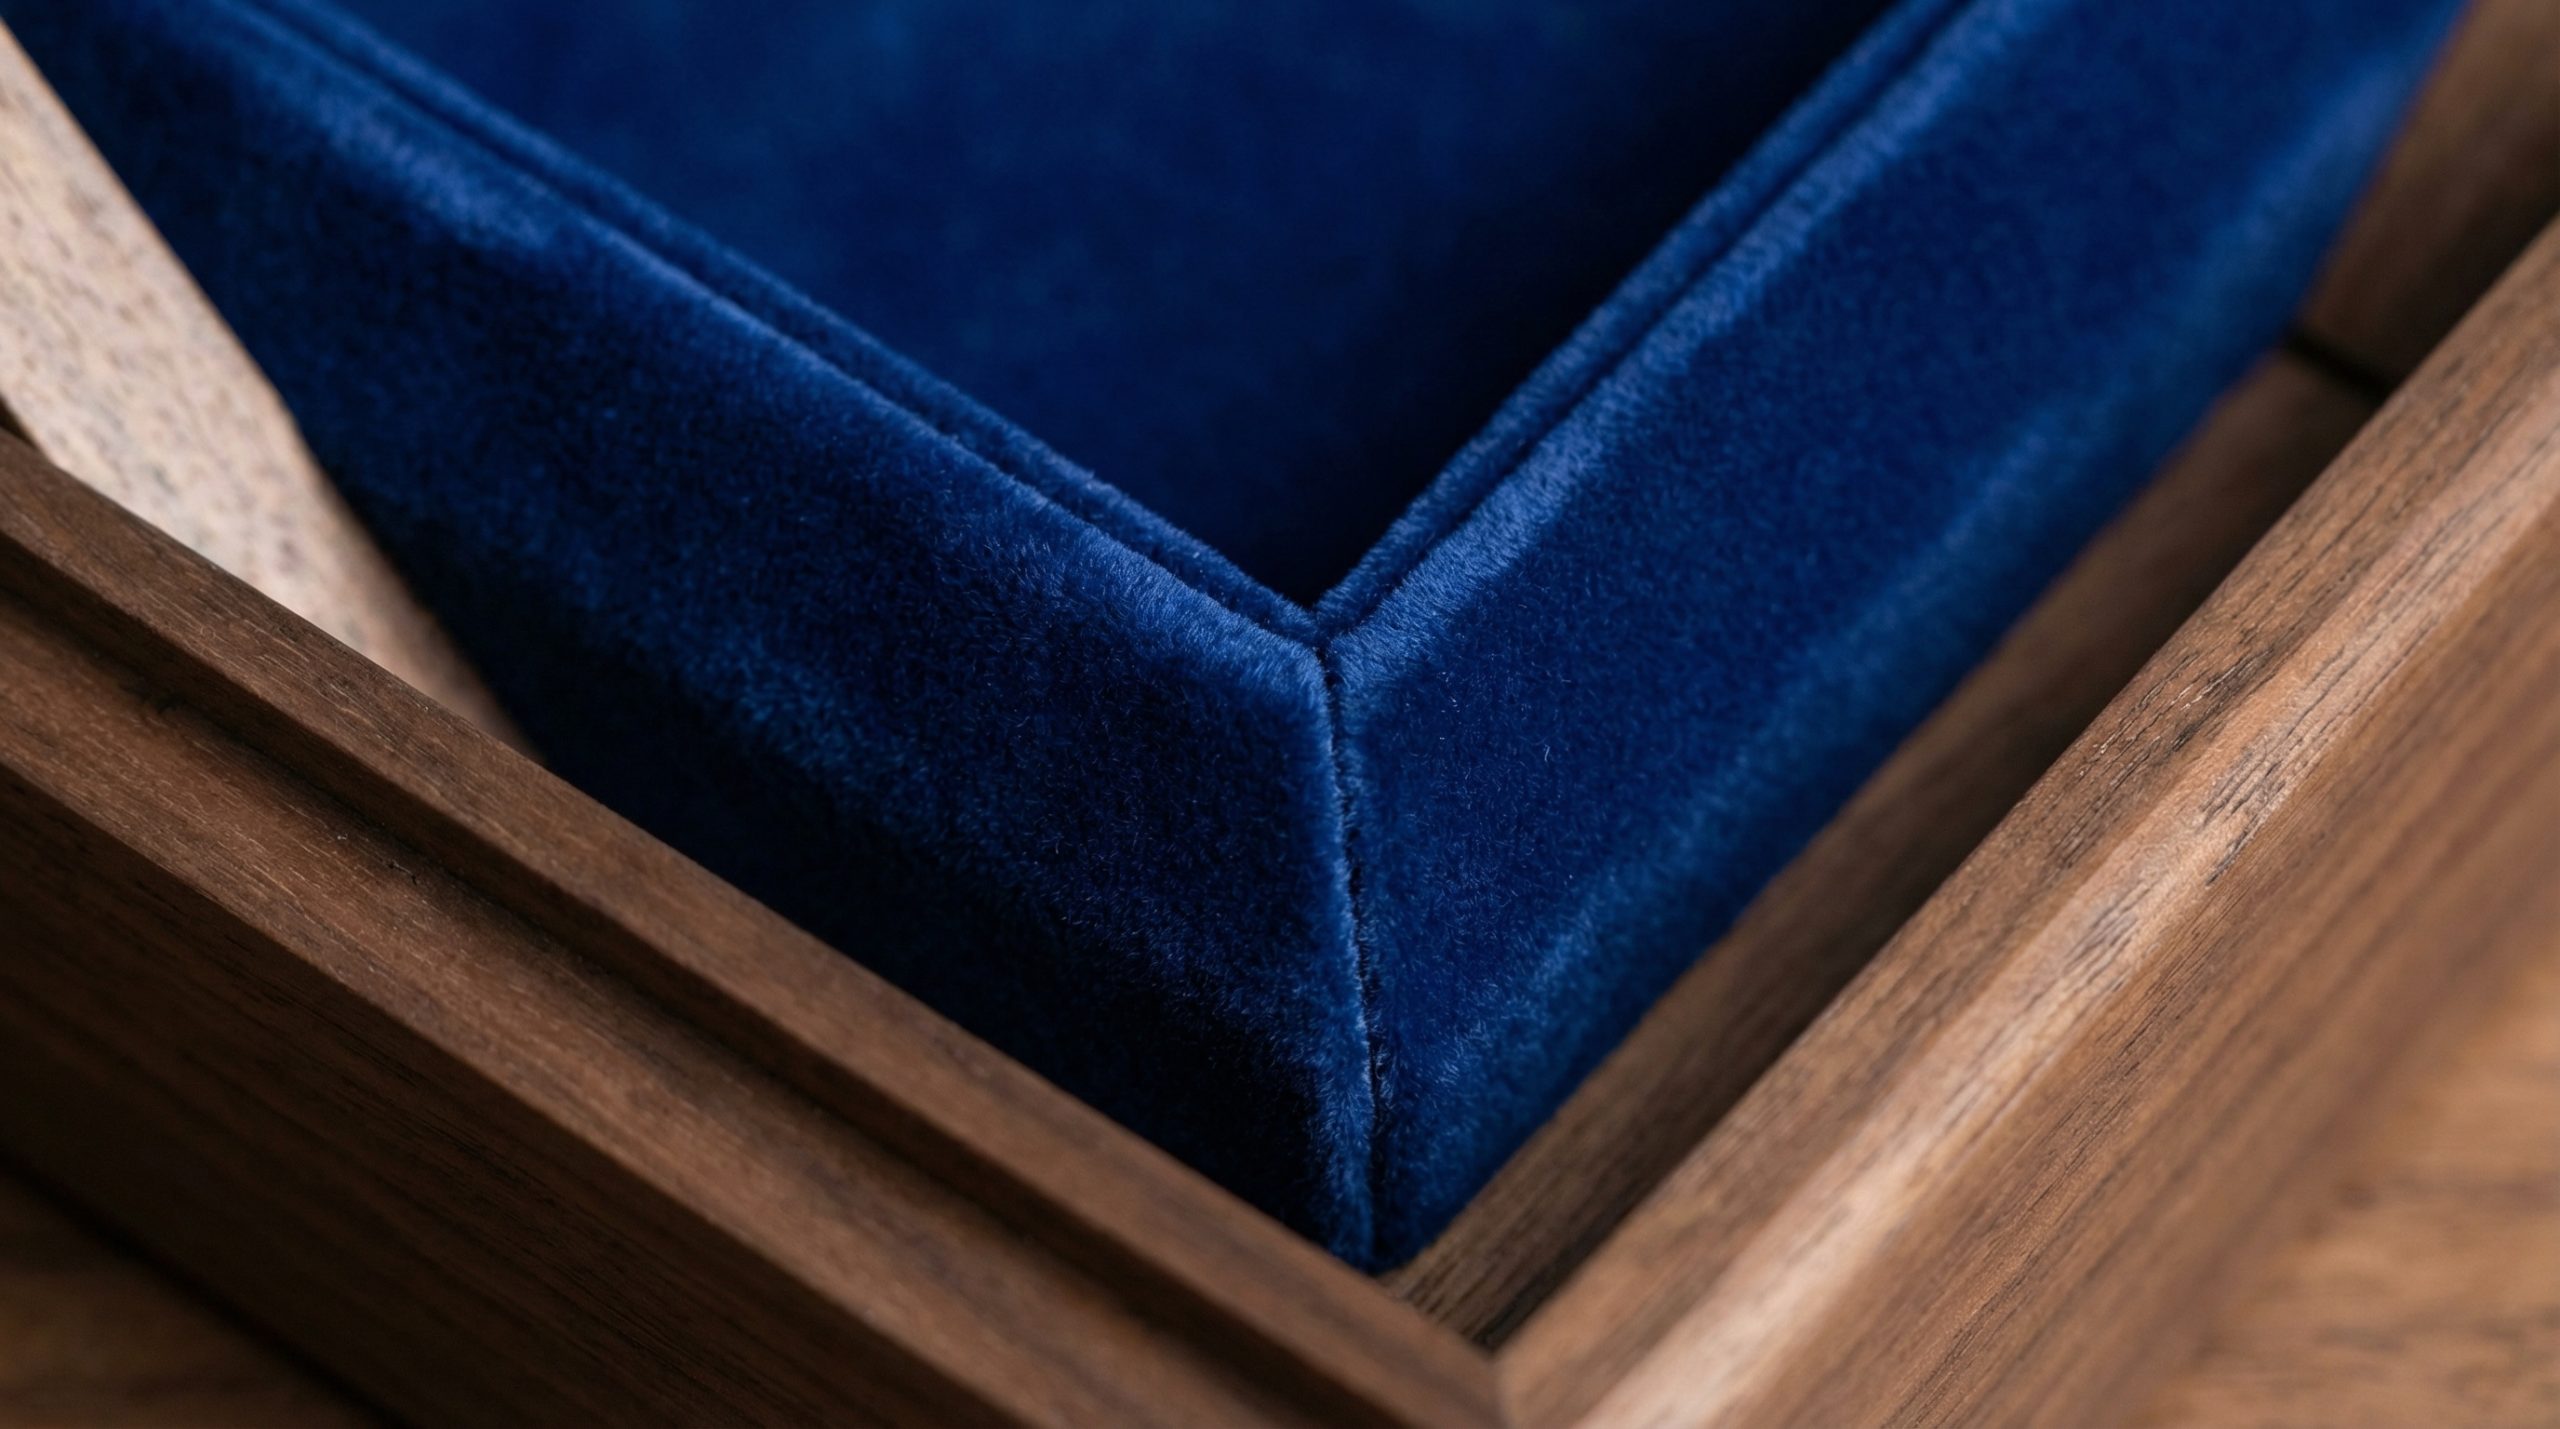
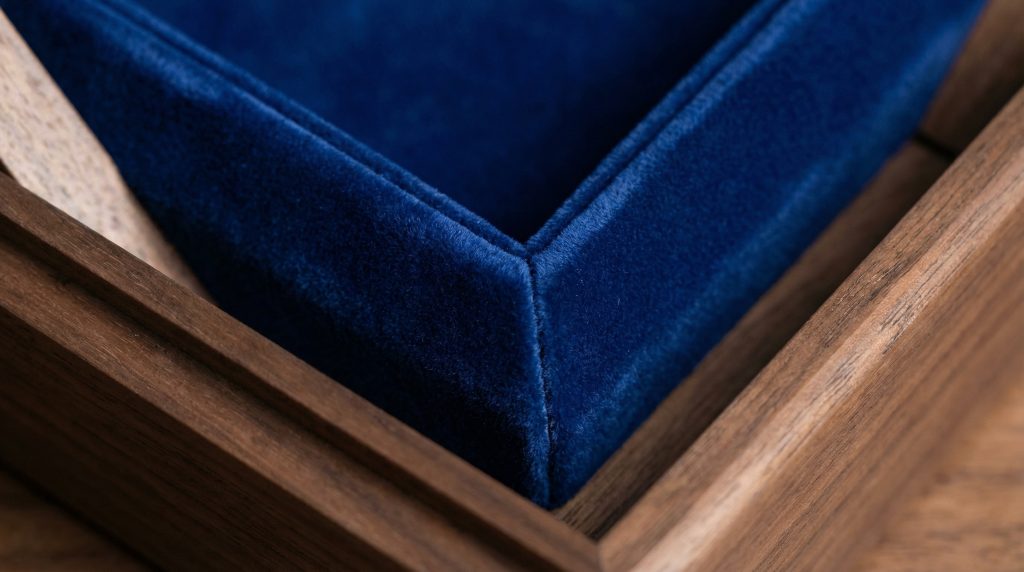
How to finish how to make the inside of a jewelry box corners?
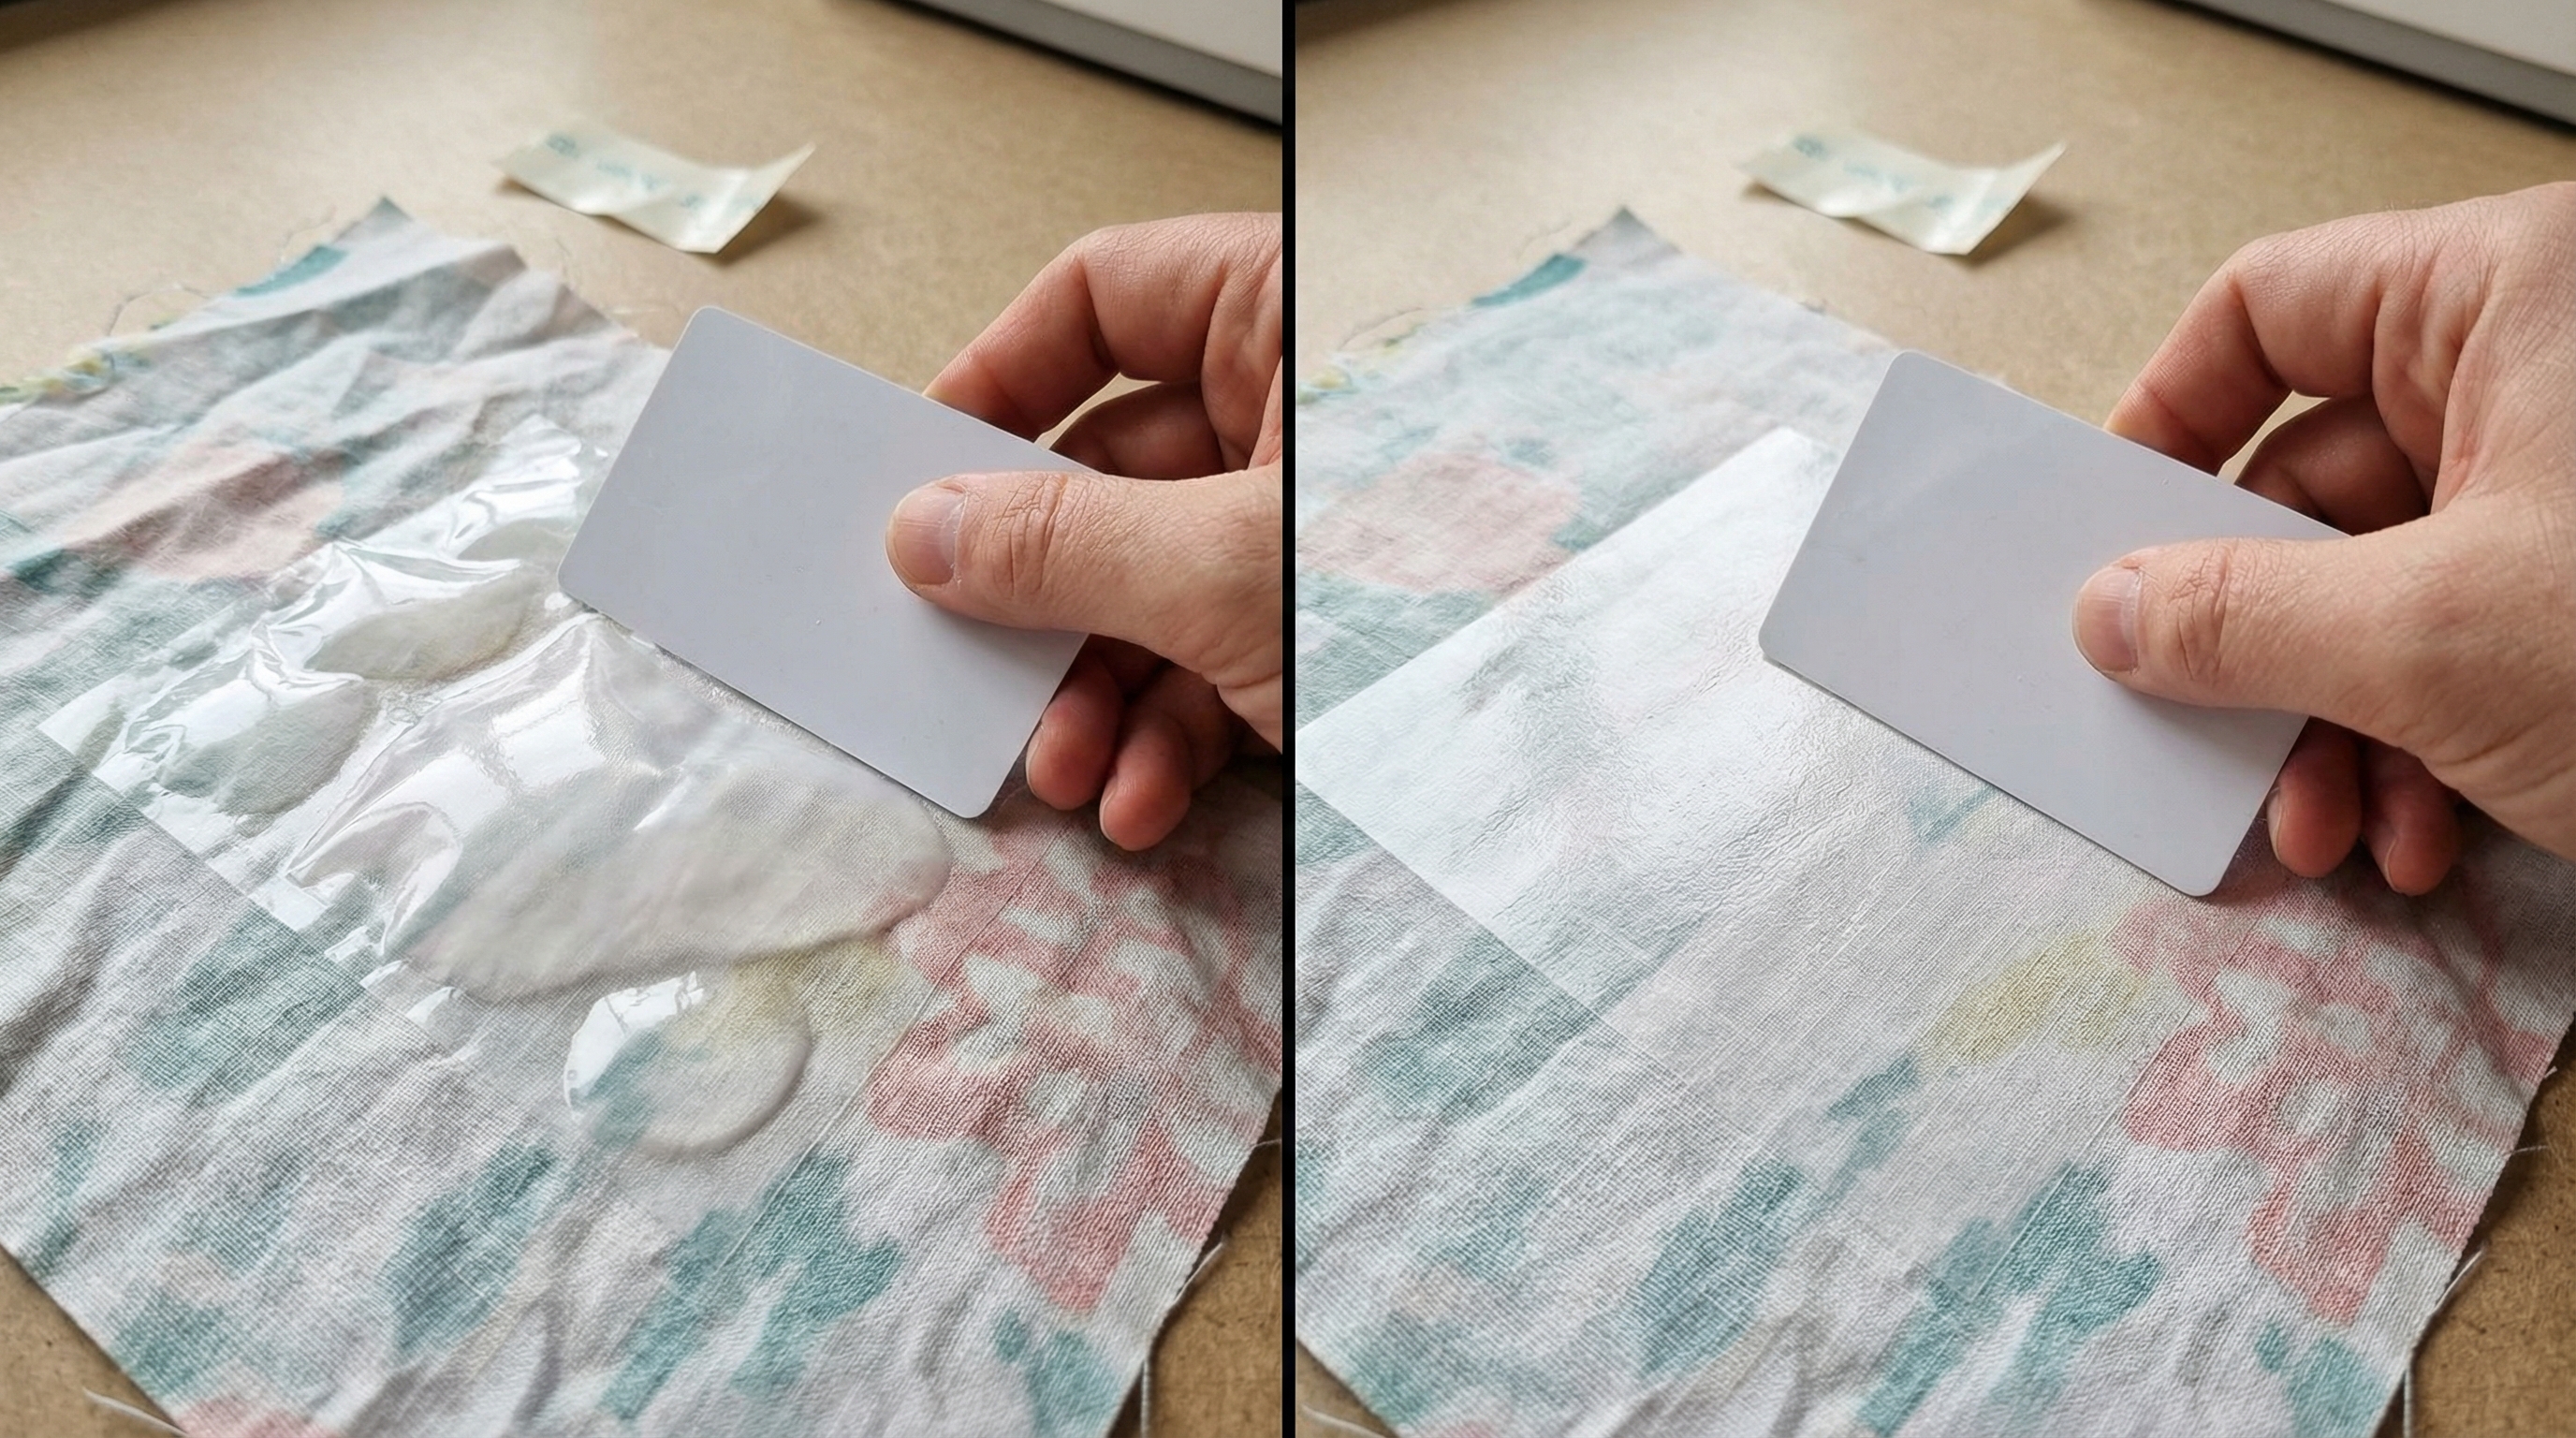
You need to fold the excess fabric into a sharp mitered corner and use a flat-edged tool to press out any remaining air bubbles. Finishing the corners is the “make or break” moment in how to make the inside of a jewelry box that looks factory-perfect. A mitered fold involves cutting a 45-degree angle at the corner point so the two sides meet without overlapping.
The result? A seamless transition that looks like the box was carved from a single piece of velvet.
- Tucking: Use a credit card or bone folder to push the fabric deep into the corner crevices.
- Bubble Removal: Work from the center toward the corners to push air out before the glue sets.
- Trimming: If the fold is too thick, carefully trim away the underlying layer of fabric allowance.
What is a bone folder?
A bone folder is a smooth, dull-edged tool used by bookbinders. It is perfect for velvet because it can apply heavy pressure to corners without snagging the delicate fabric pile.
How to handle lid hinges?
The hinge area requires extra slack. If you glue the velvet too tightly across the hinge, the fabric will rip or pull away the first time the jewelry box is opened fully.
Key Takeaway: Crisp, bubble-free corners are the definitive mark of a master craftsman in the jewelry packaging industry.
| Step | Tool | Action | |
|---|---|---|---|
| Creasing | Bone folder | Define edges | |
| Smoothing | Flat plastic card | Expel air | |
| Tucking | Precision spatula | Hide seams |
Removing air bubbles ensures the lining stays flat and provides a stable base for heavy items like watches.
Why do errors occur in how to make the inside of a jewelry box?
Most mistakes happen because of rushing the drying process or failing to account for the thickness of the velvet when measuring. When you are learning how to make the inside of a jewelry box , it is easy to forget that velvet adds about 1-2mm to every surface. If you don’t subtract this from your divider measurements, the internal components will be too tight and cause the box walls to bulge.
The reality? Patience is your most valuable tool during this process.
- Fraying Edges: Caused by using a dull blade; always snap off a new knife tip before starting.
- Lumpy Base: Usually the result of trapped dust or uneven glue application.
- Misalignment: Occurs when fabric is stretched during the gluing process.
How to avoid fabric stretch?
Velvet has a “bias” and can stretch if pulled too hard. Apply firm but gentle pressure, ensuring you are pushing the air out rather than pulling the fabric toward the edges.
What if the lid won’t close?
This is a common error caused by over-lining. If the lid is too tight, you may need to use a thinner fabric like silk or microfiber for the contact points where the lid meets the base.
Key Takeaway: Identifying and preventing these common pitfalls saves time and prevents the waste of high-value lining materials.
| Error | Cause | Solution | |
|---|---|---|---|
| Stains | Wet glue | Wait for tacky phase | |
| Gaps | Under-cutting | Add 0.5″ allowance | |
| Lumps | Dust/Dirt | Use a tack cloth |
Understanding these risks is essential for maintaining the high standards expected in B2B jewelry packaging.
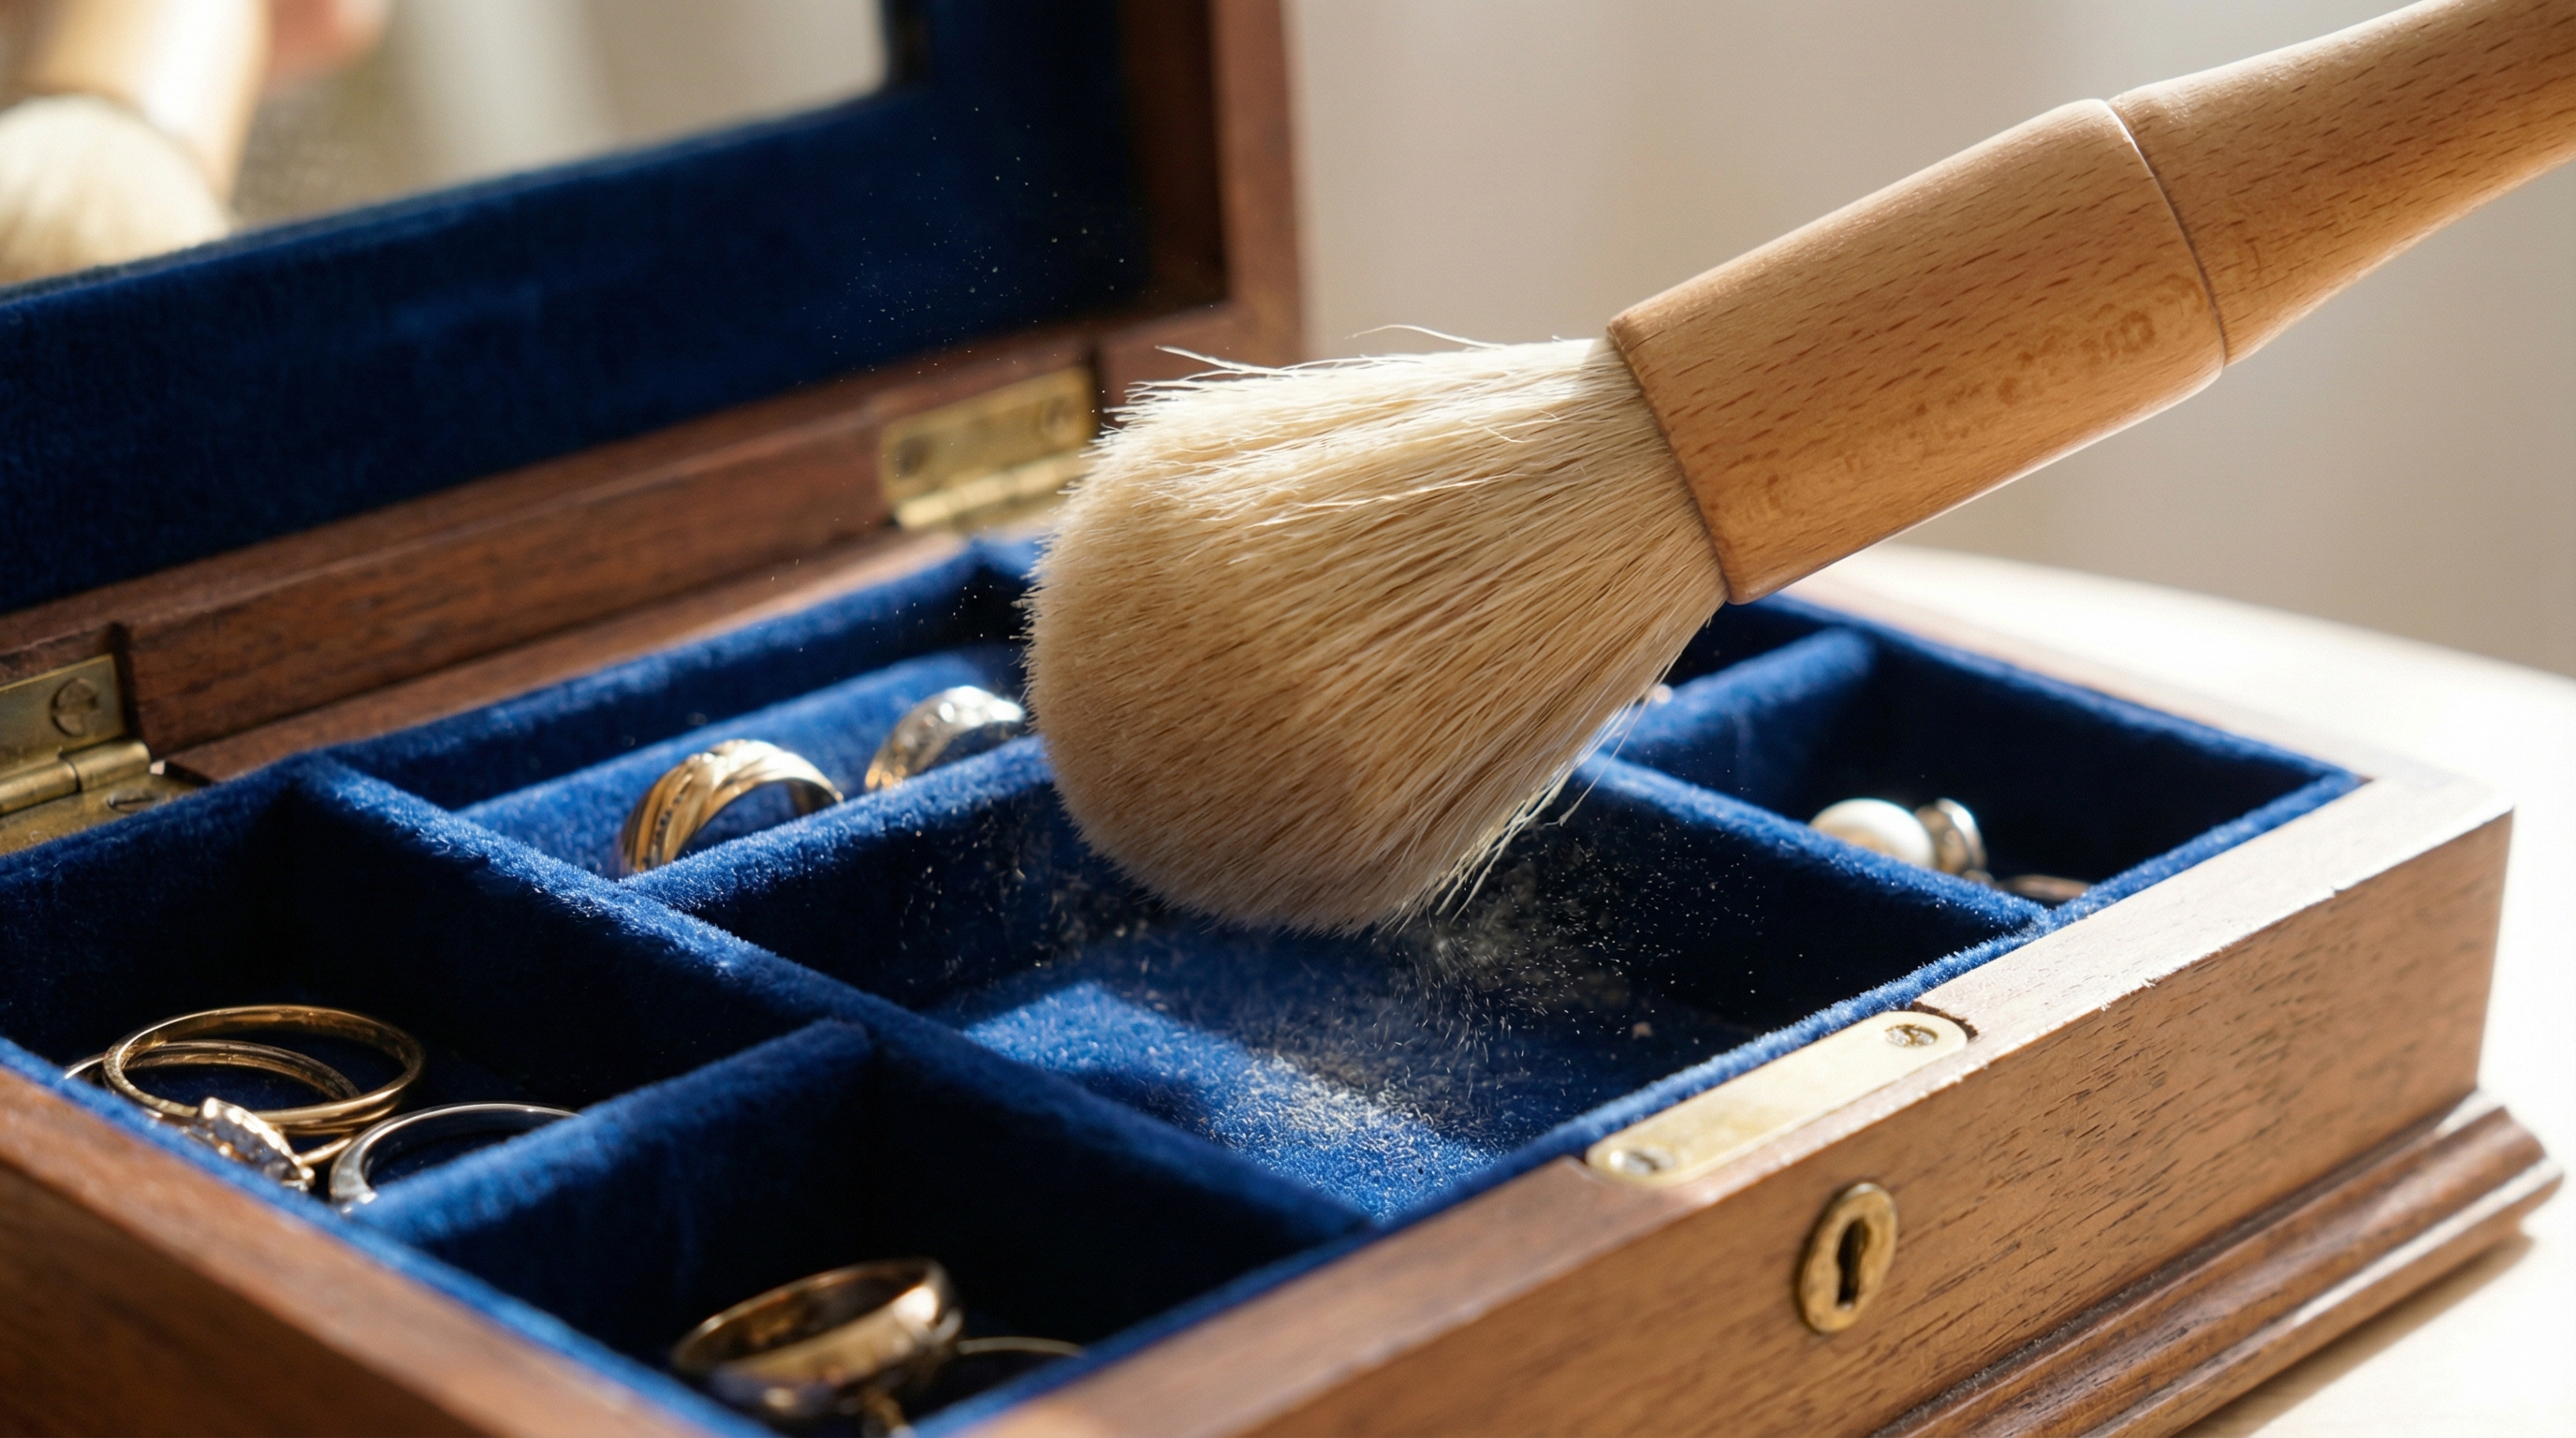
How to clean how to make the inside of a jewelry box later?
You should use a soft-bristled brush or a lint roller to remove dust, and avoid using water which can damage the adhesive bond. Maintaining how to make the inside of a jewelry box is just as important as the initial construction to ensure long-term customer satisfaction. Velvet is a “magnet” for lint and skin oils, so regular light maintenance is required to keep the interior looking brand new.
Believe it or not, a simple piece of Scotch tape is often the most effective tool for cleaning deep corners.
- Brushing: Always brush in the direction of the “nap” (the way the fibers naturally lay).
- Spot Cleaning: If a stain occurs, use a specialized dry-cleaning solvent sparingly.
- Sunlight Protection: Store the box away from UV rays to prevent the velvet dye from fading.
Can you vacuum the interior?
A low-suction handheld vacuum with a brush attachment is safe. However, avoid high-power upright vacuums as they can pull the velvet away from the adhesive if the bond is aged.
How to restore flattened pile?
If the velvet becomes crushed under a heavy item, you can gently steam the area. Hold a steamer several inches away—never touch the fabric—and then brush the pile back up once it is slightly damp and warm.
Key Takeaway: Proper aftercare ensures that the luxury experience you’ve created lasts as long as the jewelry stored inside.
| Task | Tool | Frequency | |
|---|---|---|---|
| Lint Removal | Lint roller | Monthly | |
| Corner Dusting | Soft brush | As needed | |
| Deep Clean | Dry solvent | Yearly |
Proactive maintenance protects the structural restoration and keeps your custom boxes looking professional for years.
Creating a velvet-lined interior is the ultimate way to transform a simple box into a premium branding tool. By following these professional steps, you ensure that every piece of jewelry is showcased with the respect and protection it deserves. Ready to elevate your packaging? Please contact us to discuss custom solutions for your brand. We are dedicated to delivering world-class jewelry packaging that reflects the brilliance of your collection and the integrity of your vision.
FAQ
- Can I use silk instead of velvet for lining? Yes, but it is much thinner and shows every lump of glue underneath. Velvet is more forgiving for DIY projects and offers much better scratch protection for heavy items.
- What’s the best way to cut velvet without it fraying? You should use a brand-new, sharp rotary cutter or craft knife. Fraying occurs when the blade pulls the fibers instead of slicing through them cleanly.
- Can I line a plastic jewelry box using this method? Yes, but you will need a specialized plastic-to-fabric adhesive. Standard craft glues often peel off plastic surfaces once they dry completely.
- Can I add padding under the velvet? Absolutely, using a thin layer of batting or foam creates a “quilted” look. This adds significant luxury appeal but requires more precision during the corner-tucking phase.
- Can I wash a velvet-lined jewelry box? No, you should never submerge the box in water. Moisture will warp the underlying wood or cardboard structure and dissolve the adhesive holding the lining in place.