
DIY jewelry packaging involves creating unique, cost-effective, and branded containers for your pieces using materials like cardstock, fabric, or stamps. Many small business owners struggle with the high cost of custom-ordered boxes that often don’t match their brand’s handmade aesthetic. This lack of cohesive presentation can make even high-end jewelry feel like a generic purchase. By learning how to make your own packaging jewelry , you can bridge the gap between “handmade” and “professional,” ensuring your customers feel the value of their purchase from the moment they see the box.
Why is branding essential for jewelry packaging?
Branding is the visual language that tells your customer who you are before they even see the jewelry inside. When you focus on how to make your own packaging jewelry, you are actually building a narrative that increases the perceived value of your items. A well-branded box acts as a silent salesperson, reinforcing your brand identity and making your business more memorable in a saturated market.
Establishing Brand Identity
Your packaging should reflect the “soul” of your brand. Whether you specialize in bohemian wire-wrapped pieces or minimalist gold geometric designs, the colors and textures of your packaging should align with your aesthetic. Consistency across your social media, website, and physical packaging creates a professional image that builds consumer trust.
Enhancing Customer Experience
The “unboxing experience” has become a crucial marketing tool in the digital age. A thoughtful DIY setup ensures that the customer feels special, potentially leading to social media shares and repeat business.
- Recognition: Makes your brand instantly identifiable.
- Perceived Value: High-quality DIY packaging suggests high-quality jewelry.
- Protection: Ensures the brand remains intact through safe delivery.
Cost-Effective Branding Strategies
The best part? You don’t need a massive budget to look like a high-end boutique. Using simple elements like a signature color of twine or a specific type of tissue paper can create a “signature look” that costs pennies per order.
| Branding Element | Cost Level | Impact on Brand | |
|---|---|---|---|
| Custom Logo Stamp | Low (One-time) | High Brand Recognition | |
| Signature Color Ribbon | Low | Aesthetic Consistency | |
| Hand-written Note | Very Low | Personal Connection |
This data shows that the most impactful branding elements often require more effort than money.
Key Takeaway: Consistent branding through DIY methods turns a simple purchase into a premium brand experience.
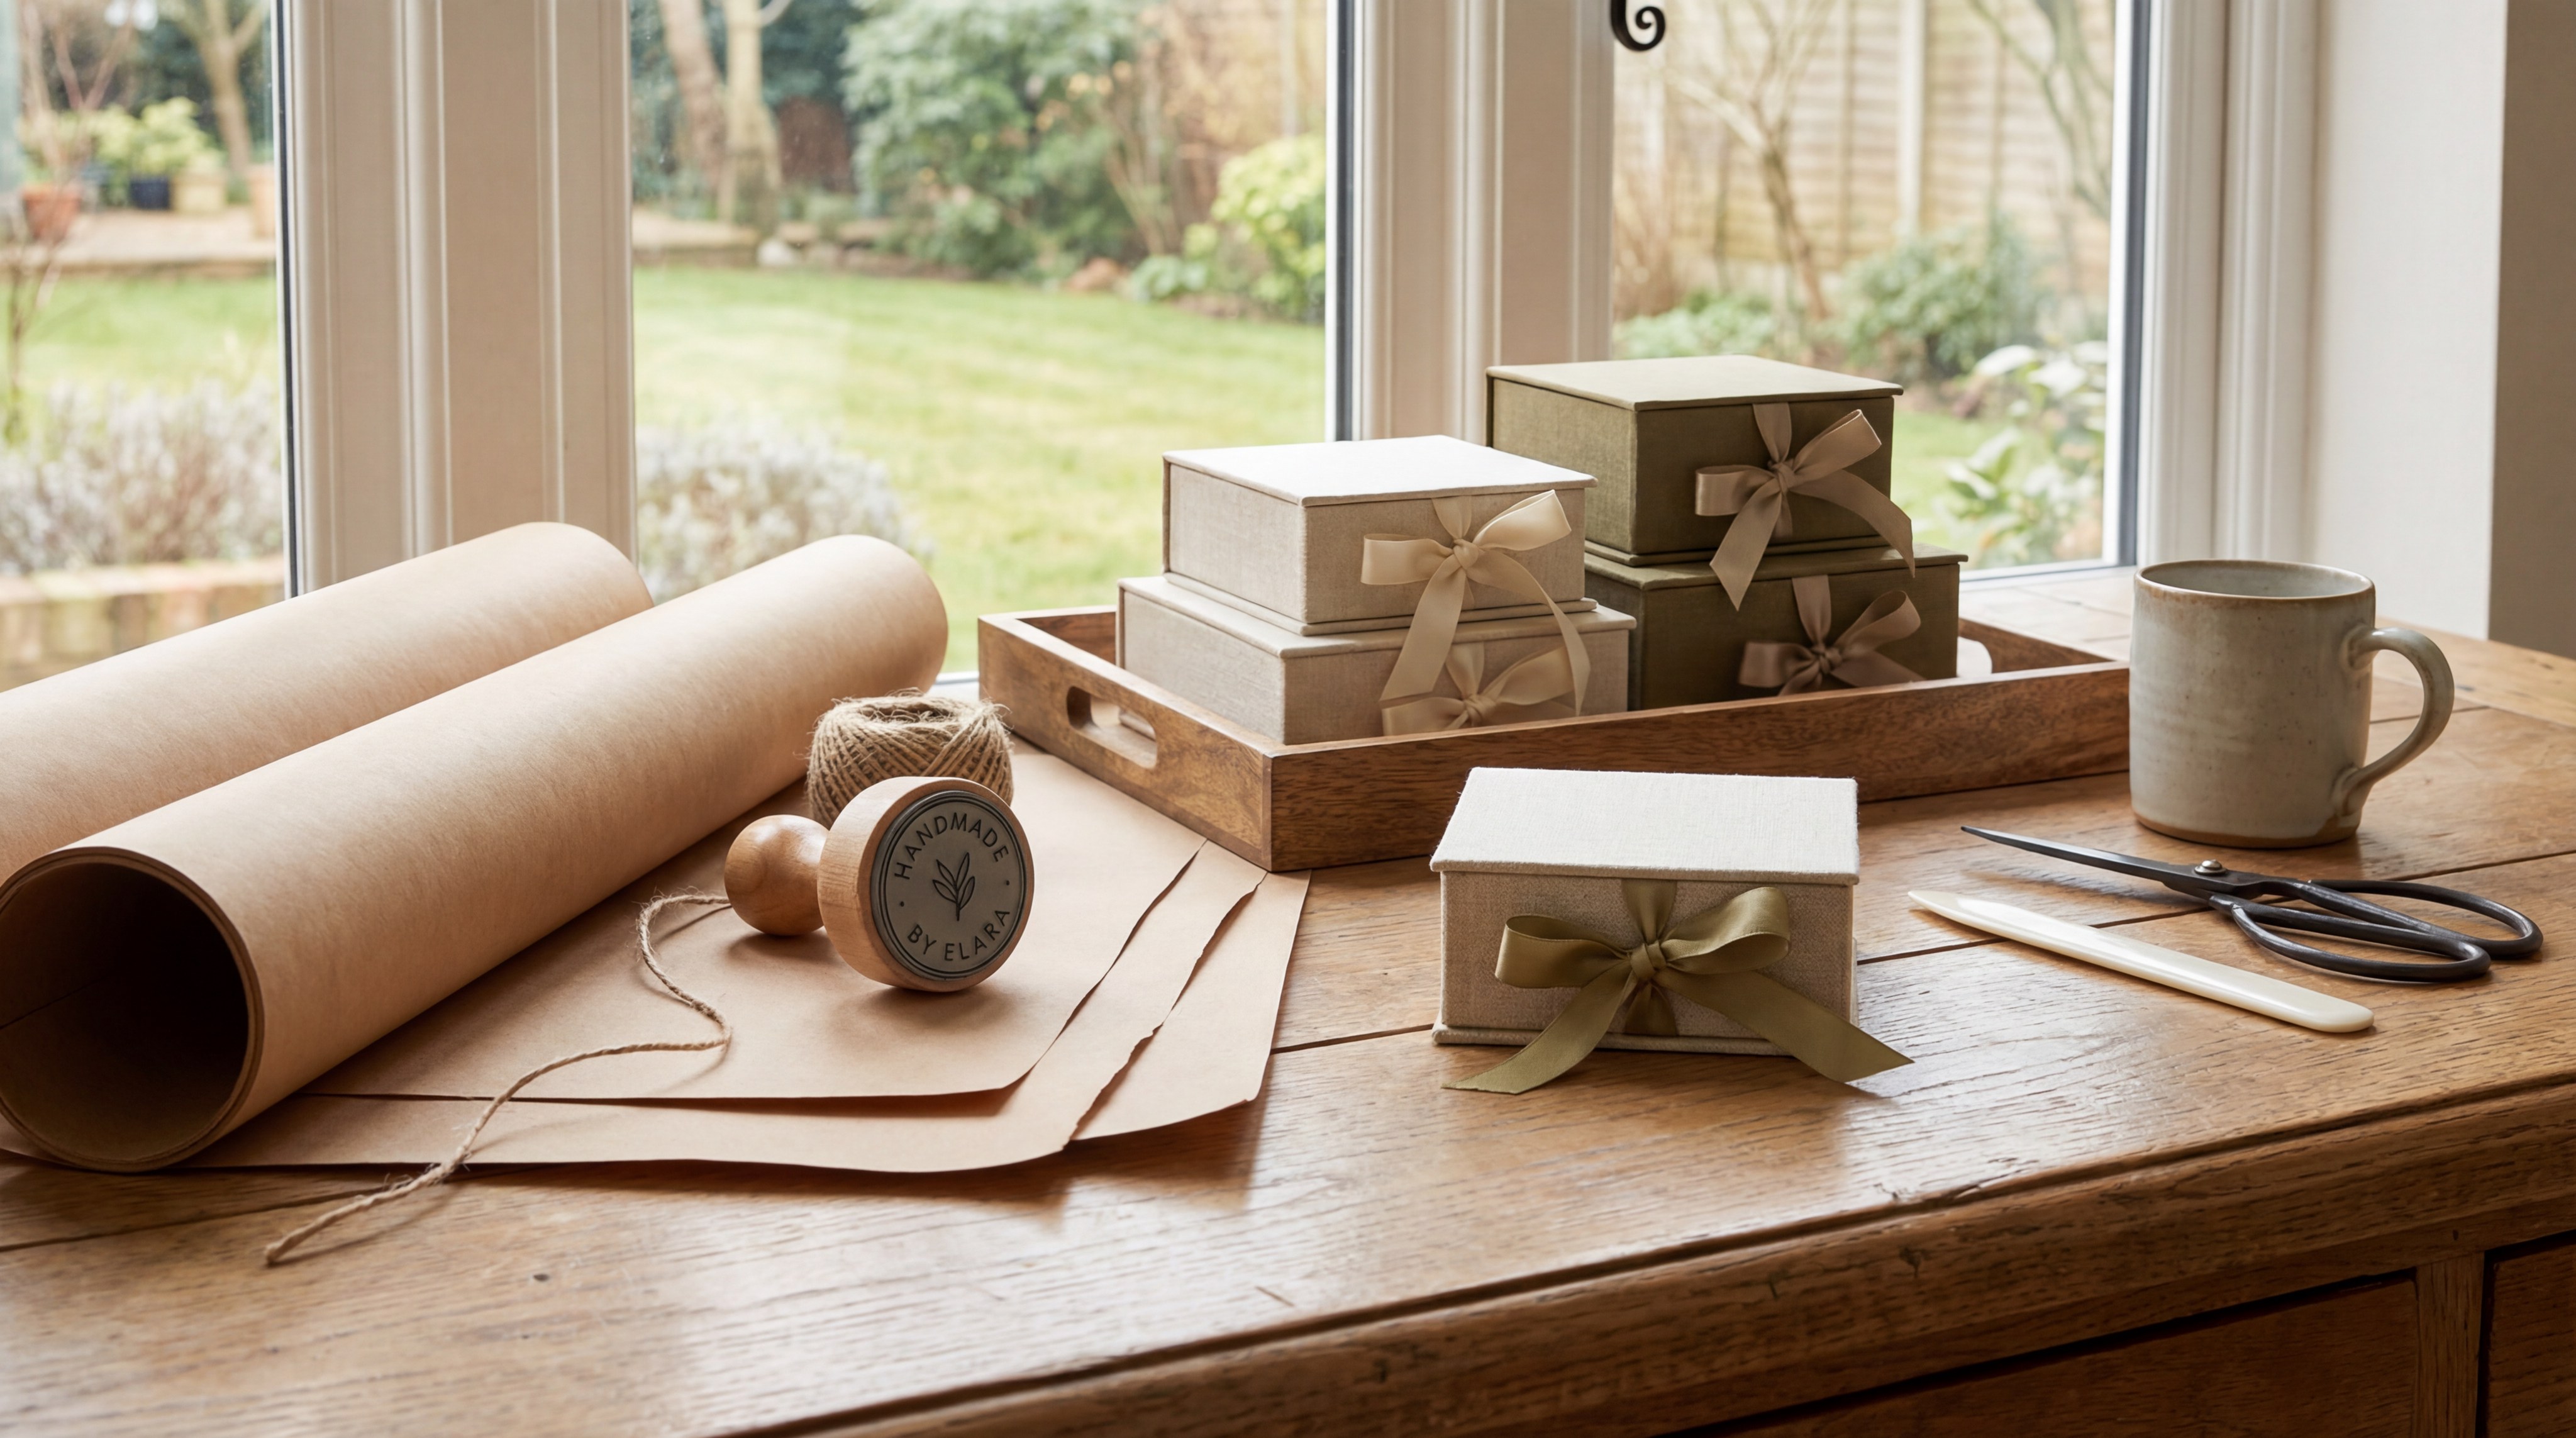
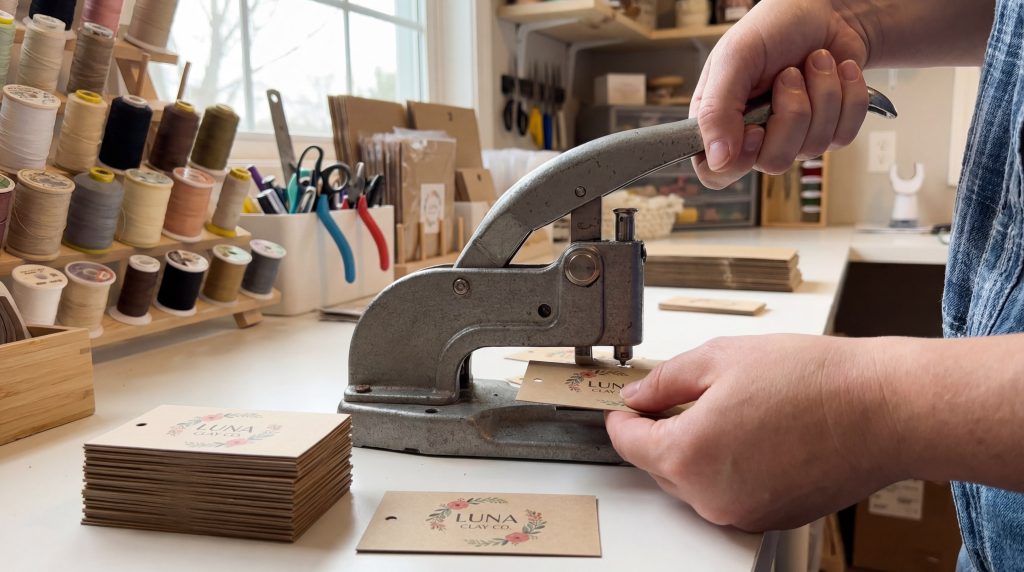
Can custom rubber stamps elevate your packaging?
Custom rubber stamps are perhaps the most versatile tool in a small business owner’s arsenal. When researching how to make your own packaging jewelry , you’ll find that stamps allow you to brand almost any surface—from cardboard boxes to cotton bags—without the high minimum order quantities of printed packaging. They offer an artisanal, “handmade” feel that resonates deeply with supporters of small businesses.
Versatility Across Materials
A single high-quality stamp can be used on mailing envelopes, jewelry cards, and even the outer shipping box. This creates a cohesive look across all stages of the customer’s journey. You can switch ink colors to match seasonal collections, giving you flexibility that pre-printed boxes simply can’t offer.
Scalability for Growing Brands
Think about it. As your business grows, you can easily scale your production by stamping in bulk during downtime. It is a one-time investment that pays for itself within the first few dozen orders compared to the cost of professionally printed custom boxes.
- Economical: No recurring printing costs.
- Flexibility: Change your packaging style without wasting stock.
- Artisanal Appeal: Every stamp is slightly unique, adding character.
Choosing the Right Ink and Stamp
The success of stamping depends on the combination of ink and material. For glossy surfaces, you need solvent-based inks, while standard water-based inks work beautifully on porous kraft paper.
| Surface Type | Recommended Ink | Drying Time | |
|---|---|---|---|
| Kraft Paper | Pigment/Dye Ink | Fast | |
| Cotton Pouches | Fabric Ink | Medium (Heat set) | |
| Glossy Cardstock | Solvent Ink | Instant |
Choosing the correct ink ensures your logo doesn’t smudge during shipping, maintaining a professional look.
Key Takeaway: Custom stamps provide an affordable, flexible, and professional branding solution for any surface.
What are the best materials for DIY jewelry packaging?
Selecting the right materials is the foundation of how to make your own packaging jewelry effectively. You must balance aesthetics, cost, and the physical requirements of the jewelry itself. For example, heavy stones require sturdy boxes, while delicate necklaces might be better suited for cardstock inserts inside a padded pouch.
Paper and Cardstock Options
Kraft paper is a favorite for its organic feel and eco-friendly reputation. However, for a more luxury feel, heavy-weight linen or velvet-textured cardstocks can be used to create custom boxes or earring cards. These materials are easy to cut with a craft plotter or even a simple paper trimmer.
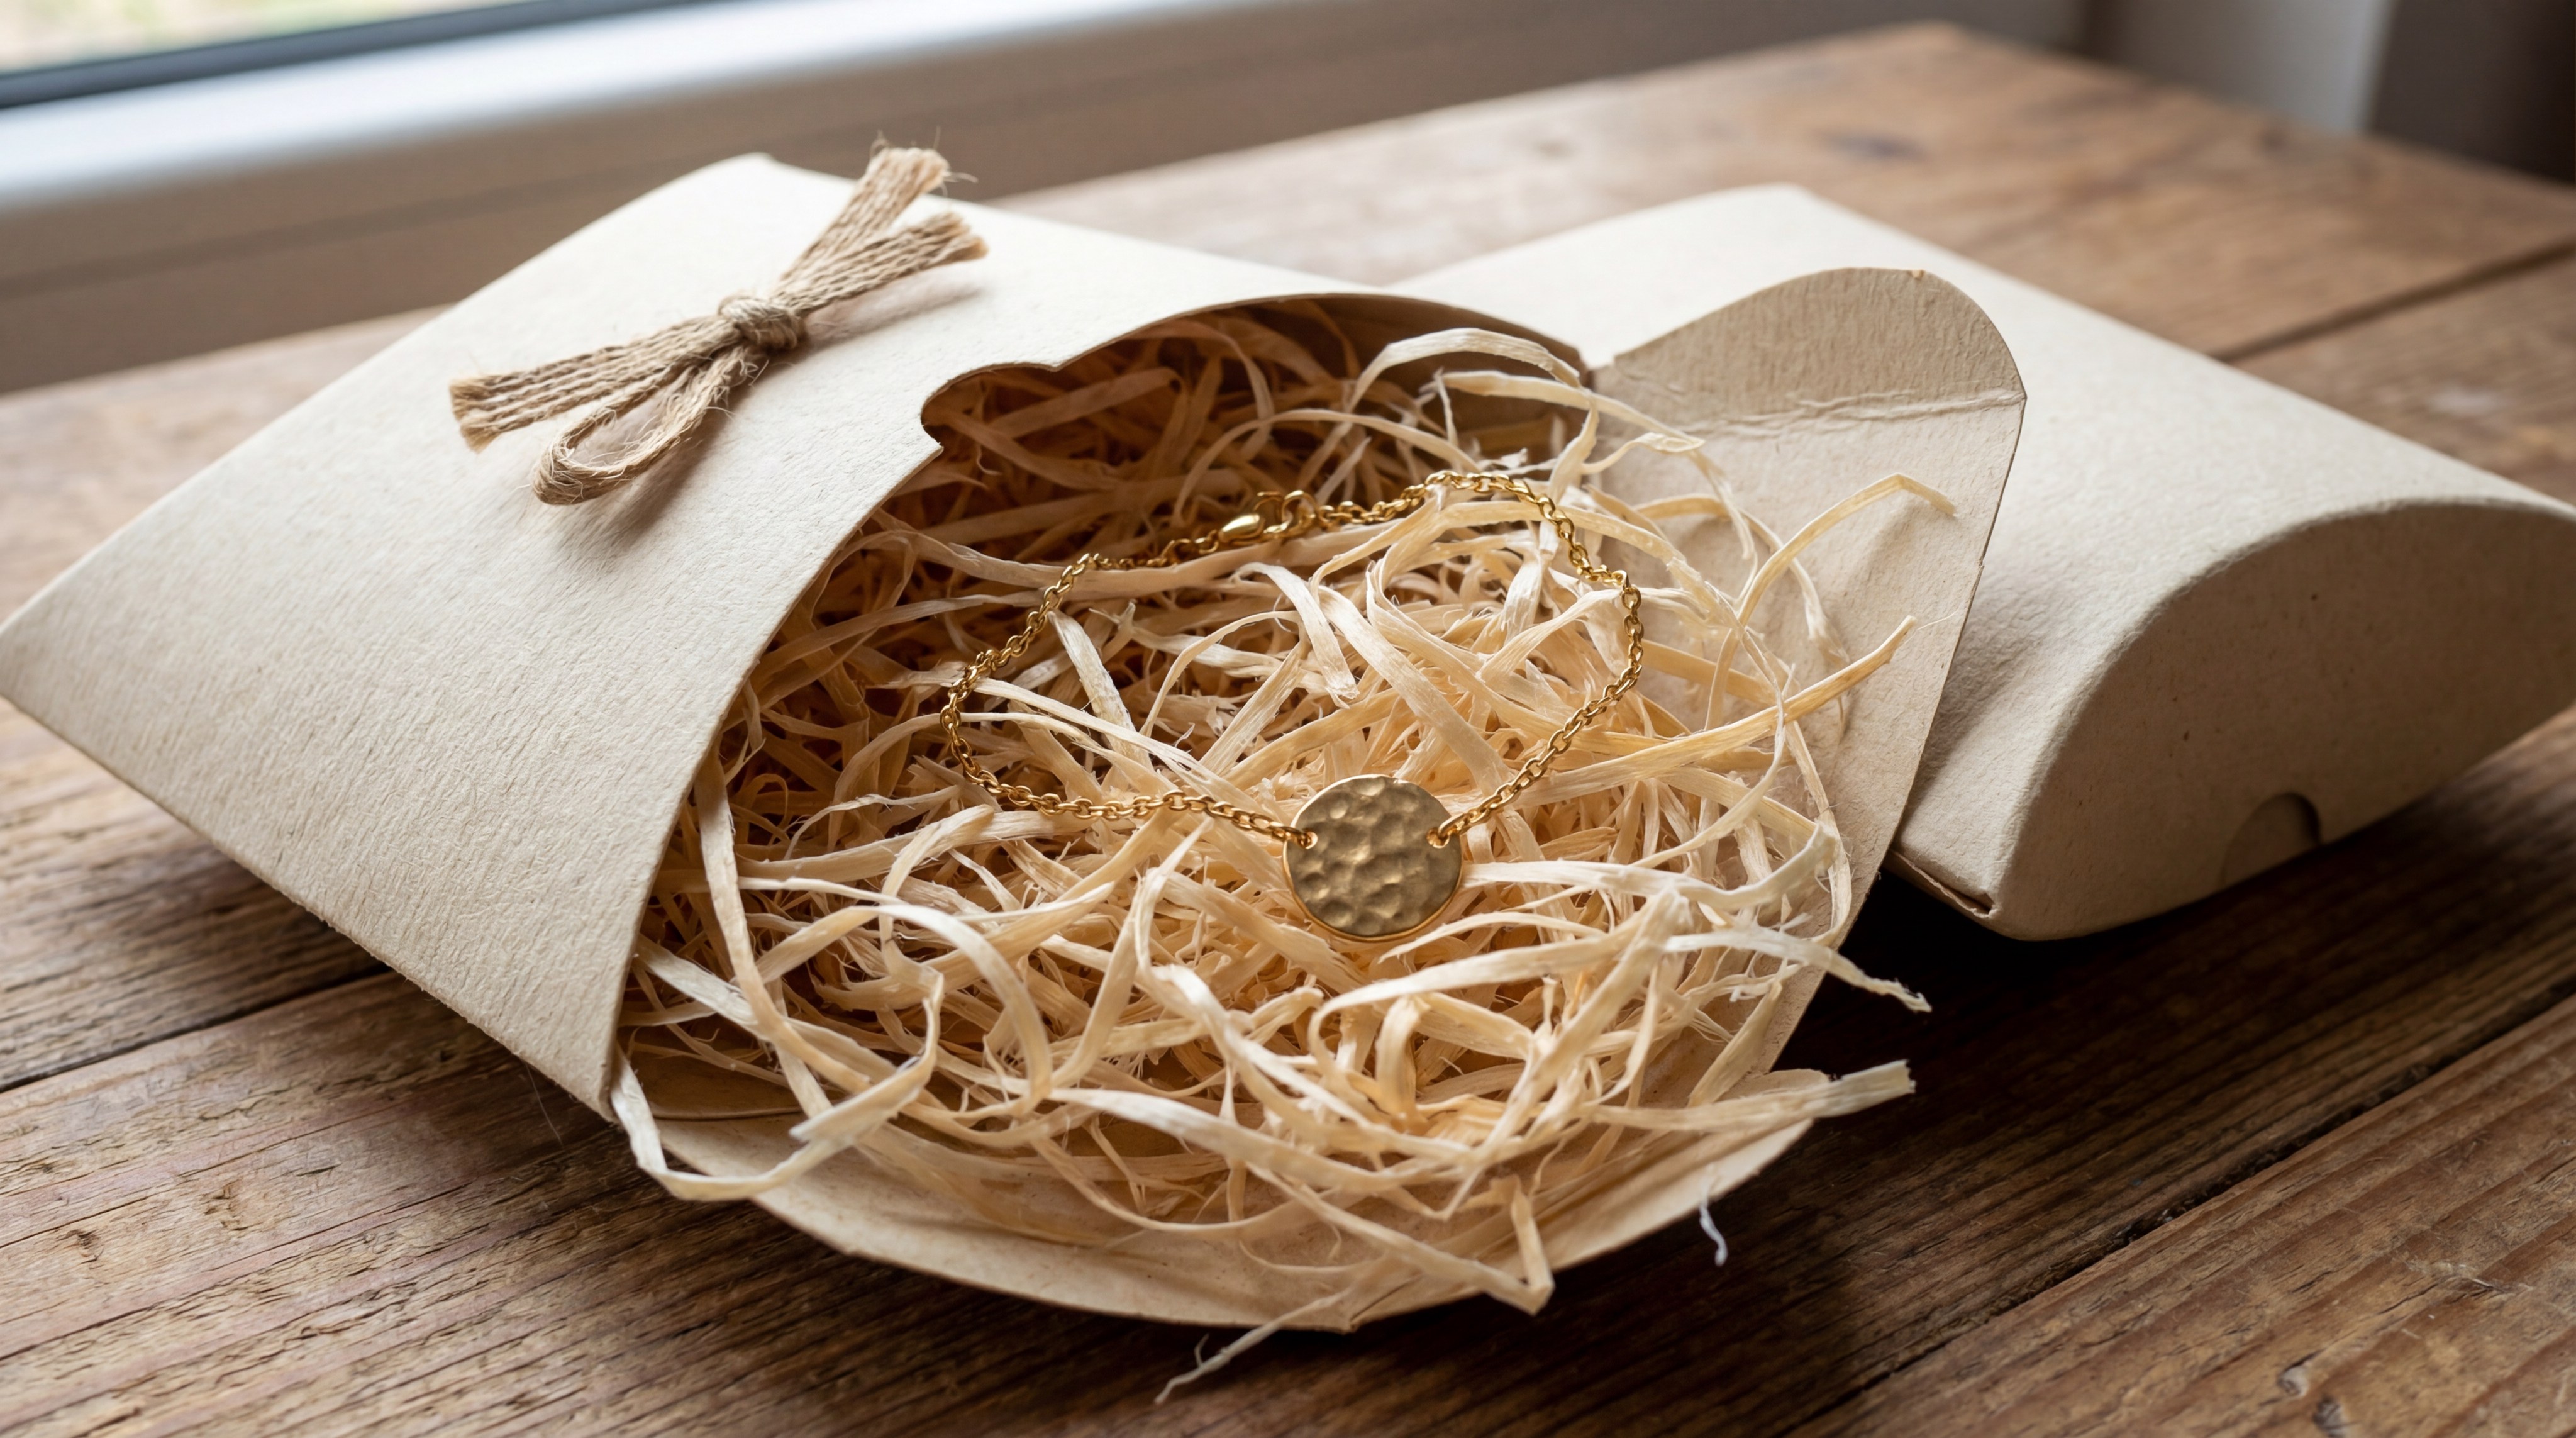
Protective Fillers
But wait, there’s more to packaging than just the outer shell. The interior filler—whether it’s wood wool, shredded paper, or custom-cut foam—serves the dual purpose of protecting the item and presenting it beautifully.
- Kraft Cardstock: Best for eco-conscious, rustic brands.
- Velvet Fabric: Ideal for high-end, luxury pieces.
- Vellum Paper: Adds a sophisticated, semi-transparent layer.
Durability vs. Aesthetics
While aesthetics are important, the material must withstand the rigors of the postal system. Always test your DIY designs by sending a “dummy” package to a friend to see how the materials hold up under pressure.
| Material | Durability | Aesthetic Vibe | Best Use | |
|---|---|---|---|---|
| Heavy Cardstock | Medium | Modern/Clean | Earring Cards | |
| Corrugated Paper | High | Industrial/Rugged | Shipping Boxes | |
| Organza/Silk | Low | Feminine/Soft | Gift Pouches |
Heavy cardstock offers the best balance for most small businesses, providing enough rigidity for display and shipping.
Key Takeaway: Choose materials that reflect your brand’s price point and provide adequate protection for the specific jewelry type.
How to create handmade fabric pouches for jewelry?

Handmade fabric pouches offer a reusable and soft alternative to traditional boxes. When you learn how to make your own packaging jewelry using fabric, you provide your customers with a permanent storage solution for their new pieces. This added value can be a significant selling point, especially for travel-friendly jewelry brands.
Selecting the Right Fabric
Linen, cotton, and velvet are the most popular choices. Linen offers a rustic, minimalist look, while velvet immediately signals luxury. If you are handy with a sewing machine, you can create these in batches using scrap fabric, making this an extremely sustainable and low-cost option.
Personalization Techniques
Here is the kicker: you can customize fabric pouches using iron-on vinyl, fabric stamps, or even simple embroidery. A small, embroidered initial or a stamped logo on a cotton drawstring bag makes the packaging feel like a part of the gift itself.
- Softness: Prevents scratches on delicate metals and stones.
- Reusability: Customers often keep these for years.
- Lightweight: Significantly reduces shipping costs.
Construction Methods
Drawstring pouches are the standard, but “envelope” style pouches with a button or snap closure are becoming increasingly popular for a more high-end, modern appearance.
| Fabric Type | Difficulty to Sew | Tool Needed | Reusability | |
|---|---|---|---|---|
| Cotton | Easy | Standard Machine | High | |
| Velvet | Moderate | Walking Foot | Very High | |
| Silk | High | Fine Needle | High |
Cotton is the most accessible material for beginners, offering ease of use and great results with basic tools.
Key Takeaway: Fabric pouches add reusable value and a soft, artisanal touch that paper boxes cannot replicate.
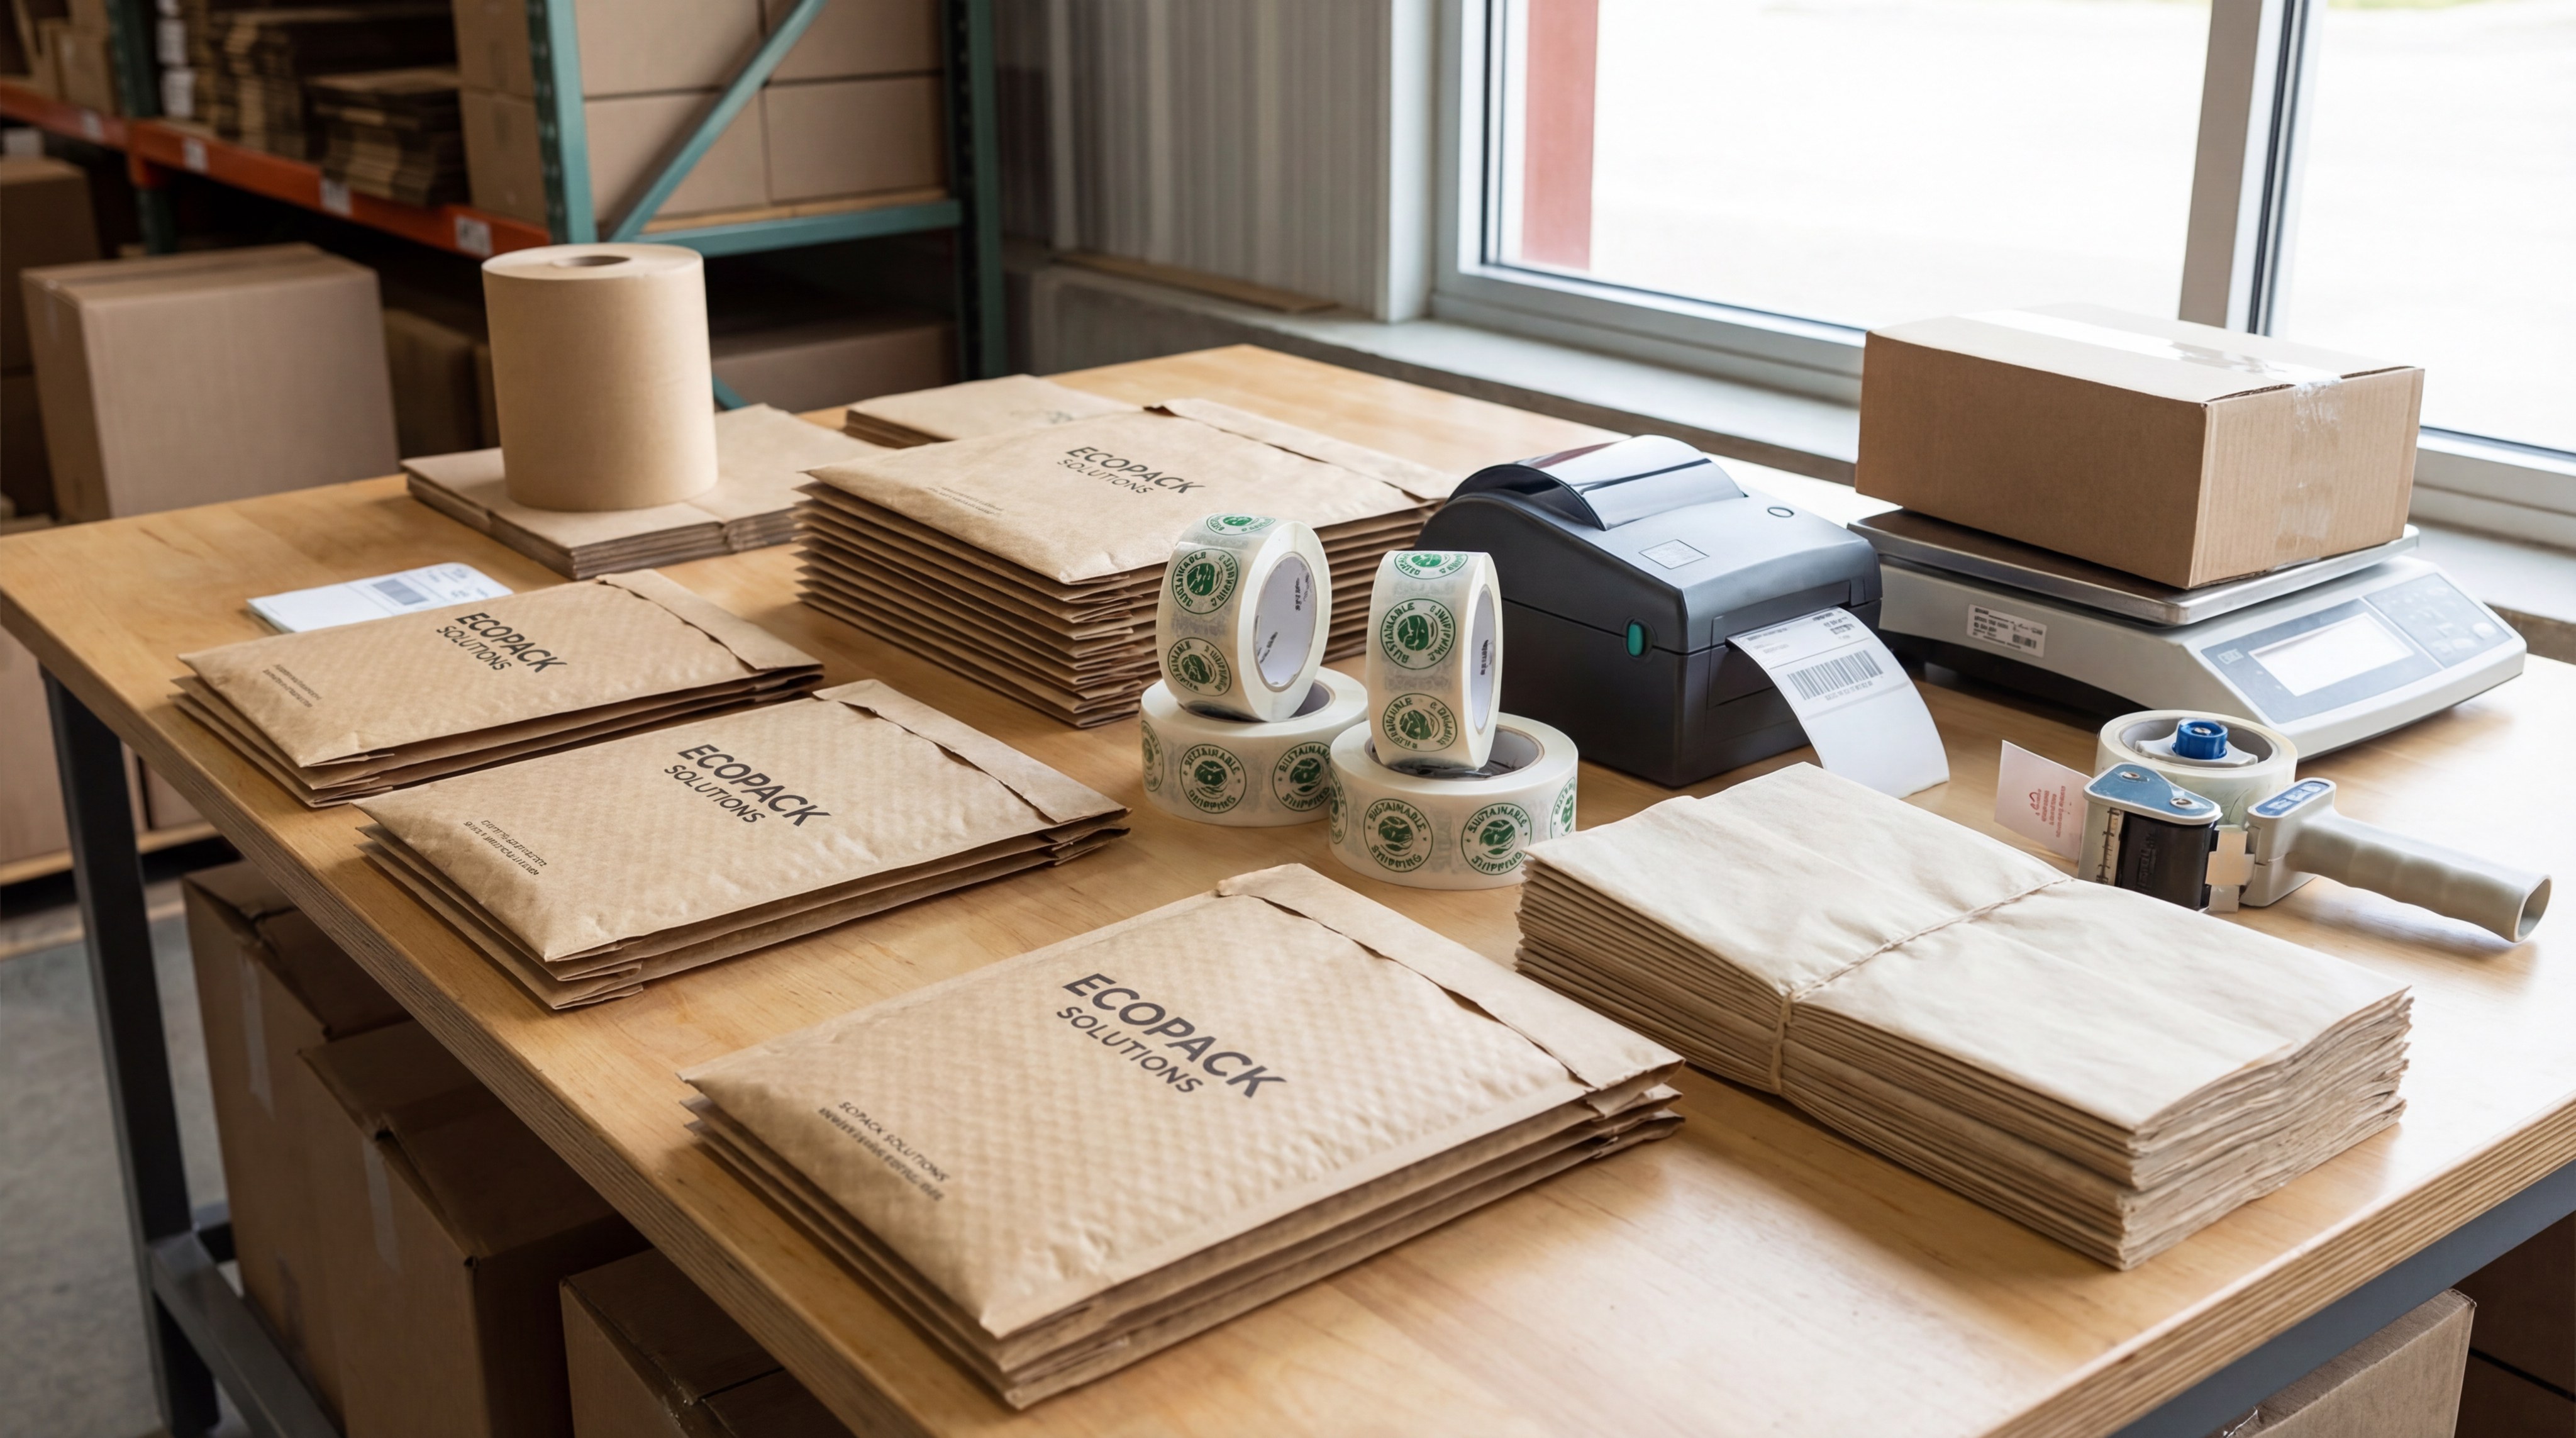
Is sustainability important in jewelry packaging?
Today’s consumers are more environmentally conscious than ever. Incorporating eco-friendly practices into how to make your own packaging jewelry is no longer just a trend—it’s a business necessity. Using recycled materials not only helps the planet but also appeals to a demographic that is willing to pay more for ethically packaged goods.
The Lifecycle of Packaging
Sustainable packaging isn’t just about using recycled paper; it’s about the entire lifecycle. Can the packaging be composted? Is it designed to be kept and reused? By choosing materials like soy-based inks and biodegradable twine, you show a commitment to the environment that resonates with modern buyers.
Reducing Waste in Production
The “DIY” nature of your packaging allows you to minimize waste by creating “made-to-order” packaging sizes. Instead of buying bulk boxes that are too large for your items (requiring more filler), you can craft custom-sized inserts that fit your jewelry perfectly.
- Recycled Content: Use paper with at least 50% post-consumer waste.
- Plastic-Free: Replace bubble wrap with honeycomb paper or wood wool.
- Multi-use Design: Create boxes that double as jewelry stands.
Communicating Eco-Values
Don’t keep your efforts a secret! Including a small note about the compostable or recycled nature of your packaging can boost your brand’s reputation significantly.
| Sustainable Alternative | Replaces | Benefit | |
|---|---|---|---|
| Honeycomb Paper | Bubble Wrap | Biodegradable Protection | |
| Hemp Twine | Plastic Tape | Compostable Closure | |
| Seed Paper Cards | Standard Cardstock | Zero Waste (Plantable) |
Switching to honeycomb paper is one of the easiest ways to remove plastic from your shipping process while maintaining high security.
Key Takeaway: Sustainable DIY packaging attracts eco-conscious buyers and reduces your brand’s environmental footprint.
How to ensure shipping security for jewelry?
Security is the most practical aspect of how to make your own packaging jewelry . No matter how beautiful the box is, if the jewelry arrives tangled, scratched, or broken, the customer experience is ruined. Professional shipping security involves layering—protecting the piece itself, securing it within the box, and then shielding the box within a mailer.
Preventing Movement and Tangling
For necklaces, the biggest enemy is the knot. Using DIY cards with slots and a small pouch on the back to hold the excess chain prevents tangling during transit. For earrings, ensuring the card is thick enough to not bend is vital.
The “Shake Test”
Let’s be honest. Your package will be tossed, dropped, and stacked during shipping. A successful DIY package should pass the “shake test”—if you can hear the jewelry moving when you shake the box, you need more filler.
- Double Boxing: Place the jewelry box inside a sturdy cardboard mailer.
- Tamper-Evident Seals: Use branded stickers or custom tape to ensure the package hasn’t been opened.
- Discreet Outer Packaging: Avoid putting “Fine Jewelry” on the outside of the shipping box to prevent theft.
Optimizing the Shipping Station
Having a dedicated station with all your DIY supplies—stamps, tape, filler, and scales—will make your process more efficient and reduce errors during the busy holiday seasons.
| Security Layer | Purpose | Material Used | |
|---|---|---|---|
| Inner Card | Prevent Tangles | Heavy Cardstock | |
| Box Filler | Impact Absorption | Wood Wool/Shredded Paper | |
| Outer Mailer | Weather/Crush Protection | Corrugated Box |
The outer mailer is the most important layer for preventing physical damage, while the inner card is essential for presentation.
Key Takeaway: Layered protection and a rigorous “shake test” are the keys to ensuring your DIY packaging survives the postal system.
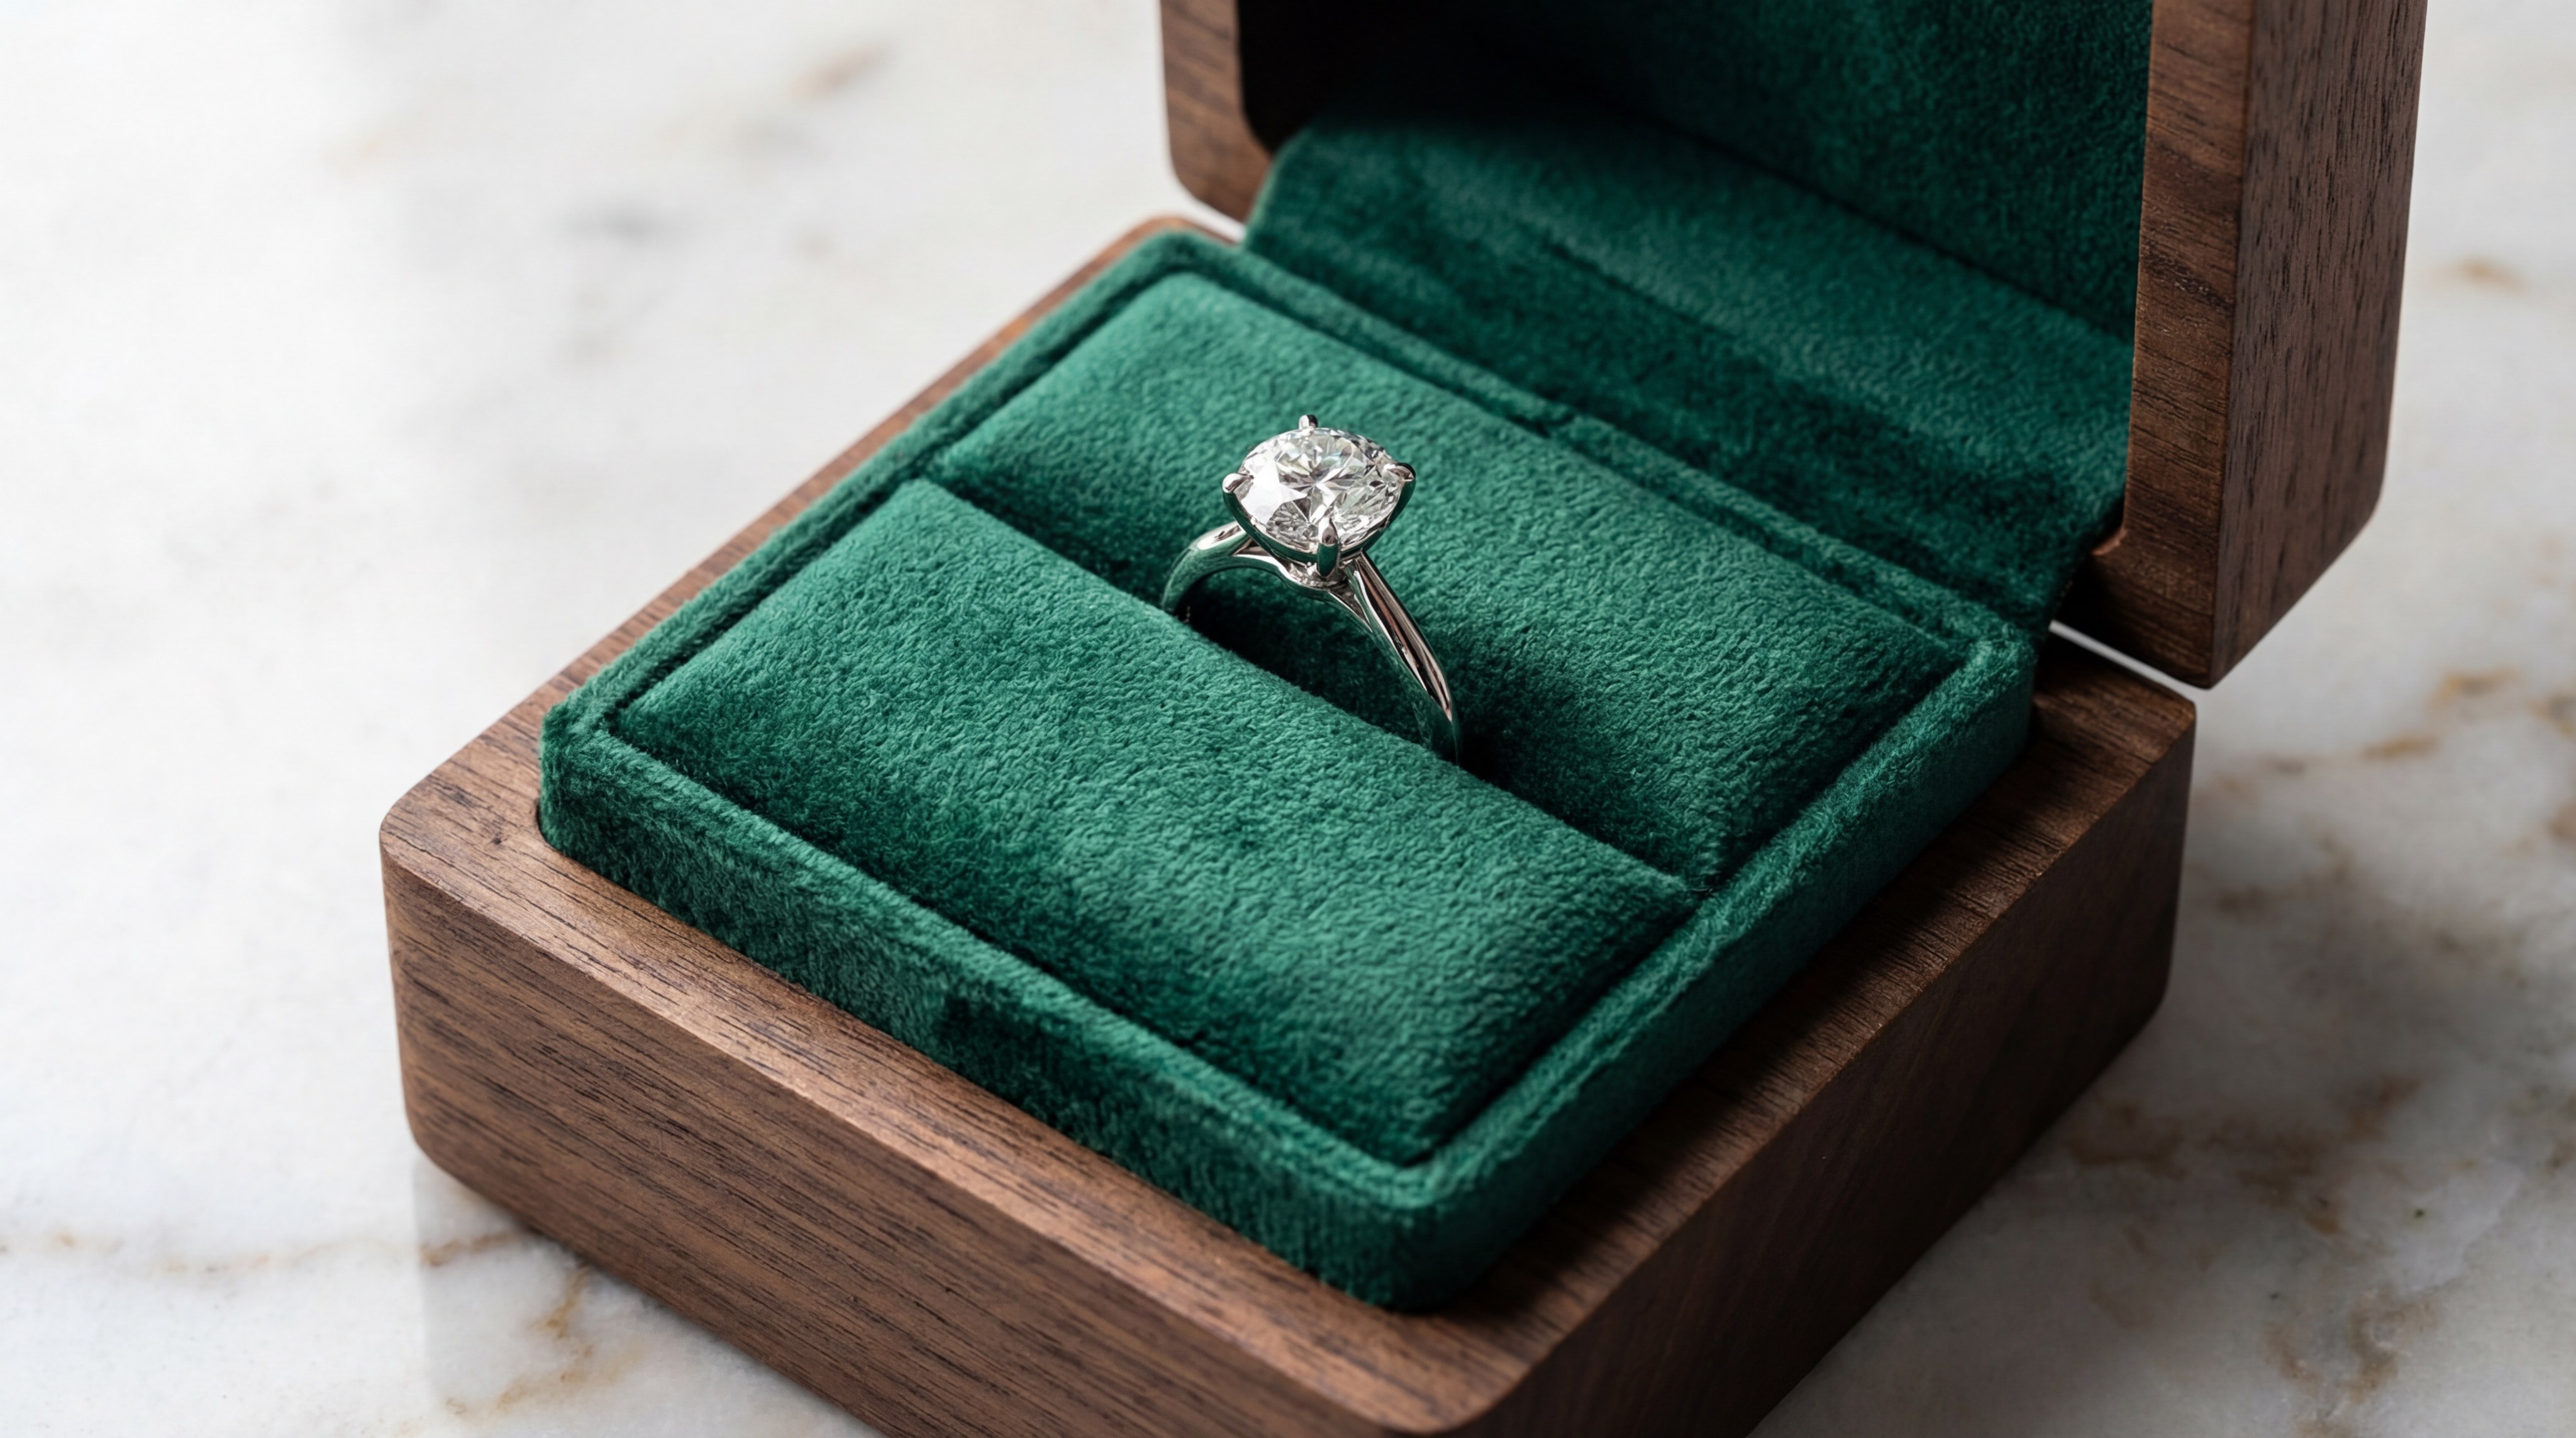
Why use custom paper inserts for jewelry boxes?
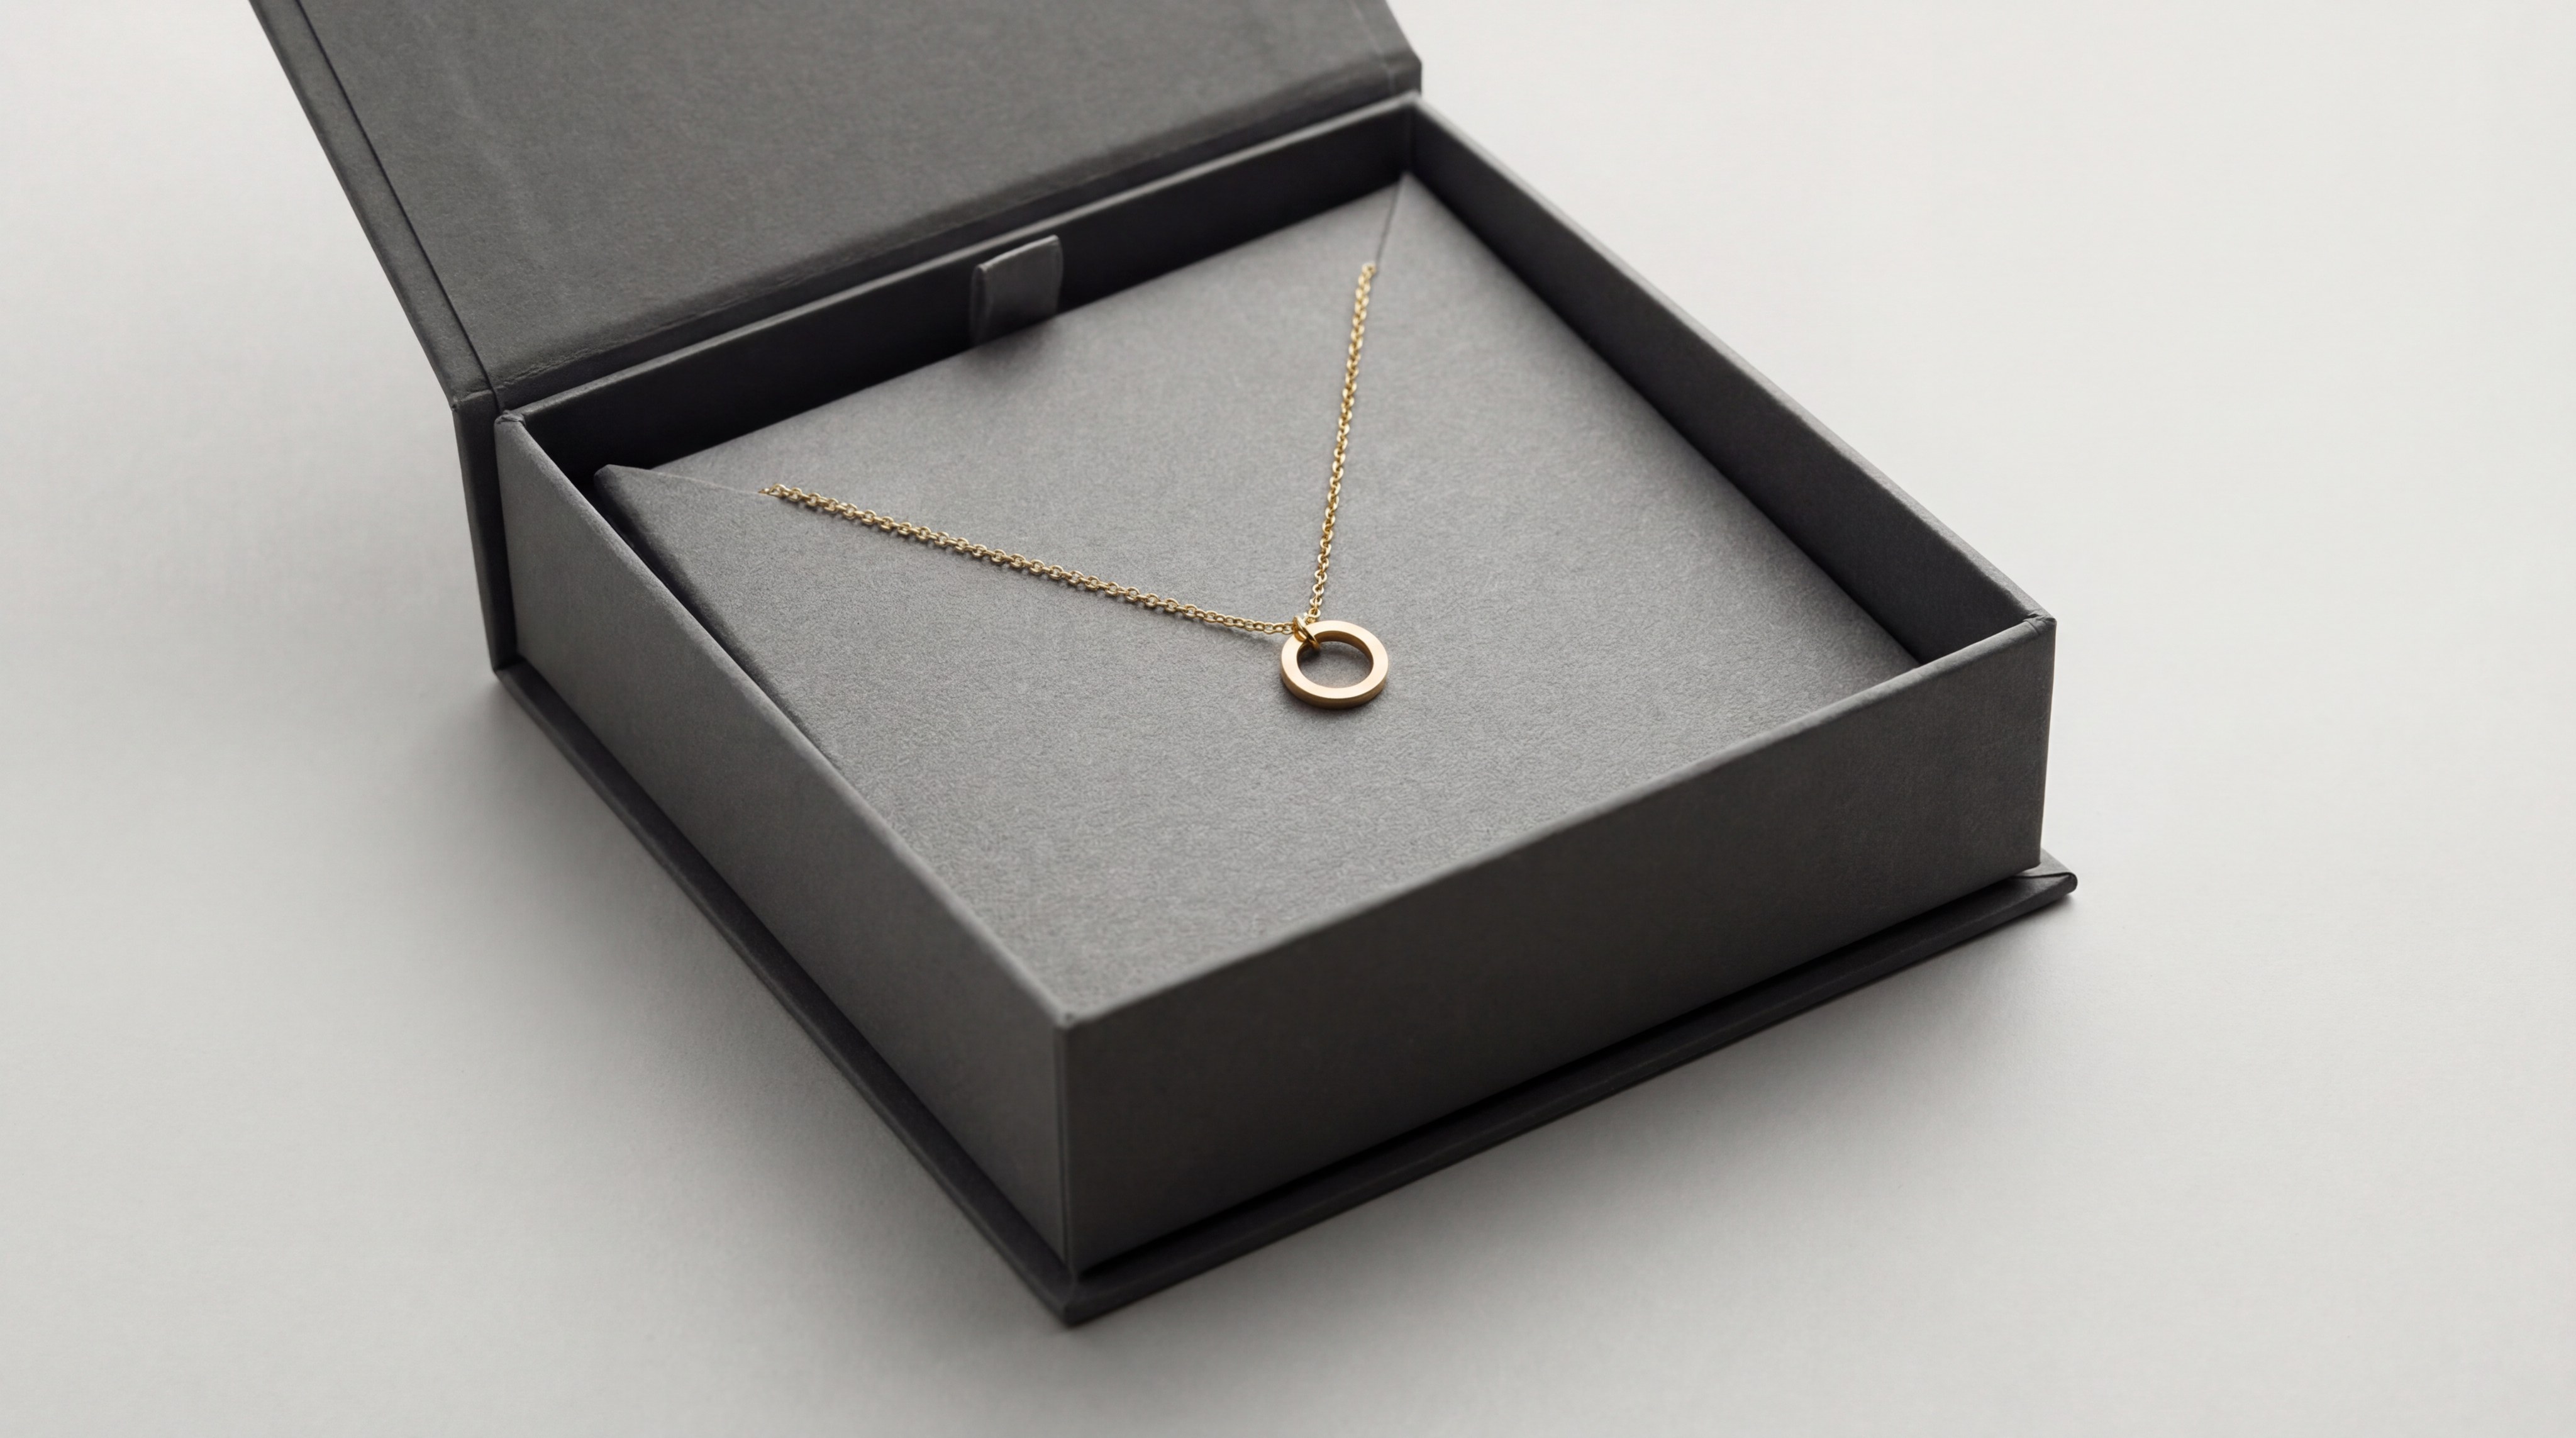
Standard jewelry boxes often come with generic foam inserts that can look cheap. When you learn how to make your own packaging jewelry , you can replace these with custom paper or fabric inserts that elevate the entire presentation. Custom inserts allow you to position the jewelry exactly how you want it to be seen upon opening.
Elevating the Visual Frame
Think of the insert as the frame for your artwork. A black velvet insert makes diamonds pop, while a kraft paper insert complements copper or wooden jewelry. By DIYing these inserts, you can match the texture and color to your specific collection.
Functional Design
Inserts aren’t just for looks; they provide the tension needed to keep jewelry in place. You can use a craft knife or a specialized hole punch to create exact placements for studs, hoops, or even multiple rings.
- Precision: Holds pieces in the “hero” position for the best first impression.
- Layering: Allows you to hide extra chain or care instructions underneath.
- Professionalism: Shows a level of detail that generic packaging lacks.
Material Choices for Inserts
Cardstock is the easiest to work with, but you can also glue fabric over thin cardboard for a more luxurious, padded effect.
| Insert Material | Best For | Visual Impact | |
|---|---|---|---|
| 300gsm Cardstock | Minimalist Studs | Clean/Modern | |
| Fabric-Wrapped Foam | Engagement Rings | High Luxury | |
| Layered Vellum | Delicate Necklaces | Ethereal/Soft |
Layered vellum provides a unique, high-end look that is surprisingly easy to achieve with DIY methods.
Key Takeaway: Custom inserts are a low-cost way to ensure your jewelry is presented as “art” rather than just “merchandise.”
How to look professional on a tight budget?
One of the biggest myths is that professional packaging requires a massive investment. In reality, how to make your own packaging jewelry on a budget is all about “the art of the mix”—combining affordable bulk items with high-impact DIY customizations.
Buying in Bulk, Personalizing in Detail
The secret is to buy plain, “blank” supplies like kraft boxes or glassine bags in bulk quantities (100+ units) to get the lowest unit price. Then, use your DIY skills—stamps, ribbons, or hand-painted details—to turn those generic items into branded masterpieces.
Utilizing Free and Natural Resources
The best part? Some of the most beautiful packaging elements are free or very cheap. Dried lavender, pressed flowers, or even unique stones found in nature can be tied to a package with twine to create a stunning, artisanal look.
- Bulk Blanks: Lowers the cost per unit significantly.
- Multi-purpose Tools: Invest in one good paper cutter or stamp.
- Minimalist Design: Often, less is more; focus on one high-quality detail.
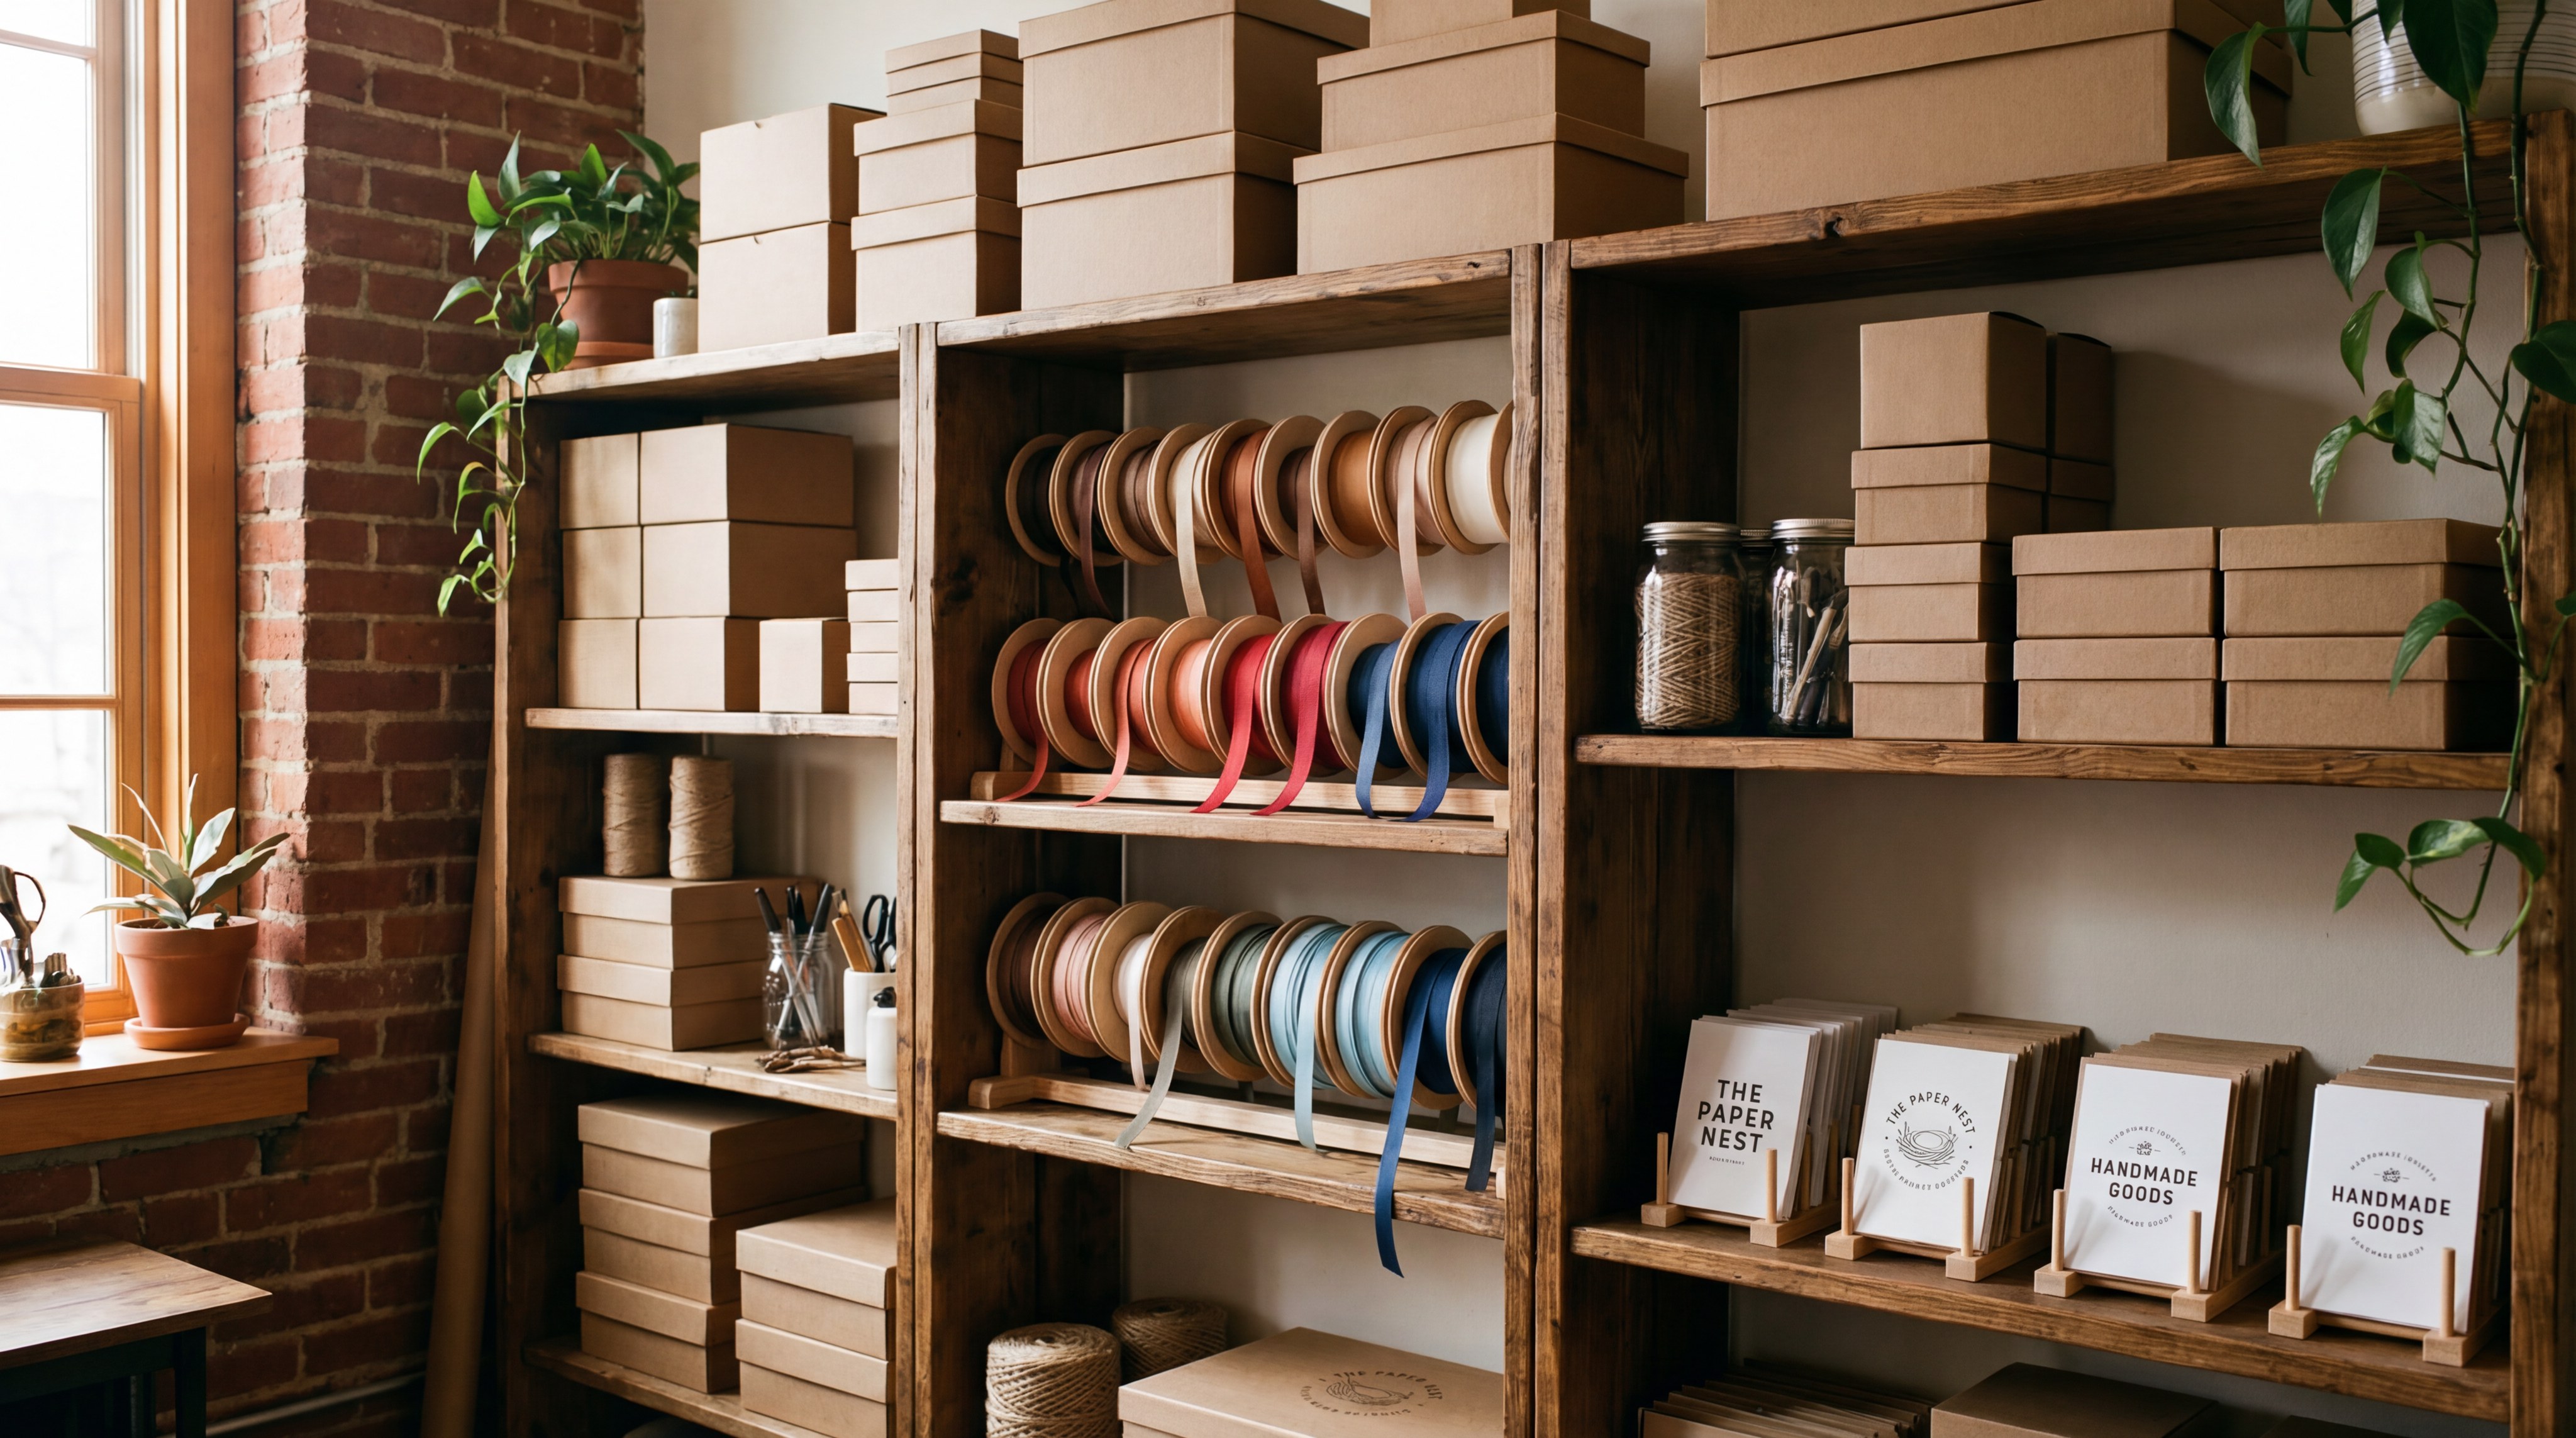
Managing Inventory
Keep your supplies organized. A messy workspace leads to wasted materials. Use clear bins to track your inventory of ribbons, cards, and boxes so you never have to pay for expedited shipping on last-minute supplies.
| Budget Strategy | Initial Cost | Saving Over Time | |
|---|---|---|---|
| Bulk Plain Boxes | Medium | 40-60% vs. Custom | |
| Single Logo Stamp | Low | 90% vs. Printed Boxes | |
| Scrap Ribbon/Fabric | Very Low | High |
This strategy shows that bulk purchasing combined with DIY labor provides the highest return on investment for small businesses.
Key Takeaway: Combine high-volume “blank” purchases with low-volume DIY customization to maximize your budget.
How to design custom earring and necklace cards?
Display cards are the workhorses of jewelry packaging. They provide structure, branding space, and essential information. When figuring out how to make your own packaging jewelry , starting with cards is the most accessible entry point. You only need a printer, some heavy cardstock, and a few specialized hole punches.
Design Principles for Cards
Your card shouldn’t overpower the jewelry. Use a clean font for your logo and leave plenty of “white space.” Including your social media handles or a “Handmade with Love” message on the back is a great way to utilize the space without cluttering the front display.
Specialized Tools
While you can use a standard office hole punch, investing in a “corner rounder” or a specialized earring hole punch (which creates tiny, clean holes) will instantly make your DIY cards look like they were professionally die-cut.
- Weight Matters: Use at least 250-300gsm cardstock to prevent sagging.
- Information: Include your website and care instructions.
- Photography: Cards also act as great backdrops for product photos.
Template Usage
Use free design software like Canva to create templates. This ensures that every card you print is perfectly aligned, saving you time and reducing paper waste.
| Card Feature | Tool Needed | Benefit | |
|---|---|---|---|
| Rounded Corners | Corner Chomp | Premium, “finished” look | |
| Tiny Stud Holes | Earring Punch | Professional fit | |
| Chain Slots | Craft Knife | Prevents tangling |
Rounded corners are a simple 2-second addition that significantly changes the perceived quality of the card.
Key Takeaway: High-quality cardstock and specialized punches turn simple DIY cards into professional-grade displays.
How to achieve a luxury presentation with DIY?
Luxury isn’t about the price tag of the materials; it’s about the attention to detail. Achieving a high-end look while learning how to make your own packaging jewelry involves using texture, weight, and “sensory layering.” A luxury package should feel heavy in the hand and have a satisfying “reveal” process.
Sensory Layering
Luxury is a multi-sensory experience. Use a lightly scented tissue paper, a thick satin ribbon that is satisfying to untie, and a heavy-weight box. This layering of textures—from the smooth ribbon to the soft velvet insert—tells the customer they have purchased something special.
Pillow Boxes and Unique Shapes
Standard square boxes are common. To stand out, try DIYing “pillow boxes” or hexagonal containers. These unique shapes are easy to make with a template and immediately signal a more “designed” and high-end brand.
- Color Palette: Stick to sophisticated tones like gold, navy, emerald, or cream.
- Foil Accents: Use a heat-foil pen to add metallic gold details to your logo.
- Seal it with Wax: A wax seal on the outer wrapping is the ultimate mark of luxury.
The Power of the “Thank You”
A luxury brand feels personal. A hand-written note on high-quality stationery, tucked into a vellum envelope, provides a level of service that mass-market luxury brands often struggle to replicate.
| Luxury Detail | DIY Method | Perceived Value | |
|---|---|---|---|
| Wax Seal | Wax beads & Stamp | Extremely High | |
| Gold Foiling | Heat Foil Pen | High | |
| Satin Ribbon | Bulk Spool | Moderate |
Wax seals are surprisingly affordable when bought in bulk but offer one of the highest increases in perceived luxury.
Key Takeaway: Luxury is achieved through the careful layering of textures, unique shapes, and personal, high-end finishing touches.
Conclusion
Mastering DIY jewelry packaging is a transformative step for any small business. By focusing on cohesive branding, sustainable materials, and secure shipping methods, you can create a customer experience that rivals major luxury retailers. From the versatility of custom stamps to the artisanal charm of handmade fabric pouches, these strategies allow you to maintain high professional standards without the high overhead costs.
At YX Jewelry Packaging, we are dedicated to helping artisans find the perfect balance between handmade charm and professional presentation. Our goal is to empower your brand with the tools and knowledge needed to leave a lasting impression. Whether you are just starting out or looking to refine your existing aesthetic, we invite you to contact us today to explore how our specialized solutions can bring your creative vision to life.
Frequently Asked Questions
1. Can I really make professional-looking boxes at home?Yes. By using high-gsm cardstock, digital cutting templates, and specialized tools like corner rounders and heat-foil pens, you can create boxes that are indistinguishable from professionally manufactured ones.
2. What is the most cost-effective material for beginners?Kraft cardstock is the best starting point. It is affordable, eco-friendly, and provides a neutral canvas that works well with almost any ink color or ribbon style.
3. How do I know if my packaging is secure enough for international shipping?Always perform a “drop test” and a “shake test.” If the jewelry remains in its hero position and the box shows no signs of crushing after being dropped from waist height, it is generally secure enough.
4. Is fabric better than paper for jewelry packaging?It depends on your brand. Fabric is superior for reusability and protection against scratches, while paper allows for more crisp branding and easier storage/stacking.
5. How do I print my logo on fabric pouches?The most effective DIY methods are using a custom rubber stamp with fabric-specific ink (which must be heat-set with an iron) or using iron-on heat transfer vinyl (HTV).