
Restoring a velvet jewelry box requires a gentle touch using a soft brush and minimal moisture to protect the delicate pile. Over time, your favorite storage case can accumulate dust, oils, and unsightly lint that dulls its luxurious appearance. This grime doesn’t just look bad; it can actually trap abrasive particles that risk scratching your high-end metal settings. Understanding how to clean the inside of a jewelry box is the only way to ensure your collection remains housed in a pristine, safe environment.
What supplies are needed for how to clean the inside of a jewelry box?
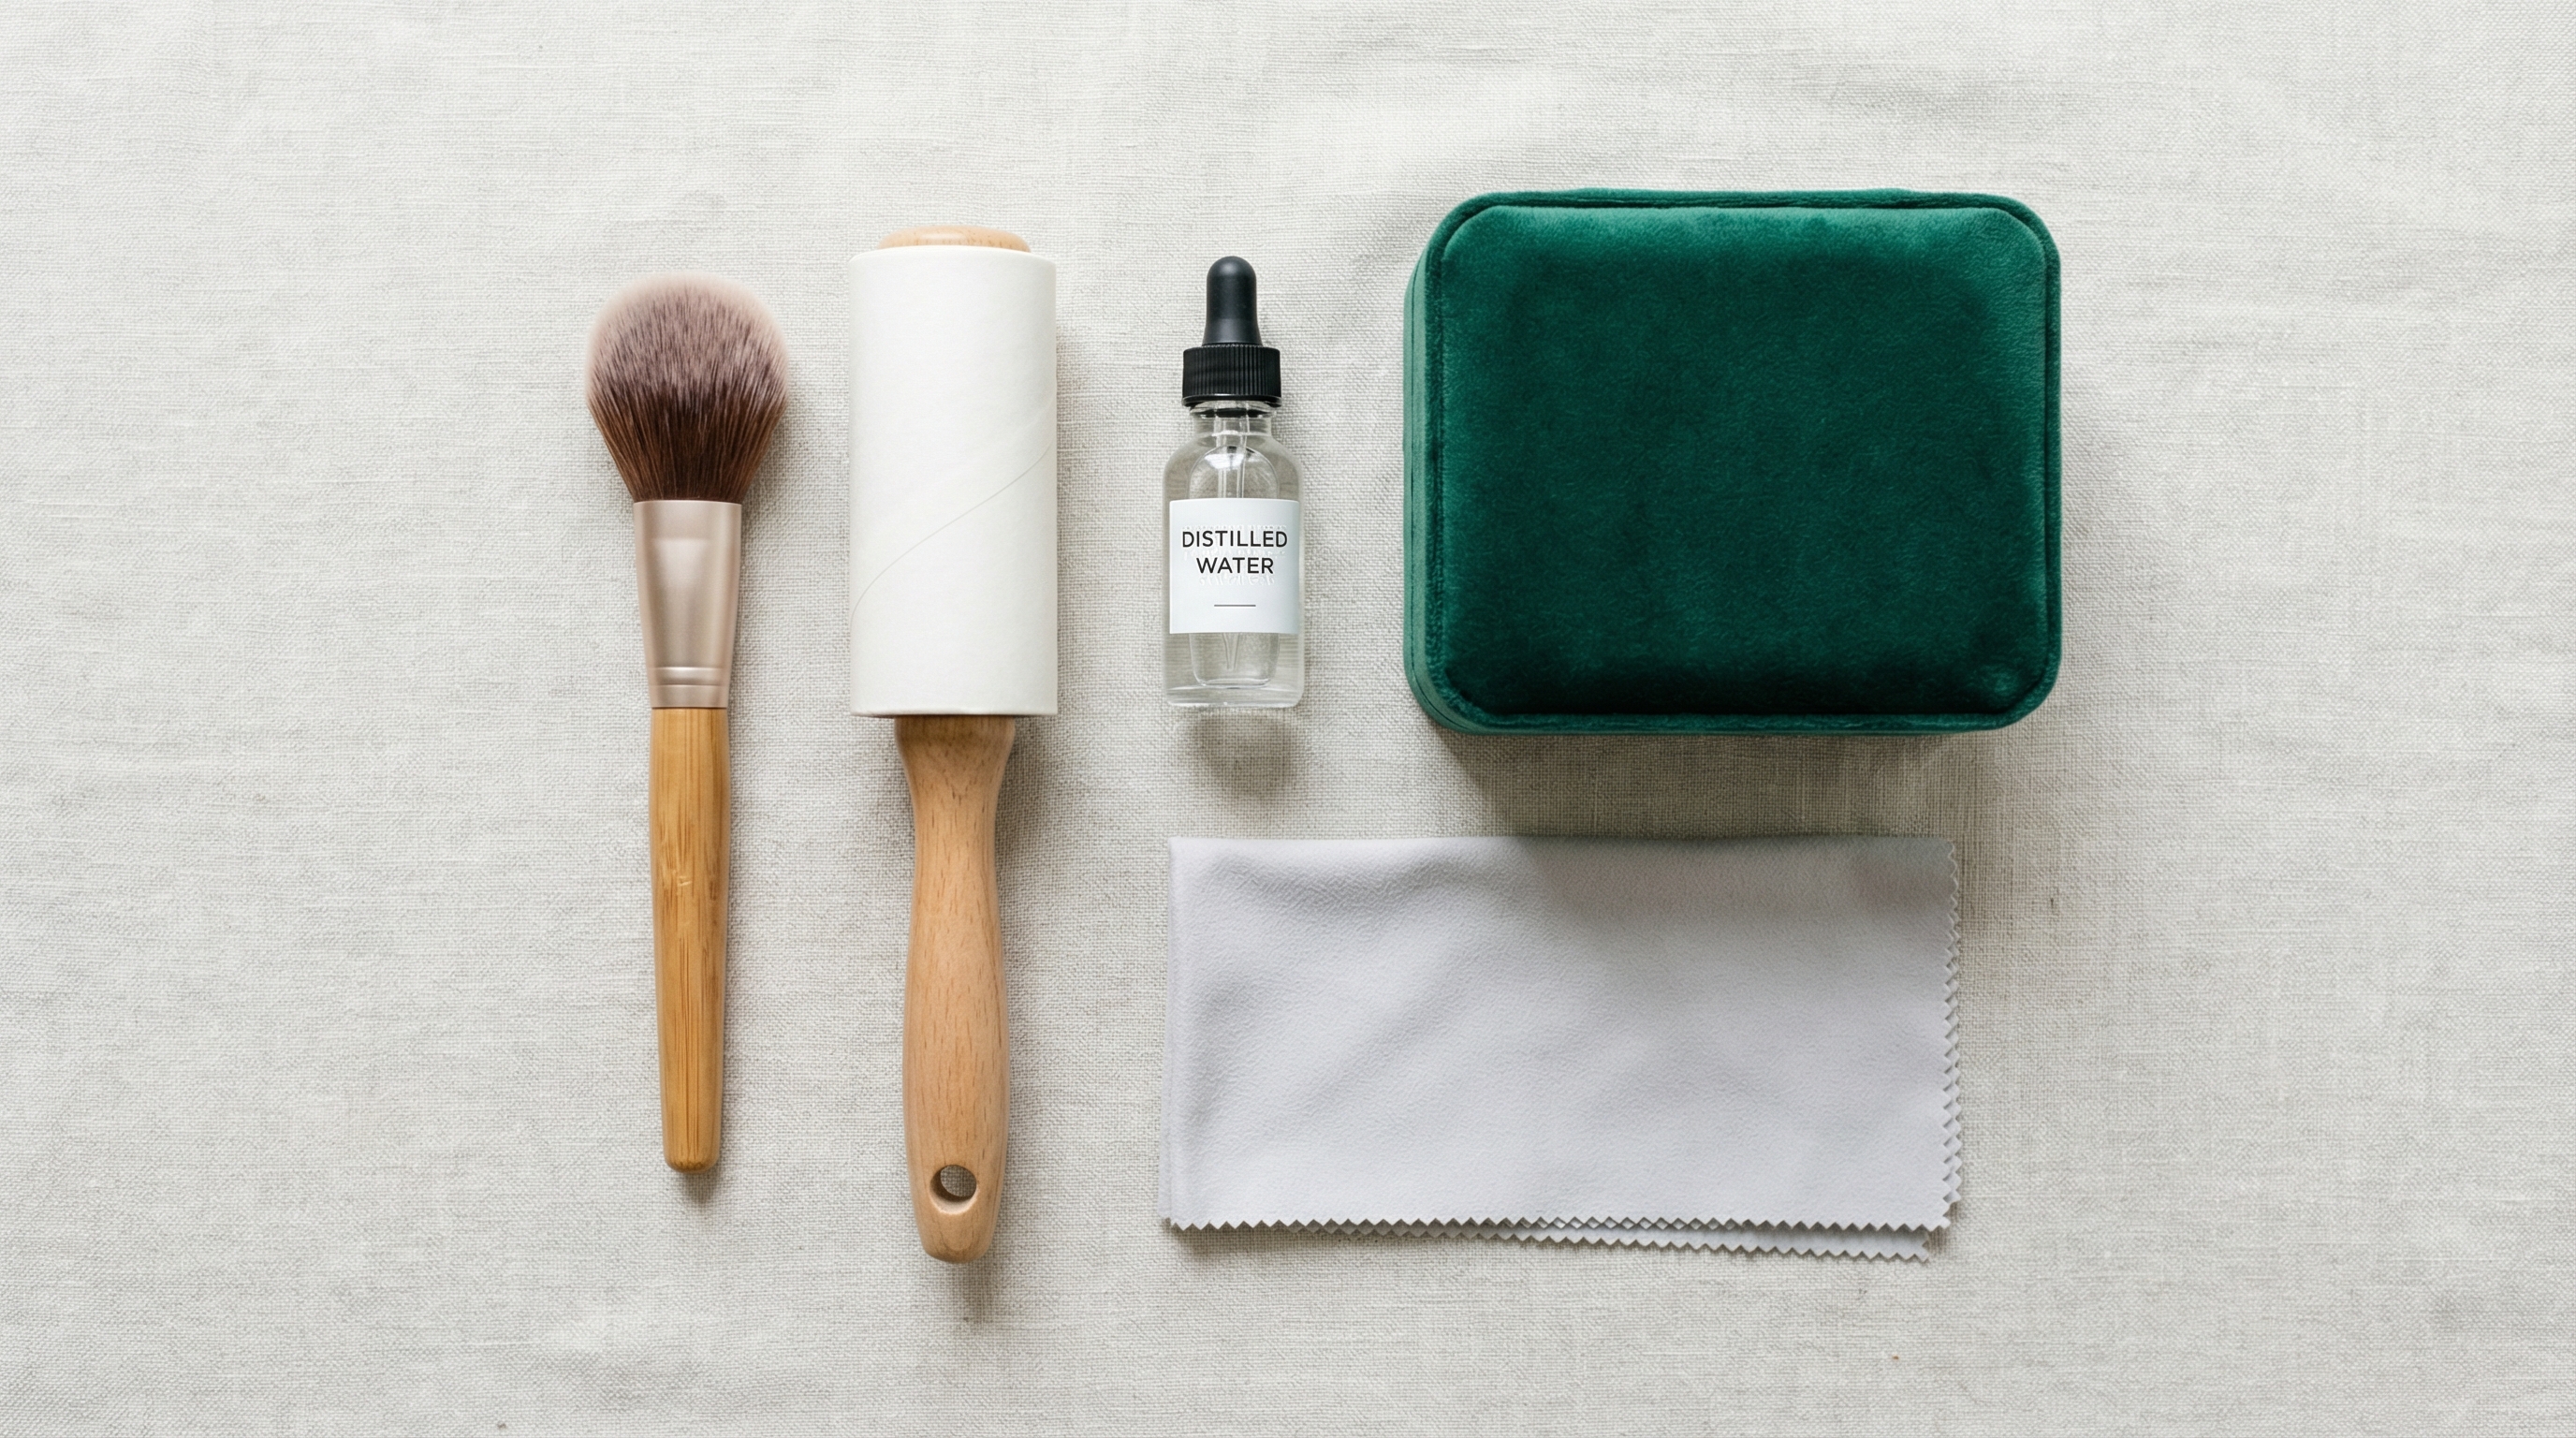
You will need a soft-bristled brush, a lint roller, distilled water, and a mild, dye-free detergent. Selecting the right tools is the first step in learning how to clean the inside of a jewelry box without crushing the velvet fibers. Using harsh chemicals or abrasive cloths can permanently damage the fabric’s texture.
Should you use specific brushes?
A soft makeup brush or a dedicated jewelry brush works best for delicate surfaces. These tools reach into corners where dust likes to hide.
Here is the deal:
- Soft bristles prevent snagging.
- Synthetic fibers often trap dust better.
- Small heads allow for precision.
Is distilled water necessary?
Distilled water is highly recommended because it lacks the minerals found in tap water. These minerals can leave white spots or “rings” on dark velvet once the fabric dries.
| Item | Purpose | |
|---|---|---|
| Soft Brush | Dust removal | |
| Distilled Water | Spot cleaning | |
| Lint Roller | Surface debris |
Proper preparation ensures the safety of your luxury packaging during the restoration process.
Key Takeaway: Always use pH-neutral supplies and distilled water to prevent permanent staining or fiber degradation inside your jewelry box.
How to clean the inside of a jewelry box with mild soap?

Mix a tiny drop of clear dish soap into a bowl of warm water to create a gentle cleaning solution. This method is effective for how to clean the inside of a jewelry box when dealing with oily residue or makeup spills. You only want to use the foam, not the liquid, to avoid over-saturating the delicate interior lining.
How do you apply the foam?
Dip a clean microfiber cloth only into the sudsy bubbles at the top of the bowl. Dab the stained area lightly without rubbing the fabric too hard.
Look:
- Only use the foam.
- Dab, never scrub.
- Work from the outside in.
Why avoid excess water?
Excessive moisture can seep through the velvet and weaken the glue holding the box together. This leads to peeling edges or structural warping over time.
| Step | Action | |
|---|---|---|
| Mix | Create light suds | |
| Dab | Apply foam gently | |
| Blot | Remove residue |
Using foam instead of liquid minimizes the risk of structural damage while effectively lifting stubborn stains.
Key Takeaway: Foam-based cleaning protects the internal adhesives and prevents the velvet from becoming matted or water-logged.
Why brush before how to clean the inside of a jewelry box?

Brushing removes loose debris that could otherwise be pushed deeper into the fibers during wet cleaning. It is a critical initial phase in how to clean the inside of a jewelry box effectively. By lifting the nap of the velvet, you expose the hidden dust trapped near the base of the fabric.
Which direction should you brush?
You should always brush in the direction of the grain to maintain the smooth appearance of the material. Moving against the grain can make the velvet look messy or uneven.
But wait, there is more:
- Brushing restores the “sheen.”
- It identifies stubborn stains.
- It prevents mud formation.
Does brushing remove pet hair?
While brushes help, a small piece of masking tape or a mini lint roller is often more efficient for hair. Gently press the adhesive against the velvet and lift straight up.
| Tool | Benefit | |
|---|---|---|
| Soft Brush | Lifts the nap | |
| Masking Tape | Pulls out hair | |
| Air Canister | Clears corners |
A thorough dry-brushing phase significantly reduces the amount of moisture needed for the rest of the cleaning process.
Key Takeaway: Dry maintenance is the most important step for preserving the tactile quality and visual depth of velvet interiors.
How to clean the inside of a jewelry box fiber by fiber?
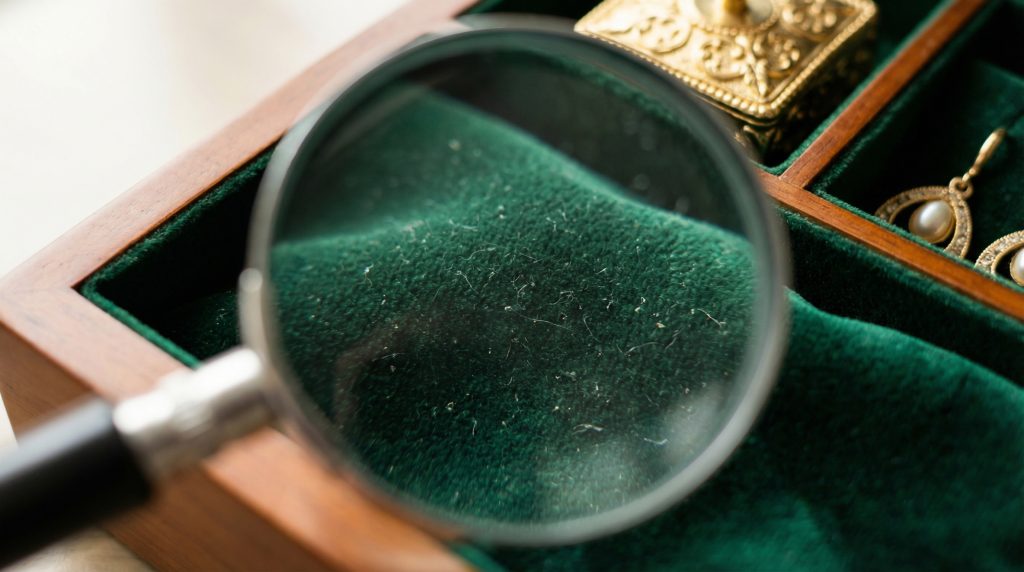
Inspect the fabric closely to identify individual fibers that may be matted or tangled. This detailed approach to how to clean the inside of a jewelry box ensures that every inch of the luxury lining is restored. Use a magnifying glass if necessary to spot tiny particles of glitter or metal shavings.
Can you use a needle?
A fine needle or toothpick can help gently separate fibers that have been glued together by a spill. Be extremely careful not to puncture the backing material during this delicate task.
The best part?
- Individual care lasts longer.
- It prevents “bald spots.”
- Shine is maximized.
Is sunlight helpful for inspection?
Natural light provides the best visibility for checking the uniformity of the velvet pile after cleaning. It reveals areas where the fabric might still be damp or clumped.
| Focus | Inspection Method | |
|---|---|---|
| Texture | Finger touch | |
| Debris | Magnifying glass | |
| Uniformity | Natural light |
Treating each fiber with care prevents the overall surface from appearing flat or worn after the cleaning is finished.
Key Takeaway: High-resolution inspection allows you to address localized issues before they affect the entire interior of the box.
What is the how to clean the inside of a jewelry box process?
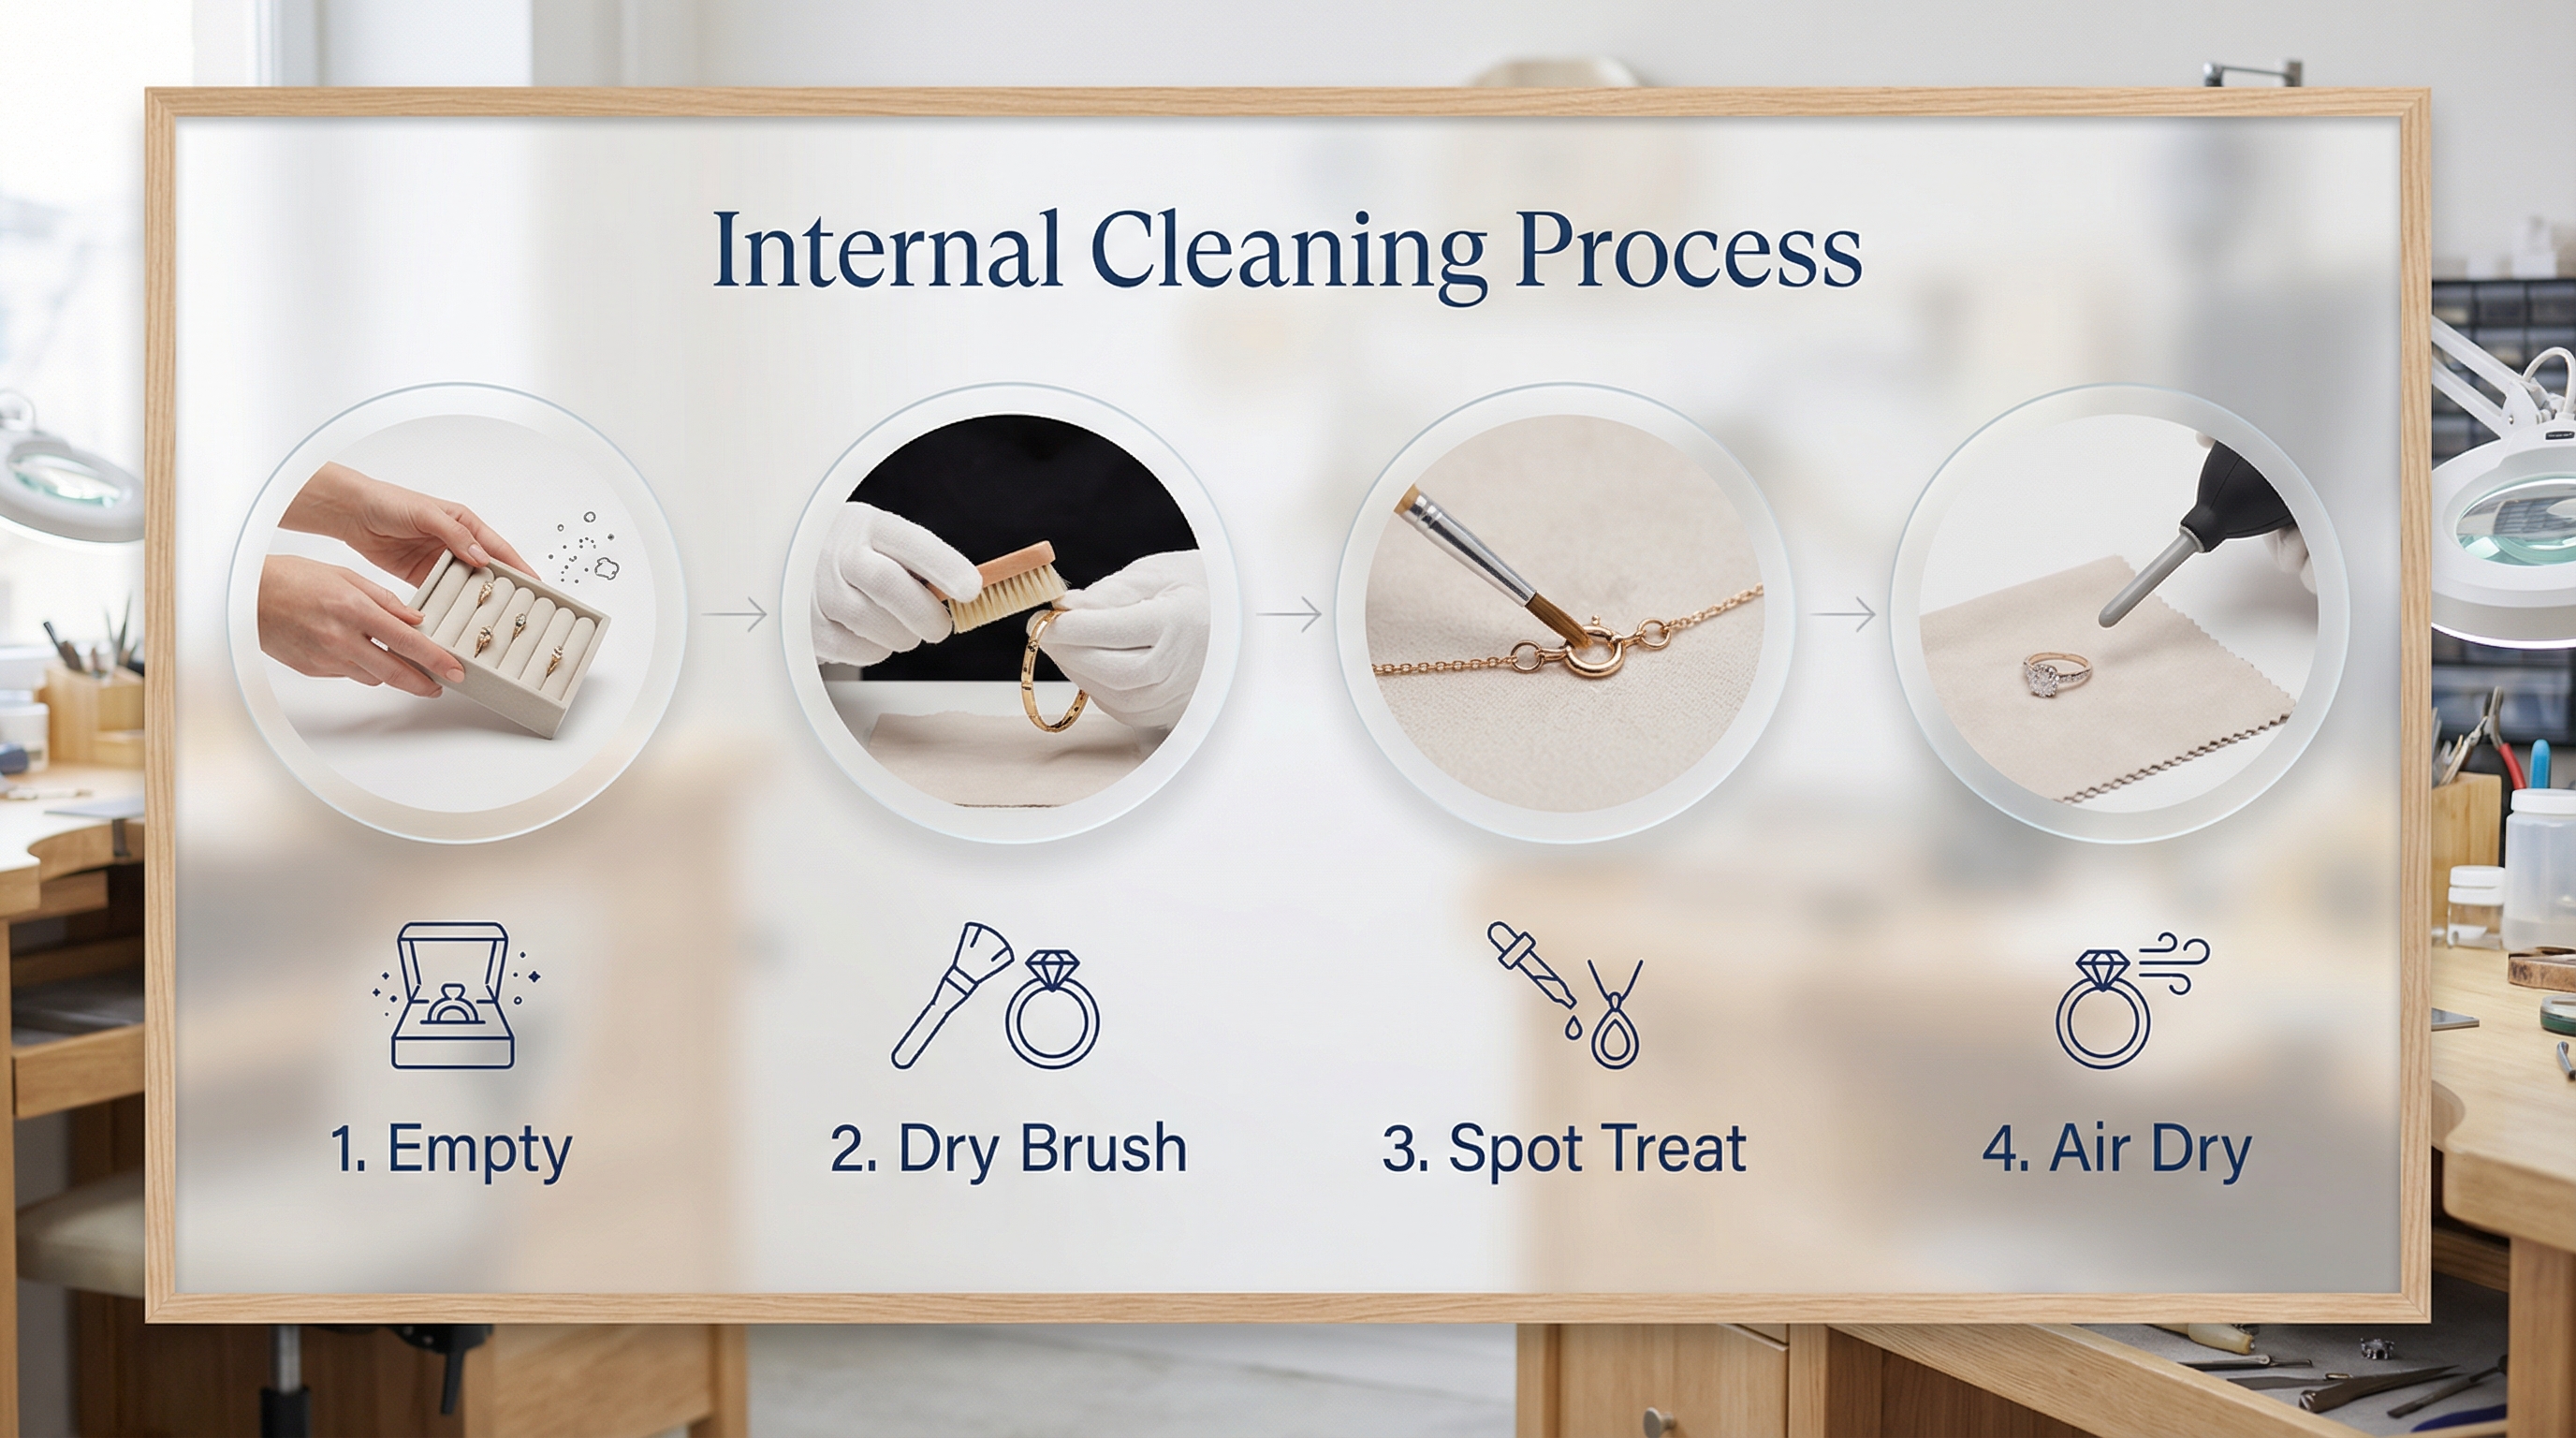
The professional process involves emptying the box, dry brushing, spot treating, and thorough air drying. Following a logical sequence is the secret to howto clean the inside of a jewelry box without causing damage. Skipping steps often leads to trapped moisture or streaks on the velvet surface.
Where should you start?
Always start by removing every piece of jewelry to a safe, clean tray. This prevents cleaning agents from coming into contact with your gemstones or metals.
Believe it or not:
- Emptying prevents chemical reactions.
- Systematic steps save time.
- Documentation tracks progress.
How long does drying take?
Drying can take anywhere from two to twenty-four hours depending on the humidity in your room. Never close the lid until you are absolutely certain the interior is bone-dry.
| Phase | Duration | |
|---|---|---|
| Prep | 5 Minutes | |
| Cleaning | 15 Minutes | |
| Drying | 12+ Hours |
A structured cleaning workflow ensures that no detail is missed and the integrity of the box is maintained throughout.
Key Takeaway: Patience during the drying phase is just as important as the cleaning itself to prevent mold and mildew.
How to clean the inside of a jewelry box before adding gems?
Wipe down all internal dividers and ring rolls with a dry microfiber cloth to catch any lingering dust. This final check of how to clean the inside of a jewelry box protects your diamonds and pearls from debris. Even invisible dust particles can accumulate on the facets of a stone, dulling its natural brilliance.
Should you wear gloves?
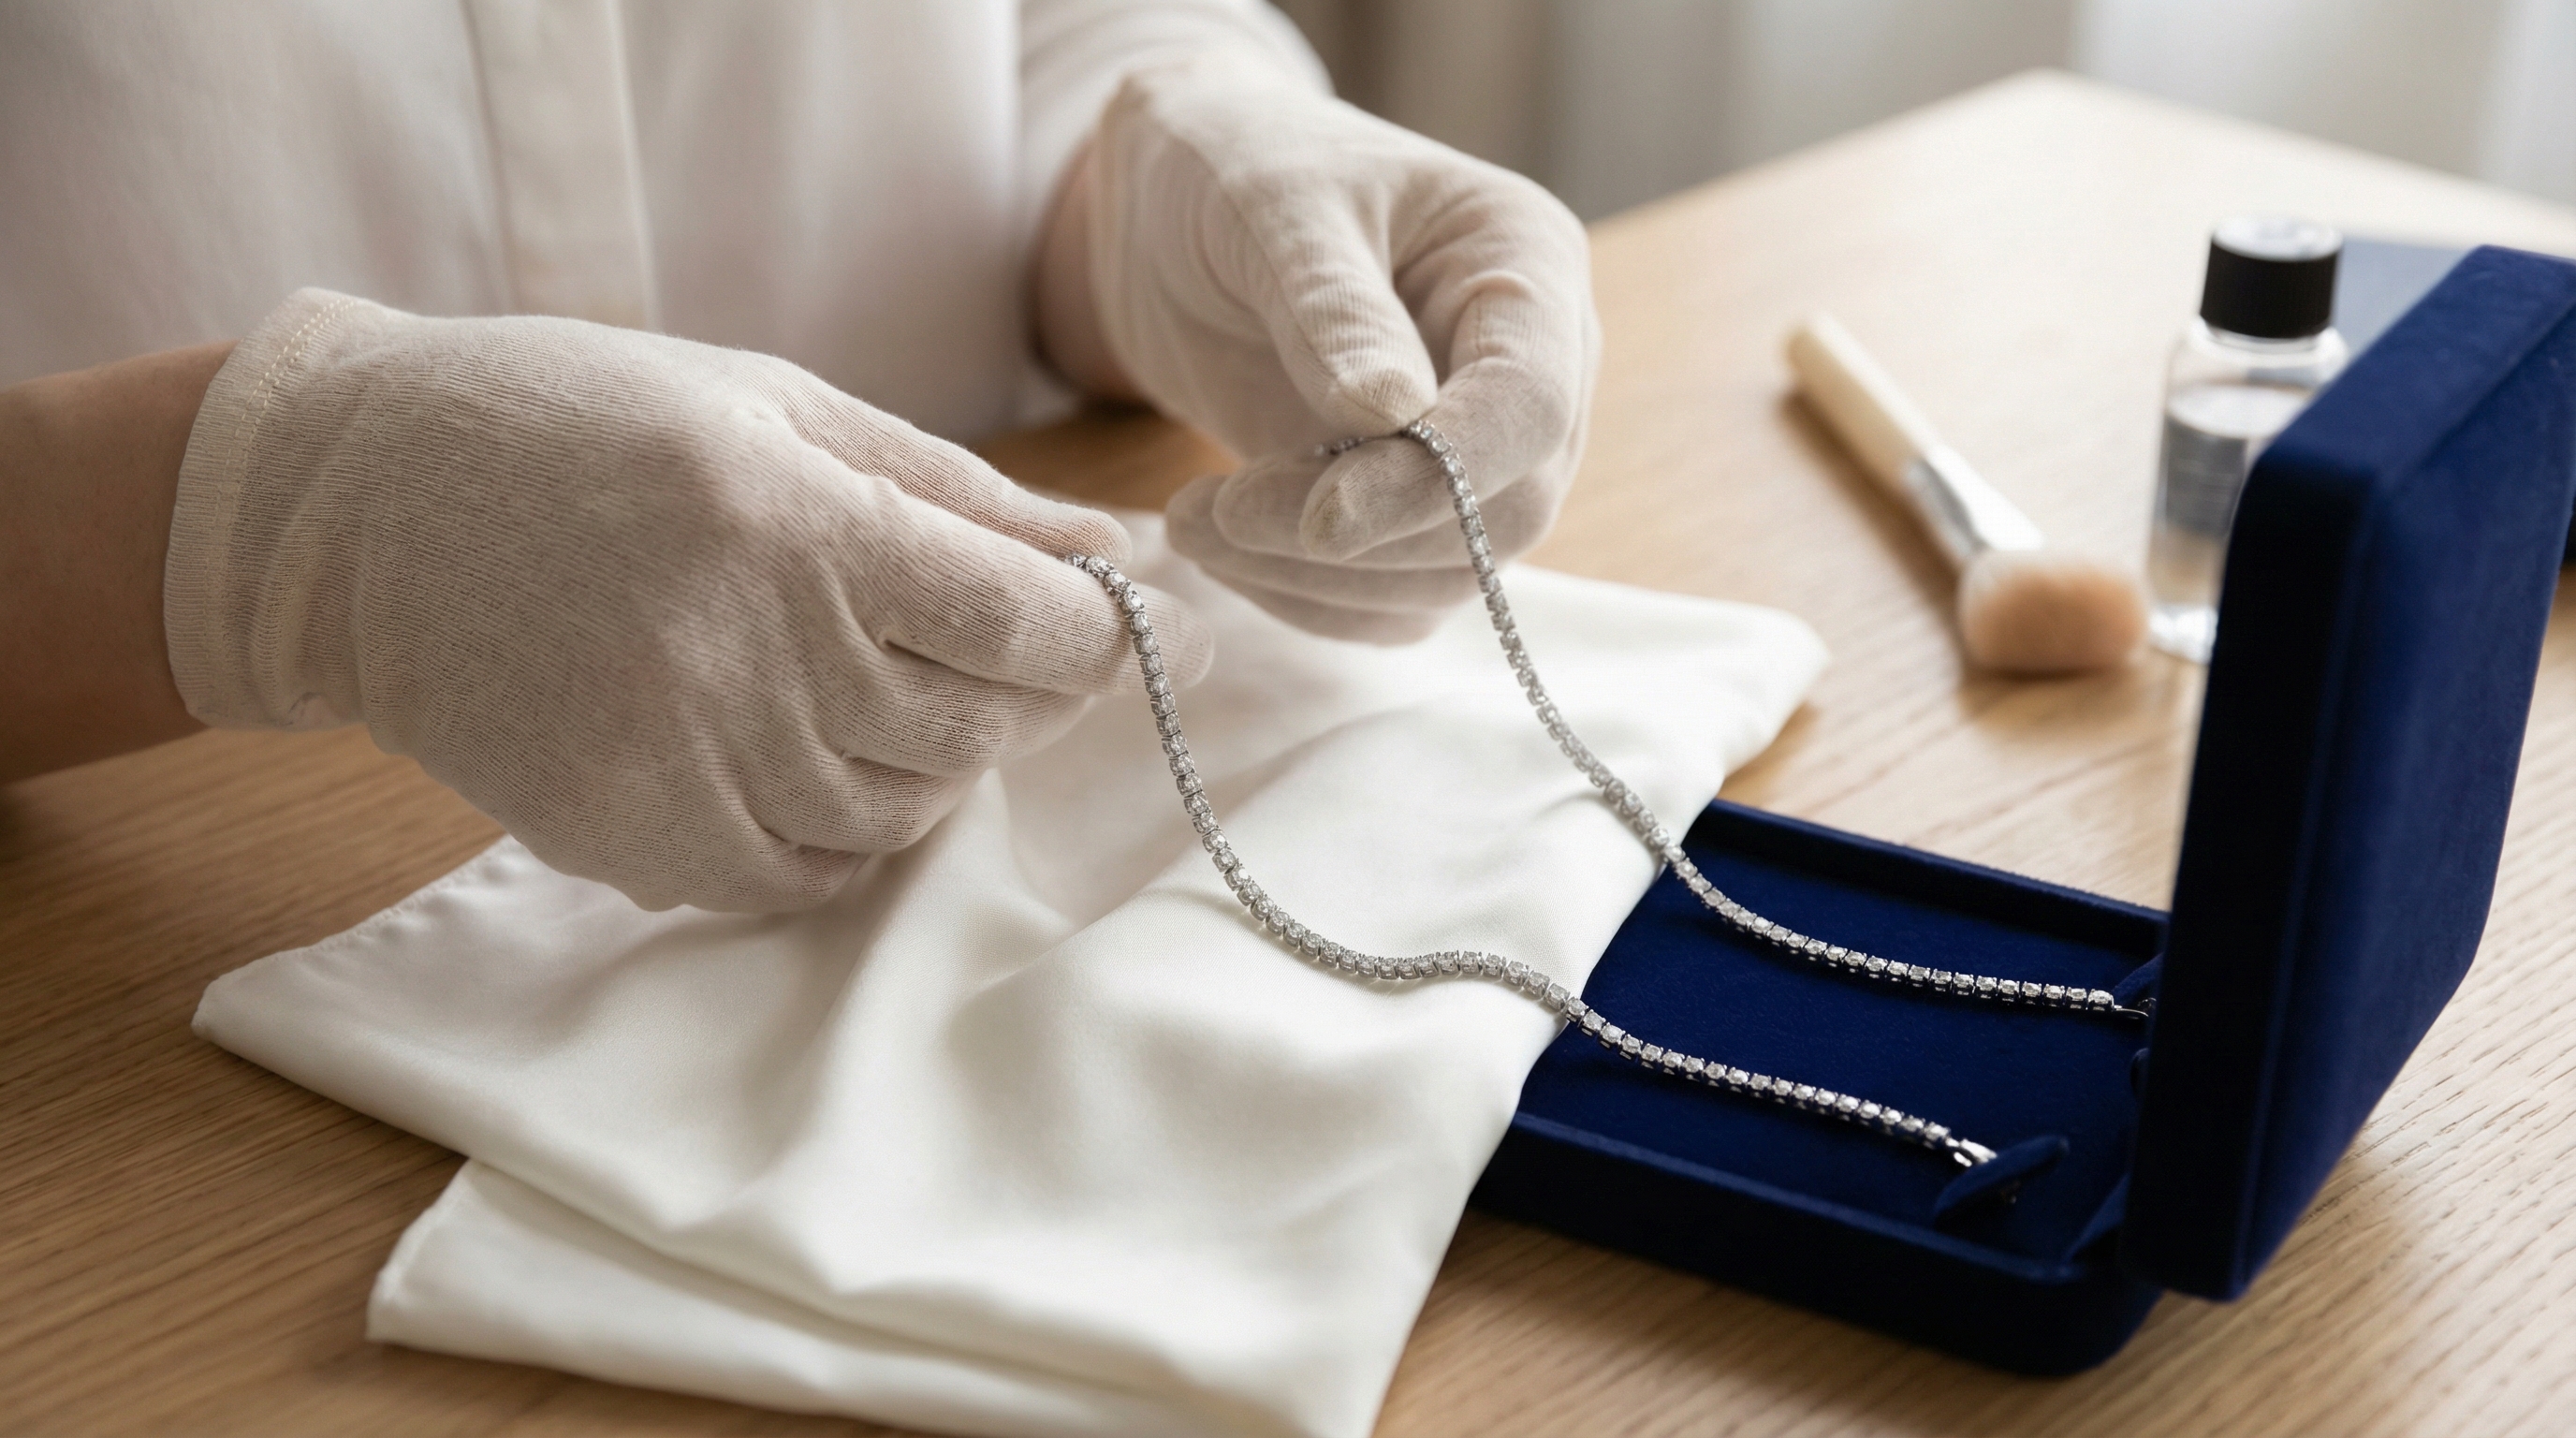
Wearing white cotton gloves prevents the oils from your skin from transferring back onto the freshly cleaned velvet. This keeps the environment sterile for your most valuable investment pieces.
Look:
- Cotton gloves are best.
- Avoid latex powder.
- Handle gems by edges.
Can you use compressed air?
A quick blast of compressed air can remove any remaining dust from the deep crevices of ring slots. Ensure the air canister is held upright to avoid spraying liquid propellant onto the fabric.
| Prep Step | Tool | |
|---|---|---|
| Oil Prevention | Cotton Gloves | |
| Final Dusting | Compressed Air | |
| Gem Check | Microfiber Cloth |
Creating a clean slate before returning your jewelry ensures that your items stay cleaner for much longer periods.
Key Takeaway: Professional handling and the use of gloves during the final stages of cleaning prevent the reintroduction of skin oils.
Can swabs help how to clean the inside of a jewelry box?
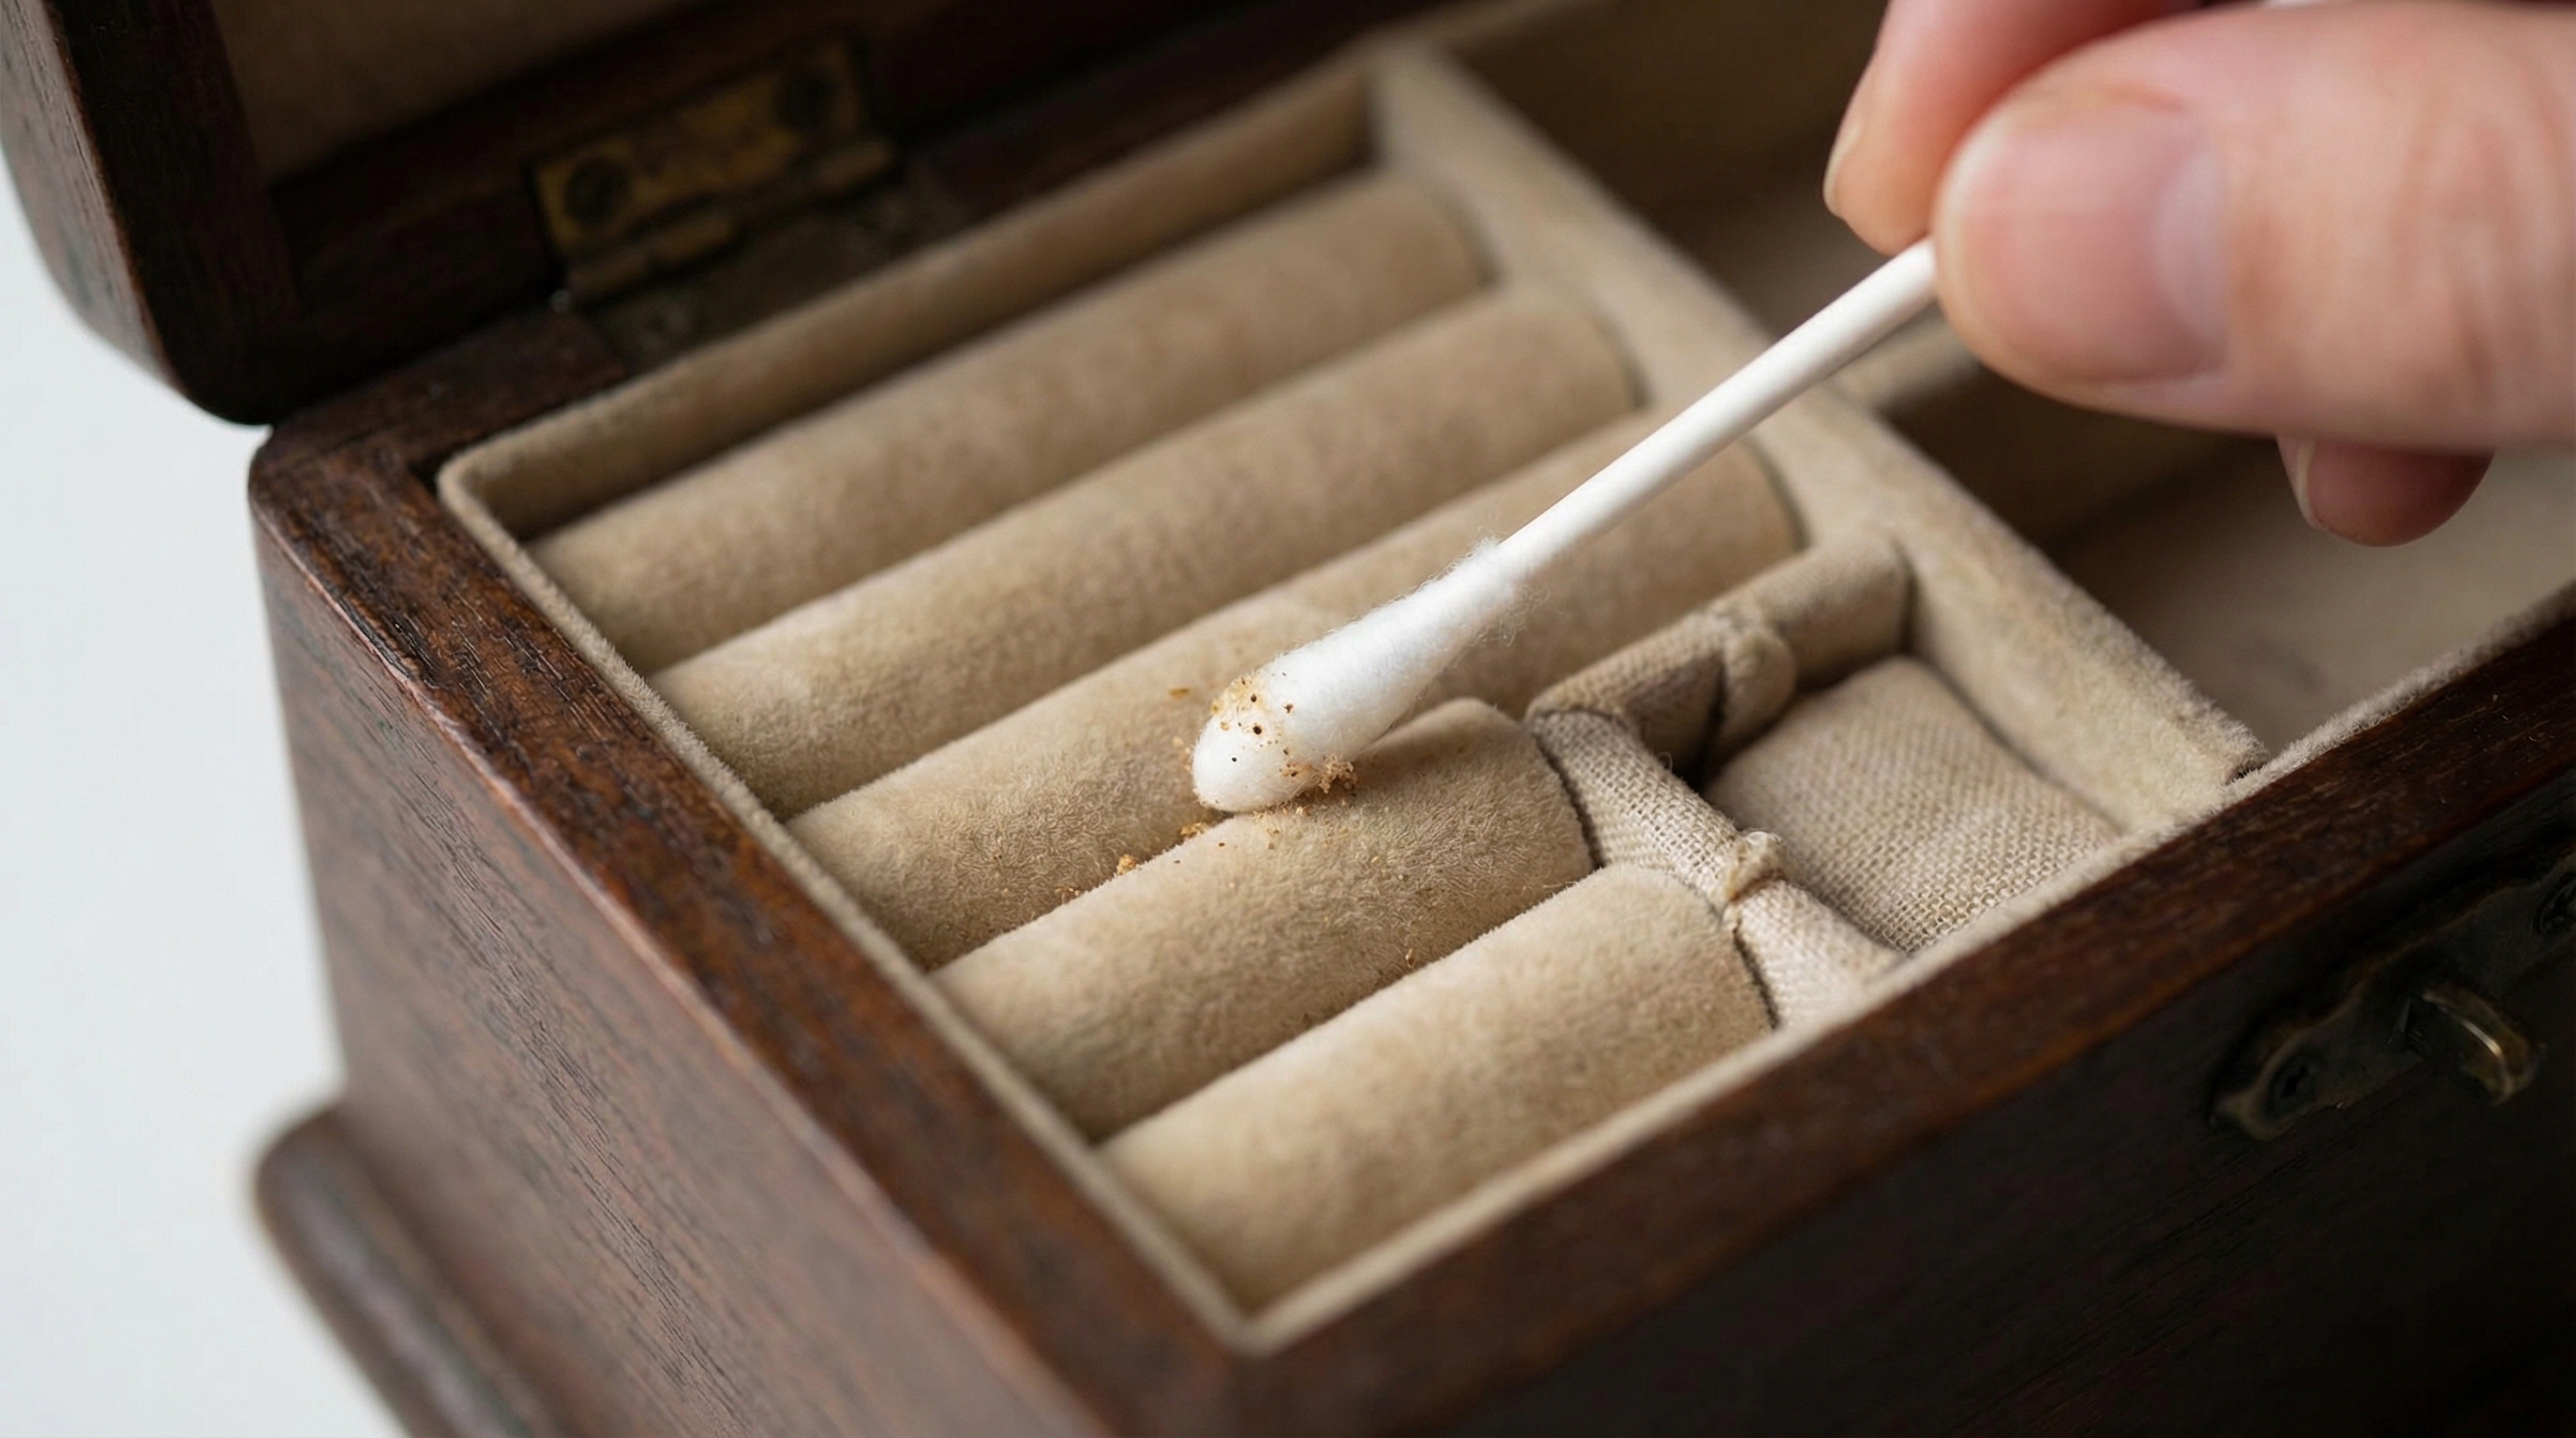
Cotton swabs are perfect for reaching tight corners and cleaning the narrow gaps between ring rolls. They are an essential tool for how to clean the inside of a jewelry box when precision is required. Simply dampen the tip slightly to pick up grime that a larger cloth would miss.
Are all swabs safe?
Choose high-quality swabs that don’t shed fibers easily, as cheap versions can leave more lint behind than they remove. Pointed swabs designed for makeup application offer the best precision for tight angles.
Here is the deal:
- Pointed tips reach deeper.
- High-density cotton is better.
- Dampen, don’t soak.
How to use them on stains?
Roll the swab over the stain rather than rubbing it back and forth. This lifting motion pulls the dirt away from the velvet fibers instead of grinding it in.
| Swab Type | Best For | |
|---|---|---|
| Pointed Tip | Corners/Joints | |
| Round Tip | Surface Spots | |
| Dry Swab | Lint Pickup |
Precision tools like swabs allow for a professional-grade finish in the most difficult areas of a jewelry container.
Key Takeaway: Precision is the hallmark of luxury care; use specialized swabs to address the hidden architecture of the box.
How to clean the inside of a jewelry box and dry it safely?
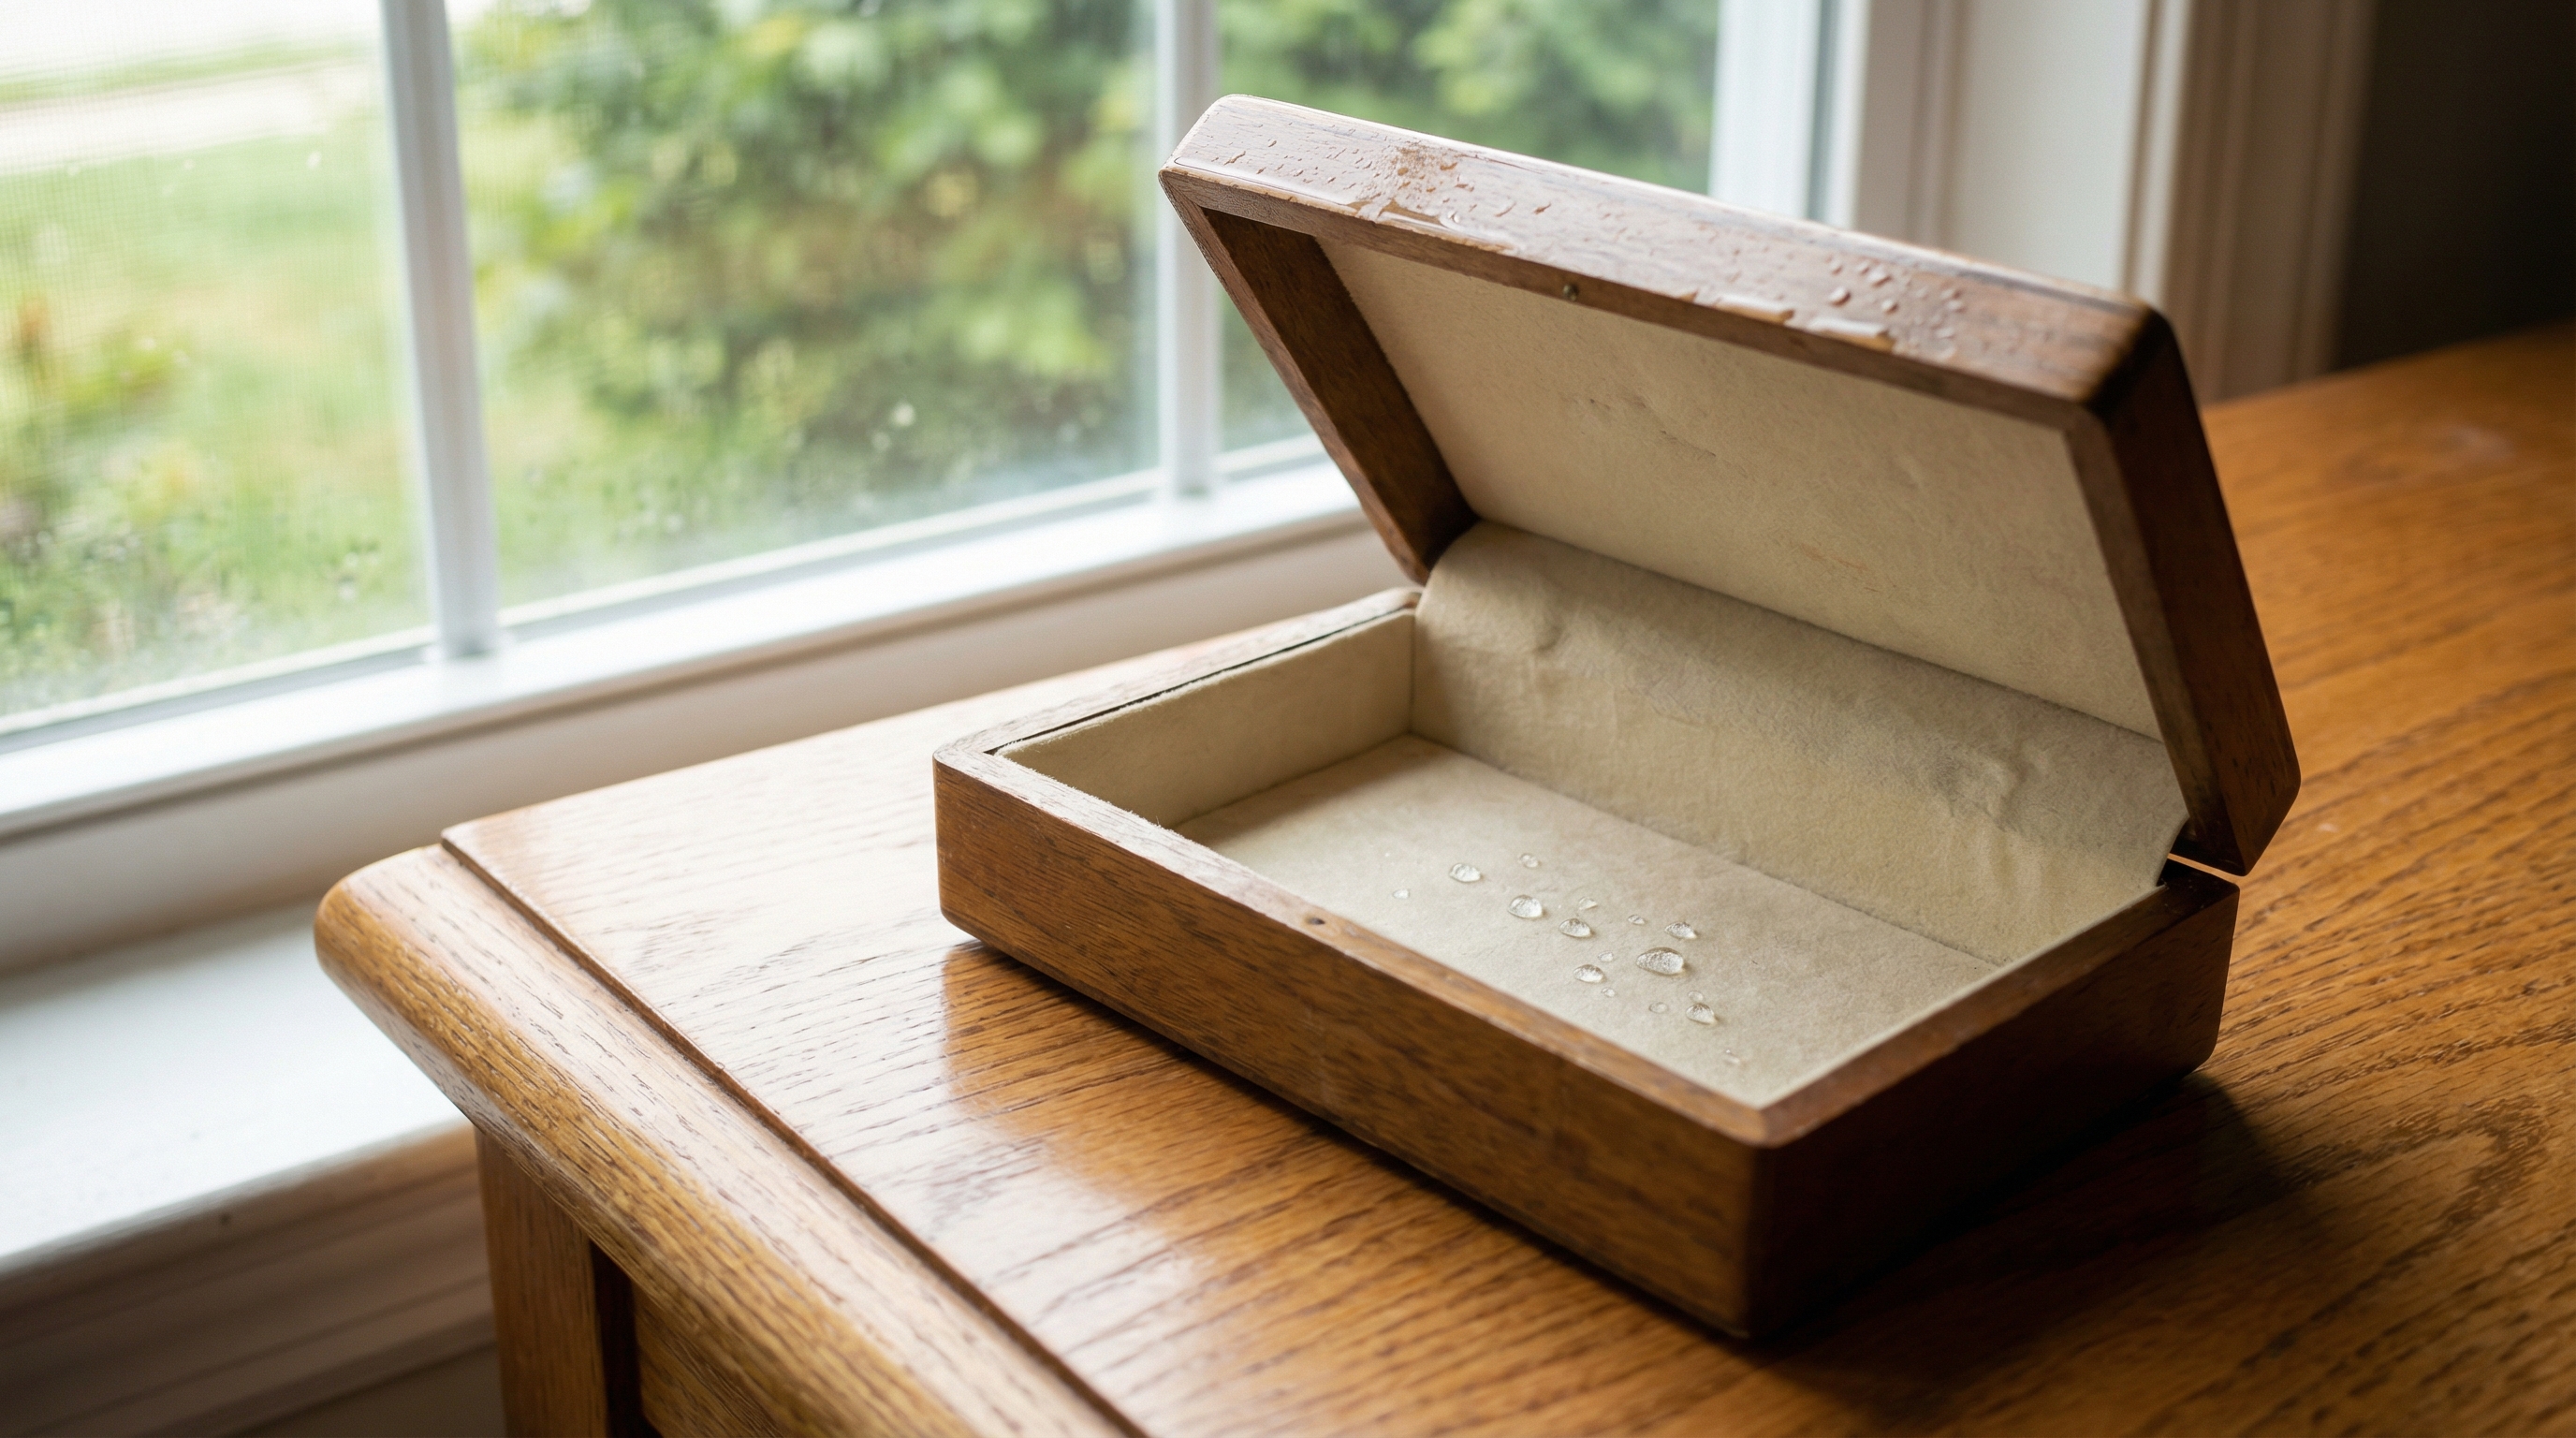
Place the open box in a well-ventilated area away from direct sunlight or intense heat sources. Safe drying is a critical component of how to clean the inside of a jewelry box to avoid fading. While natural light helps you see, direct UV rays can bleach the rich color of velvet within hours.
Can you use a hairdryer?
You may use a hairdryer on the “cool” setting, holding it at least twelve inches away from the surface. Never use heat, as it can shrink the fabric or melt the internal glue.
But wait, there is more:
- Airflow is key.
- Cool air only.
- Keep the lid open.
Why avoid the bathroom?
Bathrooms are often too humid for proper drying, which can lead to a musty smell or even mold growth. A dry room with a ceiling fan provides the ideal environment for the velvet to recover.
| Environment | Condition | |
|---|---|---|
| Living Room | Good Airflow | |
| Near Window | Indirect Light | |
| Fan | Speeds Drying |
Careful drying preserves the structural glue and the vibrant dye of your velvet jewelry packaging for years to come.
Key Takeaway: Ambient airflow is superior to artificial heat for maintaining the soft texture and color of velvet linings.
How to clean the inside of a jewelry box for daily use?
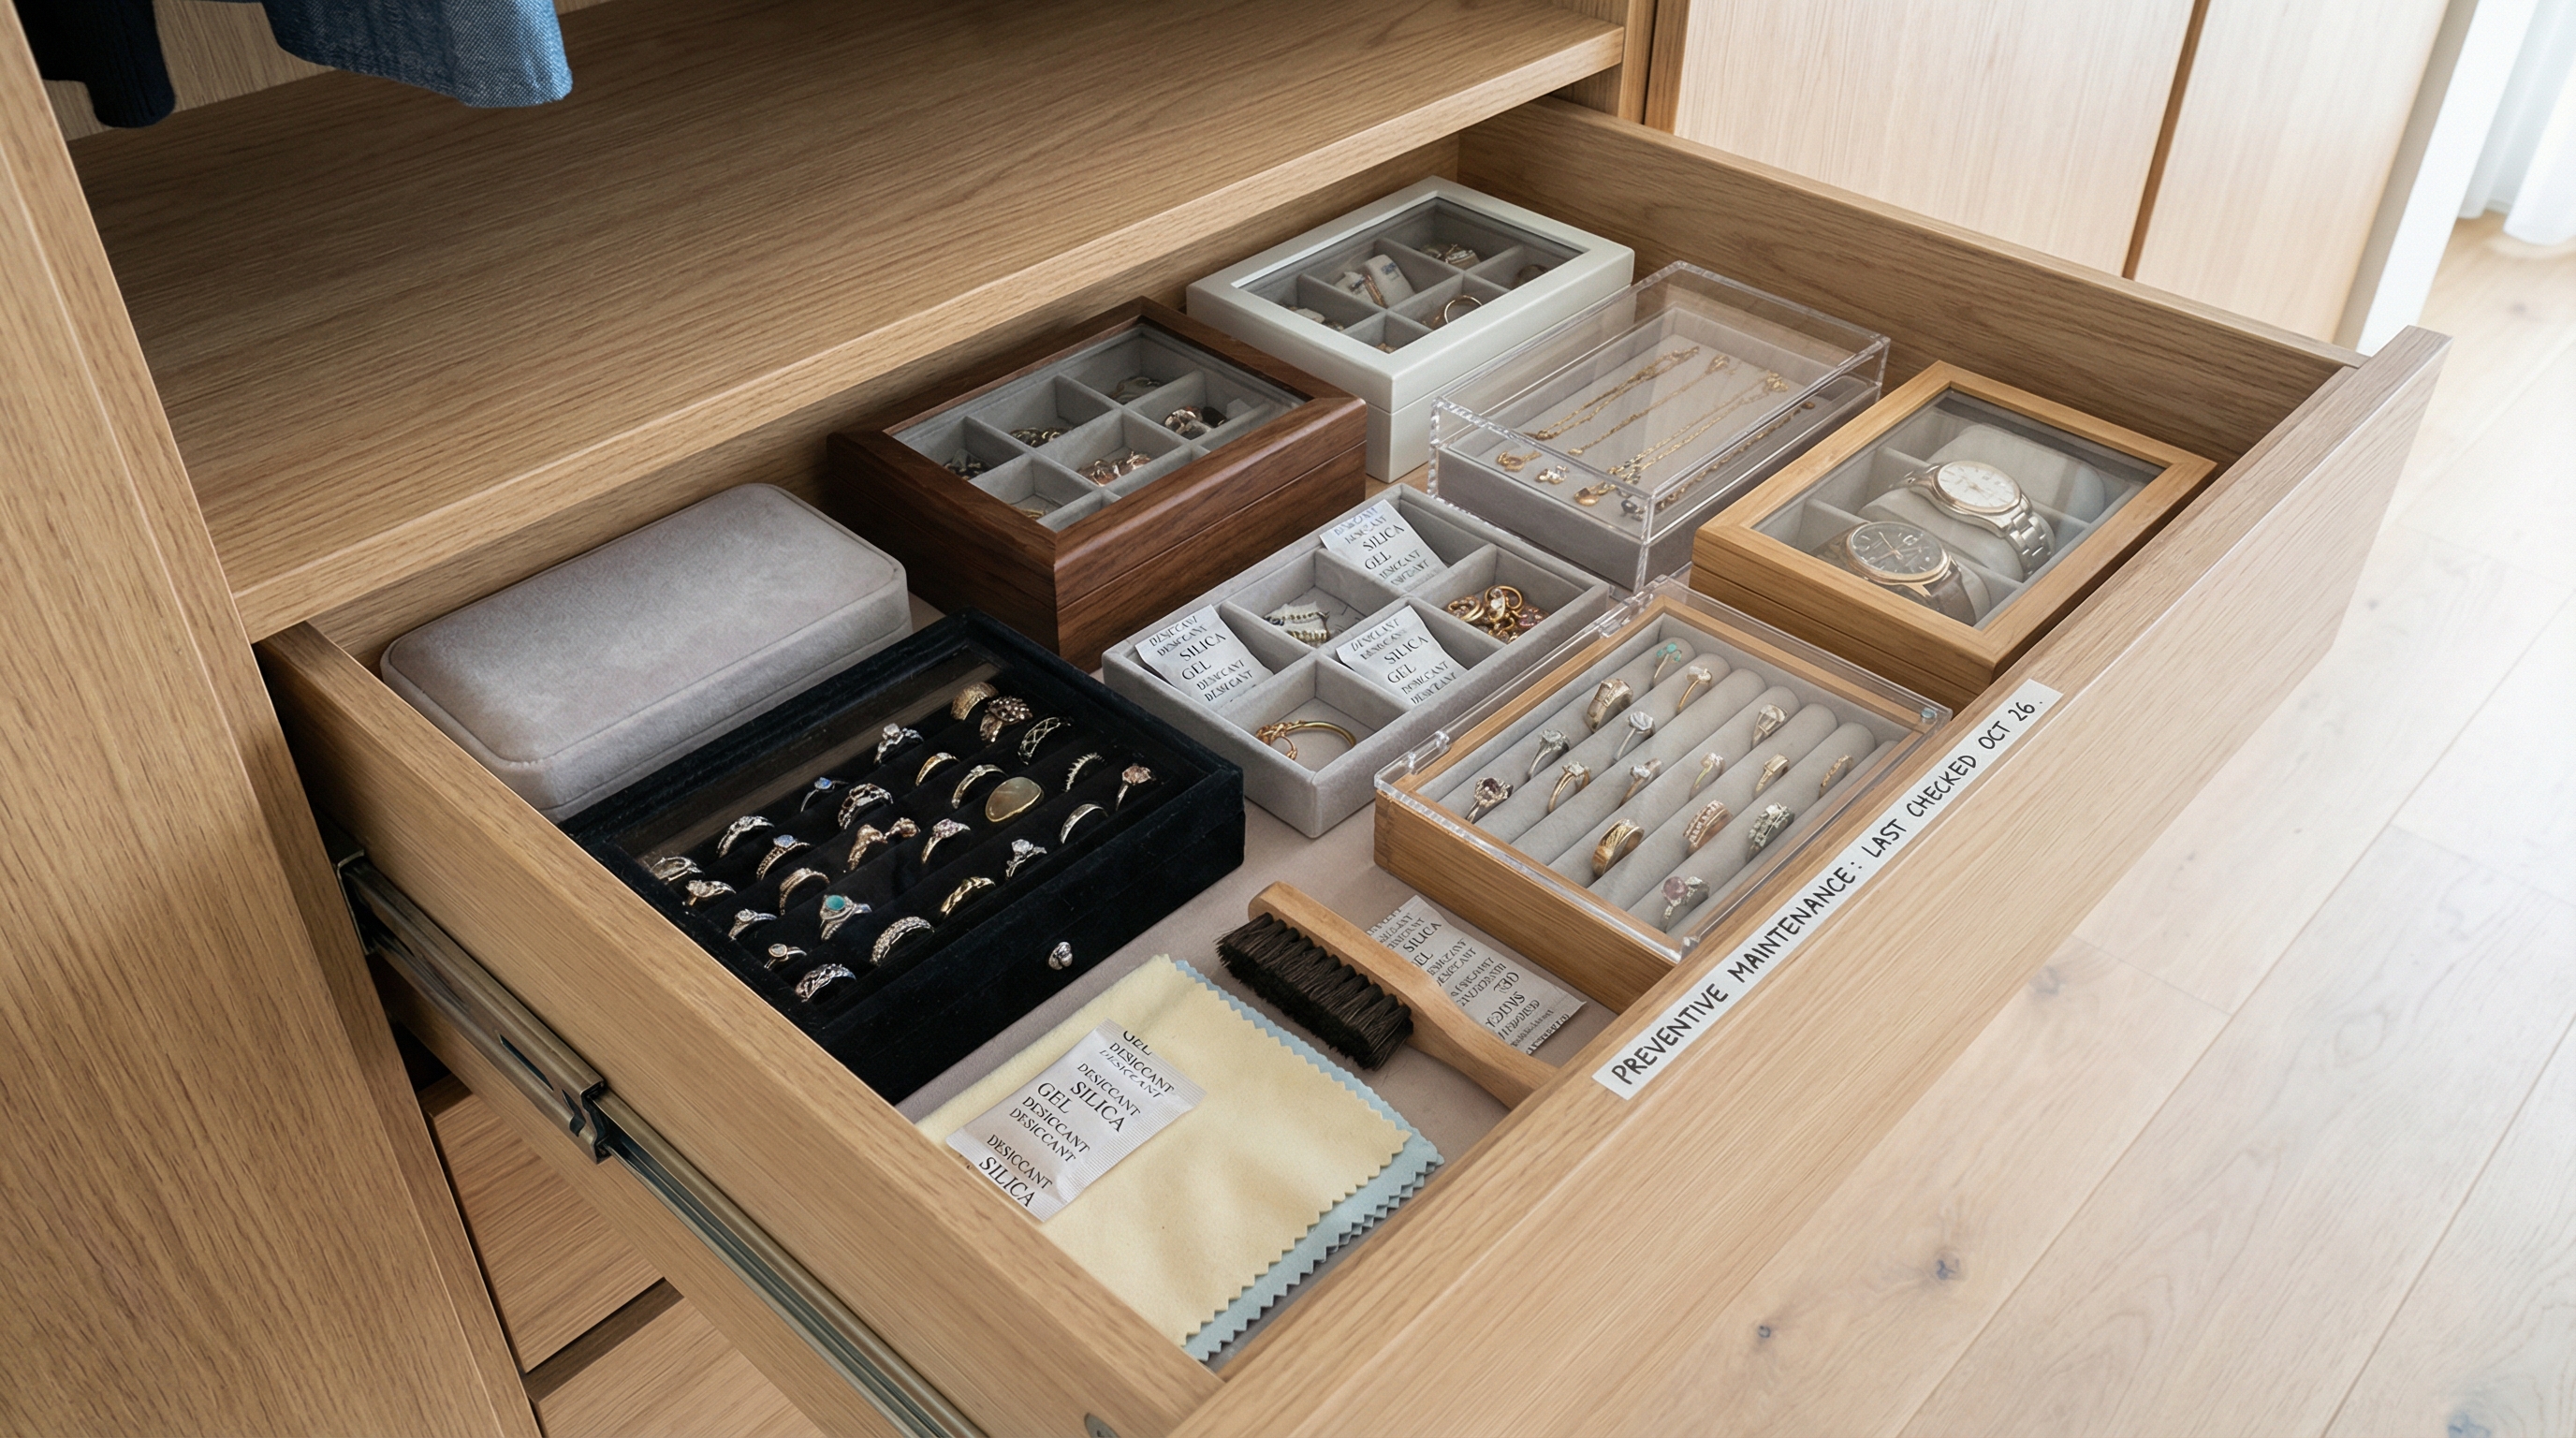
Maintain your box by giving it a quick dusting once a week with a dedicated soft brush. Preventive care is much easier than learning how to clean the inside of a jewelry box after years of neglect. Keeping the box in a closed drawer also minimizes the amount of airborne dust that can settle on the velvet.
Should you use silica packets?
Placing a small silica gel packet inside the box can help absorb excess moisture and prevent tarnishing of your jewelry. This keeps both the lining and your silver items in top condition.
Look:
- Silica prevents tarnish.
- Weekly brushing helps.
- Close the lid daily.
Is there a “quick” clean?
A quick pass with a mini lint roller every few days is usually enough to keep the surface looking brand new. This prevents the buildup of skin cells and fabric fibers that eventually turn into grime.
| Routine | Frequency | |
|---|---|---|
| Dusting | Weekly | |
| Lint Rolling | Bi-Weekly | |
| Deep Clean | Annually |
Consistent, small actions prevent the need for aggressive cleaning methods that might wear out the fabric over time.
Key Takeaway: Regular maintenance is the most effective way to protect the longevity and hygiene of your jewelry storage.
How to clean the inside of a jewelry box for luxury display?

Finish the cleaning by grooming the velvet with a brush to ensure all fibers lie in a uniform direction. For display purposes, how to clean the inside of a jewelry box must result in a flawless, showroom-quality finish. A well-groomed box reflects light beautifully and enhances the perceived value of the jewelry inside.
How to achieve a “sweep”?
Gently stroke the velvet from back to front in long, even motions to create a consistent visual texture. This creates a professional look that is standard in high-end jewelry boutiques.
The best part?
- Uniformity looks expensive.
- It highlights the jewelry.
- Light reflects better.
Can you use a velvet ribbon?
Rubbing a piece of matching velvet ribbon over the surface can help pick up the finest dust particles and restore the sheen. This is an old jeweler’s trick for making displays look absolutely perfect.
| Finish | Method | |
|---|---|---|
| Uniformity | Directional Brushing | |
| Sheen | Velvet Ribbon Rub | |
| Detail | Corner Check |
The final presentation is what separates a simple storage box from a true luxury display piece.
Key Takeaway: Directional grooming is the final touch that restores the sophisticated “depth” characteristic of premium velvet.
Maintaining your jewelry box is about more than just aesthetics; it is about preserving the legacy of your collection. At yxjewelrypackaging, we believe that luxury deserves meticulous care and the highest quality materials. To learn more about our premium storage solutions or to upgrade your current collection, contact us today .
FAQ
Can I use rubbing alcohol to remove stains?No, alcohol can dissolve the dyes in the velvet and cause permanent discoloration or “bleeding.”
What’s the best way to remove old perfume smells?Placing a small bowl of baking soda inside the box (without touching the fabric) for 24 hours is the safest method.
Can I wash the velvet in a machine?Absolutely not, as the agitation and water immersion will destroy the structural glue and the fabric’s nap.
How do I fix matted velvet?Gently steam the area from a distance and use a soft brush to lift the fibers back into place.
What’s the best tool for tiny glitter?A piece of high-tack mounting putty can often lift individual glitter specks that brushes and tape miss.