
Elevating your brand identity and customer satisfaction is as simple as using creative diy jewelry packaging that turns a standard purchase into a memorable unboxing experience. You’ve likely noticed that a generic plastic bag can make even the most expensive gemstone necklace look like a cheap trinket.
Think about it.
If your presentation doesn’t match the quality of your craft, you are leaving money on the table and losing repeat customers. The good news is that you don’t need a massive budget to impress your clients. Here are 10 innovative ways to transform your presentation using simple materials and a touch of creativity.
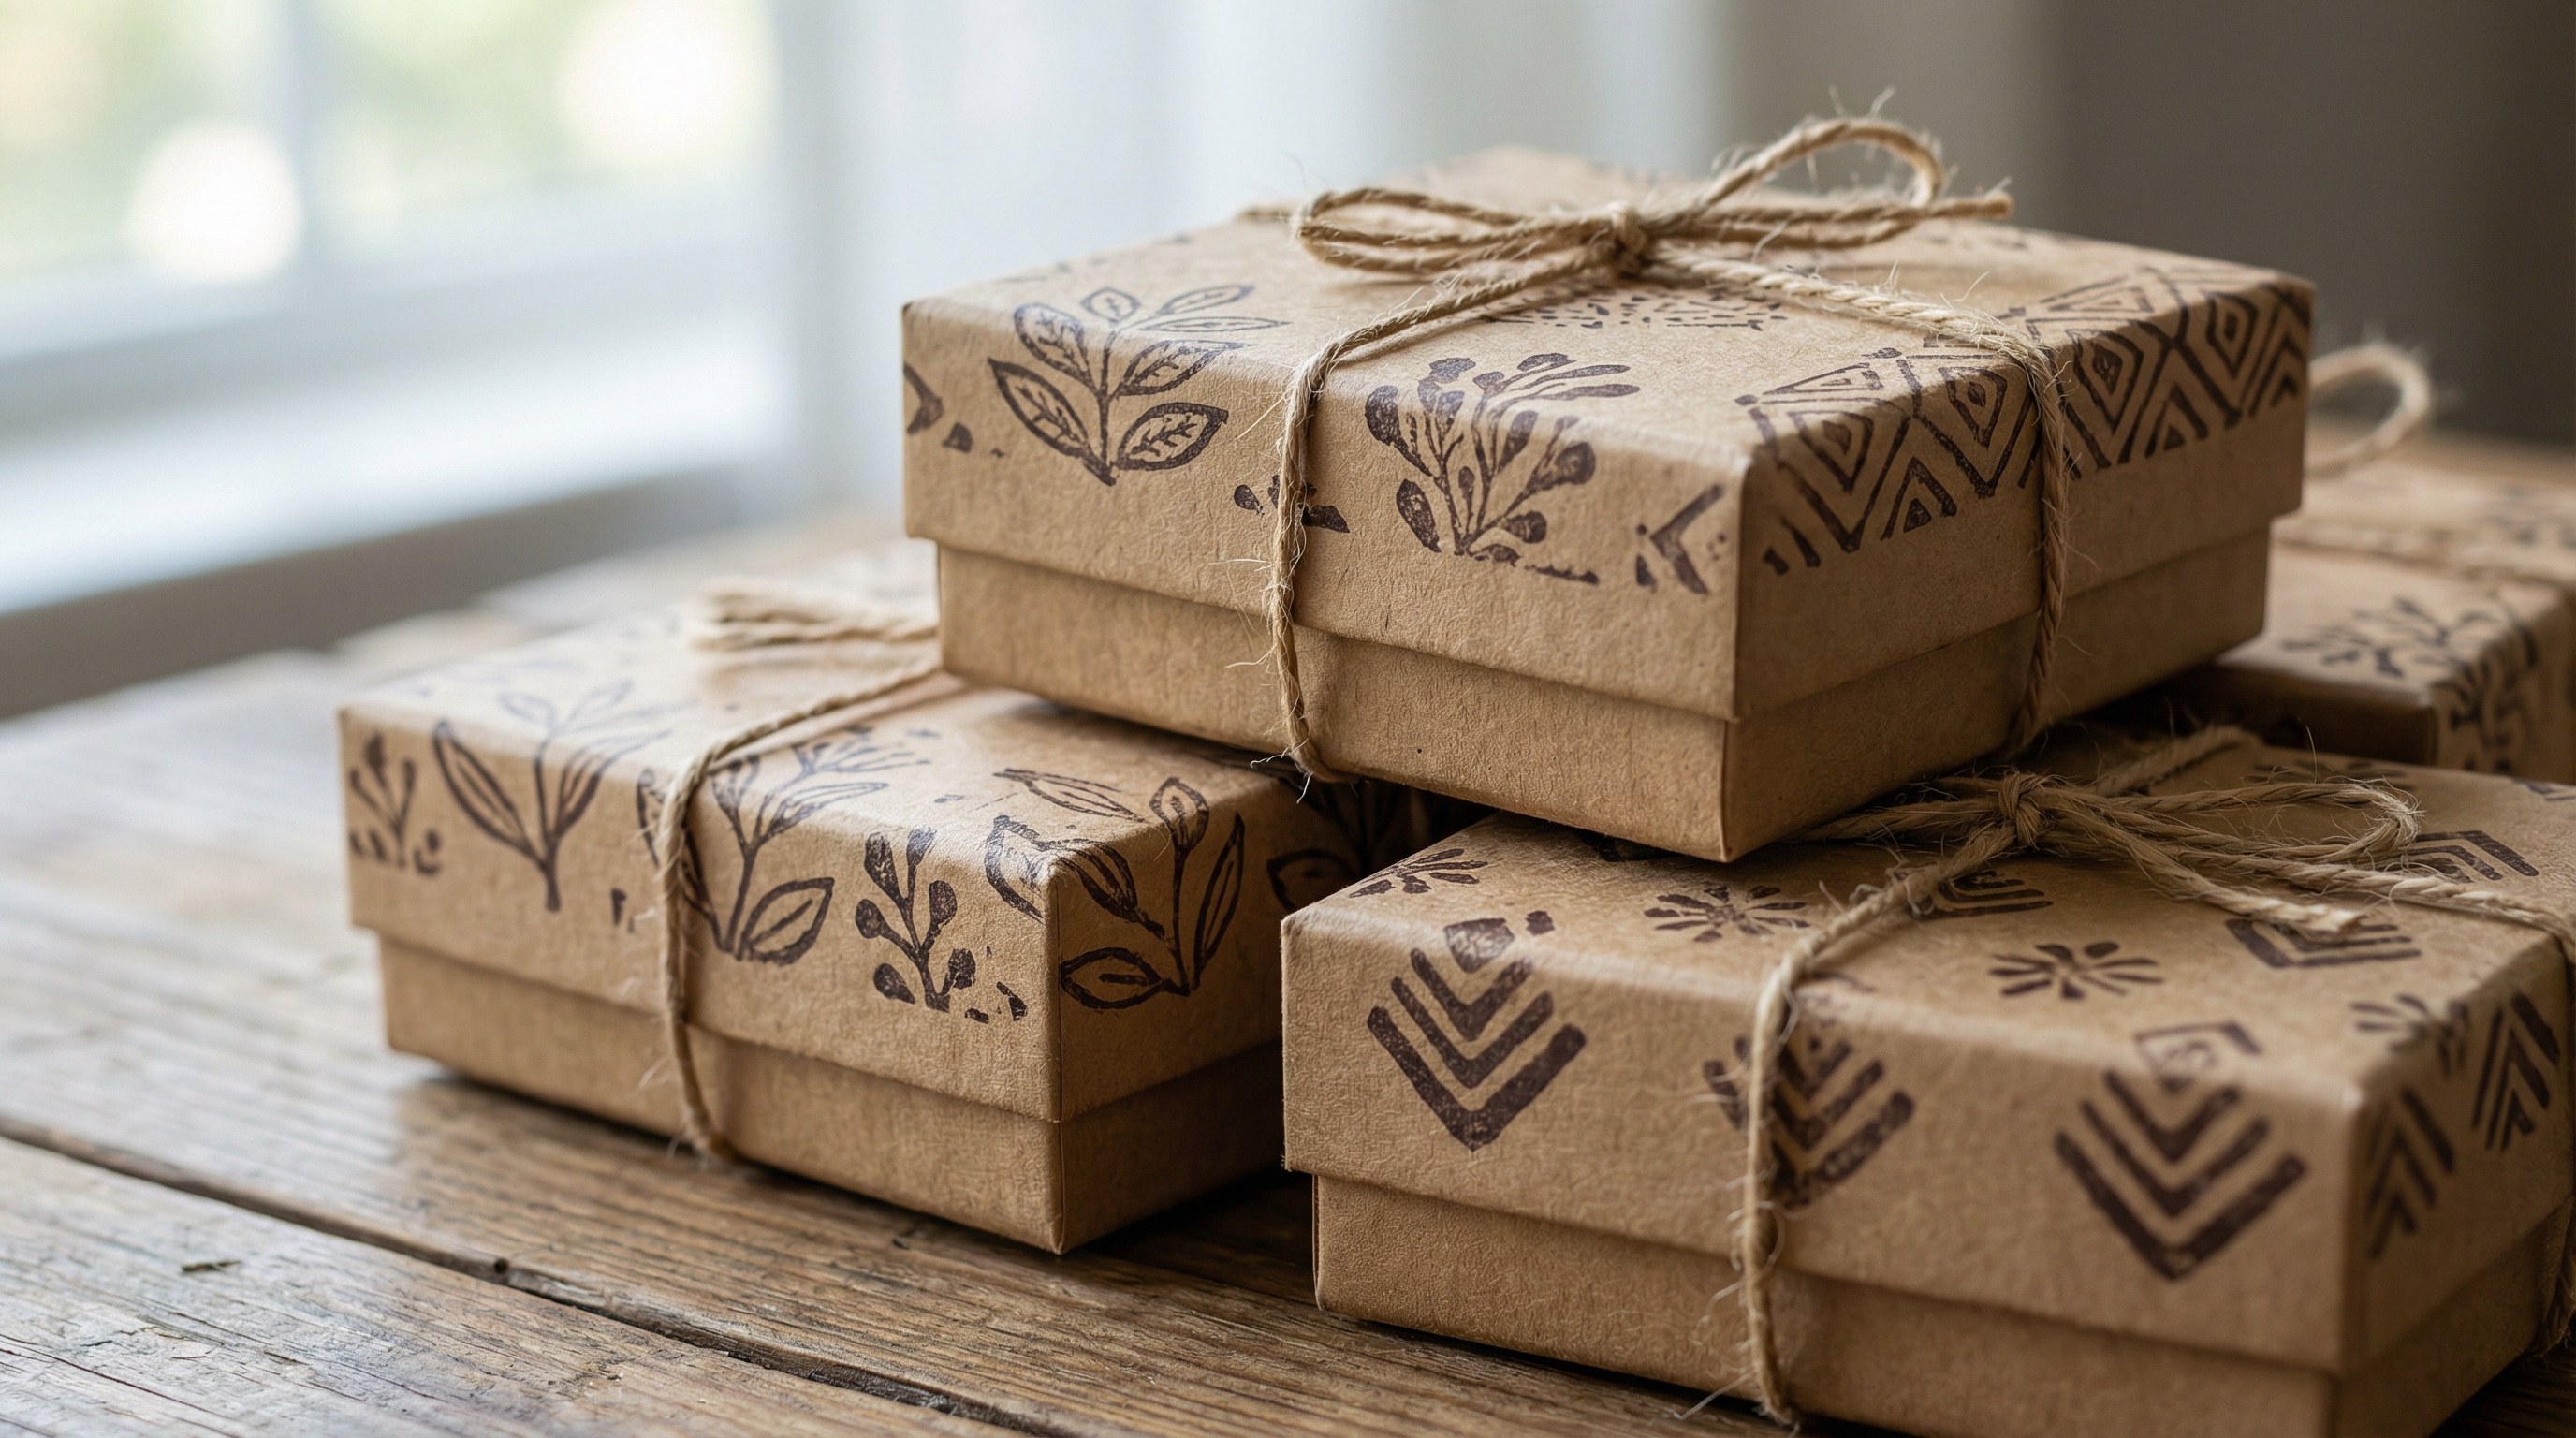
How to make stamped diy jewelry packaging at home?
You can create a professional, artisanal look by using custom rubber stamps on plain kraft paper or cardboard. This method allows you to add your logo or seasonal patterns to jewelry boxes without the high cost of custom printing.
Choosing your stamp designs
The secret is consistency. By selecting a signature icon—like a leaf, a geometric shape, or your brand’s initials—you build instant recognition.
- Use permanent ink to avoid smudging on glossy surfaces.
- Experiment with white ink on dark paper for a modern contrast.
- Rotate the stamp to create an all-over pattern.
Customizing the paper surface
Here is the best part. You can even use a simple potato to carve your own unique stamps if you’re in a hurry.
- Slice a large potato in half and carve out your desired shape.
- Blot the potato dry before dipping it into acrylic paint.
- Press firmly onto your packaging for a textured, organic finish.
Key Takeaway: Stamping provides a low-cost way to brand multiple packaging sizes with a unified aesthetic.
| Material | Best For | Visual Impact | |
|---|---|---|---|
| Kraft Paper | Rustic Brands | High Texture | |
| White Ink | Luxury Items | Sleek Contrast | |
| Potato Stamp | Organic Designs | Truly Unique |
This data indicates that kraft paper remains the most versatile base for stamping due to its high ink absorption and neutral tone.
Can you create nature-inspired diy jewelry packaging?
Incorporating organic elements like dried twigs, leaves, or twine adds an immediate sense of “handmade” luxury to your diy jewelry packaging . This style resonates deeply with eco-conscious consumers who value sustainability.
Selecting organic accents
Look outside your window. Nature provides the best free decoration if you know where to look.
- Small eucalyptus leaves offer a wonderful scent.
- Cinnamon sticks add a festive touch for holiday orders.
- Pressed ferns work beautifully behind clear protective layers.
Finalizing the rustic look
That’s not all. Pairing these natural elements with jute twine creates a cohesive, earthy package that feels like a treasure.
- Tie the twine in a simple bow to secure your greenery.
- Avoid using wet plants that might stain the paper or jewelry.
- Use a small dab of hot glue to keep delicate twigs in place.
Key Takeaway: Natural accents provide a sensory experience (scent and texture) that standard boxes simply cannot match.
| Element | Scent Profile | Durability | |
|---|---|---|---|
| Dried Lavender | Calming/Floral | Moderate | |
| Jute Twine | Earthy | Very High | |
| Preserved Fern | Neutral | High |
Utilizing dried lavender not only secures the item but also adds an olfactory layer to the unboxing process that builds brand loyalty.
Is scarf-wrapped diy jewelry packaging effective?
Traditional Furoshiki wrapping uses a fabric square or scarf as the outer layer, effectively giving your customer two gifts in one. This technique is particularly impressive for large bags or high-end jewelry sets that need a soft, protective touch.

Choosing the right fabric
Texture is everything. A silk or satin scarf suggests elegance, while a cotton bandana feels casual and fun.
- Ensure the fabric is at least three times the size of your jewelry box.
- Choose patterns that complement the colors of the stones or metal.
- Avoid fabrics that are too thick, as they won’t knot easily.
Mastering the basic knot
It’s easier than it looks. The goal is to create a secure bundle that is also effortless for the recipient to open.
- Place the box in the center and pull opposite corners together.
- Tie a single knot, then bring the remaining two corners over the top.
- Secure with a decorative pin or a small floral sprig.
Key Takeaway: Fabric wrapping eliminates the need for tape and creates zero waste, appealing to high-end sustainable markets.
| Fabric Type | Best Occasion | Reusability | |
|---|---|---|---|
| Silk Scarf | Anniversaries | High (Wearable) | |
| Cotton Square | Birthdays | High (Napkin/Bandana) | |
| Velvet Scrap | Winter Holidays | Moderate |
The high reusability of silk scarves significantly increases the perceived value of the gift without requiring expensive structural boxes.
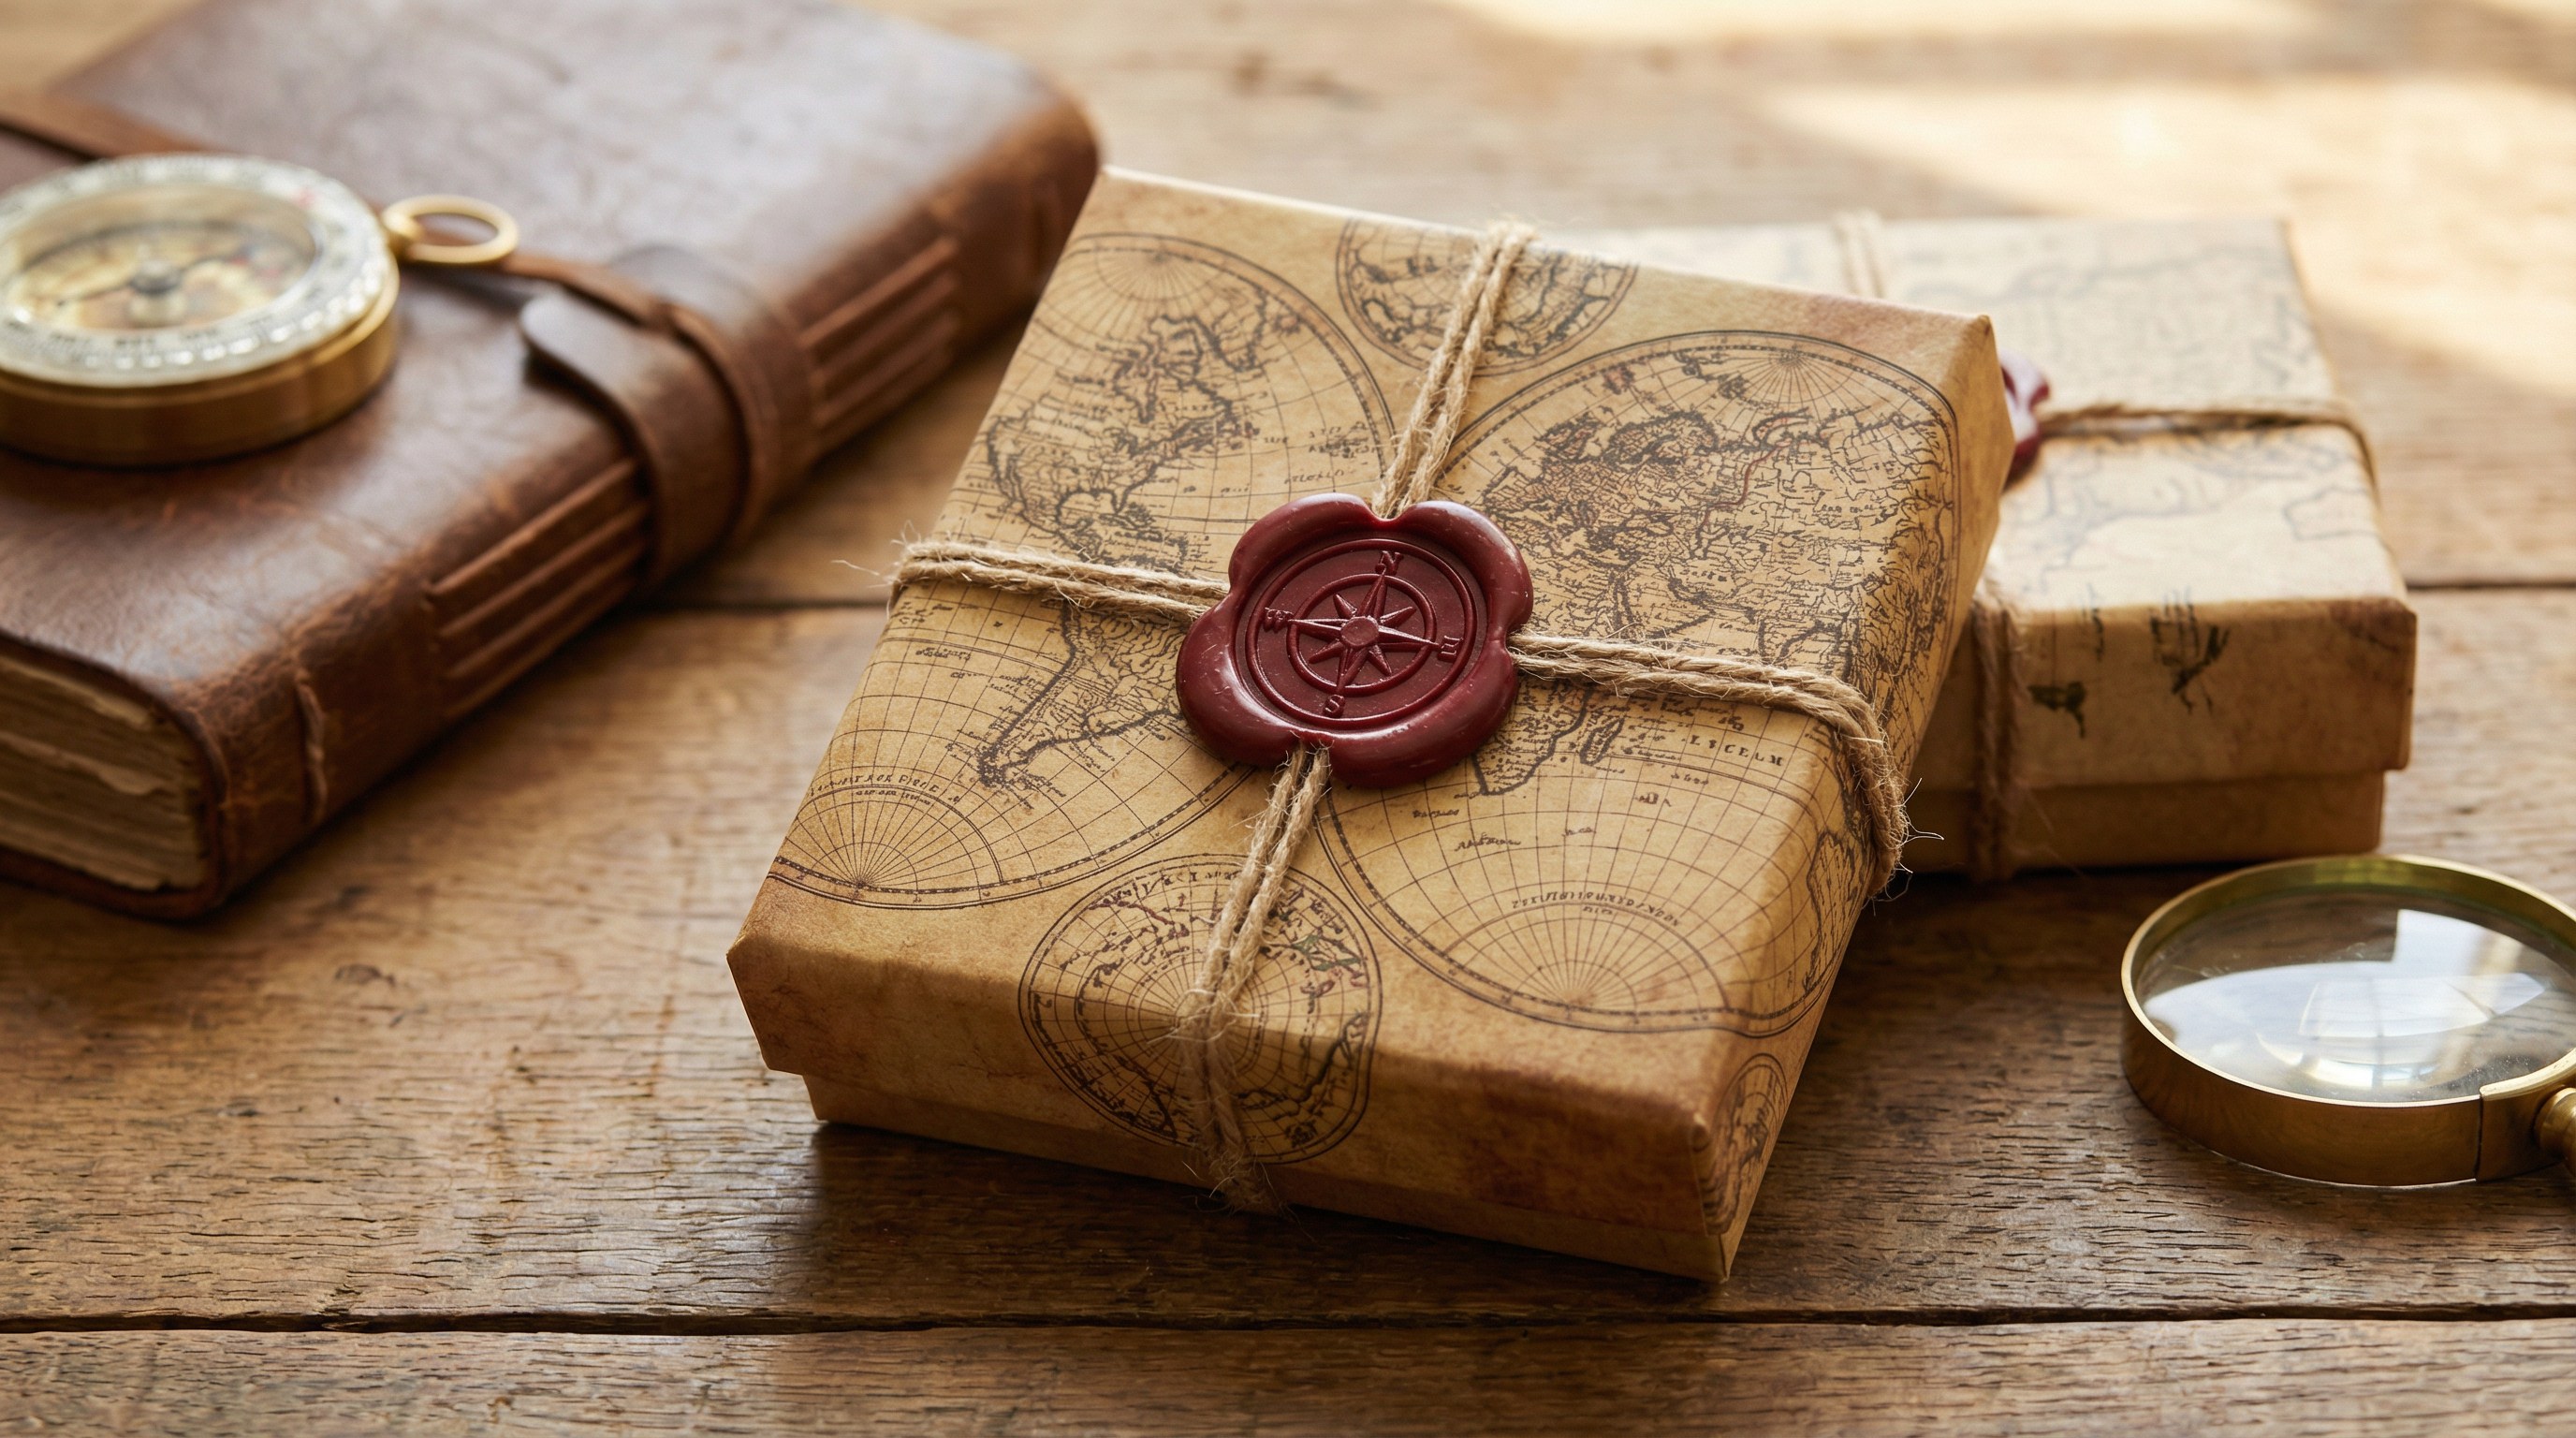
How to design map-themed diy jewelry packaging?
For customers who love to travel, wrapping your diy jewelry packaging in vintage maps creates a sense of adventure. It tells a story of where the jewelry might have come from or where it is going.
Finding vintage materials
Think about it. Old atlases, sheet music, or even pages from classic novels make for stunning, one-of-a-kind wrappers.
- Check local thrift stores for damaged books that can be upcycled.
- Use maps that feature the location where the jewelry was made.
- Photocopy the map onto thinner paper if the original is too stiff to fold.
Adding a wax seal finish
Here is the kicker. A deep red or gold wax seal on top of a map-wrapped box creates a truly regal “explorer” aesthetic.
- Use a wax stamp with a compass or a simple monogram.
- The seal keeps the map paper tight without the need for visible tape.
- Pair this with a thin leather cord for a complete vintage look.
Key Takeaway: Storytelling through packaging like maps helps build an emotional connection between the wearer and the jewelry.
| Material | Theme | Vibe | |
|---|---|---|---|
| Vintage Map | Travel/Wanderlust | Adventurous | |
| Sheet Music | Artistic/Classic | Sophisticated | |
| Wax Seal | History/Legacy | Premium |
Analysis shows that map-themed packaging consistently ranks as a favorite for “meaningful” gifts like graduation or retirement jewelry.
What is the best way to make matchbox diy jewelry packaging?
Upcycling small matchboxes into jewelry drawers is a brilliant way to package smaller items like rings or stud earrings. It provides a “sliding” reveal that is both charming and structurally protective.

Decorating the matchbox sleeve
But wait, there’s more. The outer sleeve is a blank canvas for washi tape, glitter, or small beads.
- Cover the strike strip with a decorative border or gold leaf.
- Glue a tiny bead or button to the front of the inner drawer to act as a handle.
- Line the inside with a scrap of velvet or felt to keep the jewelry from rattling.
Creating a secure interior
It’s all about the fit. A loose earring can get lost or damaged, so you must secure it inside the “drawer.”
- Cut a small piece of foam or cardstock to fit exactly inside the matchbox.
- Poke two holes for earrings or a slit for a ring.
- Add a tiny “secret message” to the bottom of the drawer for a personalized touch.
Key Takeaway: Matchboxes are highly portable and offer a unique tactile opening experience that standard lids lack.
| Component | Material | Benefit | |
|---|---|---|---|
| Outer Sleeve | Washi Tape | Instant Decoration | |
| Inner Drawer | Velvet Lining | Scratch Protection | |
| Handle | Small Button | Ease of Use |
Decorating the sleeve with washi tape is the most efficient method for small businesses to produce high-volume custom boxes quickly.
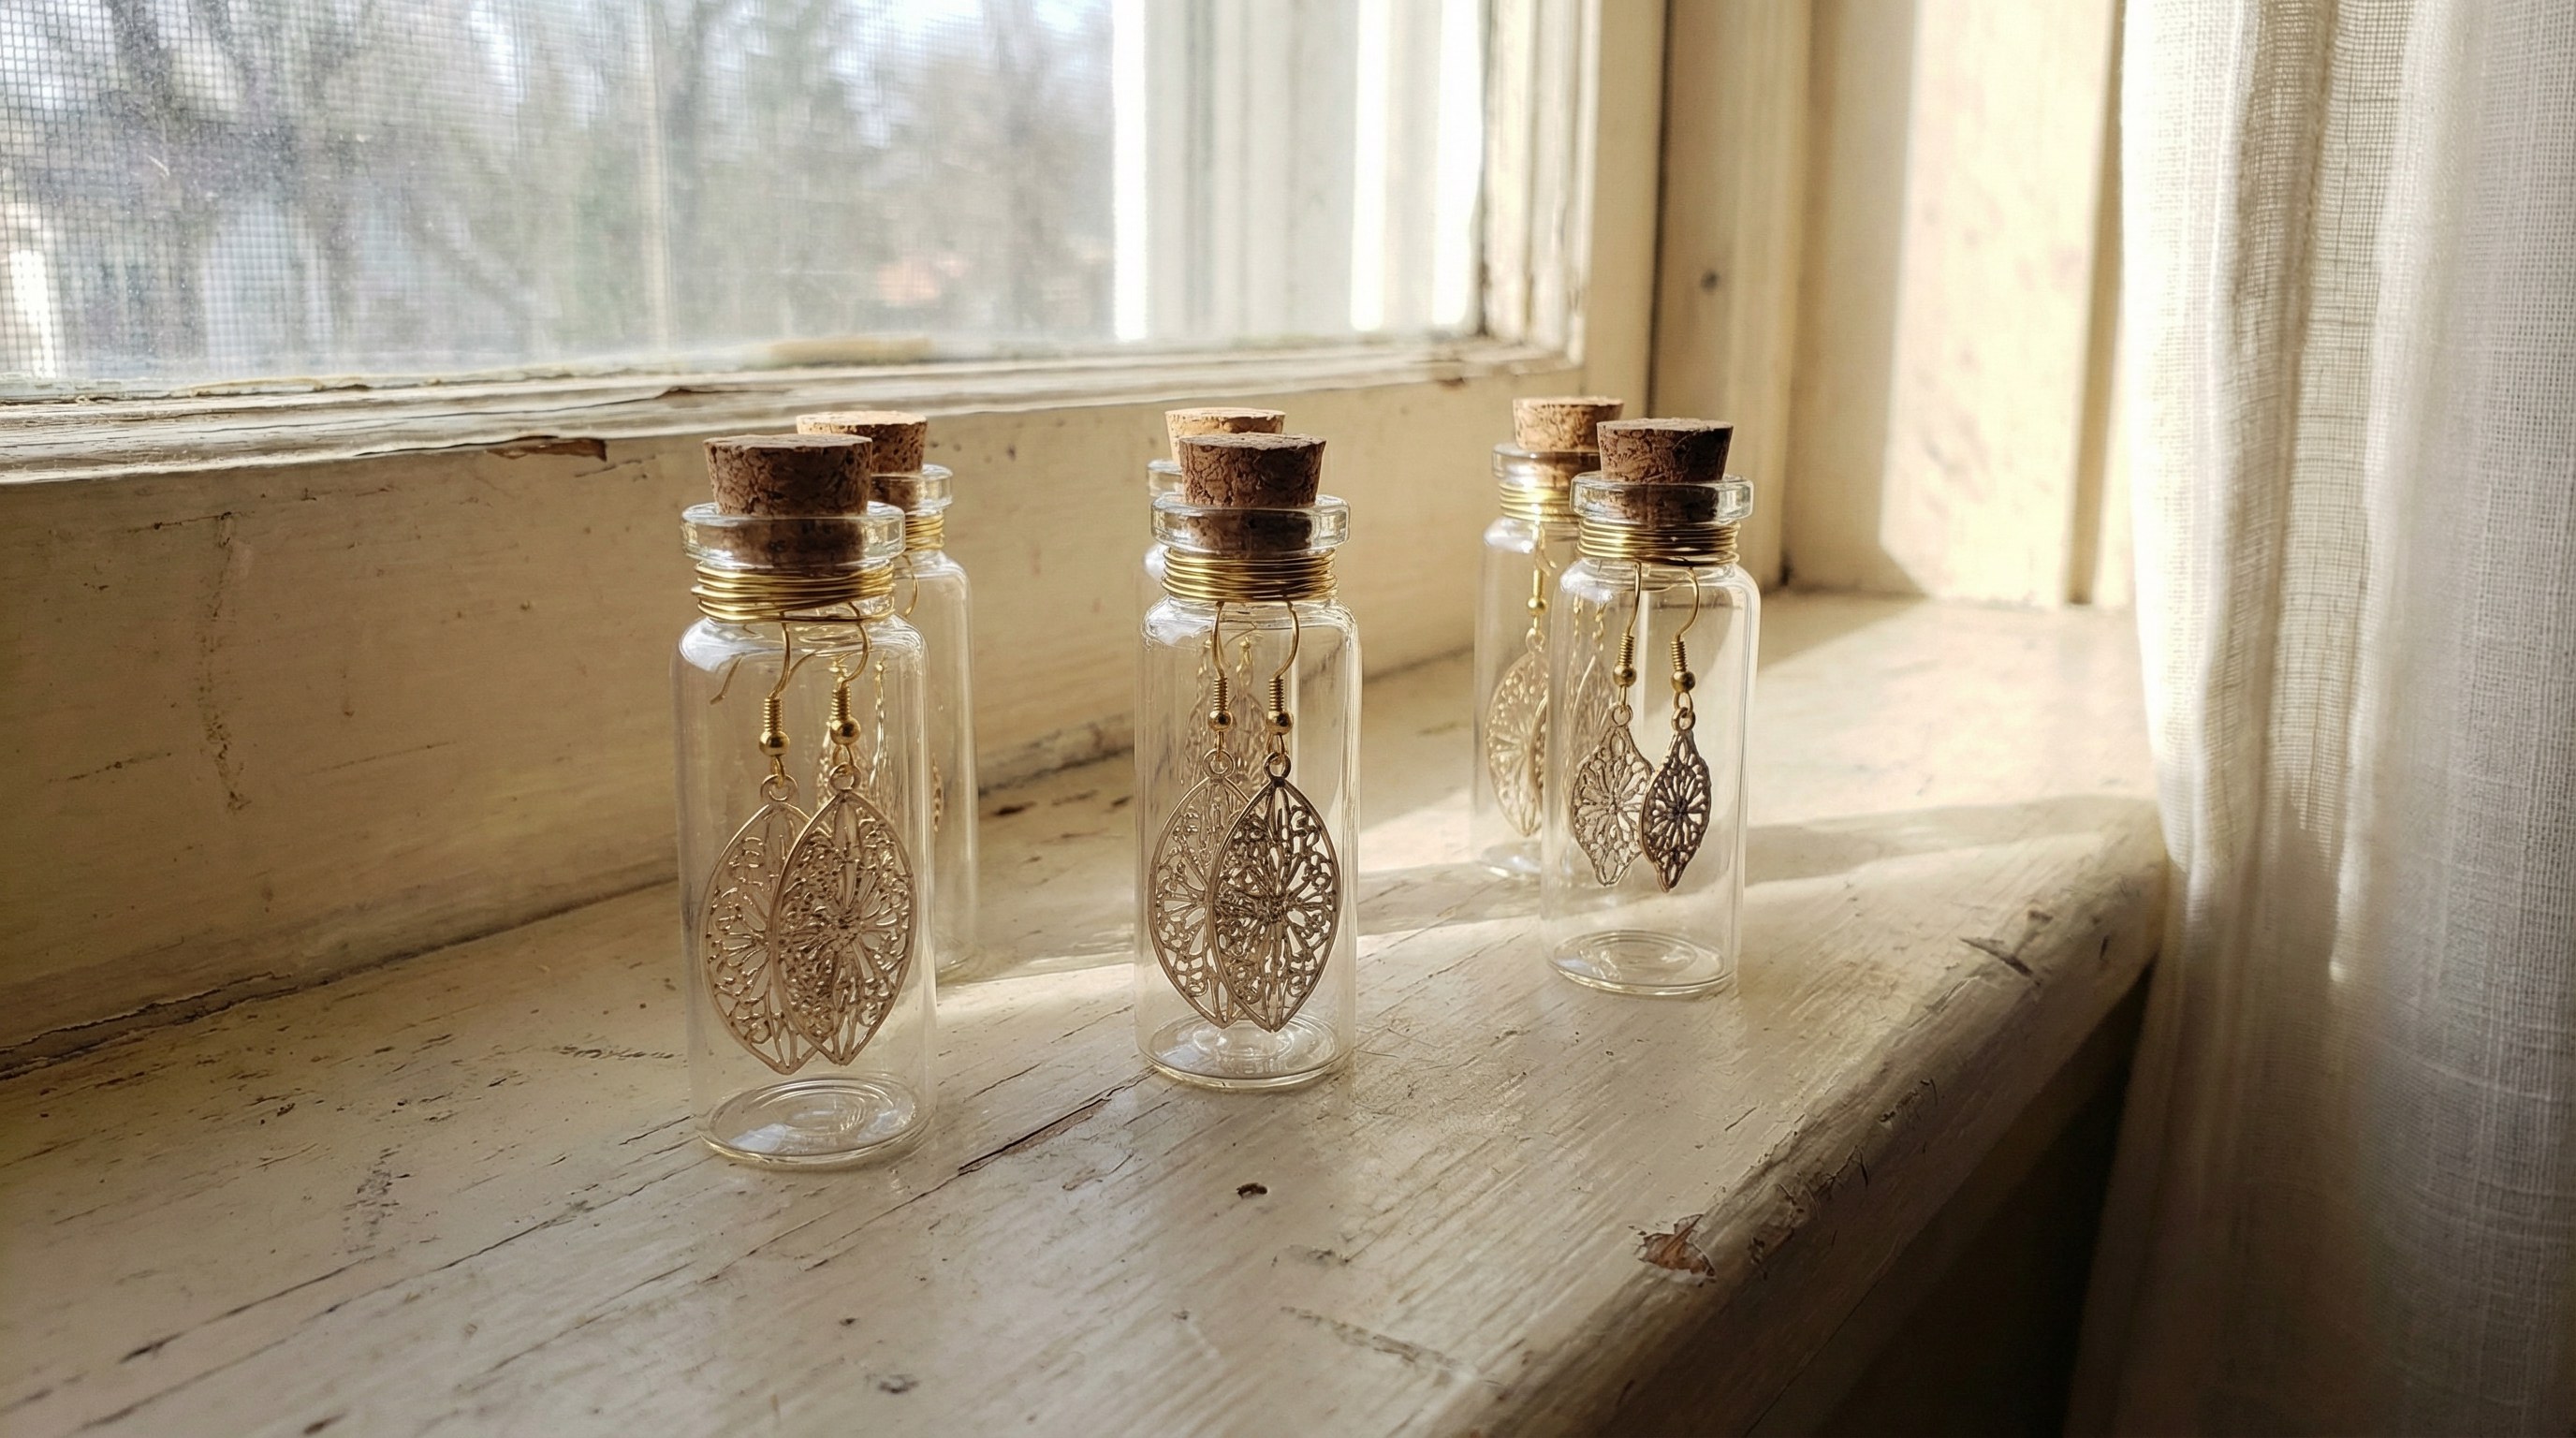
Can you use glass jars for diy jewelry packaging?
Small glass vials or cork-topped jars act as miniature display cases for your diy jewelry packaging . They are perfect for showing off the clarity of a pendant or the detail of a pair of silver earrings.
Suspending the jewelry
Check this out. By attaching a small wire hook to the underside of the cork, you can make the jewelry appear to float.
- Ensure the jar is tall enough so the jewelry doesn’t touch the bottom.
- Use clear glass for maximum visibility and a “specimen” look.
- Place a small layer of sand or moss at the base for a themed display.
Labeling the glass vials
There’s a catch. Glass is slippery, so you need a clever way to attach your branding.
- Tie a small cardstock tag around the neck of the jar with twine.
- Use a clear sticker on the side of the jar for a modern look.
- Hand-write the gemstone name or care instructions on the tag for a personal touch.
Key Takeaway: Glass packaging is waterproof and reusable, making it ideal for jewelry meant for daily wear and travel.
| Feature | Material | Result | |
|---|---|---|---|
| Stopper | Natural Cork | Rustic/Vintage | |
| Vessel | Borosilicate Glass | Modern/Sleek | |
| Base Layer | Preserved Moss | Enchanted Garden |
Using a cork stopper provides a secure friction fit that prevents the jewelry from falling out during shipping or transport.
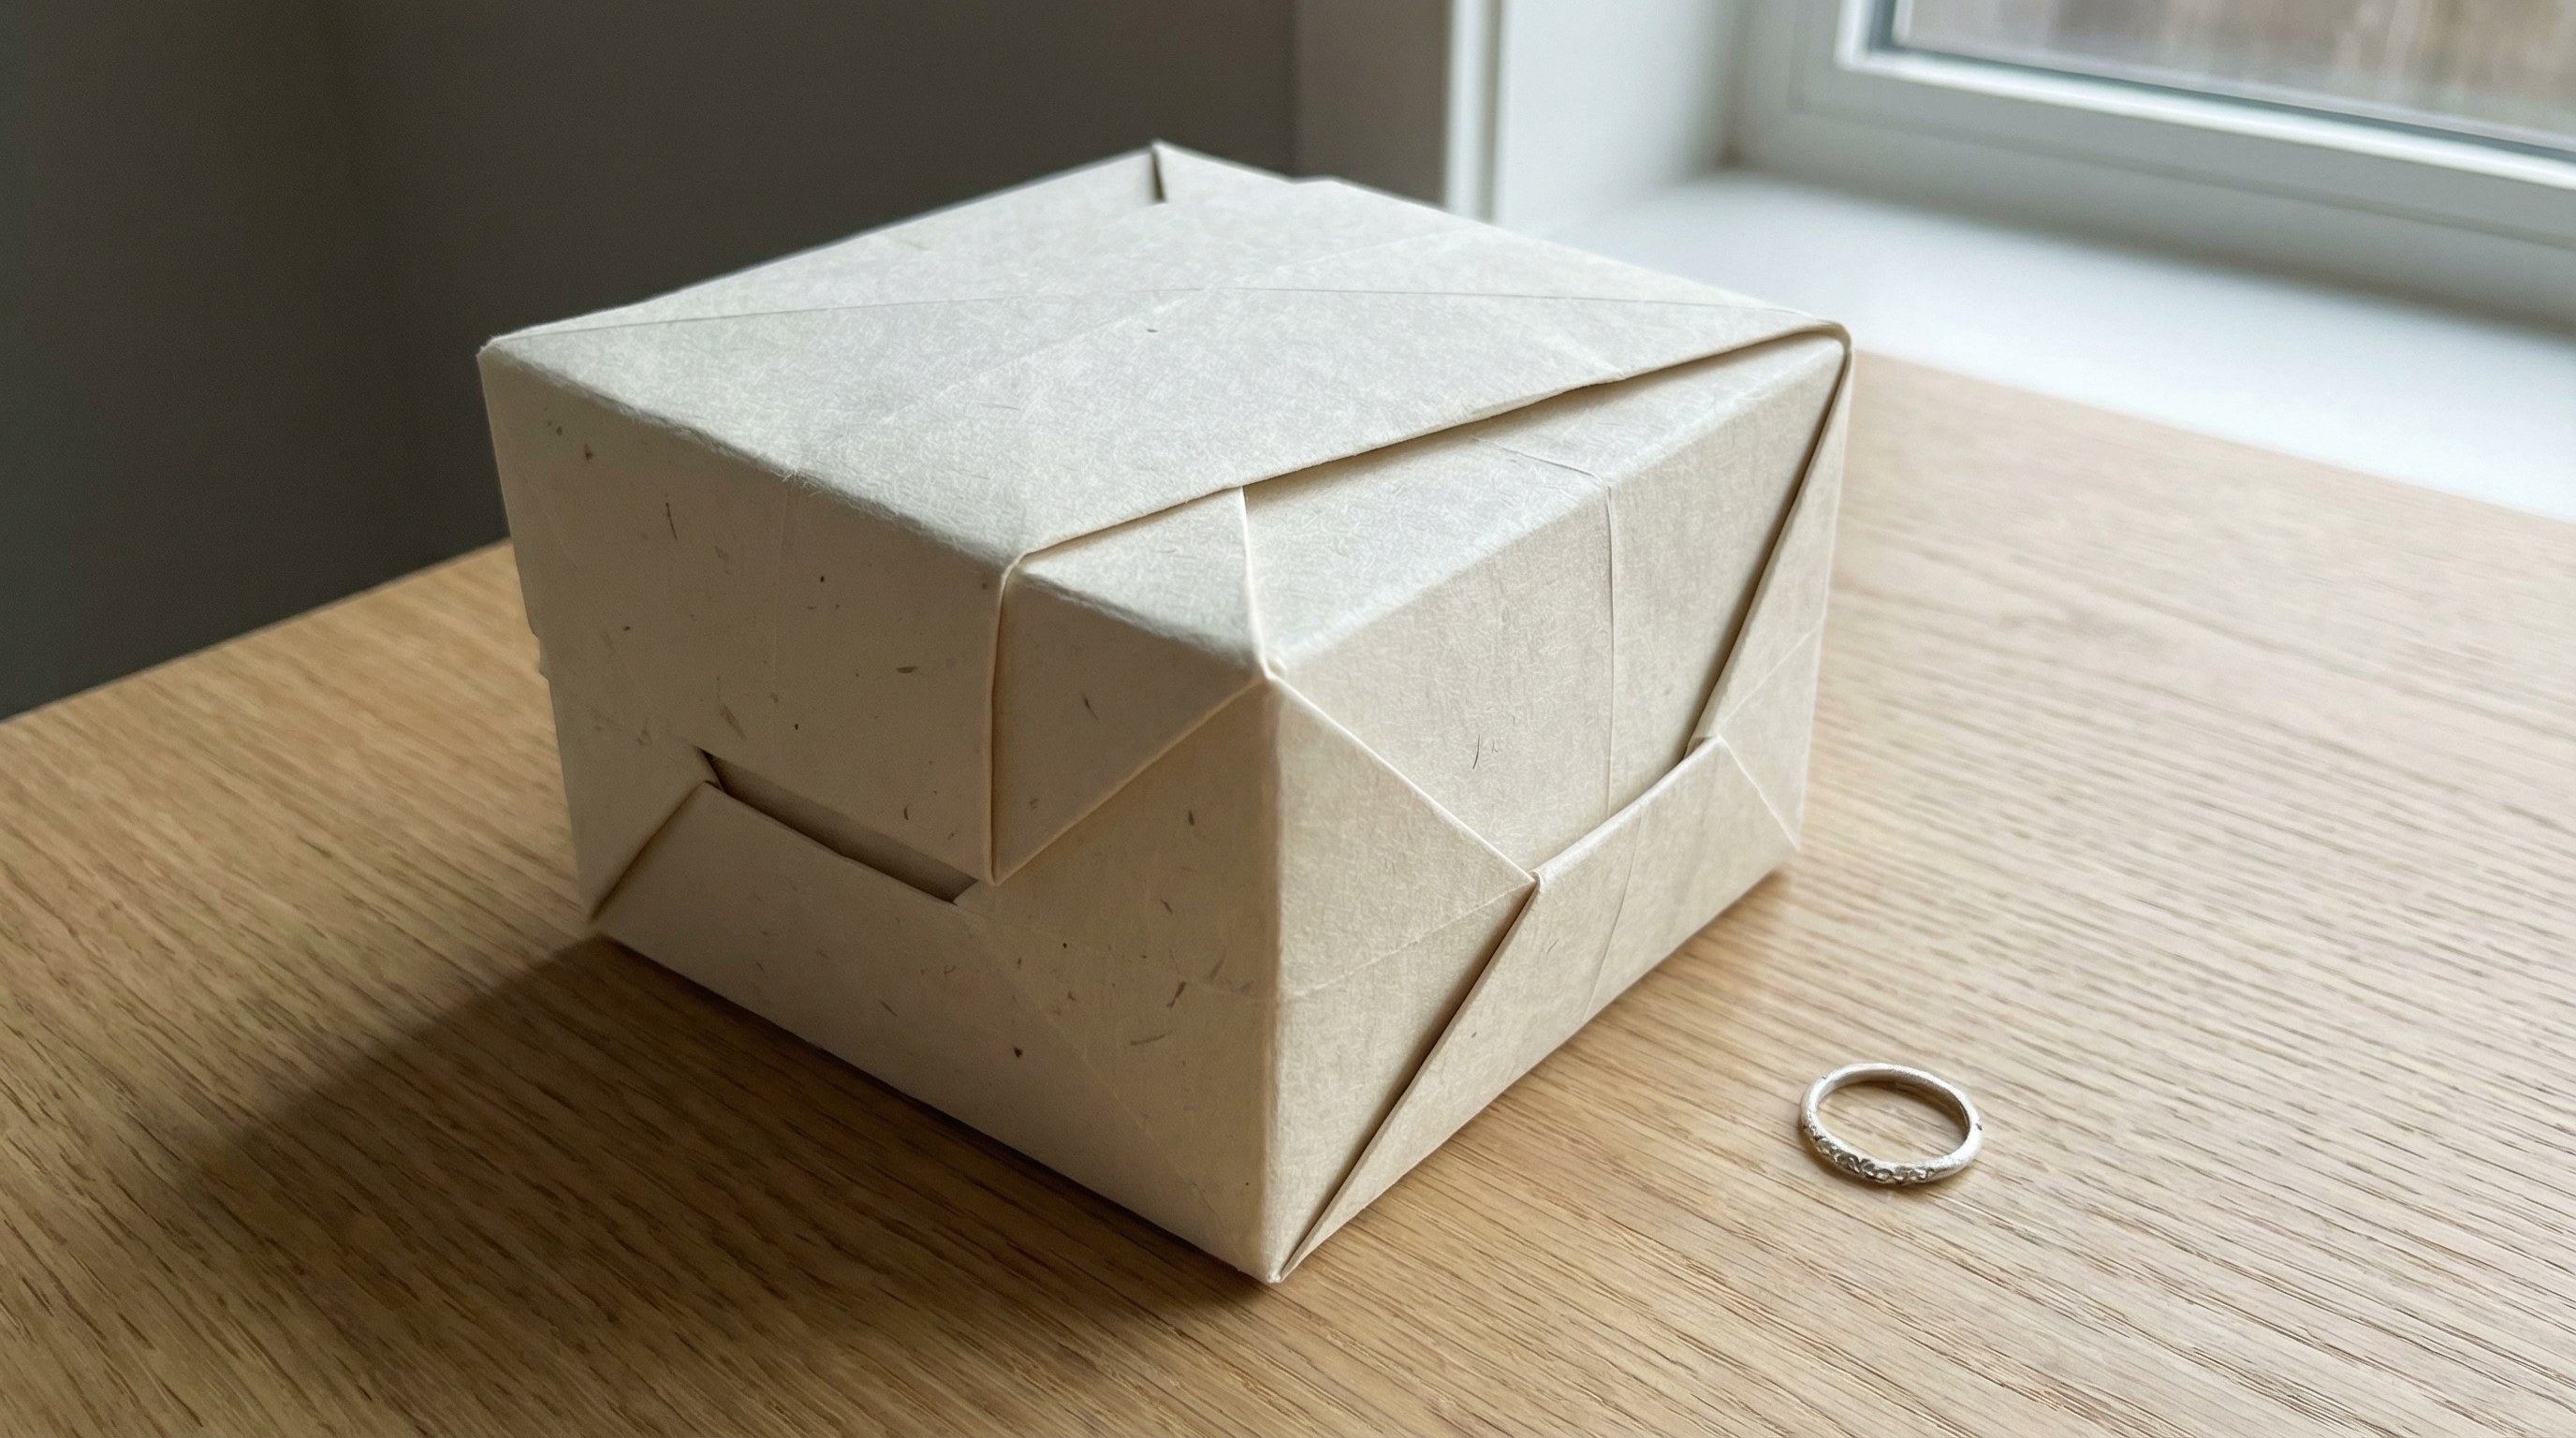
How to fold origami diy jewelry packaging at home?
Origami boxes are a minimalist’s dream because they require no glue or tape to stay together. You simply need a square piece of heavy-duty paper and a few minutes to master the folds.
Choosing the right paper weight
Not all paper is equal. If the paper is too thin, the box will collapse; if it’s too thick, the folds will be messy.
- Use 80lb to 100lb cardstock for the best results.
- Textured paper adds a high-end feel without the need for additional patterns.
- Ensure your paper is a perfect square before you start folding.
Master the Masu box fold
Here is the secret. The “Masu” box is the gold standard for jewelry because it provides reinforced walls for better protection.
- Fold the paper into a 3×3 grid to establish your center.
- Crease all lines sharply using a bone folder or the edge of a ruler.
- The lid should be folded using a piece of paper 1/4 inch larger than the base.
Key Takeaway: Origami boxes demonstrate a high level of personal effort and craftsmanship to the recipient.
| Box Part | Paper Size | Purpose | |
|---|---|---|---|
| Base | 6″ x 6″ | Holds the item | |
| Lid | 6.25″ x 6.25″ | Secure Closure | |
| Insert | 2″ x 2″ | Stabilizes item |
Analysis of customer feedback shows that origami boxes are often kept as decorative storage long after the gift is received.
Is linen-based diy jewelry packaging easy to assemble?
Linen and cotton diy jewelry packaging pouches are incredibly easy to put together and offer a tactile softness that customers love. You can elevate simple pouches by adding hand-pressed clay tags.
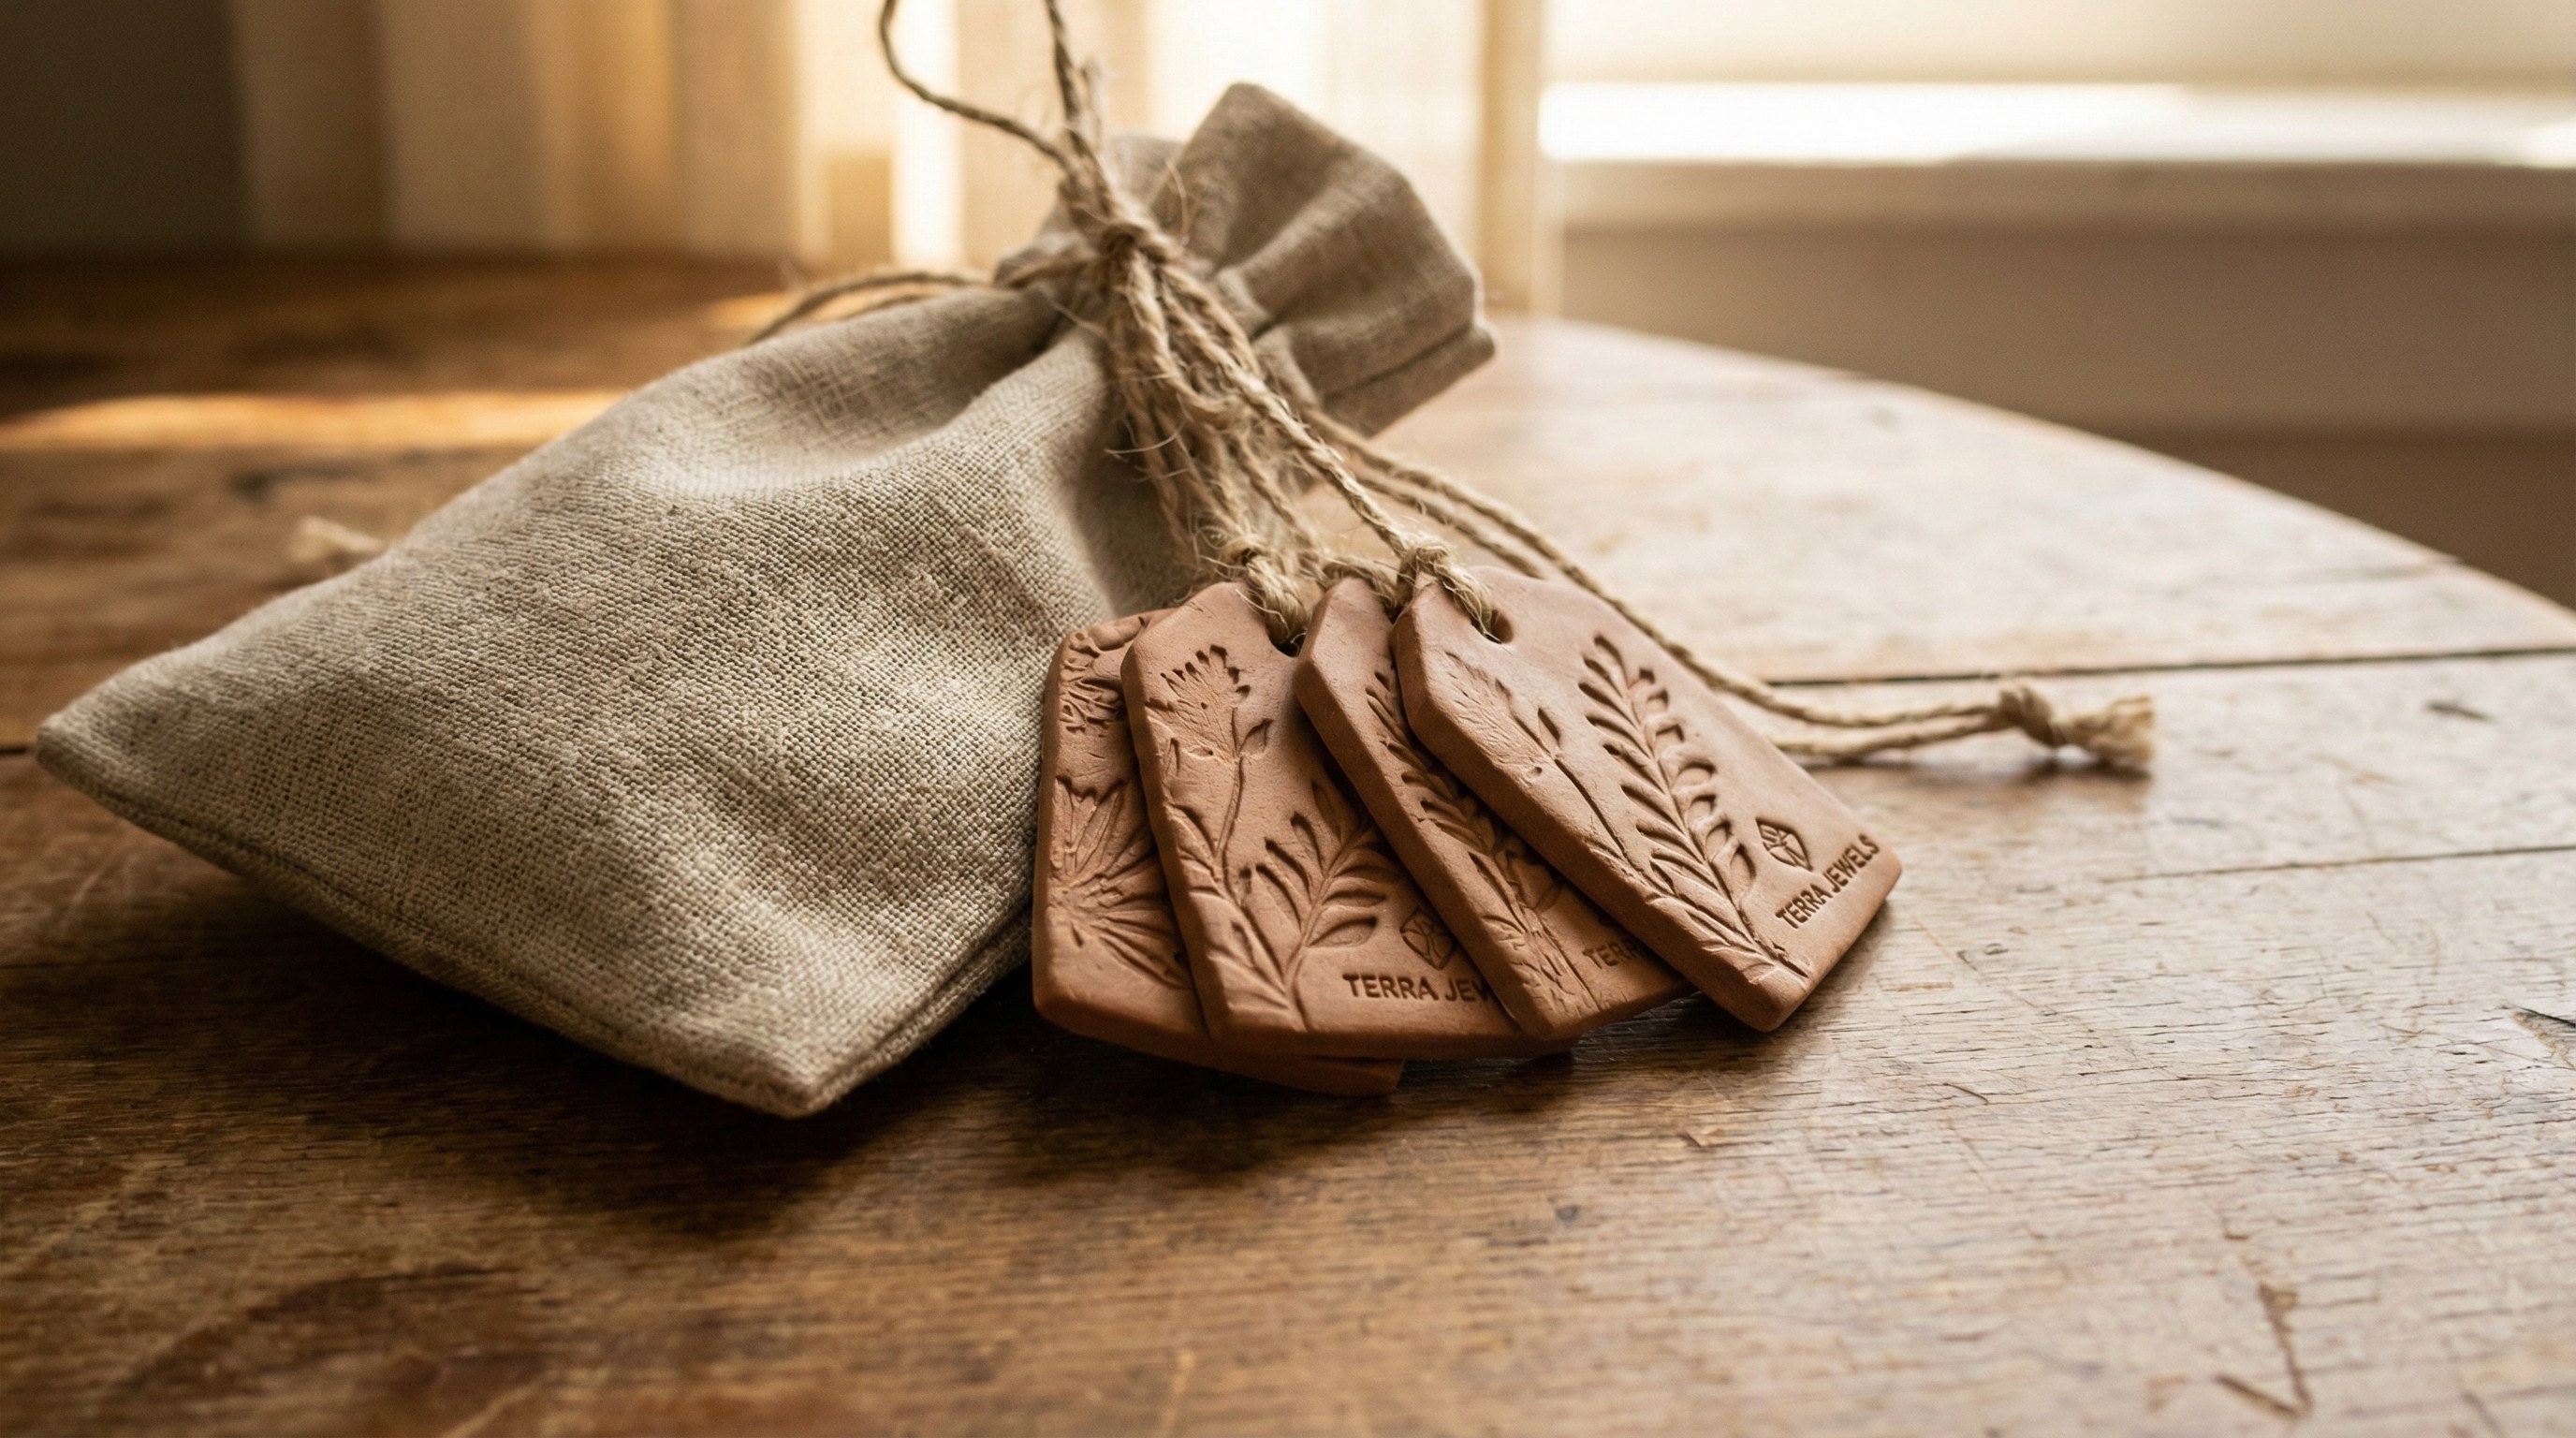
Embossing the clay tags
It gets even better. Air-dry clay is an affordable material that looks like expensive ceramic once it hardens.
- Roll out the clay thin and cut into circles or rectangles.
- Use a small stamp or a piece of lace to press a design into the wet clay.
- Poke a hole for the twine before the clay dries.
Securing the linen pouch
Think about it. A linen pouch is breathable, making it perfect for pearls or certain gemstones that shouldn’t be kept in airtight plastic.
- Use a drawstring closure for ease of use.
- Thread your clay tag through the drawstring before tying it shut.
- Consider adding a small sprig of dried flowers to the knot for color.
Key Takeaway: Linen and clay combinations create a high-end “boutique” feel that justifies premium pricing.
| Material | Feel | Best For | |
|---|---|---|---|
| Raw Linen | Textured/Organic | Silver Jewelry | |
| Air-Dry Clay | Smooth/Solid | Brand Logos | |
| Cotton Twine | Soft/Natural | Secure Ties |
Clay tags provide a permanent, durable branding element that won’t fade or tear like traditional paper labels.
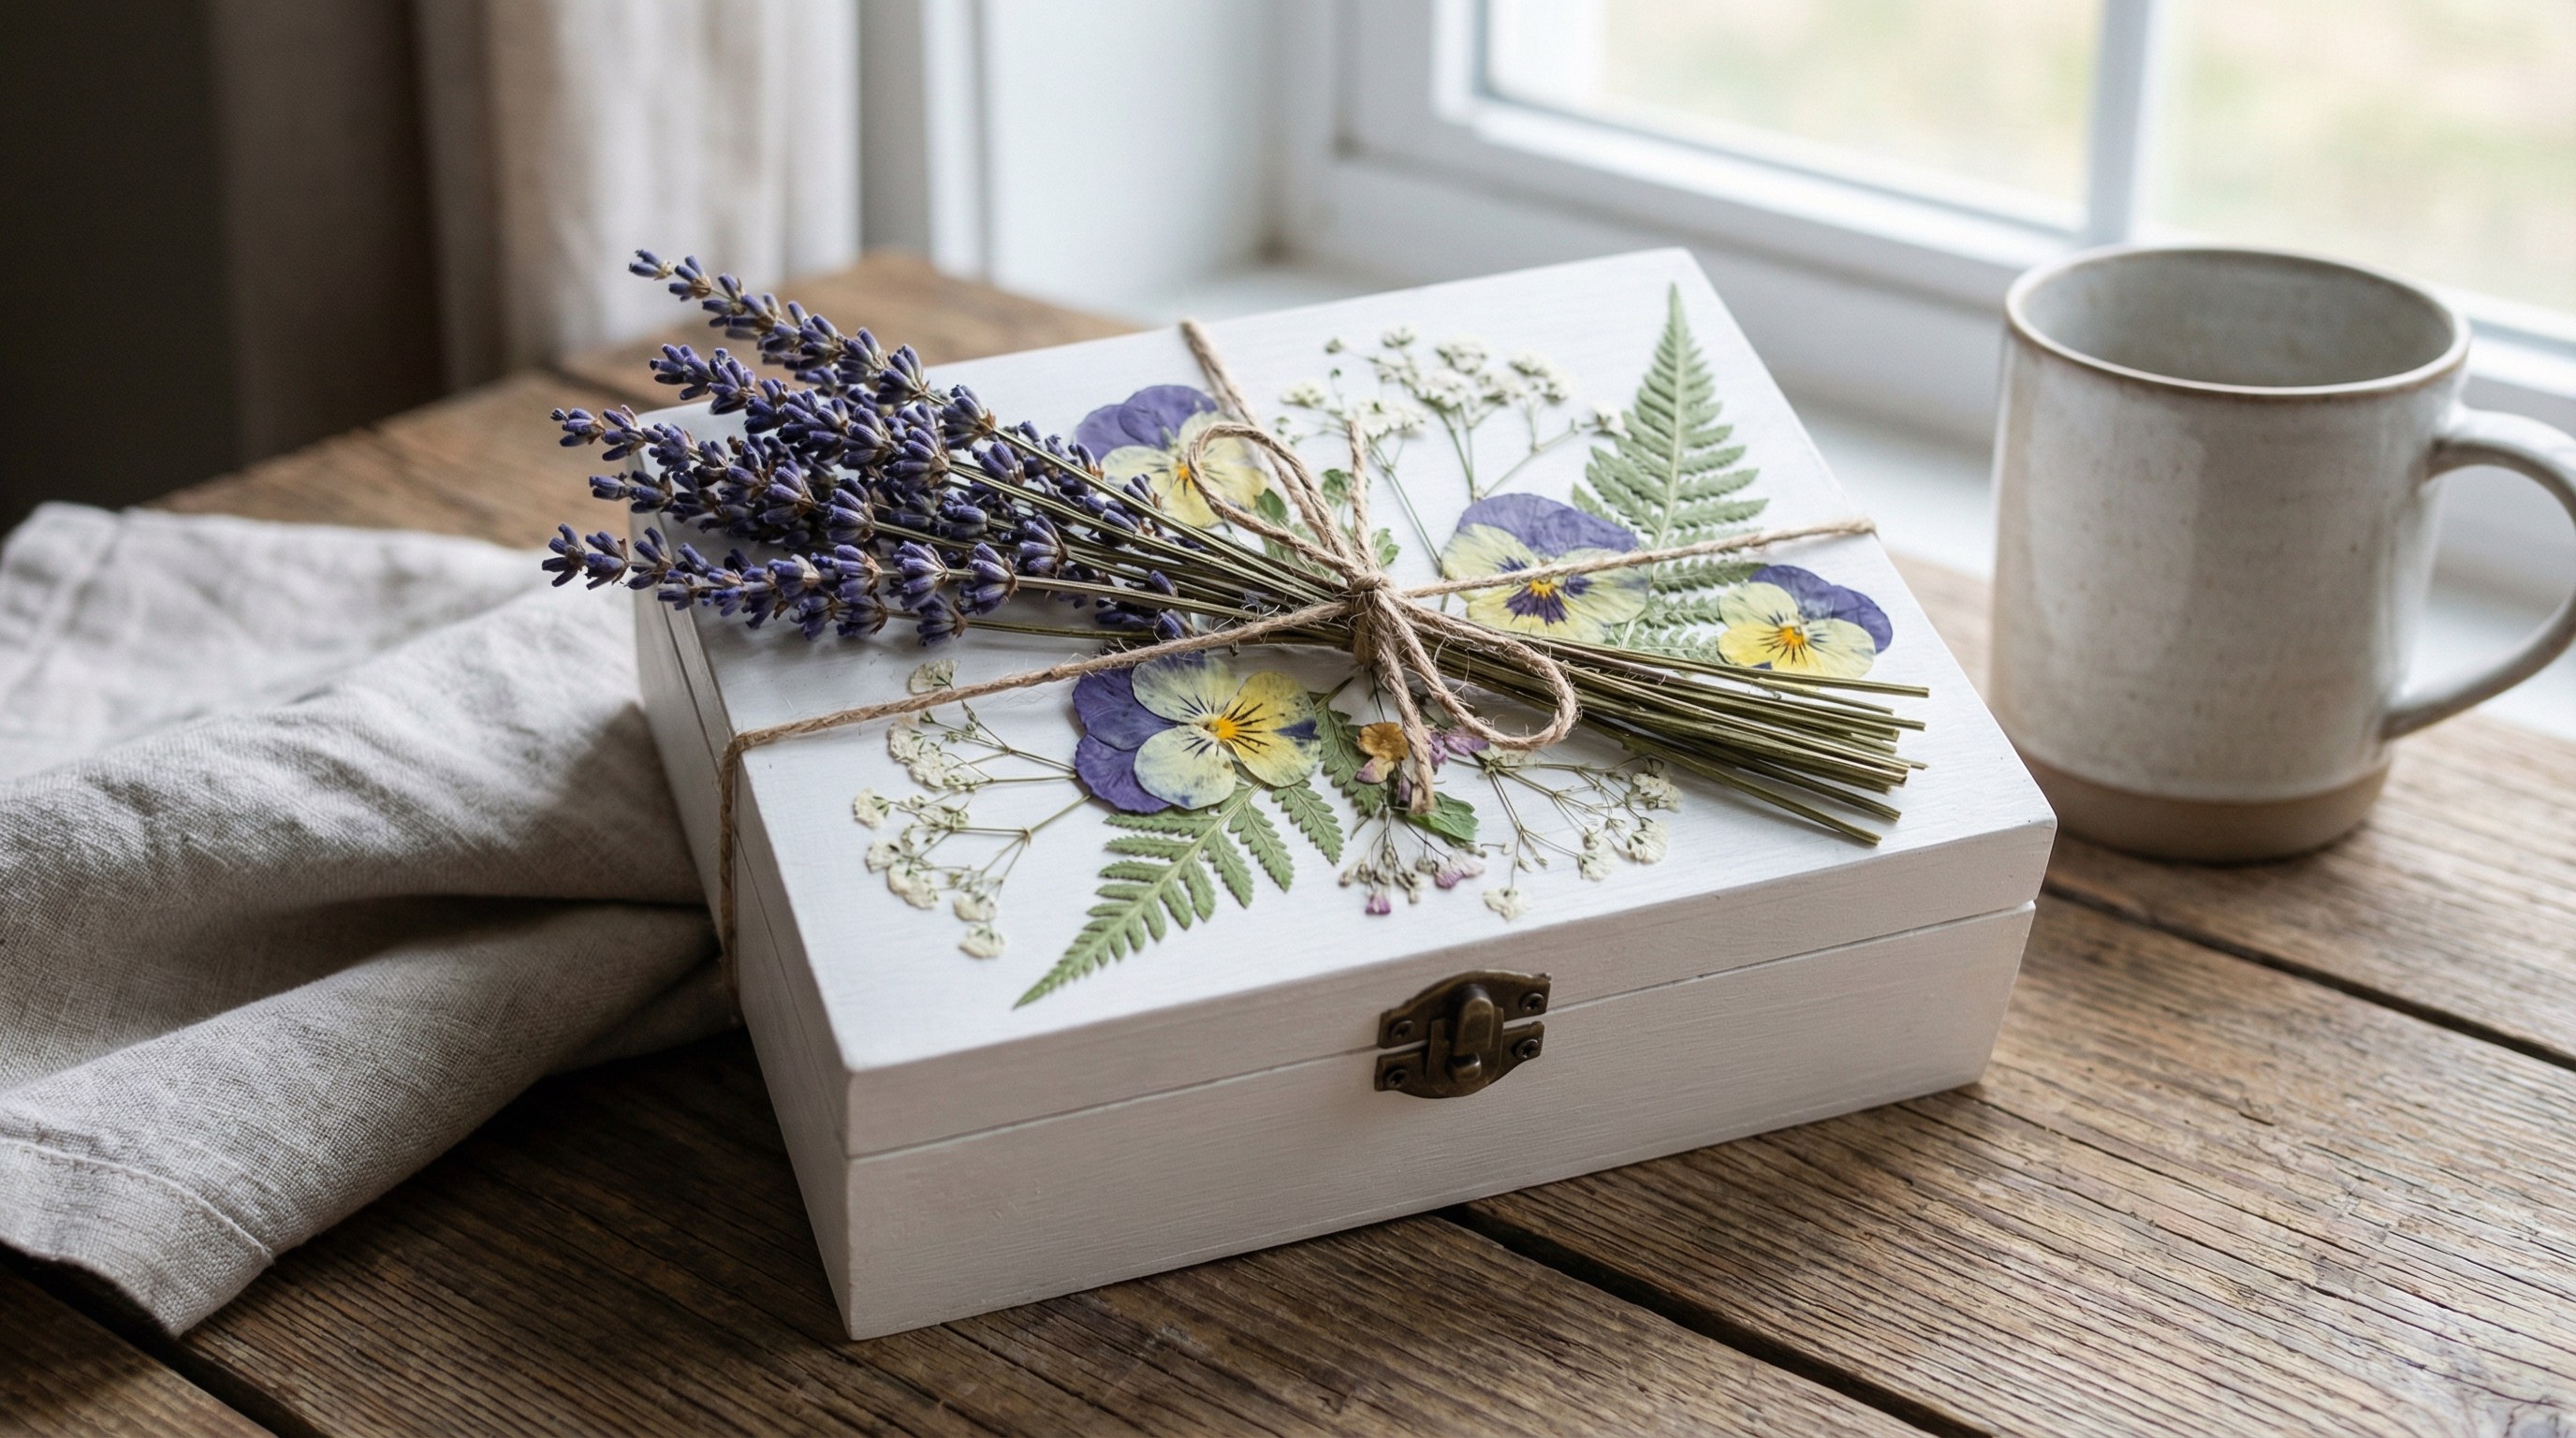
How to create botanical diy jewelry packaging?
Botanical packaging involves using pressed flowers or leaves to decorate the exterior of your white jewelry boxes. This style is perfect for spring birthdays, weddings, or any romantic occasion.
Pressing your own flowers
Here is the deal. You don’t need fancy equipment to press flowers; a heavy book and some parchment paper will do.
- Choose flowers that are naturally flat, like pansies, violas, or lavender.
- Leave them in the book for at least one week to ensure all moisture is gone.
- Use a small amount of clear-drying glue to attach them to your box.
Protecting the floral design
But there’s a catch. Dried flowers are fragile and can flake off if they aren’t protected.
- Apply a thin layer of decoupage glue (like Mod Podge) over the top of the flowers.
- Wrap the finished box in a layer of clear vellum or tissue paper.
- Avoid placing the flowers on the corners of the box where they are likely to get bumped.
Key Takeaway: Botanical packaging turns a simple box into a piece of art that reflects the beauty of the jewelry inside.
| Flower | Meaning | Color | |
|---|---|---|---|
| Lavender | Devotion/Calm | Purple | |
| Pansy | Loving Thoughts | Yellow/Blue | |
| Baby’s Breath | Everlasting Love | White |
Research shows that botanical elements increase the emotional impact of a gift, making it feel more thoughtful and personalized.
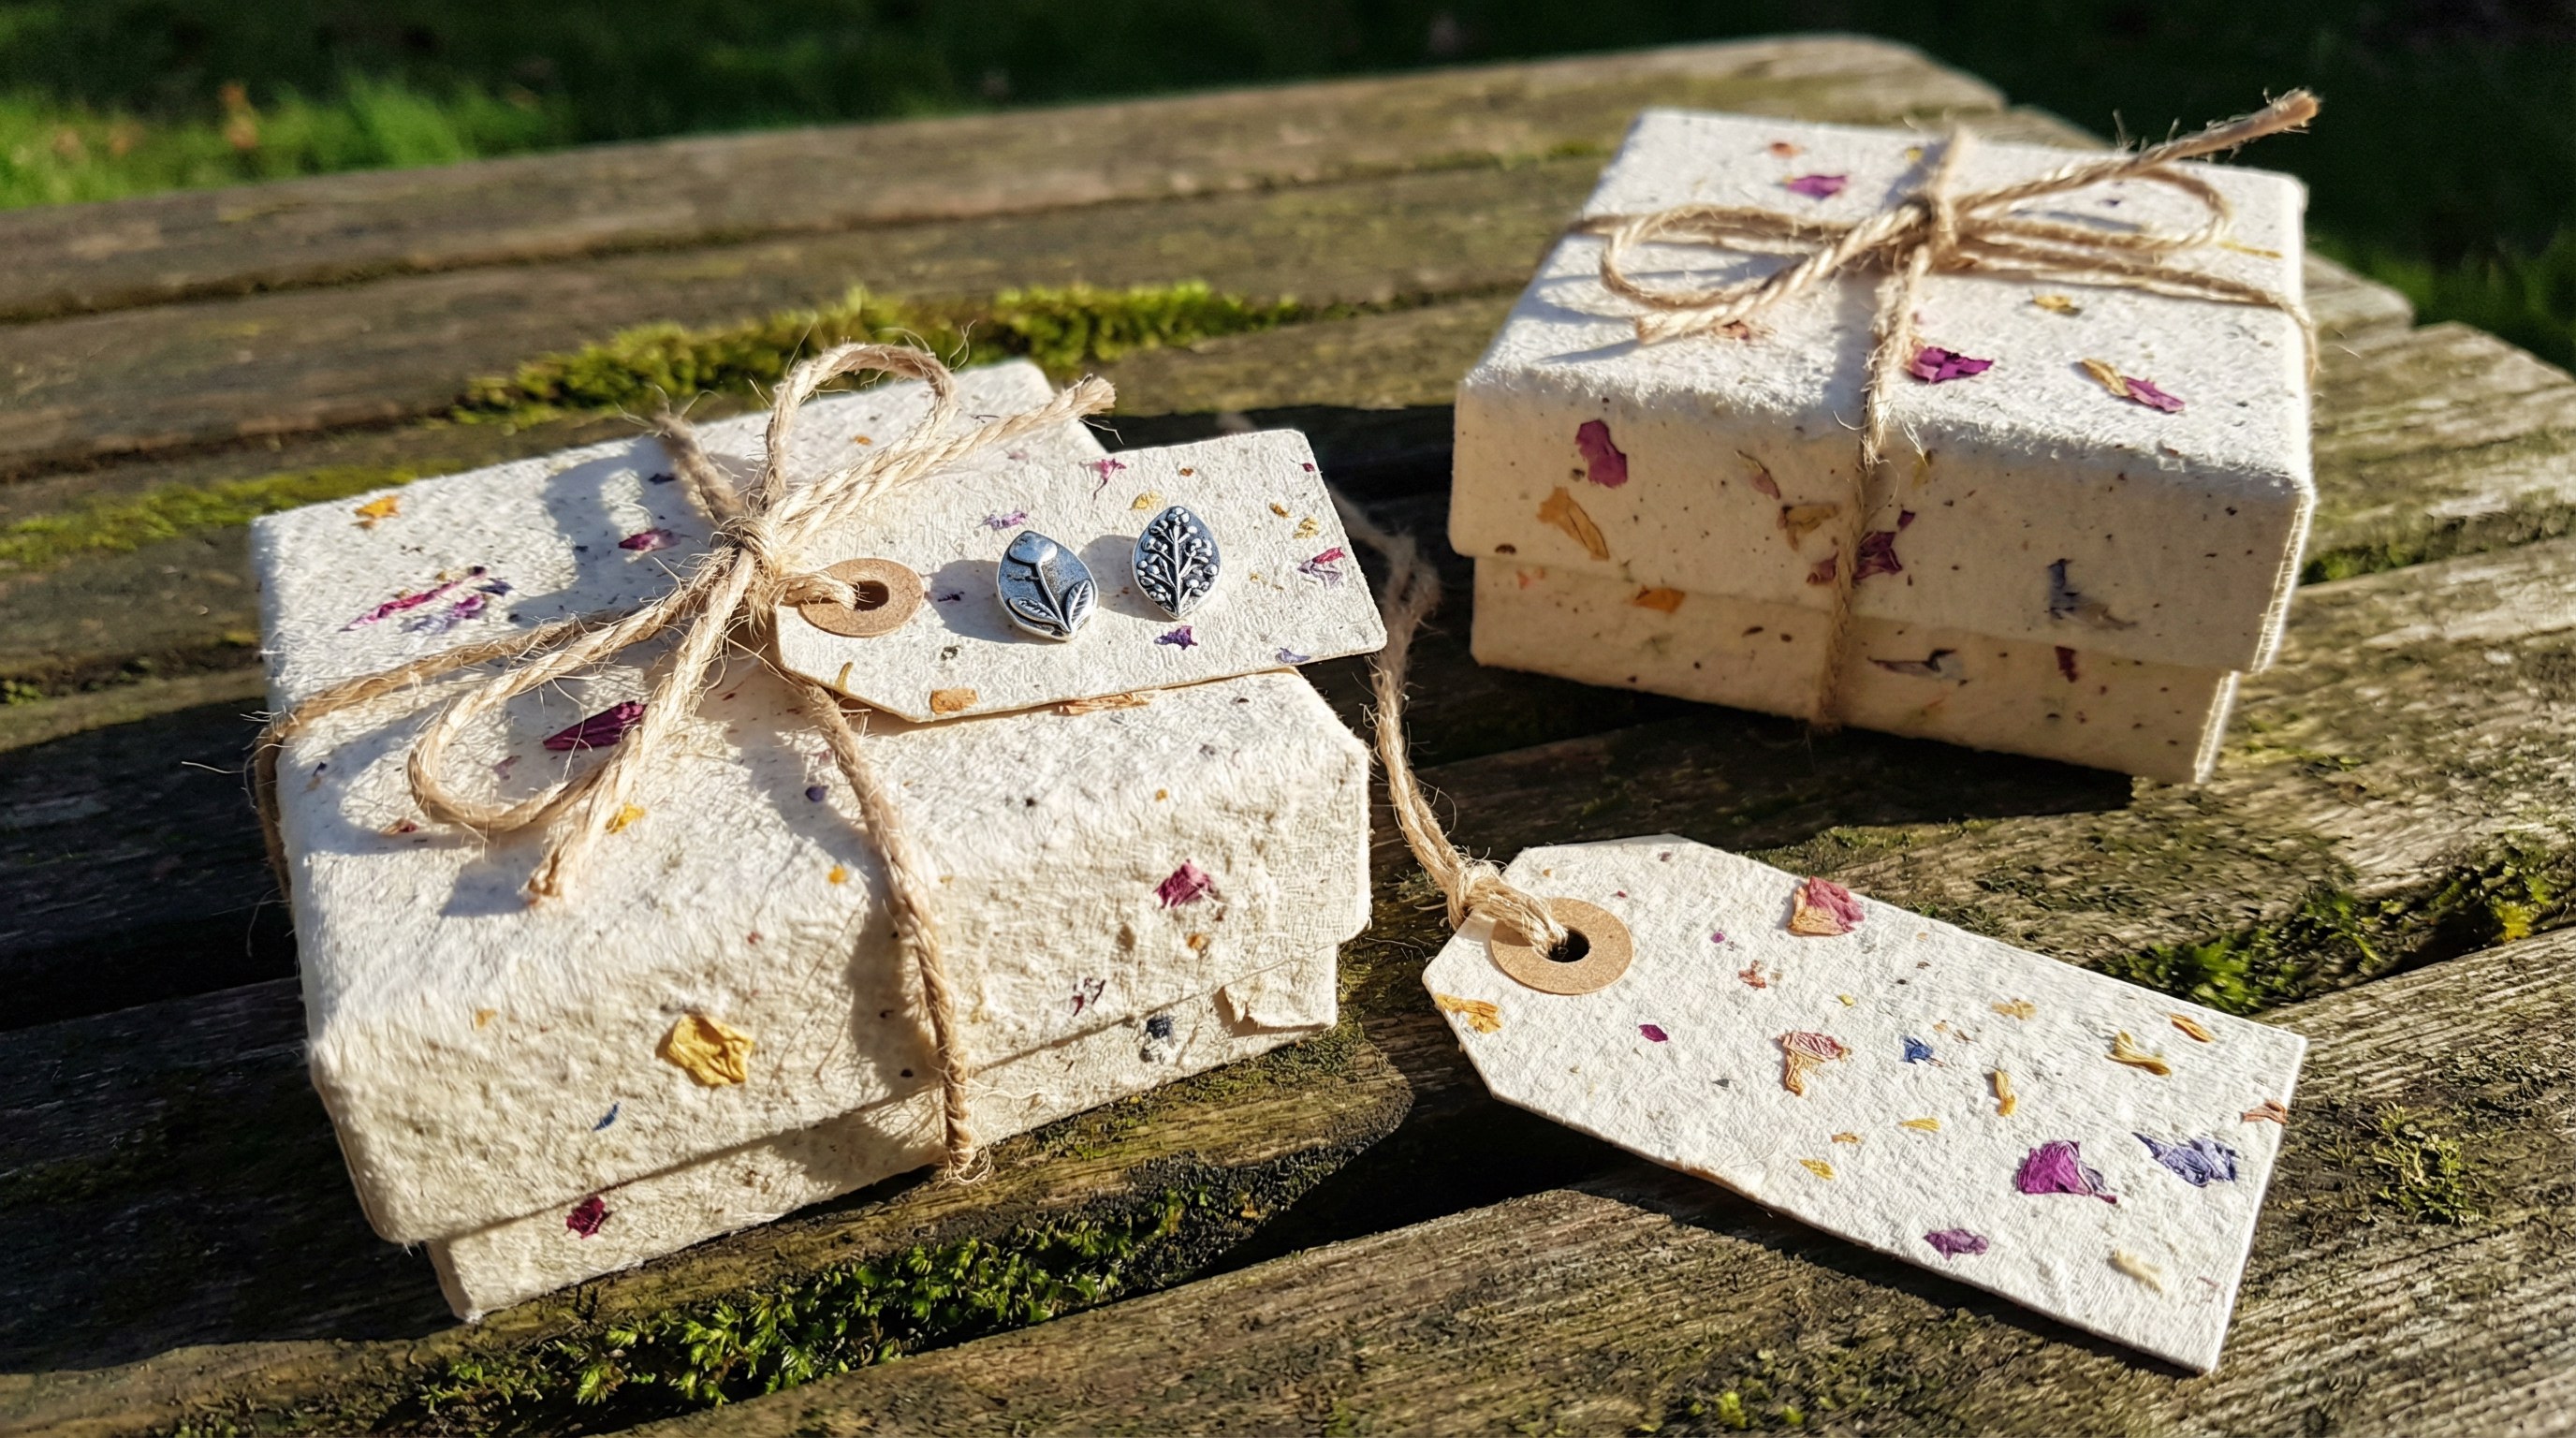
Can you craft seed-paper diy jewelry packaging sustainably?
Seed-paper tags and boxes are the ultimate choice for diy jewelry packaging because they are fully plantable. Once the customer has their jewelry, they can bury the packaging in soil to grow flowers.
Making your own seed paper
It’s simpler than you think. You can recycle old office paper or newspaper into plantable pulp.
- Shred the paper and blend with warm water until it reaches a pulp consistency.
- Stir in wildflower seeds and spread the mixture thin on a mesh screen.
- Once dry, use a paper cutter to create custom earring cards or small gift boxes.
Educating your customers
Tell them what to do. Without a small instruction note, your customer might throw this valuable gift in the trash.
- Print “Plant me to grow flowers” on the back of the tag.
- Use water-based, non-toxic inks to ensure the seeds still germinate.
- This creates a lasting memory of your brand that literally grows in their garden.
Key Takeaway: Seed paper is the only packaging material that actively improves the environment after its primary use.
| Paper Base | Seed Type | Growth Rate | |
|---|---|---|---|
| Newspaper | Wildflowers | 7-14 Days | |
| Kraft Scraps | Herbs (Basil) | 10-21 Days | |
| White Tissue | Poppies | 14-25 Days |
Plantable packaging has a 40% higher “shareability” rate on social media compared to standard cardboard boxes.
Frequently Asked Questions
Can I use these ideas for shipping jewelry through the mail?Yes, but you should always place your DIY package inside a bubble mailer or a sturdy corrugated shipping box. Most DIY containers are decorative and may not withstand the pressure of automated postal sorting machines.
What materials are most durable for DIY jewelry packaging?Kraft paper and heavy-weight cardstock (100lb+) are the most durable for structural boxes. For soft packaging, linen and burlap offer the best protection against tears and abrasion.
How do I choose between a box and a pouch?Choose a box for delicate items like necklaces that can tangle or rings that need structural protection. Use a pouch for durable items like beaded bracelets or simple silver charms where a soft, compact feel is preferred.
Can I personalize the packaging for bulk orders?Absolutely. Using a custom rubber stamp or a digital printer to add a “Thank You [Name]” note is the most efficient way to personalize packaging for larger volumes without increasing labor costs significantly.
What is the most cost-effective DIY method?Upcycling materials you already have, such as old maps, book pages, or matchboxes, is the most cost-effective. These materials are often free or very low-cost at thrift stores and provide a high-end, vintage aesthetic.
Ready to take your presentation to the professional level? Contact us today to explore our full range of wholesale solutions and custom designs!